OpenHAB Raspberry Pi Set Up - Build a DIY Smart Home Hub
The Raspberry Pi offers tons of uses. Popular Raspberry Pi projects include retro gaming with RetroPie, Recalbox, Lakka, or Batocera, a home theatre PC (HTPC) with the likes of Kodi-based distributions, and basic Linux PC. With its small footprint and low power draw, the Raspberry Pi functions extremely well as a do-it-yourself (DIY) smart home hub. For Raspberry Pi smart home hub options, there are tons of different choices such as Home Assistant, or Hass.io. OpenHAB is an excellent pick as well. Get started with an OpenHAB Raspberry Pi smart home hub!
What is the Raspberry Pi?
The Raspberry Pi is a single-board computer (SBC) capable of running a slew of different operating systems (OSes) including Linux, Android, and non-Linux OSes alike. Since its inception, the Raspberry Pi has undergone several different iterations including the Raspberry Pi 3 B+ and Raspberry Pi 4. Raspberry Pi 3 specs:- Quad-Core 1.2GHz Broadcom BCM2837 64bit CPU
- 1GB RAM
- BCM43438 wireless LAN and Bluetooth Low Energy (BLE), on-board 100 Base Ethernet
- 40-pin extended GPIO
- 4 x USB 2 ports
- 4 Pole stereo output and composite video port
- Full-size HDMI
- CSI camera port for connecting a Raspberry Pi camera
- DSI display port for connecting a Raspberry Pi touchscreen display
- Micro SD port for loading your operating system and storing data
- MicroUSB power source up to 2.5A
Raspberry Pi 3 B+ specs:
- Broadcom BCM2837B0, Cortex-A53 (ARMv8) 64-bit SoC @ 1.4GHz
- 1GB LPDDR2 SDRAM
- 2.4GHz and 5GHz IEEE 802.11.b/g/n/ac wireless LAN, Bluetooth 4.2, BLE Gigabit Ethernet over USB 2.0 (maximum throughput 300 Mbps)
- Extended 40-pin GPIO header
- Full-size HDMI
- 4 USB 2.0 ports
- CSI camera port for connecting a Raspberry Pi camera
- DSI display port for connecting a Raspberry Pi touchscreen display
- 4-pole stereo output and composite video port
- MicroSD port for loading your operating system and storing data
- 5V/2.5A DC power input
- Power-over-Ethernet (PoE) support (requires separate PoE HAT)
Raspberry Pi 4 specs:
- Broadcom BCM2711, Quad-core Cortex-A72 (ARM v8) 64-bit SoC @ 1.5GHz
- 1GB, 2GB, or 4GB LPDDR4-2400 SDRAM (depending on model)
- 2.4 GHz and 5.0 GHz IEEE 802.11ac wireless, Bluetooth 5.0, BLE Gigabit Ethernet
- 2 x USB 3.0 ports; 2 x USB 2.0 ports. Raspberry Pi standard 40-pin GPIO header (fully backwards compatible with previous boards)
- 2 × micro-HDMI ports (up to 4kp60 supported)
- 2-lane MIPI DSI display port
- 2-lane MIPI CSI camera port
- 4-pole stereo audio and composite video port
- H.265 (4kp60 decode), H264 (1080p60 decode, 1080p30 encode)
- OpenGL ES 3.0 graphics
- MicroSD card slot for loading operating system and data storage
- 5V DC via USB-C connector (minimum 3A*)
- 5V DC via GPIO header (minimum 3A*)
- Power over Ethernet (PoE) enabled (requires separate PoE HAT)
What is OpenHAB?
OpenHAB is an open-source smart home automation hub, open Home Automation Bus. It's a tech agnostic ecosystem that serves as the central pillar of a smart home. Onboard, OpenHAB boasts the ability to integrate with a bevy of different smart home devices, systems, and technologies. In this way, OpenHAB simplifies and streamlines a smart home ecosystem. Aside from the Raspberry Pi, OpenHAB runs on Linux distros such as Ubuntu, Debian, Linux Mint, OpenSUSE, and Fedora, Windows PCs, macOS, Docker, and the Pine64 A64.
OpenHAB Raspberry Pi Installation and Set-Up
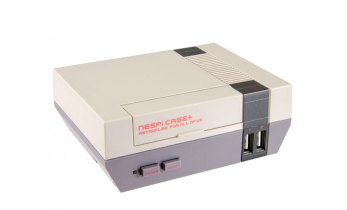
A Raspberry Pi smart home hub with OpenHAB requires a few items. First, you'll need a Raspberry Pi board. I suggest using the Raspberry Pi 3 B+ or Raspberry Pi 4. You'll need an OpenHAB download, peripherals such as a mouse and keyboard, internet connection, microSD card for boot medium, and a case.
What you'll need for a Raspberry Pi OpenHAB smart home automation hub:
- Raspberry Pi board
- OpenHAB download
- Raspberry Pi case (optional, recommended)
- Internet connection
- Peripherals (keyboard, mouse)
- Power supply
- MicroSD card
Total cost: $35+ USD. A Raspberry Pi board alone retails for about $35, with a complete Raspberry Pi starter kit sliding in around $45 or $50.
How to Make a DIY Smart Home Automation Hub with OpenHAB for the Raspberry Pi
First, head over to the OpenHAB downloads page and choose your system, in this case Raspberry Pi. Then, pick your preferred version, either stable, milestone, or snapshot. I suggest snagging the latest OpenHABian image via GitHub.
Once you've downloaded your preferred OpenHAB image, you'll need to mount it to a microSD card. It's an img.xz file, so you may need to decompress the image with a program such as 7Zip. Mount the image to a microSD card with an app like Etcher.
After your OpenHABian image is mounted to a microSD, pop it into your Raspberry Pi and power it on. You'll need to wait a few minutes for OpenHAB to finish some basic configuration which could range from 15 minutes to about 45 minutes. So go grab a cup of coffee, take a short walk, or fire up your favorite video game for a bit.
Now, either on your Raspberry Pi or via SSH (client name: openhabianpi), login with username openhabian and password openhabian.
Type in sudo openhabian-config
This launches the OpenHABian configuration tool. First, select update to update the configuration tool.
Then, choose upgrade system to upgrade the entire OpenHABian OS to the latest version. You can also install or upgrade to OpenHAB stable from here, load optional components, apply improvements, select system settings, and more.
When OpenHABian wraps up its initial setup, open a web browser and head to http://openhabianpi:8080. If all went correctly, you'll see a message reading "Welcome to OpenHAB 2 - Initial Setup."
From here, pick an installation method. You can select Simple, Standard, Expert, or Demo. I suggest standard, but any of these should work. Once installed, you can pick the OpenHAB log viewer, OpenHAB help, a REST API, HABPANEL, Basic UI, and Paper UI.
Looking at the Basic UI, you'll see some demo items like "First Floor," "Ground Floor," and "Garden."
Click the Paper UI option to access your OpenHAB installation. On the left-hand side of the screen, you'll see tabs for Control, Inbox, Configuration, Add-ons, and Preferences. Under Configuration, you'll have access to your system, bindings, services, and things.
OpenHABian Post-Installation Setup
There's a ton you can do after installing OpenHAB. I first recommend heading to Paper UI > Add-ons > Bindings and selecting the bindings you're looking for.
Since I'm a dedicated Samsung SmartThings user, I opted for an OpenHAB SmartThings integration. First, I navigated to PaperUI > Configuration > Things and clicked Add Things. Then, I selected SmartThings Hub. From here, under the configurations parameters section, I plugged in the IP of my SmartThings hub, as well as port number and clicked the little checkmark. With that completed, I selected Inbox, then clicked Search for Things, and picked the SmartThings Binding. Note that OpenHAB SmartThings integration only works with the SmartThings Classic app.
OpenHAB Raspberry Pi DIY Smart Home Automation Hub Review - Should You Use OpenHAB on the Raspberry Pi?
Overall, I'm a pretty big fan of OpenHAB. Like Hass.io, it's easy enough to install and works with tons of different smart home products and systems. A major benefit of smart home tech is the ability to control and automate various devices. Unfortunately, all of this choice occasionally lends itself to stratification. But options such as Home Assistant or OpenHAB offer platform-agnostic smart home hubs which work with loads of different devices. While I appreciated Home Assistant's user interface a bit more, OpenHAB boasts a simplicity and ease of use that's tough to beat. That's not to say Hass.io is difficult, just that OpenHAB was a bit easier to spin up. When compared with Home Assistant, OpenHAB touts incredible stability, with longer time between release cycles. There's also a massive community, and it's been around for ages.
What smart home automation software do you use?







Leave your feedback...