How to Slice 3D Printable Files for Filament and Resin Printers
3D printing is a fun, worthwhile hobby. Contrary to many myths, 3D printing isn't challenging. In fact, it's a fairly accessible practice, especially with the plethora of affordable 3D printers available, as well as a slew of 3D printing tutorials to simplify the process of getting started with 3D printing. One of the first steps after selecting a 3D printer is, well, printing. Whether you're designing your own files or sourcing them from websites, here's how to slice 3D printable files for both filament and resin 3D printers.
Where to Find 3D Printable Files
Although you can design your own files to 3D print, you can easily source them online. Usually, these are free to download, but sometimes you'll need to pay a small fee. Even if you can legally download 3D printable files, you should consider paying to support artists and designers. Thingiverse is one of the most popular sites for 3D printing files. You'll also find tons of 3D printable models on Yeggi, CUlts, 3D Warehouse, GrabCAD, and more.
How to Slice 3D Printable Files for Filament and Resin Printers
Slicing 3D printable models is fairly easy. You'll need a compatible slicer, and often this comes packaged with a 3D printer. Cura is one of the best options, but there's also 3DPrinterOS, AstroPrint, IceSL, ideaMaker, KISSlicer, OctoPrint, and ChiTiBox.
For filament printing, I prefer Cura. When using my Elegoo Mars resin 3D printer, I opt for ChiTuBox. Both my Elegoo Neptune and Elegoo Mars came bundled with slicers, ChiTuBox with the Mars and Cura for the Neptune. I've tinkered with OctoPrint and enjoy its remote printer monitoring and management capabilities, but generally enjoy Cura and ChiTuBox for slicing. Which slicer you pick depends on the type of printer you're using, resin or filament, as well as the underlying operating system (OS) you run your slicer on such as Linux, macOS, or Windows. Aside from a 3D printable file and compatible slicer, you'll need a 3D printer. This step is sort of optional, but you won't be able to print a sliced file sans a 3D printer. Lastly, you'll need a host computer to run your slicer on.
What you'll need to slice a 3D printable file:
- Compatible slicer (i.e. Cura, ChiTuBox)
- Host PC (Windows, macOS, Linux)
- 3D printer
- 3D printable file
First, make sure you've got a 3D printable file. You can design one yourself or download a file from the likes of Thingiverse. I snagged a Terminator T-800 endoskeleton skull from Thingiverse.
How to Prepare a File for a Resin Printer
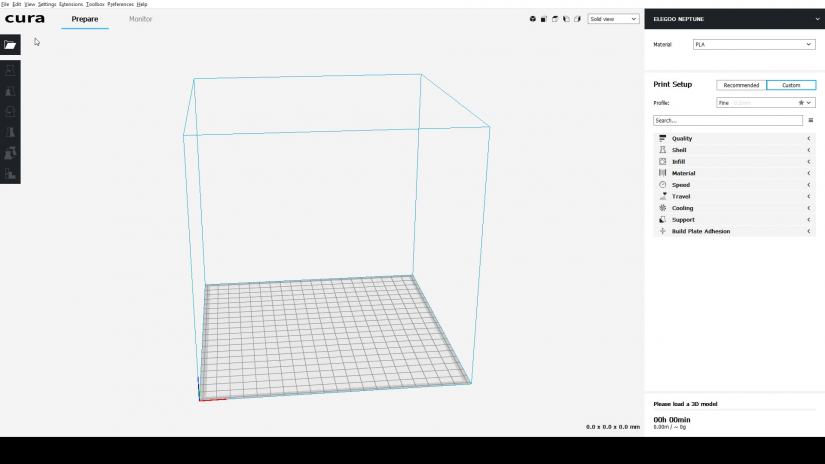 Slicing may vary slightly depending on what software you're using. Still, the general steps should be the same: import a 3D printable file, select the correct settings, slice and save. I'm using Elegoo Cura, but you should be able to use a variety of slicers. With a 3D printable file downloaded, head to File > Open File(s) and select the 3D printable model you'd like to slice. In this case, it's an STL.
Once your 3D printable model has been loaded into your preferred slicer, you'll need to select your material such as PLA, ABS, CPE, HIPS, PC, nylon, PETG, or PVA. If you can select your printer, go ahead and do so. This provides a few benefits, including the ability to select recommended settings. I picked the Elegoo Neptune, and left all settings stock. But you can also tweak preferences and use custom settings to select layer height, print speed, infill, build plate adhesion, supports, and more.
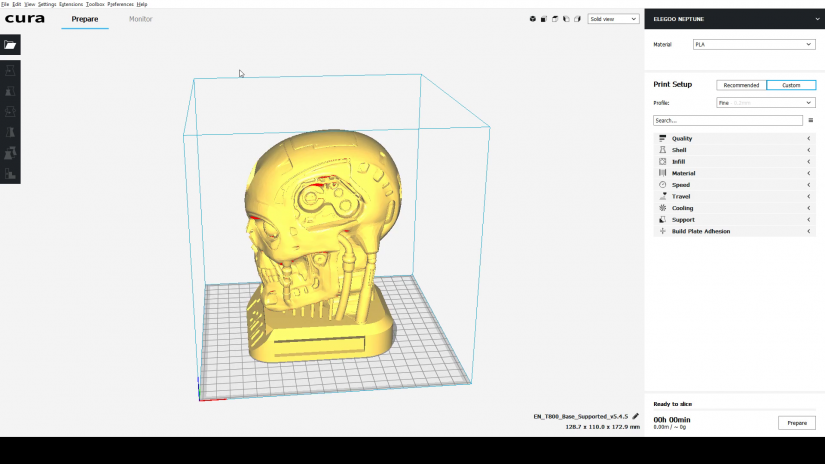 Additionally, you can move your model, scale it, rotate it, mirror it, and add support blockers. In my case, I selected PLA, and left recommended settings as is. Then, I scaled down my model 30%. When you're ready, hit Prepare or Slice, and save your sliced 3D printable model. You can output your sliced model as several formats including Gcode, STL, 3MF, and OBJ. I went with Gcode.
How to Slice a 3D Model for Resin 3D Printers
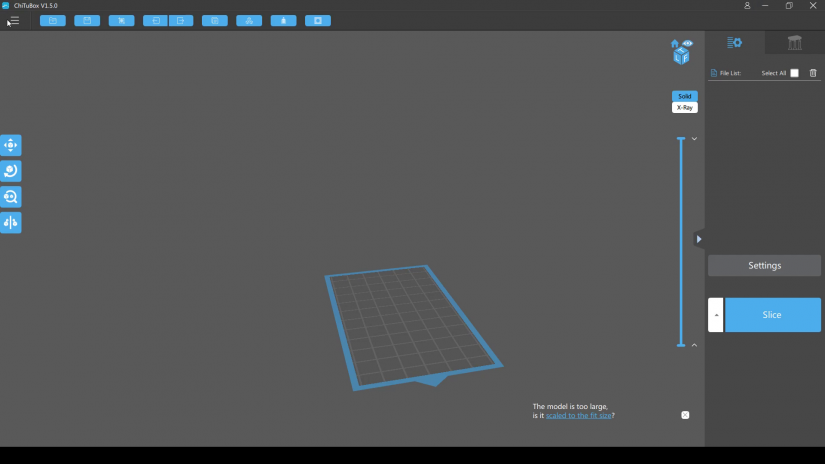 Working with resin 3D printers requires a bit of a learning curve, particularly for slicing. Plus, it's inherently messier than filament printing. However, resin 3D printers boast better quality than filament-based 3D printers.
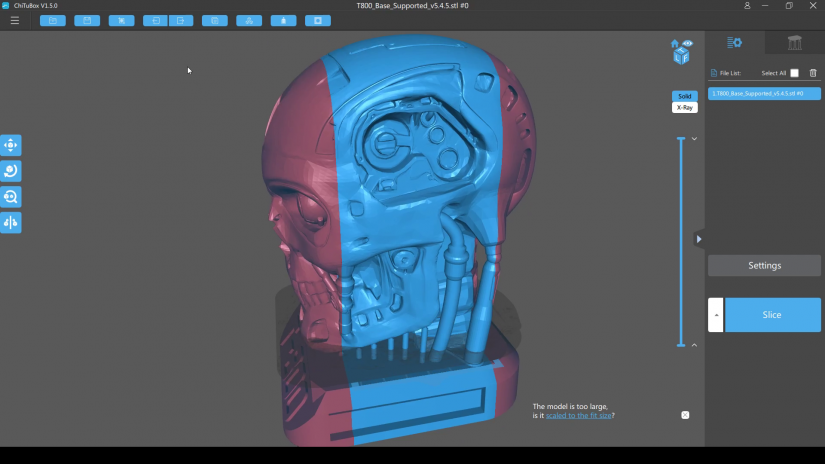 Again, the specific process might vary somewhat based on what slicer you're using, but the concept should be the same. I used ChiTuBox, what I believe to be the best slicer for resin 3D printing.
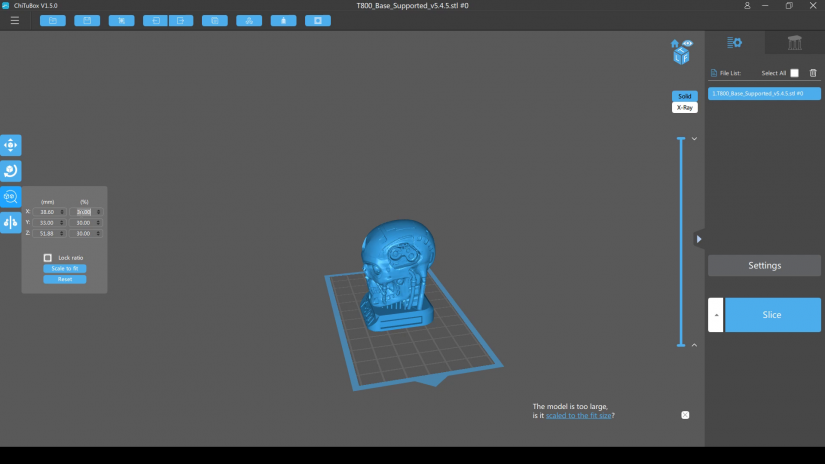 Head to Open and select your 3D printable file, in my case an STL file. Now, click Settings. You can add a new printer using the sheet with a plus icon, but if your printer isn't listed, use Default. Since my Elegoo Mars was listed, I selected that and ChiTuBox imported my printer's default settings. Use them stock or make any preferred alterations. You can change the resolution or size, select the mirror type like LCD, DLP, or normal, pick resin type, density, and cost, choose the layer height, bottom layer count, exposure time, bottom layer exposure time, light-off delay, and bottom light-off delay. When preparing a 3D printable file, you can select the infill structure and toggle anti-aliasing on or off.
Since the build platform is pretty small for a resin 3D printer, you'll often need to scale down a print before preparing your file. With a resin 3D printer slicer, you can move, rotate, scale, and mirror your print jobs. Hit the Scale button, then change the percentage or number in mm of the X, Y, or Z axis. Your print should be scaled down. When you're ready, hit Slice or prepare, then save your file. You should see some helpful information upfront such as resin type, volume in ml, weight in grams, price, and total printing time. Save your file in a compatible format, such a cbddlp.
How to Prepare a 3D Printable File: Final Thoughts
3D printing can seem pretty daunting but it's really quite easy, especially once you get familiar with the process. One of the most important aspects of printing is preparing a file, or slicing it. When slicing a 3D printable file, you'll be able to select options such as printing material, layer height, printing speed, anti-aliasing, and more. Plus, you can pick whether or not to use supports, scale a model down, and view information before printing such as total print time and materials used.
For more 3D printing fun, check out these YouTube channels to learn 3D printing!








Leave your feedback...