How to Make a Raspberry Pi Plex Player
The Raspberry Pi is a versatile single-board computer (SBC). The tiny credit card-sized computer can handle a variety of tasks ranging from a simple basic Linux desktop to a smart home hub, VPN server, and a slew of other projects. Because of its small footprint, affordability, and good price-to-performance ratio, the Raspberry Pi makes a competent media server with the likes of Plex or Emby. Byt what about Plex client support? Learn how to use the Raspberry Pi as a Plex player with the likes of Kodi and RasPlex!
What is Plex Media Server?
Plex is a media server app. You can think of it like a do-it-yourself (DIY) Netflix. Rather than subscribing to a service and paying to be able to stream content, instead you provide the (legally obtained) digital movies, TV shows, music files, and photos. Then, Plex organizes this into a pretty user interface (UI) complete with box art and descriptions. It's a great way to host your DVD or Blu-ray rips in one location for access anywhere that you've got an Internet connection. In addition to its ability to house your personal media collection, Plex offers many features for cord-cutters including free, ad-supported movies and TV shows, live streaming television, over-the-air (OTA) TV and DVR functionality, a podcast aggregator, web shows, Tidal integration, and a bunch of other aspects. It's a good overall media hub.
To use Plex, you'll need a digital media library, media server, and client. A client for Plex can be anything from a desktop PC or mobile device to a dedicated streaming device such as a Roku or Android TV box. On the server side, you can run a Raspberry Pi Plex server, or upgrade to a full-blown Plex NAS. While the Raspberry Pi works well for a Plex media server, it's not capable of transcoding. But the Raspberry Pi 4 and even Pi Zero/Zero W works like a champ for streaming from Plex.
What You'll Need for a Plex Client with a Raspberry Pi
For a Raspberry Pi Plex player, you'll need a few items. First, a Raspberry Pi board. I suggest the Raspberry Pi 4, although a Pi 3 B+ or even the Pi Zero/Zero W should suffice. Because streaming requires scant system resources, you don't need a ton of processing power. Still, for 4K streaming, go with a RasPi 4. The Pi 3 B+ should be fine for 1080p, although the price differential between the 3 B+ and 4 makes the 4 a no-brainer. Alternatively, if you don't need 4K video output and prefer a streaming stick, you could use the Raspberry Pi 0 or Pi 0 W. A case is optional but recommended. For installing an operating system, you'll need a microSD card. Plus, peripherals such as a keyboard, mouse, and HDMI cable are necessary as well. Finally, you'll need a legally-obtained collection of media such as movies, TV shows, and music files. You can either rip your own physical discs, convert analog formats such as vinyl, VHS, LaserDiscs, and cassette tapes to digital, or source content via legal torrents.
Raspberry Pi Plex client parts list:
- Raspberry Pi board (Raspberry Pi 4 recommended, but Pi 3 B+, RasPi 3 A+, Pi Zero/Zero W should be fine as well)
- Case (optional, recommended)
- microSD card
- Peripherals (keyboard, mouse, HDMI cable)
- HDMI-enabled TV, projector, or monitor
- Official Raspberry Pi power supply
- Active Internet connection
- Plex server (can be another Raspberry Pi board or another more powerful server)
- Digital media library
Total cost: $35+ USD. You can get a Raspberry Pi 4 2GB RAM model for $35. Since streaming alone uses very little RAM, you should be just fine with a 2GB model. But if you plan to run more memory-intensive applications on the Pi, go with the 4GB or 8GB variant. Alternatively, for a super cheap option, snag the Pi Zero W for around $10 which could be similar to a DIY Roku stick. A case and any other accessories will retail for extra. You could pick up a complete Raspberry Pi starter kit for a cost-effective solution.
Make a Raspberry Pi Plex Media Player with RasPlex
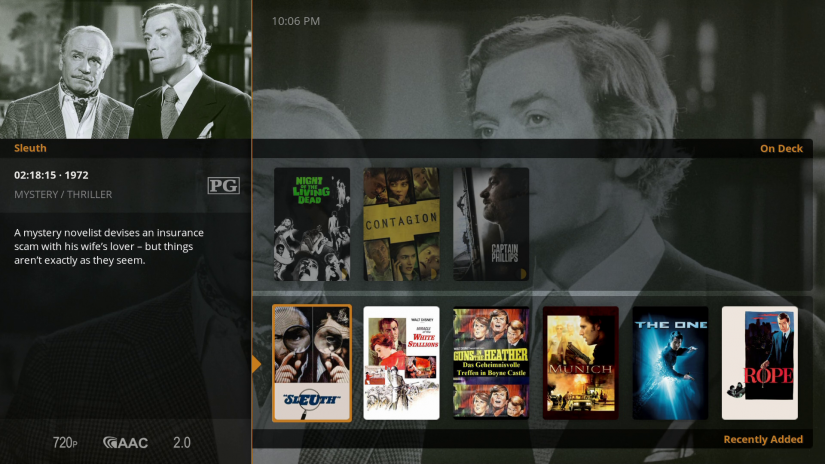 Probably the easiest method for creating a Plex Raspberry Pi client is by using RasPlex. The portmanteau of Raspberry (Pi) and Plex is a dedicated Plex media streamer that runs on the Raspberry Pi. You'll still need a Plex server, as this is purely for streaming to the Pi, but it's a cheap method for accessing your networked media on any TV or projector. Disappointingly, there's no Pi 3 B+ or 4 support, although you can run Plex on the Pi 4 via other methods.
First, head over to the official RasPlex website. From there, click Get RasPlex. Then, you'll see several different installers including a Windows version, macOS RasPlex installer, and Linux option. Download the appropriate installer, either Windows, macOS, or Linux. Then, fire up the installer.
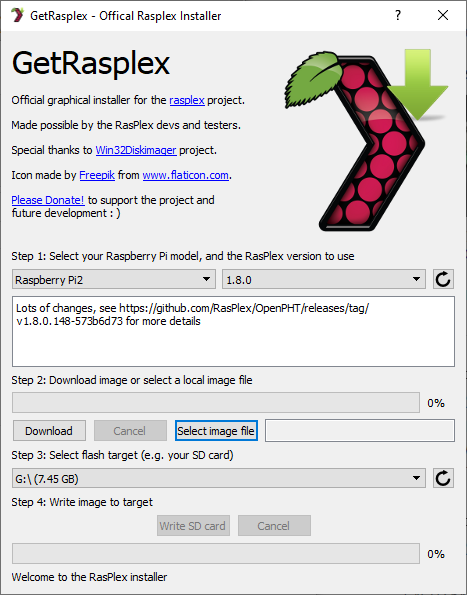
When you launch the RasPlex installer, you'll need to select your Raspberry Pi model, either 1 or 2, and the version of RasPlex you want to use. Then, hit Download to download the img.gz locally.
Then, With your microSD card inserted, select Write SD card and wait for burning to complete. After that, flash RasPlex to your microSD card. When burning completes, pop the microSD card into your Pi and power it on.
Upon first booting into RasPlex, there's a bit of basic set up. Select your network, wired or wireless, choose whether or not you want to enable SSH and Samba for remote management, then get logged in using the automatically-generated code. Then, you should be ready to start using RasPlex. I definitely suggest using the "enable pre-caching" option.
Install Plex for Kodi on the Raspberry Pi
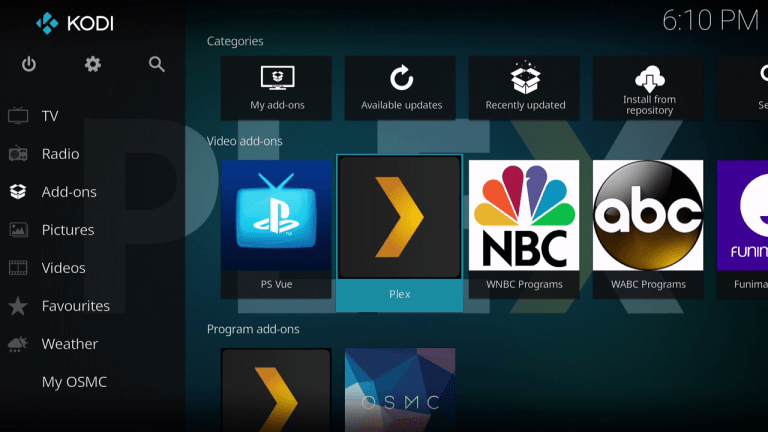
Alternatively, you could run Kodi on the Raspberry Pi and install the Plex for Kodi add-on. For a Kodi media center on the Pi, you have several options. You could install a Linux operating system and download the standalone Kodi app for Linux. Alternately, there are several different just-enough Kodi operating systems (OSes) that run on the Pi including Xbian, OSMC, and LibreELEC. Then, retro gaming emulation OSes RetroPie, Batocera, and Recalbox each include Kodi built-in. Or, the Debian-based Linux distribution (distro) RaspEX features Kodi pre-installed with the Plex add-on pre-loaded.
How to Install Plex for Kodi
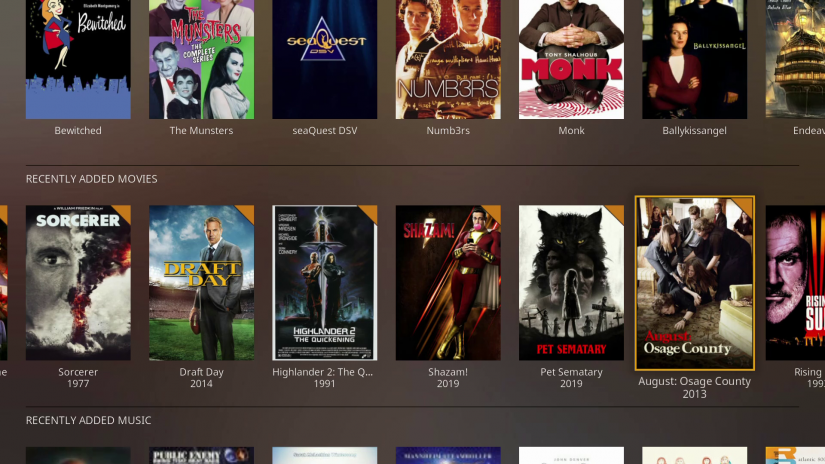 Since Plex is in the official Kodi repository, it's super simple to install. Head under Add-ons > Enter add-on browser > Install from repository > Video add-ons. Then, scroll down to Plex. Select the Plex Kodi add-on, and hit Install. When prompted to download additional add-ons, select Ok. Wait for installation to complete, then head back to the add-ons menu and launch Plex. You'll be prompted to sign-in, and Plex will generate a one-time-use code. Visit https://plex.tv/link on a different device, then sign into your Plex account and input the code. Now, you should be logged in and the Kodi for Plex add-on should redirect.
How to Install Kodi on Raspberry Pi OS and Other Debian-based Raspberry Pi Linux Distros
On Raspberry Pi and other Debian distros, Kodi can be installed easily via the command-line. In a new terminal, first run an update:
sudo apt-get update
Once that finishes, install Kodi:
sudo apt-get install kodi
THen, Kodi should download and you can launch it from your program menu.
How to Install LibreELEC on the Raspberry Pi
LibreELEC runs on the Raspberry Pi 0/0 W, Pi 1, Pi 2, Pi 3/3 B+, and Raspberry Pi 4. Start by downloading the standalone img.gz from the LibreELEC downloads page. Then, decompress it with a program like 7Zip. When you've got your IMG file, run an application such as Etcher and point your image mounting software to the LibreELEC installer as well as your microSD card. When you're ready, hit flash. After burning completes, fire up the Pi and you're in Kodi.
Alternatively, use the LibreELEC USB-SD creator installer. Download the USB creator for either macOS, Windows, or Linux. Then, follow the prompts to pick your pI version and the correct LibreELEC installer. Download the image, pick your SD card or USB stick, then flash it and once that's done, pop it into your Pi and boot into Kodi.
How to Install OSMC on the Raspberry Pi
Pop over to the OSMC downloads page. Click on Raspberry Pi, and snag the Pi 1, 2, 3, 3 B+, or Pi Zero image creation too. There's a bootable SD card creator for Windows or macOS. If you're on Linux or would just prefer to use a standalone Pi image, choose Other Images and download the latest OSMC release.
It's an IMG.GZ, so you'll need to extract that with an image unzipping program. Once you do that, use an image mounting app to burn the decompressed image to a microSD. Pop it into your Pi, fire it up, and you're in Kodi.
How to Install Xbian on the Raspberry Pi
For Xbian, there are image creation tools for Windows, macOS, and Linux. Either download one of these, or the the latest standalone image. Because it's an IMG.GZ, you'll need to decompress it, then burn that to a microSD card. After you've successfully created an Xbian Raspberry Pi microSD card, pop it in the Pi and boot it up to get into Kodi.
How to Install Raspberry Pi, Recalbox, and Batocera on the Raspberry Pi
Like installing just-enough Kodi OSes OSMC, LibreELEC, and Xbian, emulation distros like RetroPie, Recalbox, and Batocera may be installed for Kodi access. Download your preferred OS, either Batocera, RetroPie, or Recalbox. Decompress the zipped image, then burn it to a microSD card. When that's complete, put the SD card into your Pi and boot it up. However, unlike OSMC, LibreELEC, and Xbian, you won't be booting directly into Kodi.
On RetroPie, head to Menu > RetroPie Setup > Manage Packages > Manage Optional Packages > Kodi > Install from binary. Reboot your Pi, then look under Ports and you should find Kodi. With Recalbox, simply open up the main menu by pressing Start, and the first item should be Kodi media center. For Batocera, ensure that Kodi is enabled. Head to System Settings (Start) > Kodi Settings and make sure that it's enabled.
How to Use your Raspberry Pi as a Plex Client - Final Thoughts
There are tons of methods for running Plex on the Raspberry Pi. For simply streaming Plex, the Pi is more than up to the challenge. Since you can even power the Raspberry Pi off of a USB, it could be a neat little portable streaming box that you can plug into a TV or a projector for an on-the-go movie night. A home theatre PC with the Pi is a fun, simple, and functional project.






Leave your feedback...