How to Install WordPress on Raspberry Pi: Raspberry Pi WordPress Installation
The Raspberry Pi is arguably the best single-board computer (SBC) on the market. With a bevy of compatible operating systems, software options, and hardware accessories, it's a well-supported maker board. While you can perform basic tasks like setting up a Linux desktop and creating a retro gaming arcade with Lakka, RetroPie, or Recalbox, the utilitarian Raspberry Pi can be used for tons of projects. With its balance of computing performance, a small footprint, and low power draw, the Raspberry Pi may be used as a web server running content management systems (CMSes) such as Drupal. Learn how to install WordPress on Raspberry Pi boards in this Raspberry Pi WordPress tutorial!
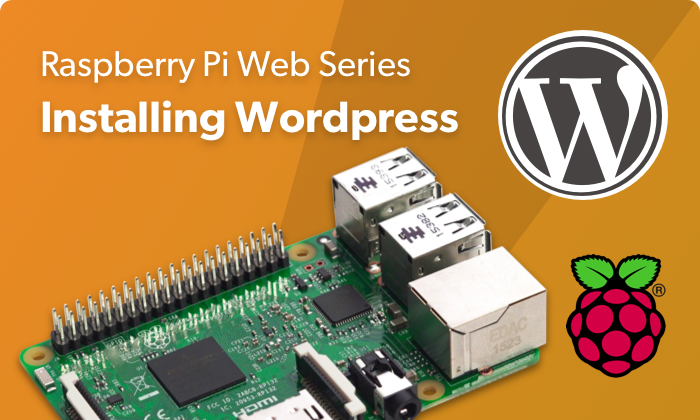
Raspberry Pi WordPress Hosting: A Word on WordPress.org vs. WordPress.com
Because WordPress boasts a slew of community resources, it's a popular CMS. You'll find loads of themes, forums, and tutorials. However, there's a key difference in WordPress.com and WordPress.org. WordPress.com is a web hosting service. Its free plan is pretty limited, though paid upgrades provide additional functionality. Compare that to WordPress.org which is the full-fledged version of WordPress. Unlike WordPress.com, you benefit from the full capabilities of this open-source CMS. But you'll need your own domain name and hosting, whether on-premises or remote. Raspberry Pi WordPress hosting offers an affordable solution.
My personal website, CupOfMoe.com, is a WordPress website with a custom theme. It's arguably the top CMS for bloggers and writers. I don't self-host because I'd rather focus my energy on creating content instead of managing a web server, but a Raspberry Pi as a WordPress server is an excellent, easy project idea.
Raspberry Pi WordPress Tutorial: Create a Raspberry Pi WordPress Web Server
Making a Raspberry Pi WordPress server is simple. You'll only need a Raspberry Pi running a Linux distribution (distro) such as Raspbian, a microSD card with your preferred operating system (OS) mounted, keyboard, mouse, internet connection, and HDMI cable unless you're running headless.
What you'll need for Raspberry Pi WordPress hosting:
- Raspberry Pi board (Raspberry Pi 4 recommended)
- Case (optional, recommended)
- Linux OS
- microSD card
- Keyboard and mouse
- PSU
- Internet connection
Total cost: $35
Raspberry Pi WordPress Tutorial
To install WordPress on a Raspberry Pi, you'll need to install Apache, MySQL, PHP, and WordPress.
Raspberry Pi WordPress Server: Install Apache
First, you'll need to install Apache, an incredibly popular web server program. In a terminal, run:
sudo apt-get install apache2 -y
This installs Apache. Once installation completes, you can test if it worked properly. Open a web browser and navigate to http://localhost. Doing so should display an Apache2 landing page.
Next, you can change the default web page, which is found at /var/www/html/index.html. In a command line, enter:
cd /var/www/htmlls -al
You'll see an output similar to:
total 20
drwxr-xr-x 2 root root 4096 Aug 23 09:55 .
drwxr-xr-x 3 root root 4096 Aug 23 09:48 ..
-rw-r--r-- 1 root root 10701 Aug 23 09:55 index.html
Edit this file by entering the following into a terminal window:
sudo leafpad index.html
Raspberry Pi WordPress Hosting: Install PHP
Now, install PHP, or code which runs when a server gets a request for a page via a web browser. To install PHP, enter:
sudo apt-get install php -y
Then, make an index.php file:
sudo leafpad index.php
Add some basic PHP to yourindex.php file:
<?php echo "hello world"; ?>
When that's finished, save your file and delete the index.html file. You'll use the index.php file instead:
sudo rm index.html
In your browser, navigate to localhost and you should see "hello world," or whatever text you added. If all you're viewing is raw PHP, restart the Apache service:
sudo service apache2 restart
Then, edit your index.php file and add dynamic content like:
<?phpecho date('Y-m-d H:i:s'); ?>
With this finished, PHP should be installed. Now it's time to install MySQL, an excellent database engine. Run:
sudo apt-get install mysql-server php-mysql -y
After that, restart Apache with:
sudo service apache2 restart
Install WordPress on Raspberry Pi: MySQL Installation
Once you've installed Apache, PHP, and MySQL, it's time to install WordPress on the Raspberry Pi. Navigate to /var/www/html/ and delete all files within it:
cd /var/www/html/sudo rm *
Next, download the latest version of WordPress:
sudo wget http://wordpress.org/latest.tar.gz
Extract the tarball with:
sudo tar xzf latest.tar.gz
And move the contents of your WordPress folder to the current directory you're in:
sudo mv wordpress/* .
Since you're done using your tarball, delete it:
sudo rm -rf wordpress latest.tar.gz
To view the contents of your WordPress folder, enter:
ls
Finally, make sure that the Apache user is the default owner of that directory:
sudo chown -R www-data: .
Raspberry Pi WordPress Tutorial: Installing WordPress
Ok, so Apache, PHP, MySQL, and WordPress are all (hopefully) properly installed. You'll have to set up your WordPress database. Run the MySQL secure installation with:
sudo mysql_secure_installation
You're prompted to enter the password for the root user. If there's none, simply hit enter.
Type y and hit enter to set a root password, then type in a new password.
Hit y to remove anonymous users, y to disallow root login remotely, y to remove test database and access to it, and y to reload privilege tables. Then, you'll see a message saying "Thanks for using MariaDB!"
In a terminal, run MySQL with:
sudo mysql -uroot -p
Enter the password you created earlier. Make a database for your Raspberry Pi WordPress install using:
create database wordpress;
If this worked, you should see a message such as:
Query OK, 1 row affected (0.00 sec)
Give database privileges to the root user by running:
GRANT ALL PRIVILEGES ON wordpress.* TO 'root'@'localhost' IDENTIFIED BY 'YOURPASSWORD';
For these to manifest, enter:
FLUSH PRIVILEGES;
Exit MariaDB with CTRL + D.
Begin configuring WordPress. In a browser, enter http://localhost and you should see the WordPress set up page. Select your preferred language from the list and click continue.
You'll see a welcome to WordPress page. Review this information, and click let's go.
Load the site information:
Database Name: wordpress
User Name: root
Password: <PASSWORD>
Database Host: localhost
Table Prefix: wp_
The info you enter here may vary. Hit submit to continue, then select run the install. Give your site a title, then make a username and password. Upon filling out this basic info, click install WordPress. You can log in with the username and password you just created.
Additionally, you may login at http://localhost/wp-admin.
Raspberry Pi as a WordPress Server: Final Thoughts
That's it! Your Raspberry Pi WordPress web server should be up and running. I found installing WordPress on the Raspberry Pi a little easier than a Raspberry Pi Drupal install, though that's not terribly difficult either. Ultimately, if you're looking for inexpensive web hosting, a self-hosted WordPress site on Raspberry Pi is a solid choice.
What are you using your Raspberry Pi for?






Leave your feedback...