


Wio Terminal Gps Tracker With Dfrobot Gnss Sensor

Made by CETECH11
About the project
Will guide you to develop a GPS tracker using Seeed Studio Wio Terminal and DFRobot GNSS Sensor
Project info
Difficulty: Easy
Platforms: DFRobot, Seeed Studio
Estimated time: 1 hour
License: GNU General Public License, version 3 or later (GPL3+)
Items used in this project
Hardware components

Story
Embark on a journey to create a dynamic and interactive GNSS-powered Wio Terminal display! This project leverages the power of the Wio Terminal and the DFRobot GNSS module to present real-time GNSS data. Whether you are a hobbyist, an educator, or a tech enthusiast, this project offers a comprehensive and engaging experience that will enhance your knowledge and skill set.
ComponentsTo get started, you will need the following components.
Wio Terminal: A powerful and versatile device featuring a 2.4" TFT LCD screen, built-in sensors, and Wi-Fi capabilities.
DFRobot GNSS Module: A highly accurate GNSS (GPS, BeiDou, GLONASS) module for tracking and time synchronization.
Jumper Wires: To connect the GNSS module to the Wio Terminal.
Power Supply: USB cable and power source for the Wio Terminal.
Get PCBs for Your Projects Manufactured
You must check out PCBWAY for ordering PCBs online for cheap!
You get 10 good-quality PCBs manufactured and shipped to your doorstep for cheap. You will also get a discount on shipping on your first order. Upload your Gerber files onto PCBWAY to get them manufactured with good quality and quick turnaround time. PCBWay now could provide a complete product solution, from design to enclosure production. Check out their online Gerber viewer function. With reward points, you can get free stuff from their gift shop. Also, check out this useful blog on PCBWay Plugin for KiCad from here. Using this plugin, you can directly order PCBs in just one click after completing your design in KiCad.
Setting Up the EnvironmentBefore diving into the code, ensure you have the Arduino IDE installed on your computer. Additionally, you will need to install the necessary libraries:
- DFRobot_GNSSAndRTC: For interfacing with the GNSS module.
- TFT_eSPI: For controlling the Wio Terminal's display.
- rpcUnifiedSensor: (No longer needed for this version)
Wio Terminal and GNSS Module: Connect the GNSS module to the Wio Terminal using jumper wires. Ensure you connect the SDA and SCL pins of the GNSS module to the corresponding pins on the Wio Terminal.
The CodeBelow is the complete code for the project.
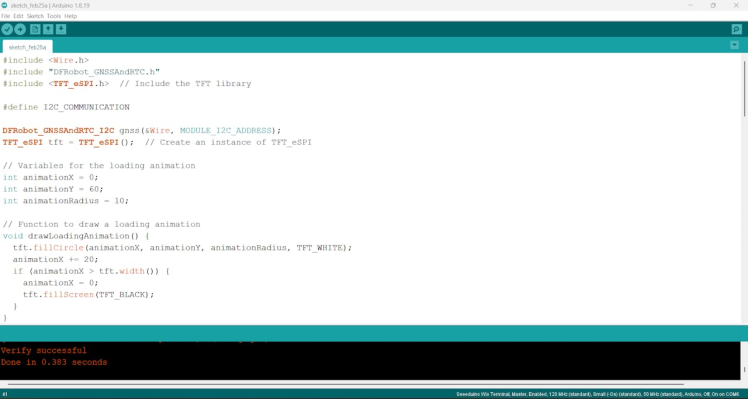
It initializes the GNSS module, retrieves GNSS data, and displays it on the Wio Terminal screen with a modern UI design.
#include <Wire.h>
#include "DFRobot_GNSSAndRTC.h"
#include <TFT_eSPI.h> // Include the TFT library
#define I2C_COMMUNICATION
DFRobot_GNSSAndRTC_I2C gnss(&Wire, MODULE_I2C_ADDRESS);
TFT_eSPI tft = TFT_eSPI(); // Create an instance of TFT_eSPI
// Variables for the loading animation
int animationX = 0;
int animationY = 60;
int animationRadius = 10;
// Function to draw a loading animation
void drawLoadingAnimation() {
tft.fillCircle(animationX, animationY, animationRadius, TFT_WHITE);
animationX += 20;
if (animationX > tft.width()) {
animationX = 0;
tft.fillScreen(TFT_BLACK);
}
}
void setup()
{
Serial.begin(115200);
// Initialize the TFT screen
tft.begin();
tft.setRotation(3);
tft.fillScreen(TFT_BLACK);
tft.setTextColor(TFT_WHITE, TFT_BLACK);
tft.setTextSize(2);
tft.drawString("Initializing GNSS...", 10, 10);
while (!gnss.begin()) {
Serial.println("NO Devices!");
tft.drawString("No Devices!", 10, 40);
delay(1000);
drawLoadingAnimation();
}
gnss.enablePower();
gnss.setGnss(gnss.eGPS_BeiDou_GLONASS);
tft.fillScreen(TFT_BLACK);
tft.drawString("GNSS Initialized", 10, 10);
delay(1000);
}
void loop()
{
// Clear the screen for new data
tft.fillScreen(TFT_BLACK);
tft.setCursor(0, 0);
DFRobot_GNSSAndRTC::sTim_t utc = gnss.getUTC();
DFRobot_GNSSAndRTC::sTim_t date = gnss.getDate();
DFRobot_GNSSAndRTC::sLonLat_t lat = gnss.getLat();
DFRobot_GNSSAndRTC::sLonLat_t lon = gnss.getLon();
double high = gnss.getAlt();
uint8_t starUserd = gnss.getNumSatUsed();
double sog = gnss.getSog();
double cog = gnss.getCog();
// Draw a modern UI layout with rounded rectangles and better text formatting
tft.fillRoundRect(10, 10, 300, 30, 5, TFT_BLUE);
tft.setTextColor(TFT_WHITE);
tft.drawString("Date: " + String(date.year) + "/" + String(date.month) + "/" + String(date.date), 20, 15);
tft.fillRoundRect(10, 50, 300, 30, 5, TFT_BLUE);
tft.drawString("Time: " + String(utc.hour) + ":" + String(utc.minute) + ":" + String(utc.second), 20, 55);
tft.fillRoundRect(10, 90, 300, 30, 5, TFT_GREEN);
tft.drawString("Lat: " + String(lat.latitudeDegree, 6), 20, 95);
tft.fillRoundRect(10, 130, 300, 30, 5, TFT_GREEN);
tft.drawString("Lon: " + String(lon.lonitudeDegree, 6), 20, 135);
tft.fillRoundRect(10, 170, 300, 30, 5, TFT_ORANGE);
tft.drawString("Satellites: " + String(starUserd), 20, 175);
tft.fillRoundRect(10, 210, 300, 30, 5, TFT_RED);
tft.drawString("Altitude: " + String(high) + " m", 20, 215);
tft.fillRoundRect(10, 250, 300, 30, 5, TFT_CYAN);
tft.drawString("Speed: " + String(sog) + " km/h", 20, 255);
tft.fillRoundRect(10, 290, 300, 30, 5, TFT_PURPLE);
tft.drawString("Course: " + String(cog) + "°", 20, 295);
// Print the same data to the Serial Monitor for debugging
Serial.printf("Date: %04d/%02d/%02dn", date.year, date.month, date.date);
Serial.printf("Time: %02d:%02d:%02dn", utc.hour, utc.minute, utc.second);
Serial.printf("Lat: %.6fn", lat.latitudeDegree);
Serial.printf("Lon: %.6fn", lon.lonitudeDegree);
Serial.printf("Satellites: %dn", starUserd);
Serial.printf("Altitude: %.2f mn", high);
Serial.printf("Speed: %.2f km/hn", sog);
Serial.printf("Course: %.2f°n", cog);
delay(2000); // Update every second
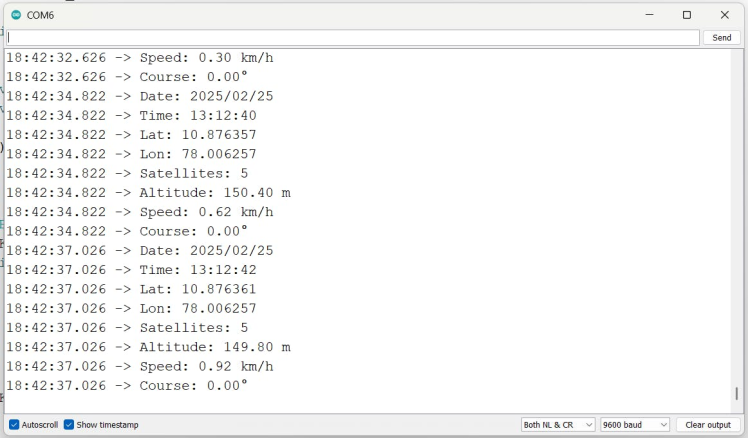
}Once uploaded the code, monitor the serial terminal for the response. First, it will take time to initialize the sensor.
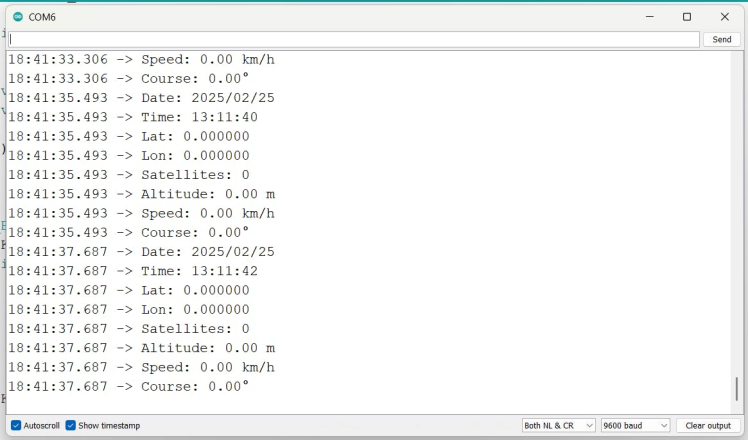
Here is the response once the GPS is initialized.
The project involves the following key steps:
Initialization:
- The Wio Terminal and TFT screen are initialized.
- The GNSS module is set up to communicate with the Wio Terminal via I2C.
void setup()
{
  Serial.begin(115200);

  // Initialize the TFT screen
  tft.begin();
  tft.setRotation(3);
  tft.fillScreen(TFT_BLACK);
  tft.setTextColor(TFT_WHITE, TFT_BLACK);
  tft.setTextSize(2);
  tft.drawString("Initializing GNSS...", 10, 10);

  while (!gnss.begin()) {
    Serial.println("NO Devices!");
    tft.drawString("No Devices!", 10, 40);
    delay(1000);
    drawLoadingAnimation();
  }

  gnss.enablePower();
  gnss.setGnss(gnss.eGPS_BeiDou_GLONASS);
  tft.fillScreen(TFT_BLACK);
  tft.drawString("GNSS Initialized", 10, 10);
  delay(1000);
}
Data Retrieval and Display:
- GNSS data including date, time, latitude, longitude, altitude, number of satellites, speed, and course are retrieved.
- This data is displayed on the Wio Terminal’s screen using a visually appealing UI with color-coded sections.
void loop()
{
  // Clear the screen for new data
  tft.fillScreen(TFT_BLACK);
  tft.setCursor(0, 0);

  DFRobot_GNSSAndRTC::sTim_t utc = gnss.getUTC();
  DFRobot_GNSSAndRTC::sTim_t date = gnss.getDate();
  DFRobot_GNSSAndRTC::sLonLat_t lat = gnss.getLat();
  DFRobot_GNSSAndRTC::sLonLat_t lon = gnss.getLon();
  double high = gnss.getAlt();
  uint8_t starUserd = gnss.getNumSatUsed();
  double sog = gnss.getSog();
  double cog = gnss.getCog();

  // Draw a modern UI layout with rounded rectangles and better text formatting
  tft.fillRoundRect(10, 10, 300, 30, 5, TFT_BLUE);
  tft.setTextColor(TFT_WHITE);
  tft.drawString("Date: " + String(date.year) + "/" + String(date.month) + "/" + String(date.date), 20, 15);

  tft.fillRoundRect(10, 50, 300, 30, 5, TFT_BLUE);
  tft.drawString("Time: " + String(utc.hour) + ":" + String(utc.minute) + ":" + String(utc.second), 20, 55);

  tft.fillRoundRect(10, 90, 300, 30, 5, TFT_GREEN);
  tft.drawString("Lat: " + String(lat.latitudeDegree, 6), 20, 95);

  tft.fillRoundRect(10, 130, 300, 30, 5, TFT_GREEN);
  tft.drawString("Lon: " + String(lon.lonitudeDegree, 6), 20, 135);

  tft.fillRoundRect(10, 170, 300, 30, 5, TFT_ORANGE);
  tft.drawString("Satellites: " + String(starUserd), 20, 175);

  tft.fillRoundRect(10, 210, 300, 30, 5, TFT_RED);
  tft.drawString("Altitude: " + String(high) + " m", 20, 215);

  tft.fillRoundRect(10, 250, 300, 30, 5, TFT_CYAN);
  tft.drawString("Speed: " + String(sog) + " km/h", 20, 255);

  tft.fillRoundRect(10, 290, 300, 30, 5, TFT_PURPLE);
  tft.drawString("Course: " + String(cog) + "°", 20, 295);

  // Print the same data to the Serial Monitor for debugging
  Serial.printf("Date: %04d/%02d/%02dn", date.year, date.month, date.date);
  Serial.printf("Time: %02d:%02d:%02dn", utc.hour, utc.minute, utc.second);

  Serial.printf("Lat: %.6fn", lat.latitudeDegree);
  Serial.printf("Lon: %.6fn", lon.lonitudeDegree);

  Serial.printf("Satellites: %dn", starUserd);
  Serial.printf("Altitude: %.2f mn", high);
  Serial.printf("Speed: %.2f km/hn", sog);
  Serial.printf("Course: %.2f°n", cog);

  delay(2000);  // Update every second
}
Serial Output:
- The same data is printed to the Serial Monitor for debugging purposes.
One practical application of this project is real-time location tracking. By integrating this setup into a portable device, you can monitor and log your location data as you move. This can be particularly useful for outdoor activities such as hiking, biking, or geocaching. The real-time display provides immediate feedback on your position, speed, and altitude, enhancing your navigation experience.
ConclusionBuilding a GNSS-powered Wio Terminal display is an engaging and educational project that offers practical applications in real-time location tracking and education. By following this guide, you can create a visually appealing display that presents real-time GNSS data, enhancing your understanding of GNSS technology and its applications.
Feel free to customize and expand the project to include additional features and functionalities. Happy coding and exploring! 🚀
Credits
Related products


Leave your feedback...