We Interrupt This Program to Bring You… TV-B-Gone!
About the project
Built a £9 TV-B-Gone to turn off TVs remotely using infrared. Tested it in an electronics store, powered by a Raspberry Pi and servo motor
Project info
Items used in this project
Hardware components
Story
Ever found yourself in a room full of blaring, unwanted televisions? Whether it's in a pub, a waiting room, or an electronics store with rows of TVs, there's always one screen that nobody's watching, but it's loud enough to drive you mad. Enter the TV-B-Gone, a small yet powerful device that allows you to remotely turn off TVs and take control of your environment.
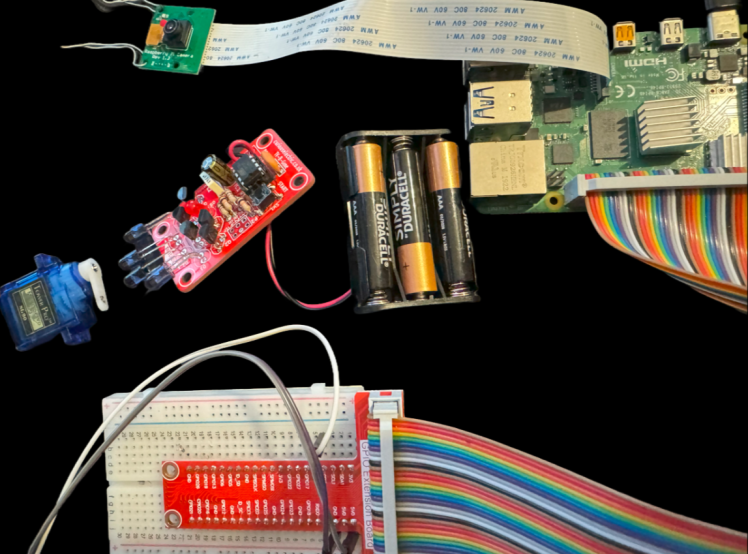
In my latest YouTube video [https://youtu.be/IkLWWnj2wB0?si=qyIlw6_pA1v5zF7W], I show how I built this gadget and put it to the test in an electronics store filled with TVs. Trust me, it was a wild ride! Keep reading to learn how the TV-B-Gone works, how I soldered the kit together, and how I added some extra tech flair.
How the TV-B-Gone Works
The TV-B-Gone is a gadget designed by Mitch Altman that sends out the "OFF" signal to most televisions. It works by emitting infrared (IR) signals from a set of high-brightness IR LEDs, similar to a universal remote. The device cycles through over 230 power codes, which correspond to different TV brands, allowing it to turn off nearly any TV in the room. As long as the device is within 150 feet and has a clear line of sight, it can send the signal to power off the TV.

The internal chip does all the heavy lifting, scanning through all the codes stored in its memory until it finds the one that matches the TV. Once it hits the right code, the TV powers off, just like magic! But since it's cycling through all the available codes, it can take up to 120 seconds to work, depending on the TV brand.
Soldering the TV-B-Gone Kit
The TV-B-Gone is a do-it-yourself kit, meaning you have to solder the parts together yourself. When I ordered it from CuriousElectric.co.uk, it arrived as a bag of components and a small PCB (printed circuit board). I spent an afternoon carefully soldering the parts together with my trusty soldering iron, connecting resistors, capacitors, and the LEDs to the board.
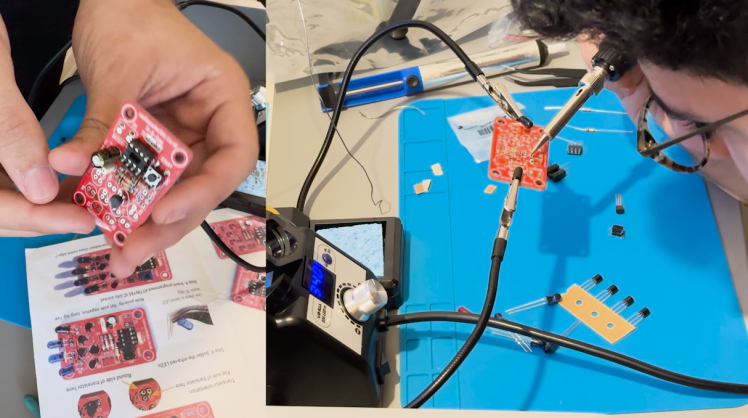
It wasn't the most challenging soldering project, but it definitely required some focus, especially when handling the small parts. After putting everything together and making sure all the connections were solid, I powered it up for the first time—and it worked like a charm. Watching the device successfully turn off a TV for the first time felt incredibly satisfying.
The Field Test: An Electronics Store
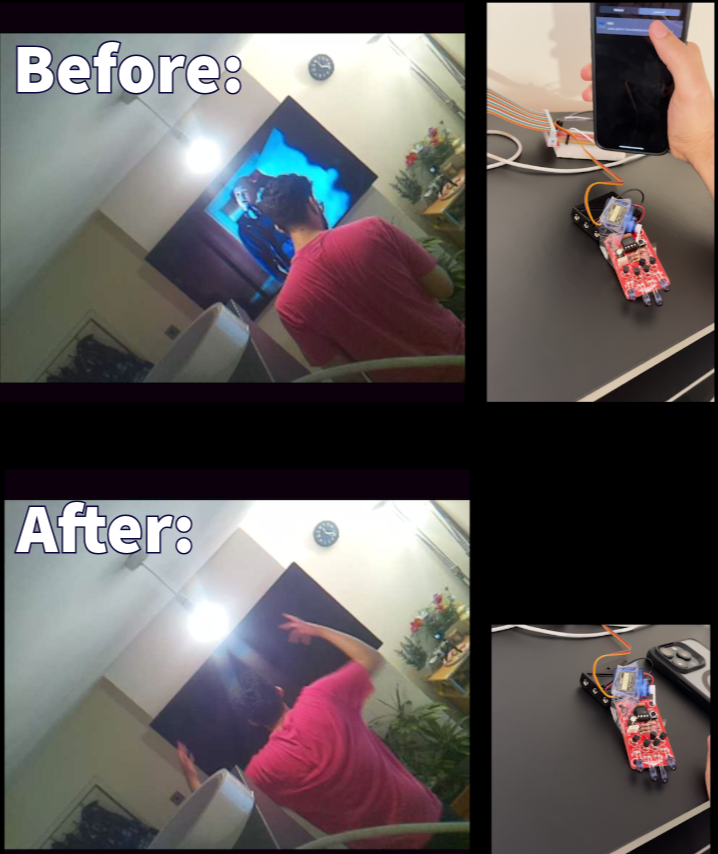
With the device fully assembled, I was itching to see it in action in a real-world scenario. Naturally, I decided to take it to an electronics store full of televisions. I casually walked through the aisles, holding the TV-B-Gone in my hand, and discreetly pressed the button. Slowly but surely, the TVs started turning off, one by one, as the device cycled through its power codes.
For a brief moment, the entire wall of TVs went dark. Some turned back on as the power codes continued cycling, but others stayed off, leaving store employees scratching their heads. The best part? No one even realized what was happening—it was pure stealth!
Taking It Further with a Raspberry Pi and Servo Motor
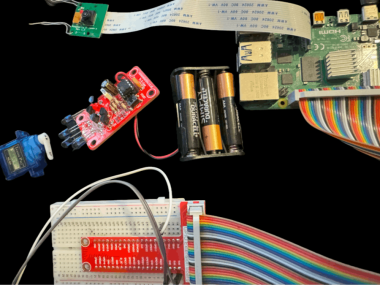
After having fun with the basic TV-B-Gone, I wanted to go a step further. I decided to integrate the device with a Raspberry Pi and an SG90 servo motor to add remote control capabilities. The servo motor acts as a mechanical finger that physically flips the on-switch of the TV-B-Gone, allowing me to control it from my phone.
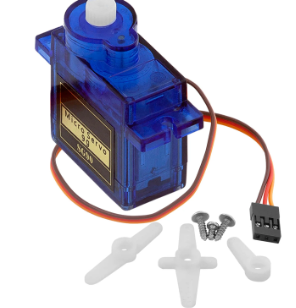
Here's a basic example of how to control the SG90 servo motor connected to GPIO pin 17 on the Raspberry Pi. This Python code will rotate the servo to turn on the TV-B-Gone:
import RPi.GPIO as GPIO
import time

# Set up GPIO mode
GPIO.setmode(GPIO.BCM)
GPIO.setup(17, GPIO.OUT)

# Initialize PWM on pin 17
pwm = GPIO.PWM(17, 50)  # 50Hz pulse

# Start PWM
pwm.start(0)

def set_angle(angle):
    duty = angle / 18 + 2
    GPIO.output(17, True)
    pwm.ChangeDutyCycle(duty)
    time.sleep(1)
    GPIO.output(17, False)
    pwm.ChangeDutyCycle(0)

# Rotate servo to trigger TV-B-Gone
set_angle(90)  # Example angle for pressing the button

# Stop PWM and clean up
pwm.stop()
GPIO.cleanup()
This code moves the servo to 90 degrees, which mimics pressing the button on the TV-B-Gone. Once it's connected, I can activate the device remotely by sending commands from my phone.
Remote Activation Using RaspController
I also set up the system to be controlled via my phone using the RaspController app. As long as my phone and Raspberry Pi are on the same network, I can connect to the Pi, view the camera feed, and even activate the servo to turn off TVs remotely. Here's the command I use to trigger the TV-B-Gone:
sudo python downloads/tvbgone/turnofftv.py
This setup allows me to watch TVs turning off in real-time while keeping a safe distance.
A DIY Build Held Together by Tape
Now, I'll be honest, the entire system isn't exactly the most robust in terms of physical design. I held everything together using a combination of fragile materials and tape. It's not pretty, but it works! The Raspberry Pi, servo motor, and TV-B-Gone components are all securely (if somewhat precariously) taped together, and as long as the device continues turning off TVs, I'm calling it a win.

Conclusion
The TV-B-Gone is an incredibly fun gadget to build and use. Whether you're annoyed by TVs in public spaces or just want to play a harmless prank, this device gives you the power to take control of your surroundings. And with the Raspberry Pi integration, I've added an extra layer of tech magic to the mix, allowing me to control the device from my phone.
At just £9, it's a fantastic budget alternative to the Flipper Zero, and assembling it yourself makes the experience even more rewarding. Just remember to use it responsibly—some people may not appreciate their TVs suddenly going dark!
Check out my full YouTube video where I take you through the build process and show how I pulled off this prank in an electronics store: https://youtu.be/IkLWWnj2wB0?si=qyIlw6_pA1v5zF7W.




Leave your feedback...