

Uv Intensity Detector With Beetle Esp32 C6 & Telegram Bot

About the project
Will guide you to build a UV Intensity Detector with Beetle ESP32 C6 with Telegram Bot.
Project info
Difficulty: Easy
Platforms: DFRobot, Seeed Studio
Estimated time: 1 hour
License: GNU General Public License, version 3 or later (GPL3+)
Items used in this project
Hardware components

Story
Imagine having a device that can measure the intensity of sunlight and send you alerts on Telegram whenever the sunlight reaches a certain level. This project will guide you through building such a device using the Beetle ESP32 C6 and the Grove Sunlight Intensity Sensor. Let’s get started! 🚀
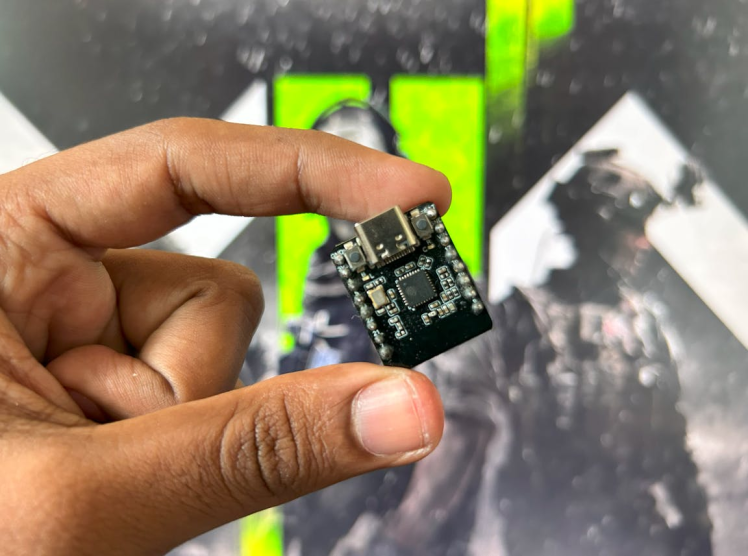
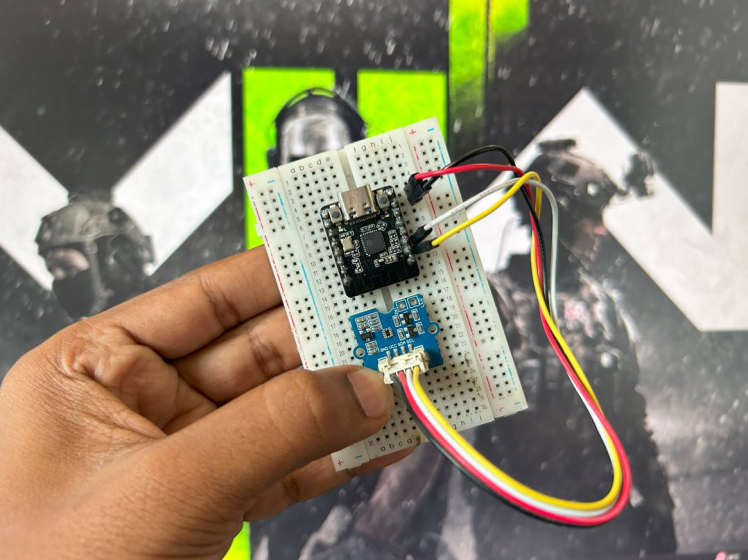
Materials Needed 🛠ï¸Â- Beetle ESP32 C6: A compact and powerful microcontroller.
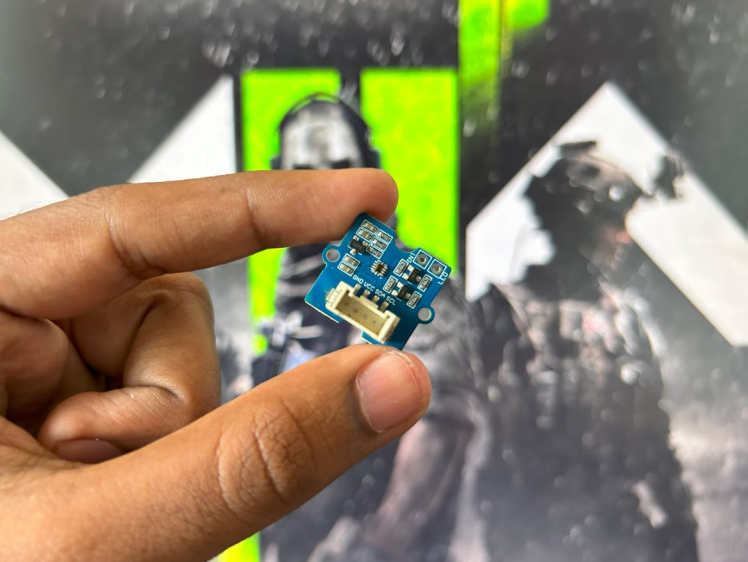
- Grove Sunlight Intensity Sensor: A sensor capable of detecting UV, visible, and infrared light.
- Jumper wires: For connections.
- USB Type-C cable: To power and program the Beetle ESP32 C6.

You must check out PCBWAY for ordering PCBs online for cheap!
You get 10 good-quality PCBs manufactured and shipped to your doorstep for cheap. You will also get a discount on shipping on your first order. Upload your Gerber files onto PCBWAY to get them manufactured with good quality and quick turnaround time. PCBWay now could provide a complete product solution, from design to enclosure production. Check out their online Gerber viewer function. With reward points, you can get free stuff from their gift shop. Also, check out this useful blog on PCBWay Plugin for KiCad from here. Using this plugin, you can directly order PCBs in just one click after completing your design in KiCad.
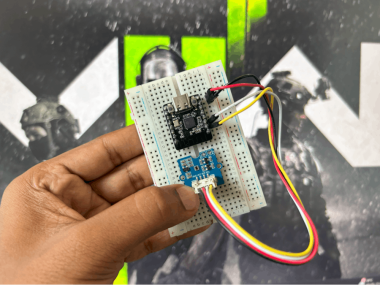
Step 1: Hardware Setup ðŸâ€Â§- Connect the Sunlight Sensor: Plug the Grove Sunlight Intensity Sensor into one of the Beetle. The I2C ports are usually labeled and color-coded for convenience.
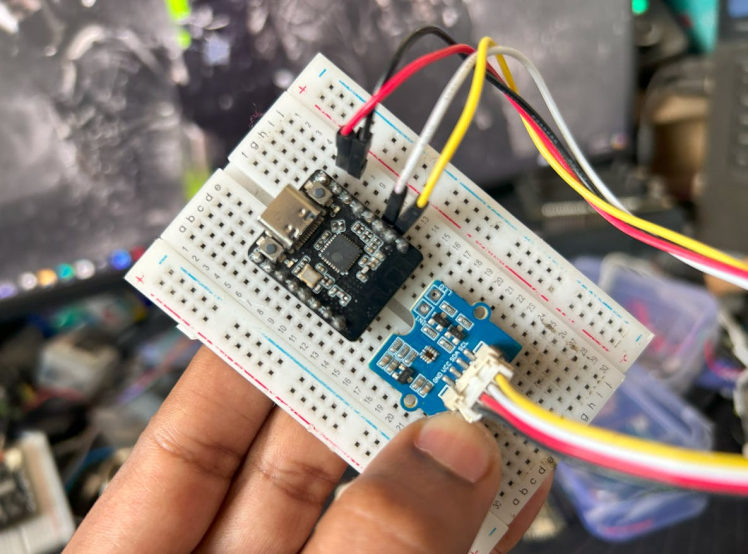
- Power the Board: Connect the Beetle ESP32 C6 to a power source using the USB Type-C cable. You can use a battery or a USB power bank if you want to make your setup portable.
- Install Arduino IDE: If you haven’t already, download and install the Arduino IDE from the official website.
Add ESP32 Board to Arduino IDE:
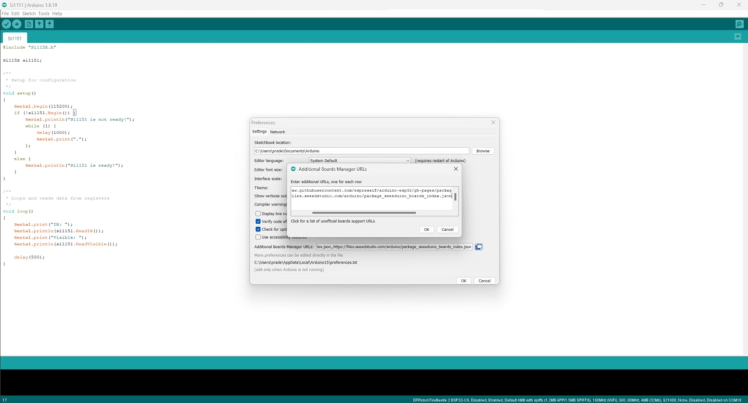
- Open Arduino IDE and go to
File > Preferences. - In the “Additional Board Manager URLs†field, add:
https://raw.githubusercontent.com/espressif/arduino-esp32/gh-pages/package_esp32_index.json.
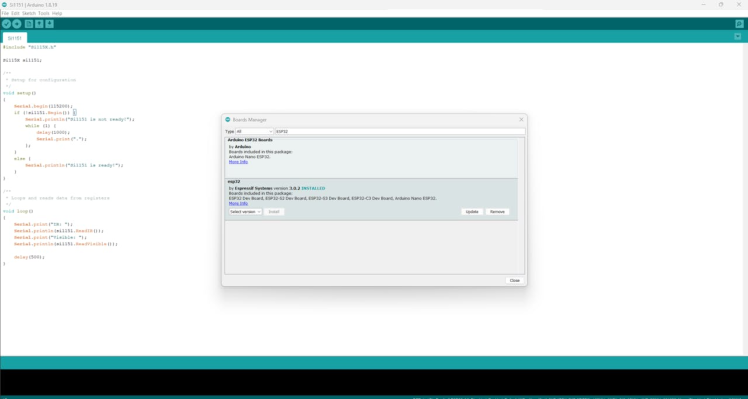
- Go to
Tools > Board > Board Manager, search for “ESP32â€Â, and install the ESP32 board package.
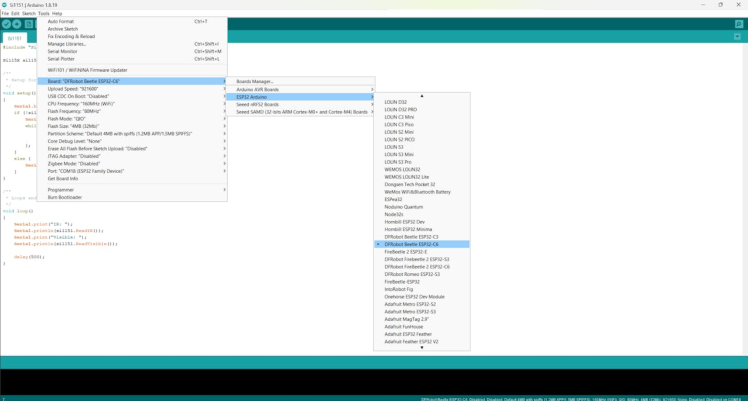
Select the Beetle ESP32 C6 Board:
- Go to
Tools > Boardand selectBeetle ESP32 C6.
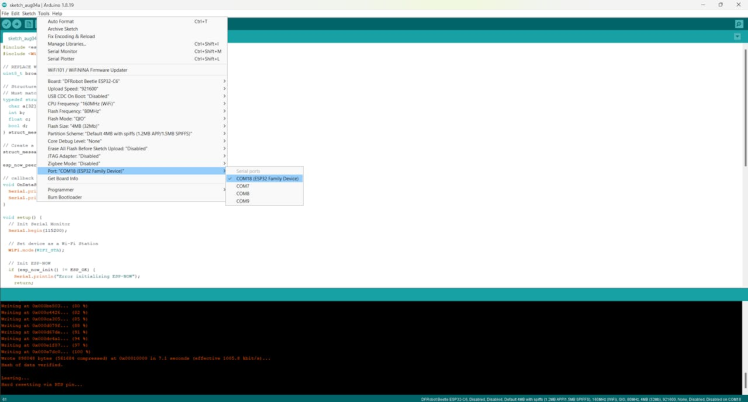
- Choose the correct port from
Tools > Port.
Install Required Libraries:
- Open Arduino IDE and go to
Sketch > Include Library > Manage Libraries.
Search for and install the following libraries:
WiFiUniversalTelegramBot
Write the Sunlight Intensity Detection Code:
#include "Si115X.h"

Si115X si1151;

void setup()
{
    Serial.begin(115200);
    if (!si1151.Begin()) {
        Serial.println("Si1151 is not ready!");
        while (1) {
            delay(1000);
            Serial.print(".");
        };
    }
    else {
        Serial.println("Si1151 is ready!");
    }
}

void loop()
{
    Serial.print("IR: ");
    Serial.println(si1151.ReadIR());
    Serial.print("Visible: ");
    Serial.println(si1151.ReadVisible());

    delay(500);
}- Upload the Code: Connect your Beetle ESP32 C6 to your computer and upload the code using the Arduino IDE.
- Test the Sensor: Once the code is uploaded, the sensor will start measuring sunlight intensity.
Create a Telegram Bot:
- Open Telegram and search for
BotFather.
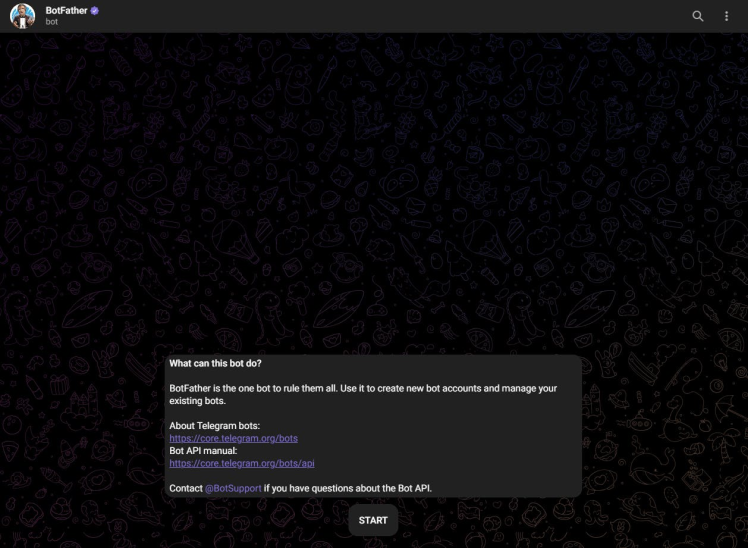
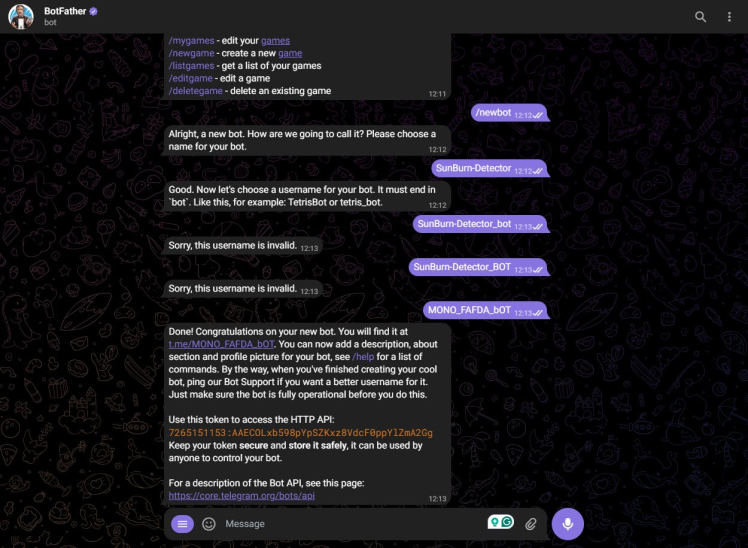
- Start a chat with BotFather and use the command
/newbotto create a new bot.
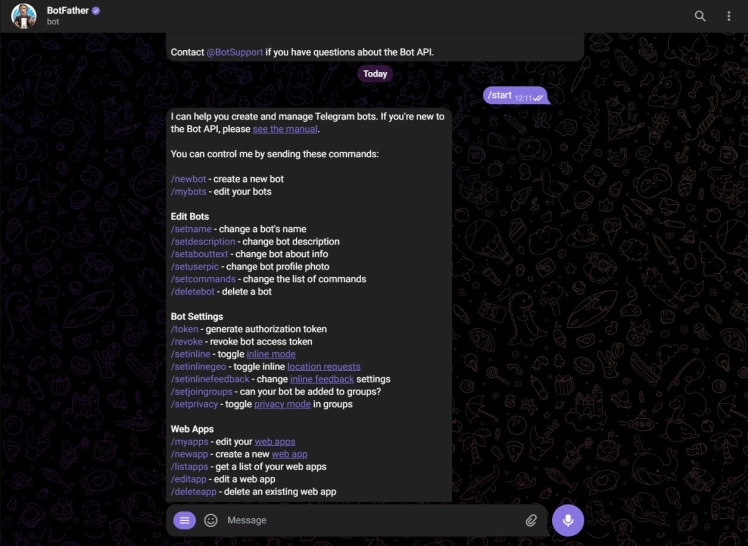
- Follow the instructions to get your bot token.
Get Your Chat ID:
- Start a chat with your bot and send any message.
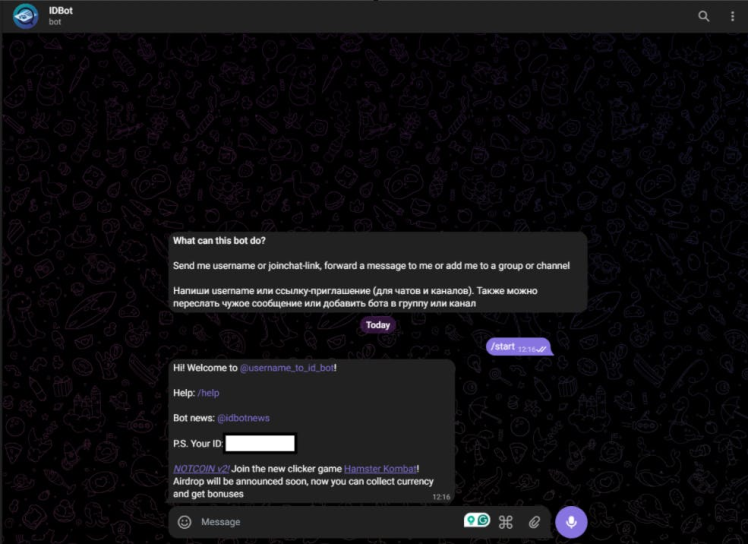
- Look for the
chatobject in the response to find your chat ID.
#include <WiFi.h>
#include <WiFiClientSecure.h>
#include <UniversalTelegramBot.h> // Universal Telegram Bot Library written by Brian Lough: https://github.com/witnessmenow/Universal-Arduino-Telegram-Bot
#include <ArduinoJson.h>
#include "Si115X.h"
// Replace with your network credentials
const char* ssid = "ELDRADO";
const char* password = "amazon123";
// Use @myidbot to find out the chat ID of an individual or a group
// Also note that you need to click "start" on a bot before it can
#define CHAT_ID "XXXXXXXXXXXXX"
// Initialize Telegram BOT
#define BOTtoken "XXXXXXXXXXXXX" // your Bot Token (Get from Botfather)
float uv;
float light;
Si115X si1151;
WiFiClientSecure client;
UniversalTelegramBot bot(BOTtoken, client);
//Checks for new messages every 1 second.
int botRequestDelay = 1000;
unsigned long lastTimeBotRan;
// Get BME280 sensor readings and return them as a String variable
String getReadings(){
uv = si1151.ReadIR();
light = si1151.ReadVisible();
String message = "UV Intencity: " + String(uv) + " n";
message += "Visible Light: " + String (light) + " n";
return message;
}
//Handle what happens when you receive new messages
void handleNewMessages(int numNewMessages) {
Serial.println("handleNewMessages");
Serial.println(String(numNewMessages));
for (int i=0; i<numNewMessages; i++) {
// Chat id of the requester
String chat_id = String(bot.messages[i].chat_id);
if (chat_id != CHAT_ID){
bot.sendMessage(chat_id, "Unauthorized user", "");
continue;
}
// Print the received message
String text = bot.messages[i].text;
Serial.println(text);
String from_name = bot.messages[i].from_name;
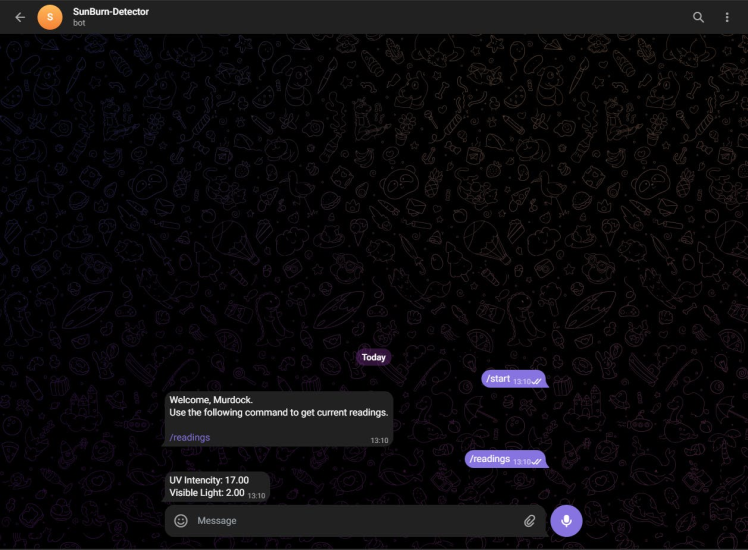
if (text == "/start") {
String welcome = "Welcome, " + from_name + ".n";
welcome += "Use the following command to get current readings.nn";
welcome += "/readings n";
bot.sendMessage(chat_id, welcome, "");
}
if (text == "/readings") {
String readings = getReadings();
bot.sendMessage(chat_id, readings, "");
}
}
}
void setup() {
Serial.begin(115200);
if (!si1151.Begin()) {
Serial.println("Si1151 is not ready!");
while (1) {
delay(1000);
Serial.print(".");
};
}
else {
Serial.println("Si1151 is ready!");
}
// Connect to Wi-Fi
WiFi.mode(WIFI_STA);
WiFi.begin(ssid, password);
#ifdef ESP32
client.setCACert(TELEGRAM_CERTIFICATE_ROOT); // Add root certificate for api.telegram.org
#endif
while (WiFi.status() != WL_CONNECTED) {
delay(1000);
Serial.println("Connecting to WiFi..");
}
// Print ESP32 Local IP Address
Serial.println(WiFi.localIP());
}
void loop() {
if (millis() > lastTimeBotRan + botRequestDelay) {
int numNewMessages = bot.getUpdates(bot.last_message_received + 1);
while(numNewMessages) {
Serial.println("got response");
handleNewMessages(numNewMessages);
numNewMessages = bot.getUpdates(bot.last_message_received + 1);
}
lastTimeBotRan = millis();
}
}
- Libraries and Credentials: The code includes the necessary sensor, Wi-Fi, and Telegram bot libraries. Replace the placeholders with your Wi-Fi credentials and Telegram bot token.
#include <WiFi.h>
#include <WiFiClientSecure.h>
#include <UniversalTelegramBot.h> // Universal Telegram Bot Library written by Brian Lough: https://github.com/witnessmenow/Universal-Arduino-Telegram-Bot
#include <ArduinoJson.h>
#include "Si115X.h"

// Replace with your network credentials
const char* ssid = "ELDRADO";
const char* password = "amazon123";

// Use @myidbot to find out the chat ID of an individual or a group
// Also note that you need to click "start" on a bot before it can
#define CHAT_ID "77777777"

// Initialize Telegram BOT
#define BOTtoken "jkjkklkkllkl:ffghhyjjkkjkkkl" // your Bot Token (Get from Botfather)- Sensor Initialization: The
setup()function initializes the serial communication, connects to Wi-Fi, and sets up the sunlight sensor.
void setup() {

  Serial.begin(115200);

  if (!si1151.Begin()) {
    Serial.println("Si1151 is not ready!");
    while (1) {
      delay(1000);
      Serial.print(".");
    };
  }
  else {
    Serial.println("Si1151 is ready!");
  }

  // Connect to Wi-Fi
  WiFi.mode(WIFI_STA);
  WiFi.begin(ssid, password);
  #ifdef ESP32
    client.setCACert(TELEGRAM_CERTIFICATE_ROOT); // Add root certificate for api.telegram.org
  #endif
  while (WiFi.status() != WL_CONNECTED) {
    delay(1000);
    Serial.println("Connecting to WiFi..");
  }
  // Print ESP32 Local IP Address
  Serial.println(WiFi.localIP());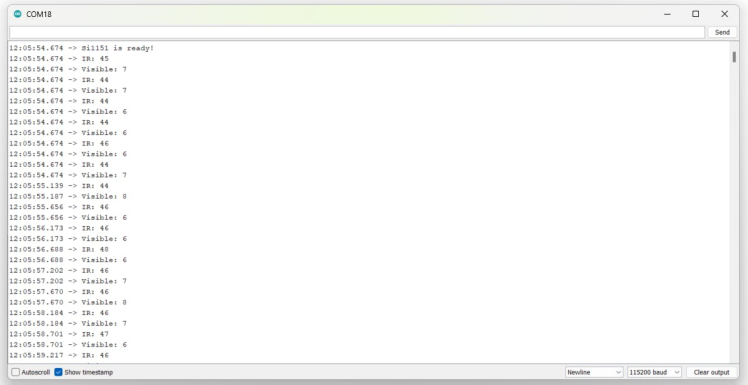
}- Reading Sensor Data: In the
loop()function, the sensor readings for UV, visible, and IR light are obtained and printed to the serial monitor.
String getReadings(){
  uv = si1151.ReadIR();
  light = si1151.ReadVisible();
  String message = "UV Intencity: " + String(uv) + "  n";
  message += "Visible Light: " + String (light) + "  n";
  return message;
}- Sending Telegram Alerts: If the UV index exceeds a specified threshold (e.g., 5.0), a message is sent to your Telegram bot with the current UV index.
void handleNewMessages(int numNewMessages) {
  Serial.println("handleNewMessages");
  Serial.println(String(numNewMessages));

  for (int i=0; i<numNewMessages; i++) {
    // Chat id of the requester
    String chat_id = String(bot.messages[i].chat_id);
    if (chat_id != CHAT_ID){
      bot.sendMessage(chat_id, "Unauthorized user", "");
      continue;
    }

    // Print the received message
    String text = bot.messages[i].text;
    Serial.println(text);

    String from_name = bot.messages[i].from_name;

    if (text == "/start") {
      String welcome = "Welcome, " + from_name + ".n";
      welcome += "Use the following command to get current readings.nn";
      welcome += "/readings n";
      bot.sendMessage(chat_id, welcome, "");
    }

    if (text == "/readings") {
      String readings = getReadings();
      bot.sendMessage(chat_id, readings, "");
    }
  }
}- Delay: The
delay(10000)function ensures that the sensor readings and alerts are checked every minute.
Congratulations! You’ve successfully built a sunlight intensity detector with the Beetle ESP32 C6 and the Grove Sunlight Intensity Sensor, complete with Telegram alerts. This project can be expanded further by adding sensors or integrating with other IoT platforms.
Feel free to share your project and any modifications you make. Happy building! 🛠ï¸Â
Credits
Related products


Leave your feedback...