Trashbot - The Trashcan's Answer To The Roomba
About the project
An arduino-powered bluetooth-controlled trashcan that senses when you're close to it!
Project info
Difficulty: Moderate
Platforms: Arduino
Estimated time: 2 days
License: GNU General Public License, version 3 or later (GPL3+)
Items used in this project
Hardware components
View all
Hand tools and fabrication machines
Story
Hello!
Welcome to my TrashBot project! This is a double Arduino blutooth ultrasonic-controlled robot. I know that's a mouthful; hopefully, the explanation of this won't be. Truthfully it's not that hard to create, and I'm working to make it more complex in the future, but for now, I'm gonna briefly as possible, explain how you, too can create your own TrashBot.
How Do I Make One ?!?
I'm glad you asked random viewers!...you did ask, right?
///////////////////////////////////////////
1. Making Sure You've Got Everything
2.Draw a Picture of Your Part Placement
3. Soldering Time!
4. Writing The Code/Putting the Sound File to the SD Card
5. Placing Everything with Zip Ties/Screws/etc.
6. Enjoy your Talking Remote Control TrashBot
////////////////////////////////////////
Step 1: Making Sure You've Got Everything!
The first thing a person should do is make sure they have all the right parts for the job. You don't see Linus Tech Tips build a PC without all the parts, so what makes the robot any different? Please take a moment to look over everything you have and make sure it matches the parts and tools list given.
If you're done with that, congrats! You've already passed the first lesson; give yourself a pat on the back and maybe a cookie. Next, we get into something more serious.
![]()
Step 2: Draw A Picture of Your Part Placement
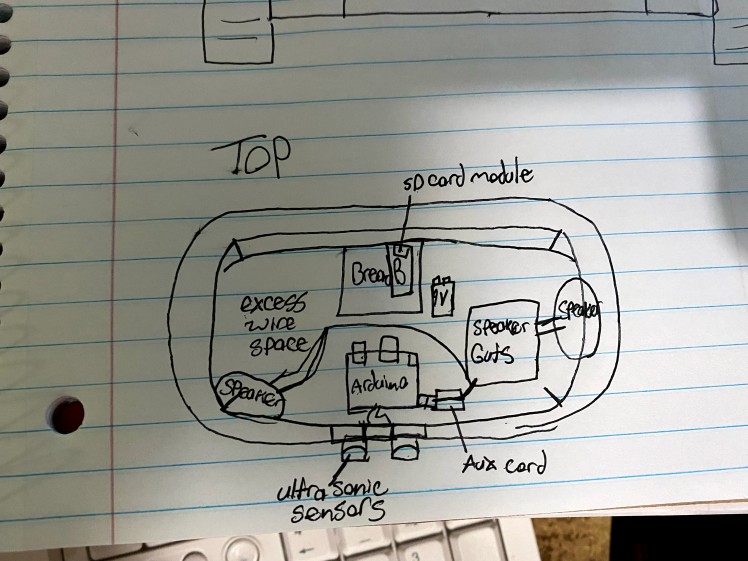
This is to get a rough idea of where you'll be putting your parts in from an overhead view. The part placement doesn't have to be on any fancy paper or follow a specific ruleset. This will help you later when you are placing the parts into the shell of the robot.
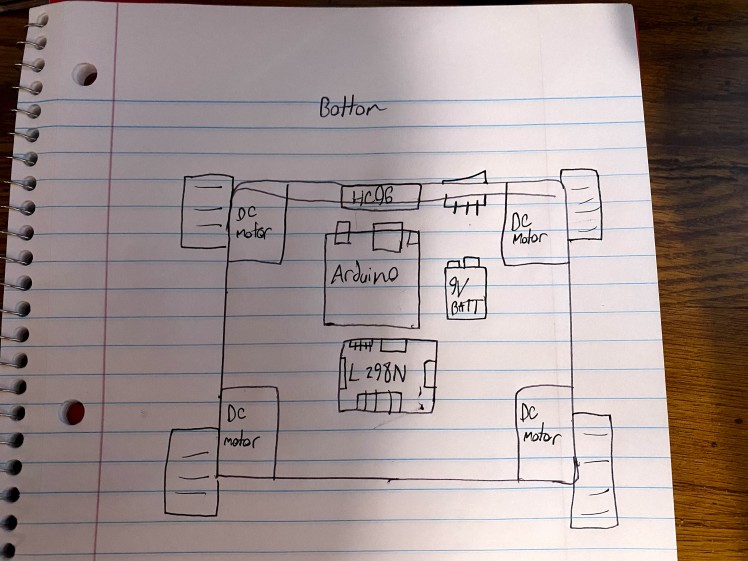
I highly recommend placing the Arduino or the Breadboard in the middle of the shell. This will make cable management a tad bit easier, considering a majority of wires are going into or extending from those parts.
Step 3: Soldering Time!
Now Kids it's Time to Play with LEAD!
THIS IS A JOKE DON'T ACTUALLY PLAY WITH LEAD IT CAN POISON AND KILL YOU
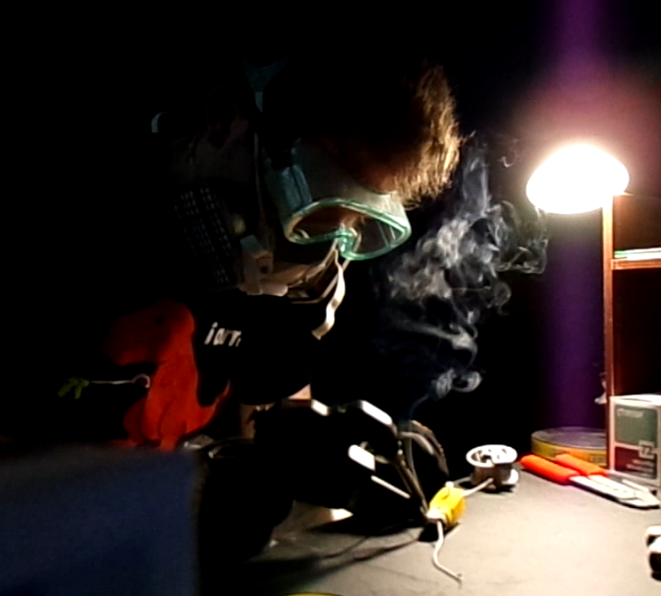
Alright, now that I have your attention, it's time to soldering some parts together. The two main things that need this are the Solder and the Soldering Iron. This is where the wires come in! before I go into this, I have to stress if you are not at least 16 with an understanding of solder, please get an adult to oversee your soldering! (Please Wear a Mask, Protective Eyeware, and Gloves)
Now that the parental warnings are finally out of the way grab your Soldering Iron, and let's start cooking!
We need to solder the DC motors, don't worry about red and black wires. Last I checked, the motors do not have a polarity, so no need to worry about color-coding. I opted to use male-to-male jumper wires, cut off one end, and soldered the bare wire end to the solder point for this portion.
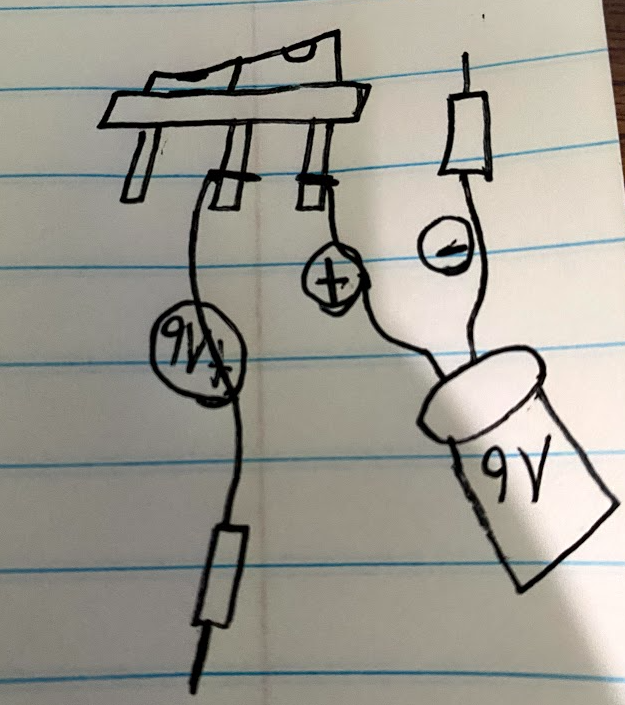
Then we need to solder the Switch. The Switch is an interesting case since you only want to solder 2 of the prongs. The picture below should portray the process rather simply. If it doesn't, feel free to message me!
This is all the soldering I used for this project, but if you want to use solder for connecting wires, be my guest, I used electrical tape. I found that electrical tape is good to use if you want to connect wires easily and efficiently.
Step 4: Writing The Code/Putting The Sound File Onto the SD Card
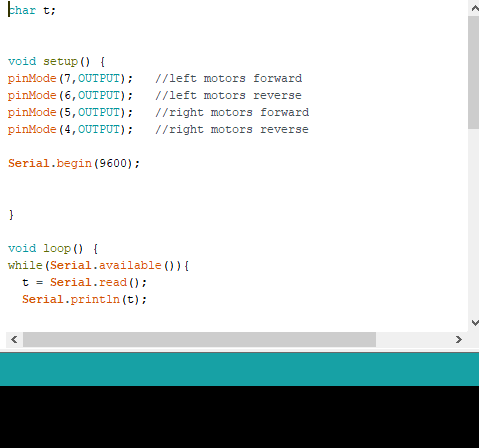
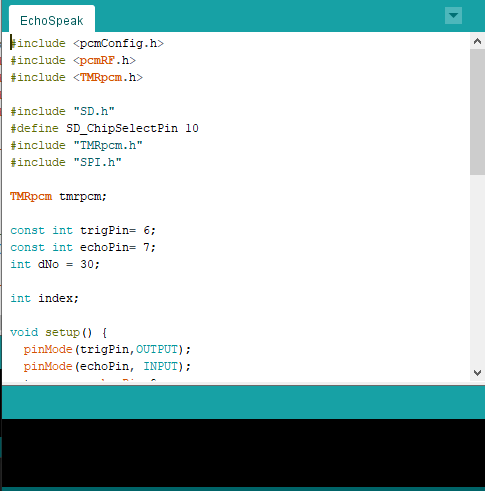
This step is the easiest, one of them all, in my opinion. The code is provided in the files, and if you want to see a couple of screenshots here ya go my pupils.
Before you put the sound file onto the card, you have to make sure your audio file is configured in a specific way. I made a step by step process to make this easier
1.Record the Audio/Get the Audio
2. Go to the website http://audio.online-convert.com/convert-to-wav
3.Find where it says 'Bit Resolution' and change that to 8bit
4.Then change the 'Sampling Rate' to 16000Hz
5.Switch the audio channels to mono
6.Go to advanced options they should be below and click PCM format
7. In the PCM format change it to 'unsigned 8 bit'
8. Then finally convert the file.
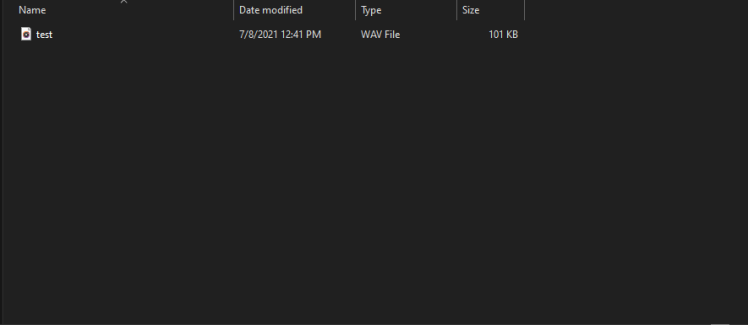
9. After downloading rename the file to 'test'
Then you want to take the micro SD card and put that into your computer and drag that sound file onto the card.
Onto the more difficult part, which is actually putting the machine together and making it well balanced.
Step 5: Placing Everything with Zip Ties/Screws/etc.
This is the best part! Putting everything together. We're gonna split this up to make it easier for everyone. The first part will be tackling the 'Bottom' Blutooth RC section, and the 'Top' section will be covering the Ultrasonic SD Speaker section.
Bottom:
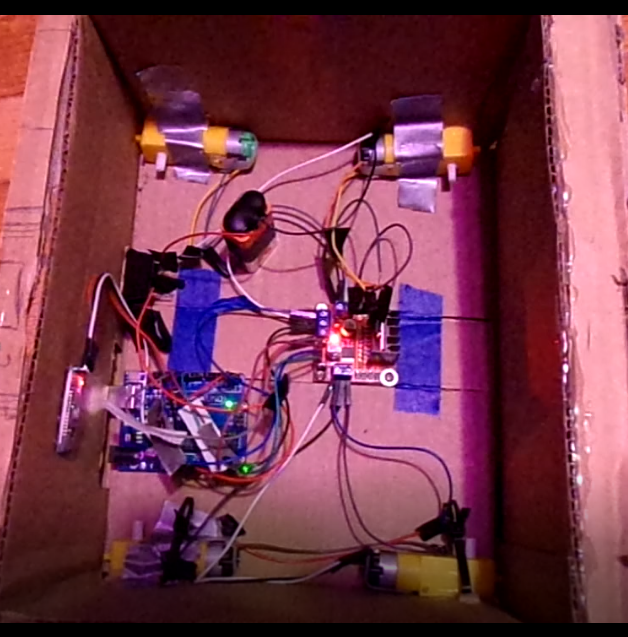
This may look a little confusing but hear me out. I made little diagrams that will make matching up wires a whole lot easier!
Main Components Used Here:
1x Arduino Uno
1x HC-06
1x L298N
1x On/Off Switch
4x DC Motors
1x 9Volt Battery
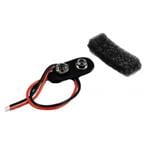
1x 9Volt Battery Clip Connector
1x 3.5 Ma Portable Battery
20-21x Wires
Let's start with the Arduino. This can be powered with a 9 volt or a USB. In this certain case, we're gonna use the portable battery to give us the best performance. Be sure to upload the 'Remote Control'code to the Arduino before we start putting anything else together. Now that we have the right code there, we now move onto placing it in the box and attaching wires.
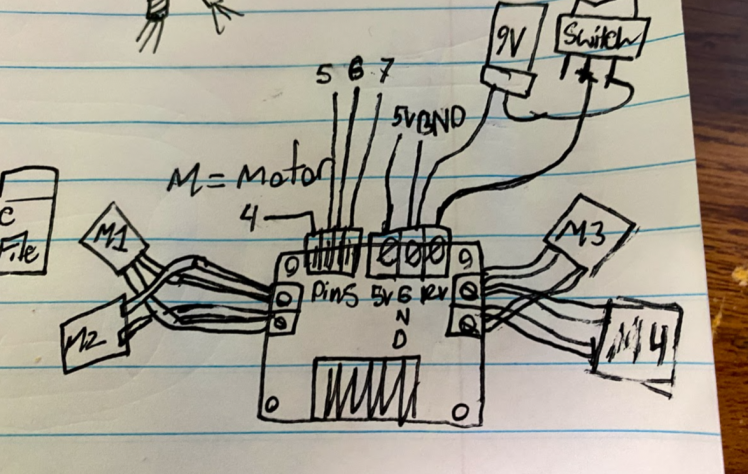
We're gonna move over to the two other big items, the DC motors, and the L298N module. I have arranged a pen and paper diagram to make placing wires a bit easier. If you want to freehand this and base it off the main picture, be my guest but be warned that is like putting this tutorial in HARDCORE mode.
To give you a little help if you're scratching your head on what the numbers mean. The 4-7 represent the ports that each wire going from the pin connects to on the Arduino. The M's represent the motors, and you should pay attention to the little pins in front of the board. The pins send information to run the motors, so you must pay attention to where the motor wires go. The squares next to the pins on the front are where your 5V port, ground or GND, and 12V port reside. You should have wires from the 5V and GND ports on the Arduino connecting to these squares. The GND square will be used again for the ground lead of the 9V connector wire. The middle prong wire of the switch will be using the 12V square. That covers what you need to know about the motors, now onto the Blutooth.
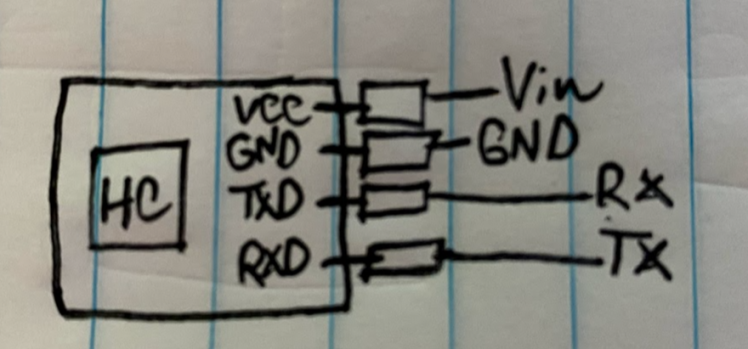
The HC-06 is somewhat tricky when it comes to setting everything up. No need to worry though; I have a diagram for this too!
This requires the same amount of pins as the last part but with different ports. The VCC should have a direct wire to the Vin port on your Arduino. The GND will connect to a different GND port on the Arduino. I believe there are 3 on an Arduino Uno, so no worries there. The TXD and RXD are where this gets tricky. You got to think, get rid of the D and opposite. The TXD goes into the RX port located near the bottom of the Arduino. The RXD goes into the TX port, also located near the bottom of the Arduino. With that, you've got your bottom portion of all wires correctly; all there is to do now is place it in the shell, attach the portable battery to the back and test it out.
To test this out, be sure to download the app and connect it via blutooth. If the connection asks for a password, it's 1234. App: Arduino Bluetooth Controller - All in One - Apps on Google Play
*Fun Fact: if you want to upload code without error after you have to unplug the RX and TX ports, or it will result in an error, and no new data will be uploaded to the Arduino.
Top:
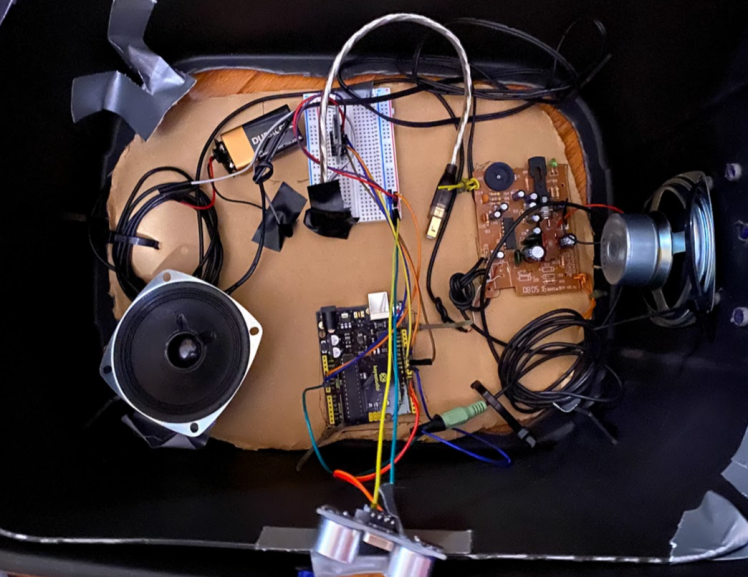
Now we've made it to the precipice of this project, both literally and metaphorically. This portion will explain the sensor and how you will have a speaking bot! First, let's look at the top and...oh boy, this is poorly cable managed.
Main Components Used Here:
1x Arduino Uno
1x Breadboard
1x UltraSonic Sensor
1x Micro SD Card Module
1x Speaker
1x 9Volt Battery
1x 9Volt Battery Clip Connector
1x 3.5 Ma Portable Battery
20x Wires
We'll start as we started last time, from the Arduino. The Arduino gets power differently this time around. You remember when I said it could get power from either a 9v or battery pack. This is where it comes in; you plug the leads from the 9V into a breadboard directly next to the board. Then get an Arduino cord you won't be using and cut it up until you find the positive and negative leads; connect the two positive and negative pairs. (Make sure you get those right, or it won't power or, your battery might explode)
The breadboard is a versatile piece of technology for this project. The next quick thing you'll want to do is get two wires, one for GND and the other for the 5V port. Connect one end of the wire to the port and then connect the other to the breadboard, not in the same rows. This will come in handy later with the other parts in the 'Top.'
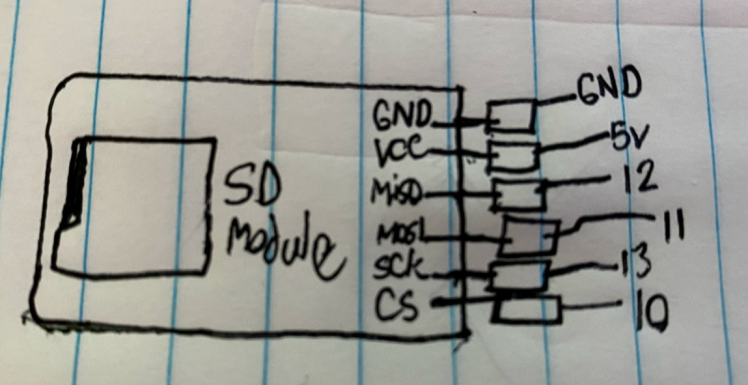
Now that we have the main brain powered, let's get to the memory. The memory, in this case would be the Micro SD Card Module. There is a very certain way you set this up so the Arduino can understand what it's processing and sends it to the speakers. The diagram below should help out.
Before you do this, it is integral that you base this on a Breadboard. The easiest way to connect the wires to the module, in my opinion is through the back. Where you see the solder points is the back. Based on everything you've seen so far pin wise you know where each one connects to on an Arduino. The main difference here is rather than connecting the GND and 5V ports to the Arduino itself, connect it in the same row as where you put the wires extending from the Arduino's 5V and GND ports.
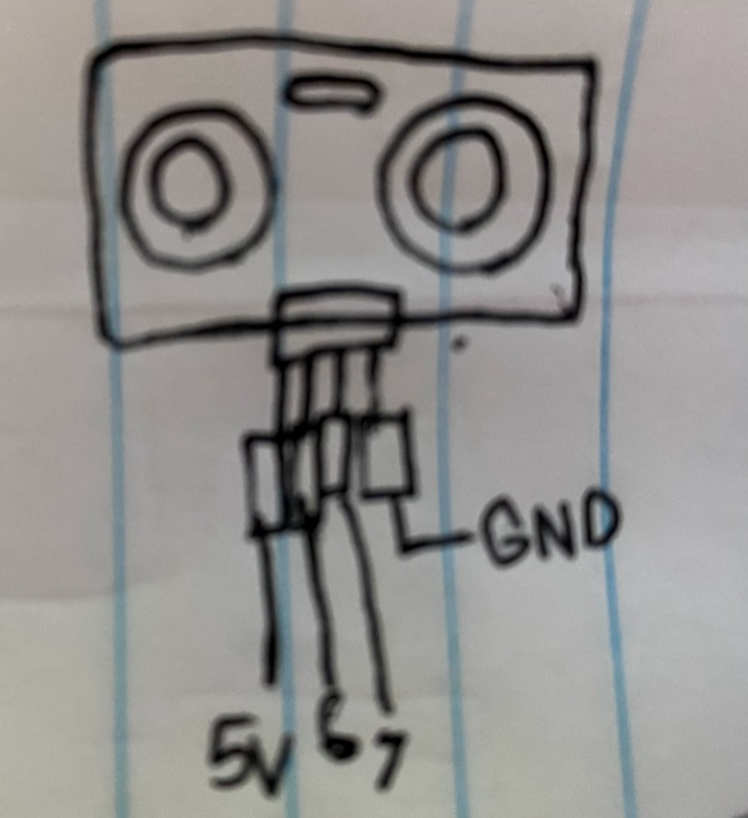
When you've got the memory all ready, we're gonna need the eye. The eye in this case, is the Ultrasonic sensor. This specific part is quite interesting. The way it works is it sends ultrasonic waves through one port, and they bounce back from a physical object, and depending on the time it took to get back, it can calculate the distance away it is from a person. The script uses this information to know when to start talking. To set this up, it's only 4 pins, so it's a tad easier than the previous and this doesn't have to mount to a breadboard; however, this might make it easier to give it power. I would recommend connecting the 5V and the GND next to the row of the Arduino GND and 5V like the previous step.
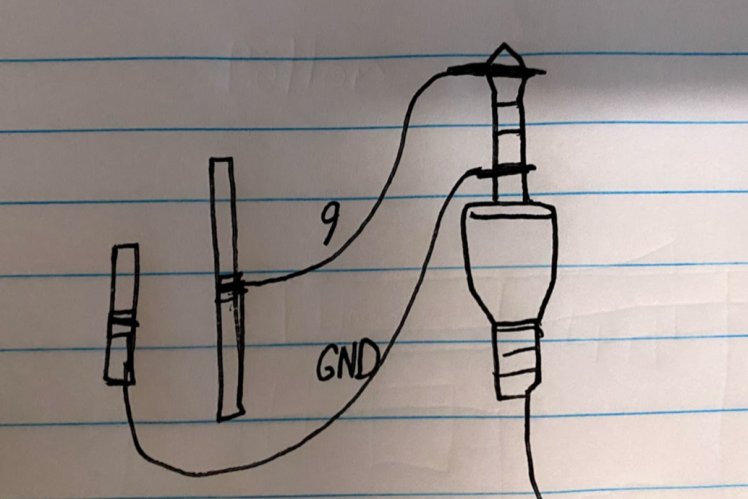
Now that we have the brain, memory, and eye, there's only one thing left to do. To add the speakers or, in this analogy the mouth! You have to open up a Speaker set. You can pick some up on Amazon or eBay for around $10 and $20. Now one VERY VERY IMPORTANT thing you have to pay attention to is if you have an aux cord and a port on the Speaker set, this is integral to its working. You have to take the aux cord and connect it to bare wires connected to pins 9 and GND on the Arduino.
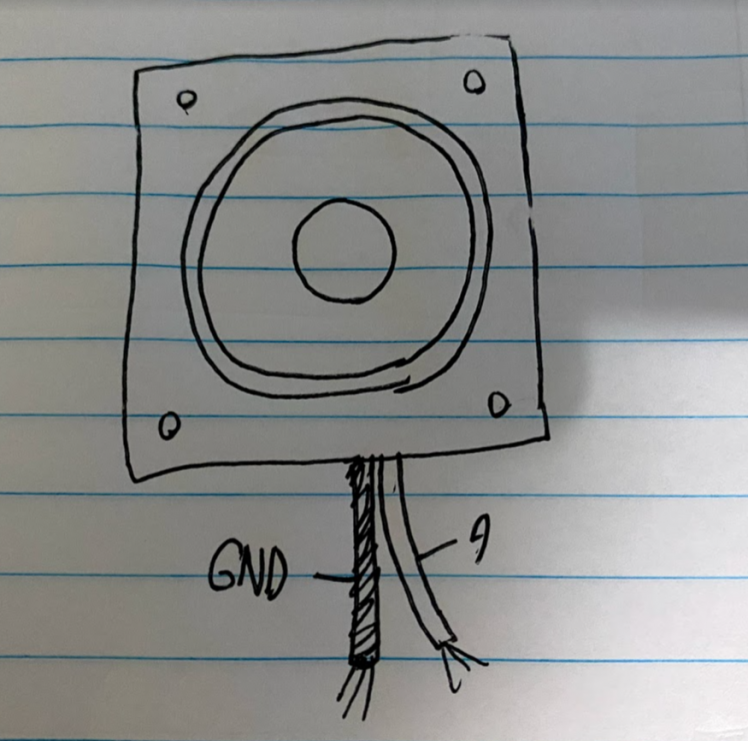
If you chose to get a singular speaker with just the positive and negative leads, you have to set it up a tad differently. You will still use the same 9 and GND leads, however you connect the positive lead to the 9 port and the GND port with the negative lead. This is better shown below.
That concludes the 'Top' let's see what we've made!
Step 6: Enjoy Your Talking Remote Control TrashBot
Wow!
Either you skipped to the end, or you have something that looks a little something that looks like this.
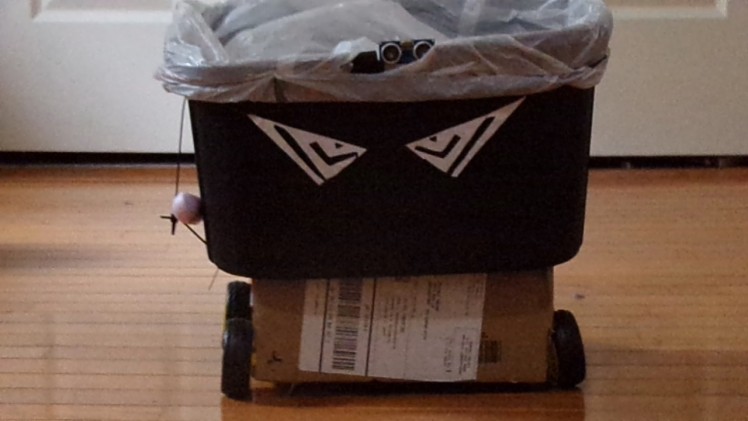
Congratulations!
You've created your own Trashbot, and now it's time to bring it to an anime convention and put everyone else's waifu to shame. Though the other option would be making picking up trash a tad more fun. Have a friend control it while you try to skoosh paper or cans into the bot!
In all seriousness, I'd like to thank Sam for reaching out to me from ElectroMaker to make this. I don't know if I'd ever do this type of thing again, but it was fun!
Check out my Other Socials and keep an eye out for MRk2 'Now With Better Voice!'
Twitter: P (@greeny_pm) / Twitter
Youtube: GreenyPM - YouTube





Leave your feedback...