


Tesla Garage Opener Powered By Particle Monitor One

Made by gusgonnet / Automotive / Home Automation / Security / Sensors / IoT
About the project
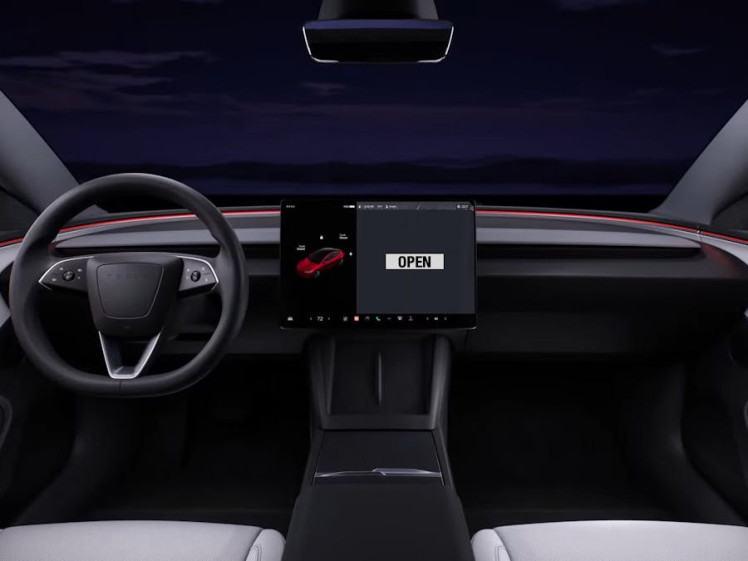
Control your garage door using a Particle Monitor One, integrated with your Tesla touchscreen.
Project info
Difficulty: Expert
Estimated time: 2 weeks
License: GNU General Public License, version 3 or later (GPL3+)
Items used in this project
Hardware components
Story
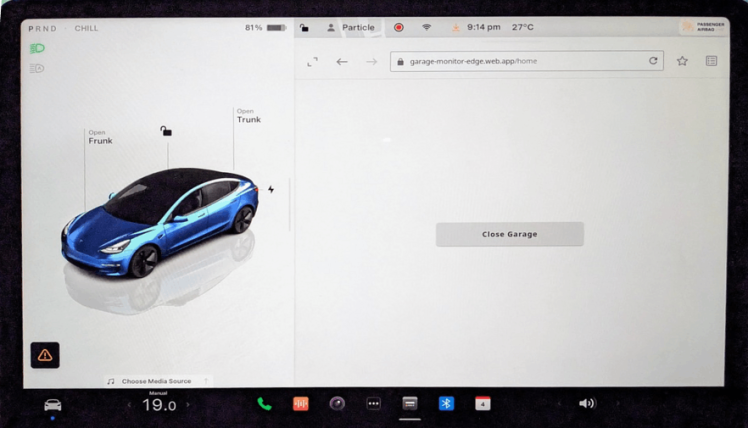
This project lets you control your garage door directly from your Tesla's touchscreen.
By using a Particle Monitor One and Google Firebase, you can easily open or close your garage door by visiting a website through the car's onboard browser.
Architecture
The Particle Monitor One is connected to your garage door system. When you use the web interface on your Tesla's touchscreen, it communicates with Google Firebase. Firebase then sends the command to the Particle Cloud, which relays it to the Monitor One, controlling the garage door.
The master plan

The master plan
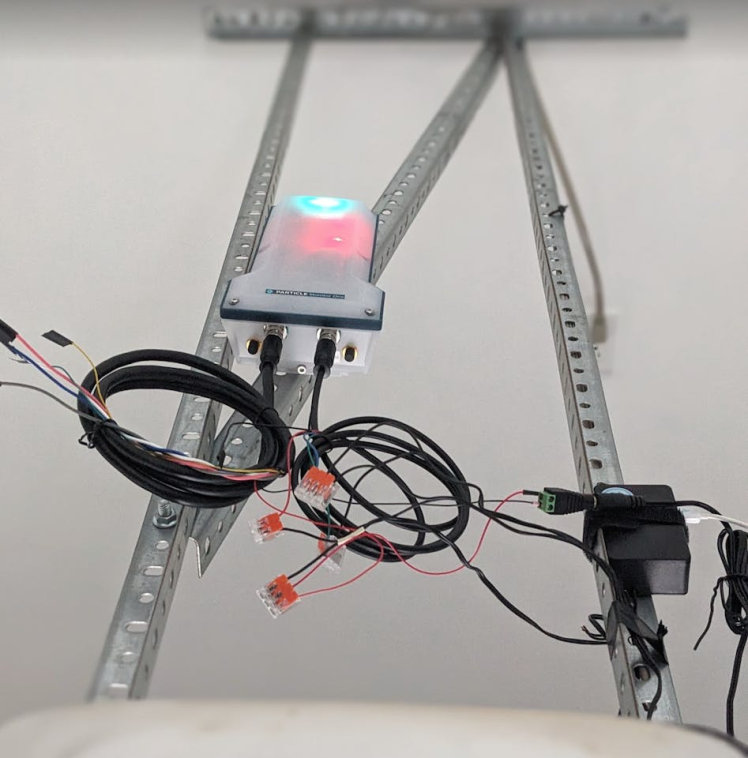
Hardware
The project uses a Particle Monitor One Developer Edition and its I/O Card.
Monitor One and its I/O Card

Monitor One and its I/O Card
The I/O Card included with your Monitor One Developer Edition is packed with useful features to help you start creating right away:
- VIN - Power input, 6 to 30V DC
- CAN Bus
- RS485 (Modbus)
- 4-20 mA input
- 0-10V analog input
- 12-24V slow-signal input, Opto-isolated
- Relay, 30VDC 2A maximum
- QWIIC connector, 3.3V I2C
Prototype card
There are few prototype cards included that you can swap for the original I/O Card and solder on it whatever your project might need:
Monitor one extra Prototype card

Monitor one extra Prototype card
However, we will use the I/O card because it contains all the necessary components.
Perk #1: Particle Ledger
We leverage Particle Ledger to automatically sync the garage door status with the cloud.
What is Ledger?
Ledger is the digital representation of your product. It's a cloud-based key/value store designed to create digital twins for your customers and users.
Particle Ledger enables you to build digital twins, monitor state changes, queue messages, and aggregate data across devices through a simple key/value store scoped to your devices, products, and organizations
- Store the last known state and configuration data of your device
- Easily get () and set() data to/from a Ledger from Device OS or the REST API
- Understand state and changes over time with timestamped data points with queryable history
Source: Particle.io

Source: Particle.io
Create the Particle Ledger
Go to the Particle console and create a Device to Cloud ledger, naming it "garage-monitor-edge". The process is detailed in the Particle documentation.
Perk #2 - BLE buttons
The project uses Shelly BLE buttons to control the garage door.
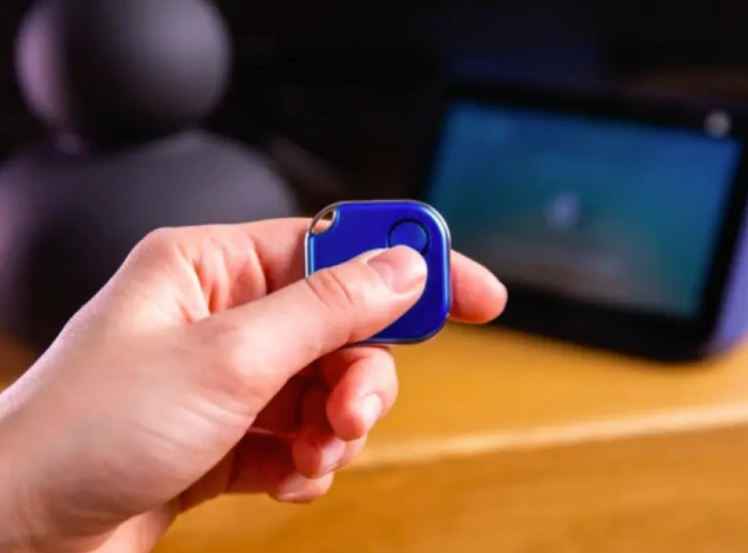
Do not underestimate the impact of this little button. My son was thrilled when I gave him one and told him he could use it to open or close the garage door whenever he wanted. His "This is so cool, Dad!" still resonates in my mind. Only a Maker Dad will understand how rare an event that is.
You can find more information and usage instructions here.
Firmware
Based on the Monitor Edge firmware, code was added to control the garage door and get its status. The 'particle' folder in the code provided contains the firmware.
There are few areas of interest:
- The Particle cloud function toggleRelay() activates the relay for one second.
- The local function checkStatus() monitors the input signal indicating whether the door is closed. The ledger is updated when a change is detected.
- Continuous scanning detects BLE button presses.
Wiring
The Monitor One comes with two cables: one 8-pin and one 4-pin and an AC power source.
The 8-pin cable will be used for powering the system.
The 4-pin cable needs to be connected as follows:
RED: connect to one of the two terminals of the industrial magnetic switch. The other terminal connects to +24V on the power source.
GREEN and BLUE: these two wires connect to you garage door opener. There is a relay on the I/O Card that will short these two when you want to trigger the garage opener.
BLACK: not used.


Testing 123...
Installation
Monitor One comes with two magnets that enable easy attachment to the garage opener support.
Firebase Google Cloud - Project setup
Go to Firebase console and add a project named "garage-monitor-edge".
Install the Firebase CLI on your computer:
npm install -g firebase-toolsCheck the Firebase CLI documentation for more information.
New to Firebase? Check out this intro video.
Note: Documenting each step precisely isn't straightforward due to the specific knowledge required for Firebase. If you're new to Firebase, be prepared to invest time in reading and watching instructional videos.
Firebase Google Cloud - Cloud Functions
The 'fx' folder in the code provided with this project contains everything we need.
Step 1: create an api user with permissions to call functions on Particle
Step 2: create an.env file under the 'fx/functions' folder with the following:
API_KEY_CALLFX="1235083045abcdef" <- this is what you get in step 1
PARTICLE_PRODUCTID="123456"       <- Monitor One, Particle product
PARTICLE_DEVICEID="1234567abcdef" <- Monitor One, device id
Do not include the comments I added here.
Step 3: deploy:
firebase deploy --only functionsThe cloud function is called callParticleFunction(). It receives a request from an authorized user of the web app and calls the Particle API. The Particle API, in turn, calls a function on the Monitor One to trigger the onboard relay, which then opens or closes the garage door.
Here's a great video to help you understand how Cloud Functions work.
Firebase Google Cloud - Web app
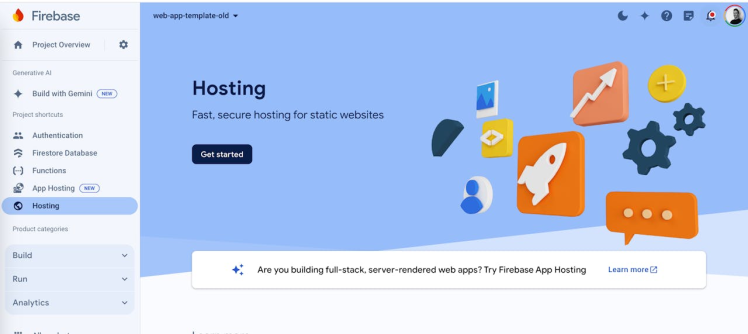
The web app will be hosted on Firebase Hosting.
On the 'fx/ionic' folder, run:
npm iIf you want to run the web app in your development environment, run:
ionic serveThe web app is using Angular v17 and the Ionic Framework v8.
Enable Firebase Hosting
Navigate to the Firebase console of your project then enable Hosting:
To deploy to Firebase Hosting, there is a deploy.sh script:
cd fx/ionic
./deploy.sh
Note: Firebase will assign a domain to your web app:

Firebase Google Cloud - Authentication
Now, you'll need to manually create a user on Firebase Auth. While a typical web app would provide a signup page for this purpose, our web app omits this to simplify complexity.
Create your user by providing email and password:

Perk #3: Mobile and web app
Since the web app we just deployed can run on any browser, we can now use it on our laptop or phone.
Tip: Swipe down to refresh the system state.
Perk #4: Always Knowing Where My Garage Is
Thanks to the Monitor One's tracking abilities, I can now keep tabs on my garage's location 24/7.
No more lost garages!

Final Result
After finalizing this project, the key outcome is as follows:
Mission complete!
Credits
Related products


g