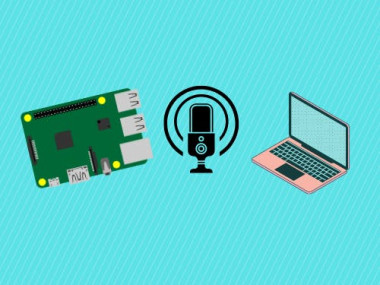
Stream Audio From Raspberry Pi To Local Computer
About the project
Learn to stream live audio from your Raspberry Pi to the web with our quick, easy guide. Start broadcasting in no time!
Project info
Difficulty: Easy
Platforms: Raspberry Pi
Estimated time: 1 hour
License: GNU Lesser General Public License version 3 or later (LGPL3+)
Items used in this project
Story
Discover the simplicity of streaming live audio directly from a USB microphone connected to your Raspberry Pi to your local computer via the internet. This step-by-step guide will walk you through the entire process, ensuring a seamless setup for real-time audio streaming.
In the digital era, streaming has become one of the most effective ways to broadcast content. Whether it's music, live discussions, or podcasts, having the capability to stream audio content live can significantly enhance your reach and engagement. Today, we’re going to guide you through setting up your own audio streaming server using a Raspberry Pi, Icecast, and DarkIce. This setup is not only cost-effective but also highly customizable and perfect for hobbyists, content creators, and small broadcasters alike.
Why Streaming Audio Is Useful
Streaming audio is increasingly popular, allowing creators and broadcasters to connect with audiences in real-time. Whether you're a musician looking to share performances live, a podcaster hosting live shows, or even a hobbyist wanting to start your own radio station, streaming is an invaluable tool. It allows instant interaction and feedback from your audience, making it a dynamic and engaging form of media.
What You’ll Need
- Raspberry Pi (any model that supports Raspbian)
- MicroSD card with Raspbian installed
- Internet connection
- Microphone or another audio input device
- Icecast2 and DarkIce software packages
Before reading the remainder, be sure to subscribe and support the channel if you have not!
Subscribe:
Support:
https://www.buymeacoffee.com/mmshilleh
Step 1: Installing Icecast on Raspberry PiIcecast is an open-source server designed for streaming multimedia. It acts as the backbone of your streaming operation.
Install Icecast :sudo apt-get update; sudo apt-get install icecast2
During the installation, you'll be prompted to configure basic settings like passwords for different types of access. Remember to secure your passwords.
Step 2: Installing DarkiceDarkIce is a live audio streamer that captures audio input and sends it to your Icecast server.
Install Darkice :sudo apt-get install darkice
Create or edit the DarkIce configuration file at /etc/darkice.cfg with the following settings:
[general]
duration = 0 # Stream indefinitely
bufferSecs = 5 # Buffer for the input, in seconds
reconnect = yes # Reconnect to the server if disconnected

[input]
device = default # Your audio capture device
sampleRate = 44100 # Sample rate in Hz
bitsPerSample = 16 # Bits per sample
channel = 2 # 2 = stereo, 1 = mono

[icecast2-0]
bitrateMode = cbr # Constant bit rate
format = mp3 # Audio format
bitrate = 128 # Bitrate in kbps
server = localhost # Server name or IP
port = 8000 # Port number
password = hackme # Your Icecast password
mountPoint = mystream # Mount point to stream to
name = My Stream # Name of the stream
description = My live stream # Description of the stream
url = http://mywebsite.com # URL related to the stream
genre = myGenre # Genre of the stream
public = no # Do not list on public listsOnce everything is configured, start DarkIce to begin streaming:
darkiceYour stream will be live and can be accessed using the specified URL.
Tuning Into Your StreamOnce DarkIce is running, and your stream is live, you can listen to it using VLC Media Player, which can be downloaded from VLC's official website. VLC is often more efficient and offers less latency compared to browser-based streaming, providing a smoother listening experience.
- Open VLC Media Player.
- Go to
Media->Open Network Stream. - Enter your stream URL:
http://[Your_Icecast_Server_IP]:8000/mystream.mp3.
Creating your own audio streaming server with a Raspberry Pi, Icecast, and DarkIce is a rewarding project that gives you full control over your digital broadcasting setup. This can be an ideal solution for anyone looking to explore the world of streaming, offering both flexibility and performance.
Don't forget to subscribe to our channel for more insightful tutorials like this, and drop us a comment if you have questions or thoughts on the setup!
Credits

mahmood-m-shilleh
Mechanical and Software Engineering Background. University at Buffalo 2019 Texas A&M 2021 I make data pipelines for my day job. Outside of work, I participate in online communities regarding Full Stack Engineering, Microelectronics, and more. You can find more details about me on my Youtube Channel. https://www.youtube.com/@mmshilleh Feel free to reach out!


Leave your feedback...