Smart Home Automation Using Arduino
About the project
People have smartphones, so it makes sense to use these to control home appliances. Presented here is a home automation system.
Project info
Difficulty: Moderate
Platforms: Arduino
Estimated time: 1 hour
License: GNU General Public License, version 3 or later (GPL3+)
Items used in this project
Story
hello guys..
Nowadays, people have smartphones with them all the time. So it makes sense to use these to control home appliances. Presented here is a home automation system using a simple Android app, which you can use to control electrical appliances with clicks Commands are sent via Bluetooth to Arduino Uno.
Step 1: Components
1:-arduino uno(Generic Uno R3 ATmega328P with USB Cable length 1 feet, Compatible with ATMEGA16U2 Arduino (Color may vary))
2:-relay board(REES52 16220 Isolated Optocoupler Driver Expansion Board Relay Module 4CH 5Volt)
3:-bluetooth module hc-05(Bluetooth Transceiver Module with TTL Outputs-HC05)
4:-jumper wires(REES52 Jumper Wire - 10 Male to Male + 10 Female to Female + 10 Male to Female)
and others needed components like CFL,light,fan..
Step 2: Relay Connecting With Arduino
.It is a simple project and but its also very dangerous ...
because we are going to deal with high voltage 220v . Do not attempt if you are a amateur in dealing with high voltage.
Why to use relay for controlling AC light,fan and other appliances:-
AC is alternating current 220v (india) which powers the ac lights,fans,cfl ets.... Arduino cannot control high volt n amp, but a relay can do this job, which is the sole design of it.
so we are using relay as switch to control high power devices.
What is NO NC and COM in relay?
C = Common Connection
NC = Normally Closed Connection
Step 3: Set Up Circuit Using Relay,arduino and Bluetooth
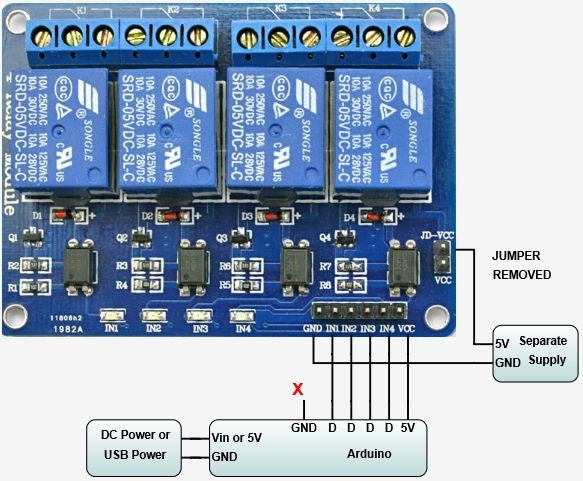
Step 3: Set Up Circuit Using Relay,arduino and Bluetooth
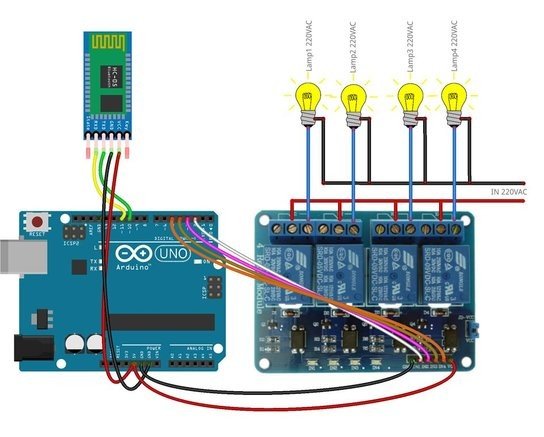
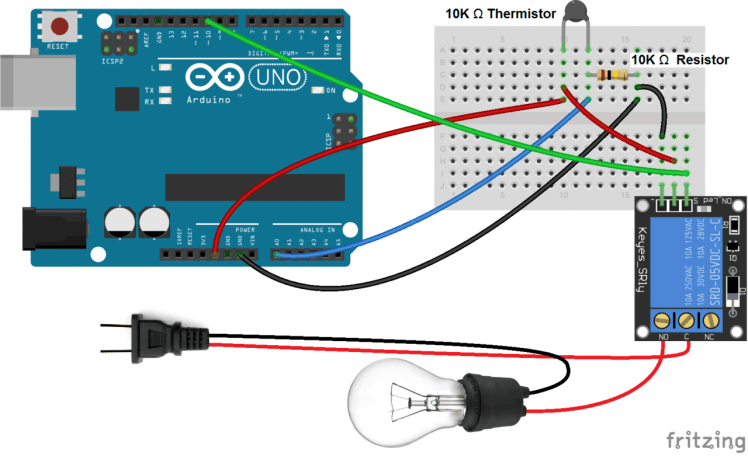
. here is connection..
bluetooth is connect to arduino in tx and rx pin...
we have to connect all appliances to relay board.
one relay board for one lights,then 2nd for CFL,3rd for fan and 4th relay for tubelight....
thats it....
Step 4: Connect App With Bluetooth
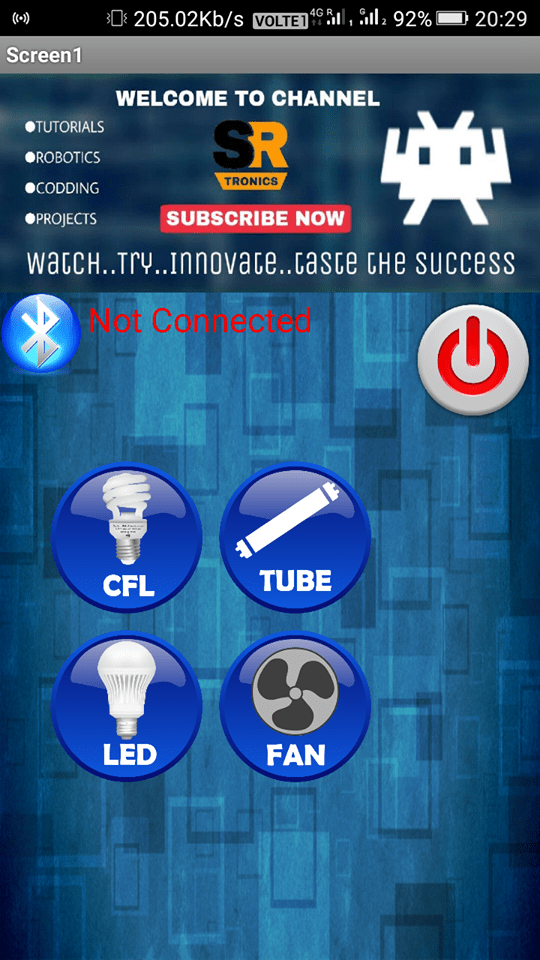
this is the screenshot of the app...which is made by mit app inventor..
download the app link description below ..
install it in your phone..and connect it with hc-05 bluetooth module..
thats it...
please subscribe our channel s_r tronics
Schematics, diagrams and documents
Code
Credits

berasukanta
we are s_r tronics on you tube... we are maker... we love electronics and robotics.. plz support us and subscribe our channel https://m.youtube.com/channel/UCcSpCN3nV34zZsdaiVhPTKA


