Remote Nextion Display Updates With Particle Asset Ota
About the project
Update Nextion displays effortlessly with Particle Asset OTA. Deploy content, tweak visuals, and cut costs while ensuring peak performance.
Project info
Difficulty: Moderate
Estimated time: 1 day
License: GNU Lesser General Public License version 3 or later (LGPL3+)
Items used in this project
Hardware components
Story
Deploying updates to your fleet with the Particle platform is easy. However, when your product includes additional components—such as ML models, displays, coprocessors, certificates, or media like images and sounds—managing updates remotely becomes more challenging. Traditional methods often require physical access, which can be time-consuming, costly, and impractical at scale.
The solutionParticle Asset OTA empowers you to remotely update these additional components with ease. Say goodbye to on-site maintenance and outdated versions. Read on to learn how it works!
What is Particle Asset OTA?Particle Asset OTA expands the power of Particle's OTA (Over-the-Air) updates beyond just the main Particle device. Inspired by advanced systems, like Tesla’s OTA capabilities, it allows seamless updates to all interconnected components in a product.
In systems where multiple processors or subsystems—such as displays, coprocessors, or external media—need to work in harmony, keeping everything updated can be a challenge. Asset OTA simplifies this by bundling updates for these components into a coordinated package (or bundle). Much like a central processor in a car ensures all subcomponents run compatible software versions, Particle Asset OTA delivers a bundle of assets to different subsystems.
Here’s a great introduction from Zach Supalla, Particle’s CEO.
Why Use Asset OTA with Nextion Displays?Imagine your product includes a Nextion display. Once delivered to customers, updating or fixing bugs (on the display) would typically require:
- Direct access, which is time-consuming and costly.
- Shipping a memory card to customers and asking them to insert it into the back of the display to apply the update.
With Particle’s rock-solid Asset OTA, you can deliver updates from the cloud, just like traditional Particle OTA updates—saving time, effort, money, and a little bit of embarrassment.
How does Asset OTA work?It all begins with your firmware in a Workbench project:
- Organize Your Assets: Add a folder to your project containing the assets or files you want to deploy to your product (e.g., images, configurations, or binaries - in our case this will be a Nextion binary).
- Implement Update Logic: Add code that checks for new assets, ensuring they are sent to the intended components.
- Compile the Firmware: When you compile the project, it generates a binary that includes the bundled assets.
- Deploy the Firmware: Flash your device by releasing the firmware via the Particle Cloud.
- Update Components: Once the new firmware runs on your device, it uses the bundled assets to update the components according to your instructions.
STEP 1: Prepare the Assets
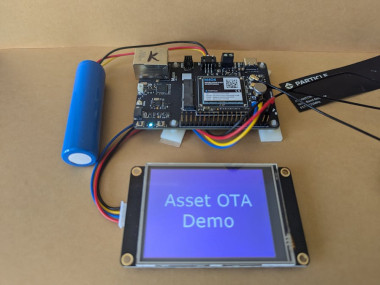
Start by preparing the asset you want to update—in this example, a .tft file for the Nextion display. For simplicity, I created a Nextion file with a different background color. Initially, the display has a purple background, which we’ll update to blue using Asset OTA. Keep in mind that Asset OTA allows you to update all aspects of the Nextion display, not just the background. This includes fields, images, text, variables, and more, giving you full control over your display’s content remotely.
STEP 2: Prepare Your Project for Asset OTA
In Particle Workbench, open your project’s project.properties file and add or uncomment the following line:
assetOtaDir=assetsThis line specifies the directory for your OTA assets. Next, create an assets folder at the same level as your src folder, and place the .tft file inside this folder.
When you build your project, you’ll notice a new "CREATING BUNDLE" section in the logs, indicating that your assets are being bundled for OTA deployment:
:::: COMPILING APPLICATION
Creating /writeup-asset-ota/target/6.2.0/msom/memory_platform_user.ld ...
Creating /writeup-asset-ota/target/6.2.0/msom/memory_platform_user.ld ...
text    data     bss     dec     hex filename
12258 124 4466 16848    41d0 /writeup-asset-ota/target/6.2.0/msom/writeup-asset-ota.elf
:::: CREATING BUNDLE
Bundling /writeup-asset-ota/target/6.2.0/msom/writeup-asset-ota.bin with /writeup-asset-ota/assets:
Bundling successful.
Saved bundle to: /writeup-asset-ota/target/6.2.0/msom/writeup-asset-ota.zip
*** COMPILED SUCCESSFULLY ***
STEP 3: Prepare Your Firmware for Asset OTA
Add this to your firmware:
void handleAssets(spark::Vector<ApplicationAsset> assets)
{
 for (ApplicationAsset &asset : assets)
 {
   if (asset.name() == "nextion.tft")
     {
        Log.info("Nextion TFT file found, writing to Nextion");
        NexUpload nex_download(1);
        nex_download.upload();
     }
 }
 System.assetsHandled(true);
}

STARTUP(System.onAssetOta(handleAssets));
Explanation: the line STARTUP(System.onAssetOta(handleAssets)); ensures that on startup, the handleAssets() function is called. This function iterates through any assets available for OTA and, if it finds the "nextion.tft" file, initiates an update to the Nextion display using NexUpload from the Nextion library. The display will then be updated with the new asset automatically.
STEP 4: Test Locally Before Deployment
Flash the code locally to experience how seamlessly the update process works:
STEP 5: Release Your Firmware via the Particle Cloud
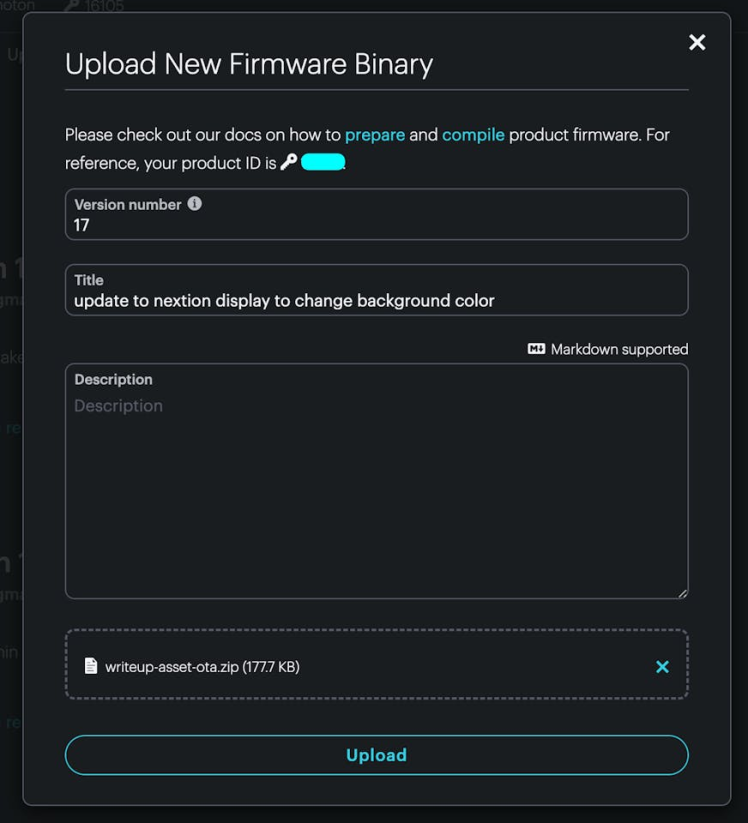
With your firmware successfully tested locally, it's time to upload it to your product and roll it out to your entire fleet!

This is just one way to leverage the power of Asset OTA. For more information, visit the Particle documentation. Examples found in the docs include:
- Arduino Uno Asset OTA
- LCD Image Asset OTA
- RP2040 Raspberry Pi Asset OTA
- Sound Asset OTA
- STM32 Asset OTA
You can access the documentation through this link.


Leave your feedback...