
Remote Access A Raspberry Pi Hf1r0 Interface
About the project
In this project, We go through the steps on how to set up a Raspberry Pi VNC to remote access HF1R0 Interface with command lines.
Project info
Difficulty: Moderate
Platforms: Raspberry Pi, STMicroelectronics
Estimated time: 1 hour
License: MIT license (MIT)
Items used in this project
Hardware components
Story
Introduction:
Sometimes it is not convenient to work directly on the Raspberry Pi. Maybe you would like to work on it from another device by remote control.
VNC (Virtual Network Computing) is a graphical desktop sharing system that allows you to remotely control the desktop interface of one computer (running VNC Server) from another computer or mobile device (running VNC Viewer). VNC Viewer transmits the keyboard and either mouse or touch events to VNC Server, and receives updates to the screen in return.
You will see the desktop of the Raspberry Pi inside a window on your computer or mobile device. You'll be able to control it as though you were working on the Raspberry Pi itself.
In this project, We go through the steps on how to set up a Raspberry Pi VNC to remote access HF1R0 Interface with command lines.

• Connect the Modules to HF1R0 module.
• Take your Hexabitz array and HF1R0 module and solder them together.
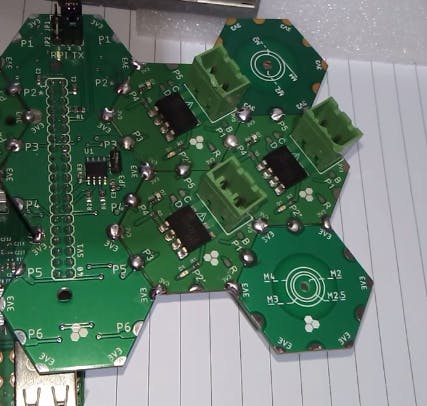
• Make sure to connect your Hexabitz array at the right spot or left spot. In this project, I have Jumper JP1 and JP2 at position 3 & 4 and my Hexabitz array is soldered as shown in the picture below:
Notes:
- Be sure to download the firmware on each module before soldering .
https://hexabitz.com/docs/how-to/update-module-firmware/
- Installing operating system -Raspbian Buster with desktop and recommended software-image and Writing an image to the SD card
https://www.raspberrypi.org/documentation/installation/installing-images/README.md
- You can use Raspberry pi 3 or pi 4.
On your Raspberry Pi, run the following commands to make sure you have the latest version of VNC Connect:
sudo apt update
sudo apt install realvnc-vnc-server realvnc-vnc-viewer
Now enable VNC Server. You can do this graphically or at the command line.
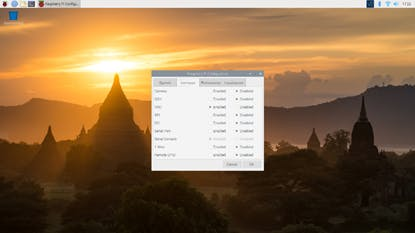
Enabling VNC Server graphically- On your Raspberry Pi, boot into the graphical desktop.
- Select Menu > Preferences > Raspberry Pi Configuration > Interfaces.
- Ensure VNC is Enabled.
Direct connections are quick and simple providing you're joined to the same private local network as your Raspberry Pi. For example, this might be a wired or wireless network at home, at school, or in the office).
-
On your Raspberry Pi (using a terminal window or via SSH) run
ifconfigto discover your private IP address. - On the device you'll use to take control, download VNC Viewer app.
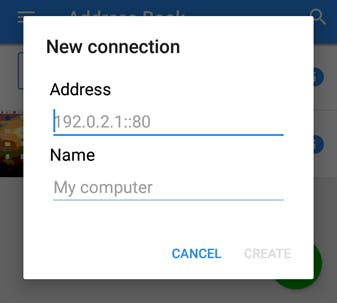
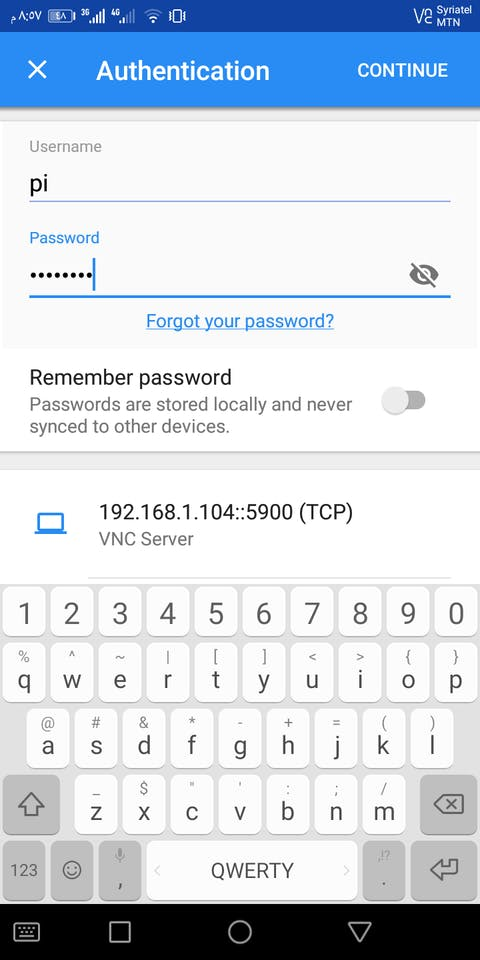
- Enter your Raspberry Pi's private IP address into VNC Viewer:

1 / 2


Note:
We can Establishing a cloud connection : You are entitled to use RealVNC's cloud service for free, provided that remote access is for educational or non-commercial purposes only.
Cloud connections are convenient and encrypted end-to-end. They are highly recommended for connecting to your Raspberry Pi over the internet. There's no firewall or router reconfiguration, and you don't need to know the IP address of your Raspberry Pi, or provide a static one.
- Sign up for a RealVNC account here: it's free and it only takes a few seconds.
- On your Raspberry Pi, sign in to VNC Server using your new RealVNC account credentials:
- On the device you'll use to take control, download VNC Viewer. You must use the compatible app from RealVNC.
- Sign in to VNC Viewer using the same RealVNC account credentials, and then either tap or click to connect to your Raspberry Pi:
https://www.realvnc.com/en/connect/download/viewer/
1- Connecting to your Hexabitz Modules with putty· Open a terminal on your Raspberry Pi and run the following command to install Putty to communicate with Hexabitz modules:
sudo apt-get install putty
· You can start Putty using this command:
sudo putty
· As you can see in the screenshot below, switch the Connection Type to Serial then edit the Serial Line to match the COM port you want to use and edit the Speed to match the BAUD Rate to 921600.
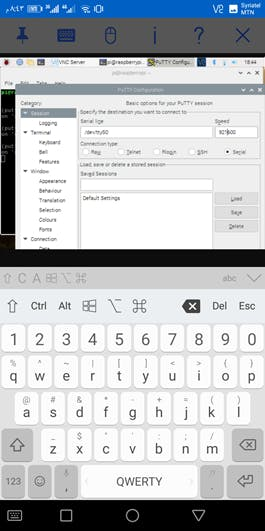
· After you click on Open button, the connection window appears.
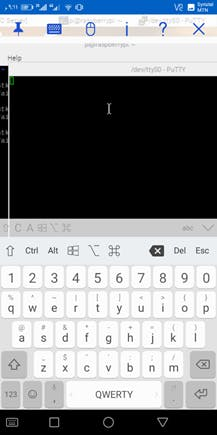
· Then you should press ENTER keyboard key to start the communication session. You should see the CLI welcome message shown below. It tells you the ID of the module you are connected to and through which array port.

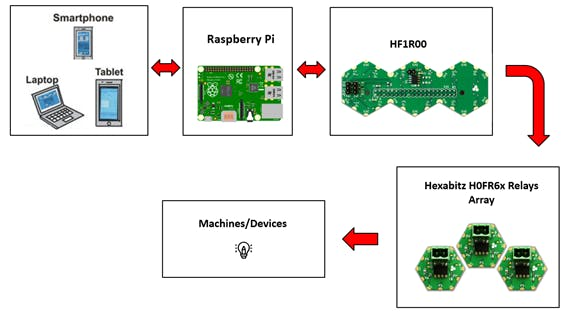
Build and use a remote controlled modular array of solid-state relays:
- The Raspberry Pi is great for powering all kinds of home automation projects.
- If you want to get those power outlets connected the Hexabitz solid state relays so you can control them from anywhere.
- The Raspberry Pi to power a system where you can remotely turn off a lamp from anywhere. It's not just a lamp either, you can turn anything connected to the outlet on and off from any mobile device or from internet.
- H0FR6x is a compact solid state relay (SSR) module capable of driving AC loads up to 600V and 1.2A. It is based on Panasonic AQH3213A SSR and STM32F0 MCU.
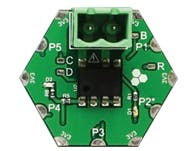
- Use as a stand-alone smart AC relay and easily control AC loads (lamps, fans, power outlets, etc.) via a Command Line Interface (CLI).
- Send commands to a single relay, a group of relays or broadcast to all of them.
· WARNING: Voltages higher than 24V can be dangerous! Make sure you know what you’re doing and use protection (circuit breakers, etc.) whenever possible.
The System Diagram:
https://www.hackster.io/aula-jazmati/remote-access-a-raspberry-pi-hf1r0-interface-3f116f


