

Diy Pet Feeder Based On Esp8266

Made by sokolsok / 3D Printing / Animals / Home Automation / IoT
About the project
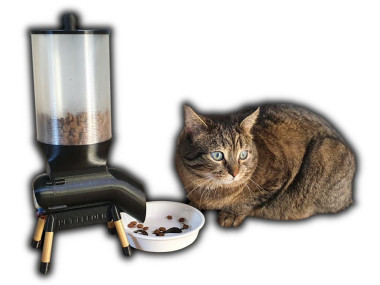
A DIY Feeder for a cat, dog, lizard, gremlin or anything you have there :) It is based on the popular ESP8266. So, it can be integrated with any open smart system like Home Assistant, Domoticz, or OpenHAB. And if that's the case, it can probably also be controlled from your smartphone from anywhere in the world.
Project info
Difficulty: Moderate
Platforms: Espressif
Estimated time: 1 day
License: GNU General Public License, version 3 or later (GPL3+)
Items used in this project
Hardware components

Hand tools and fabrication machines
Story
Ah, the age-old problem: your furry little overlord doesn't care about your sleep schedule. Welcome to the club! My cat, Strachu (which, by the way, means "Fear" in English, and trust me, it's a fitting name), has this uncanny ability to know exactly when it's the weekend. How? I have no idea. But like clockwork, every Saturday at the ungodly hour of 7 a.m., he decides to belt out his greatest hits album titled "Feed Me Now or Suffer My Wrath." And let me tell you, it's not the kind of music you want to wake up to.
You try to explain to him, "Buddy, it's the weekend. The human needs sleep." But nope, your pleas fall on deaf ears (or, in this case, ears that are conveniently selective). Whether you were burning the midnight oil at a wild party, slogging through a mountain of work, or being kept awake by a restless child, Strachu doesn't care. His stomach clock is more accurate than the atomic clock, and when it's time to eat, it's time to eat.
But fear not, my sleep-deprived friends! Today, I'm going to walk you through how I engineered a solution to this all-too-common problem: a DIY Pet Feeder. This isn't just any pet feeder; it's a smart, integrated system that puts you back in control of your mornings. And the best part? You can sync it with any "Smart" System you've got at home. So, grab your tools, and let's get to work. By the end of this, not only will you have reclaimed your precious sleep, but you'll also have earned the undying gratitude of pet owners everywhere. Let's dive in and turn the tables on our furry alarm clocks.
Introduction
The idea of Smart Homes is to facilitate everyday routine activities. One of them undoubtedly is pet feeding. Automatic “Smart” Pet Feeder integrated with the Smart System in your home gives many possibilities for doing it.
- You can set up a detailed meal schedule.
- You can put the food automatically after detecting a pet near the bowl. Although in this case, a lot depends on the pet itself. Starchu would probably live by the bowl just to keep the food flowing. Yes, he is the biggest glutton on the street 🙂
- You can also just sprinkle some cat food remotely using your smartphone at any time and from anywhere.
Without further ado, let’s get down to business!
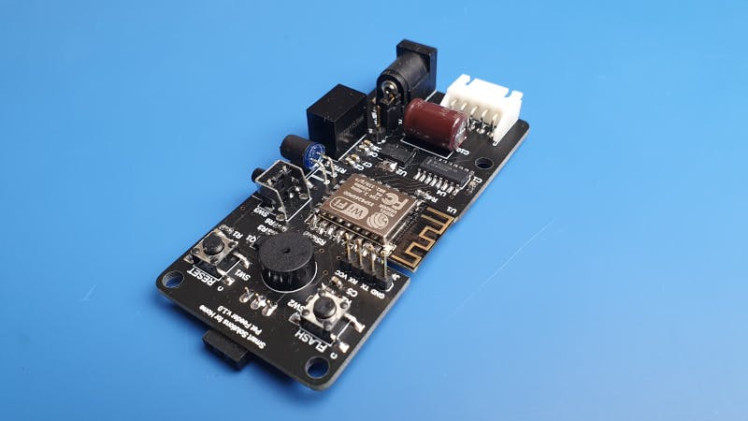
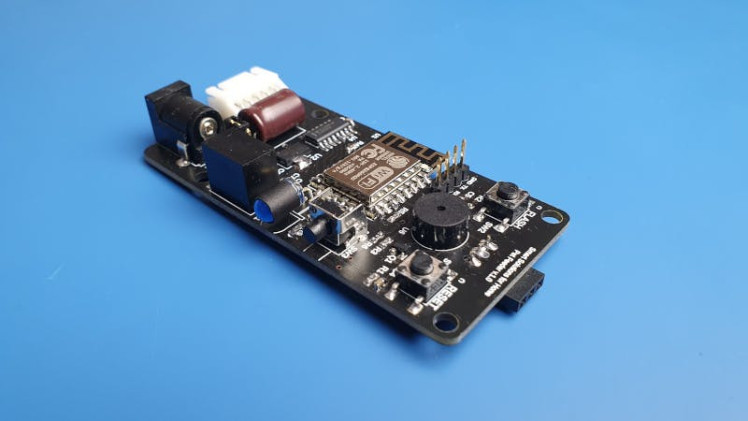
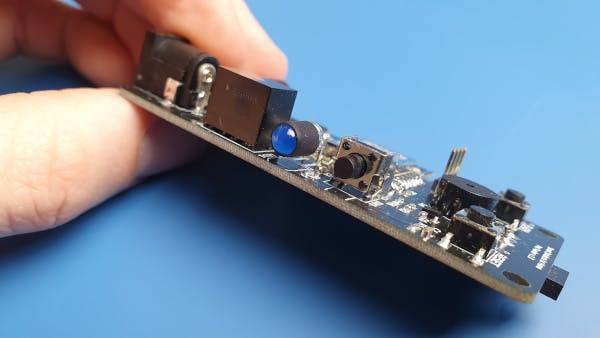
ElectronicsIn this project, the schematic is straightforward. There’s nothing too complicated here.
The main "brain" is an ESP12F module with an ESP8266 chip on board. It controls the 28BYJ-48 stepper motor via the ULN2003 driver, reads data from the PIR module, supports the button, LED, and the Buzzer. And it communicates with our Smart Home via WiFi.
The Stepper Motor is powered by 5V, the rest 3.3V.
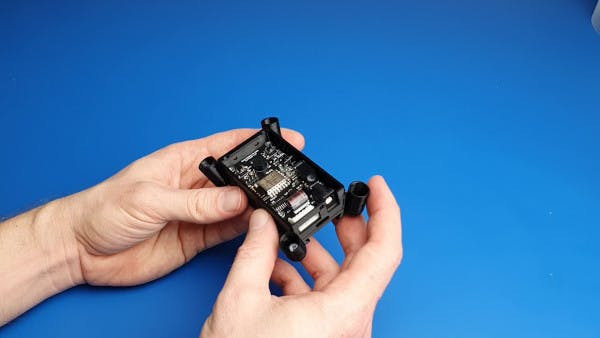
The PCB is custom-designed. The GERBER files needed for its production can be found in the attachments. As for the assembly itself, it's quite straightforward. No need to go into too much detail about it.
1 / 3
Printing takes about 15 hours, so congratulations on your persistence 🙂.
It’s time to put them together. Apart from the printed elements themselves, you’re gonna need a few M2.5 and M3 screws, a screwdriver, and cyanoacrylate glue (Superglue).
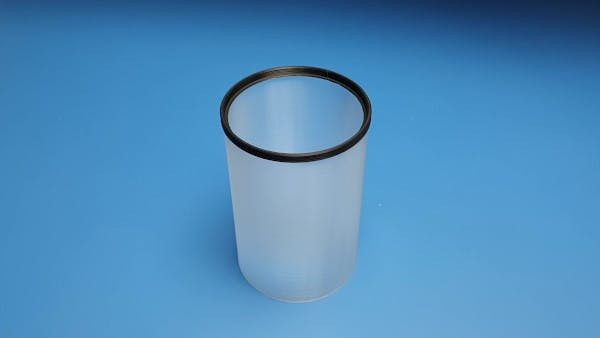
Step 1First, we gonna mount the flap frame on the top edge of the container.
Do the same on the other side, but glue the funnel this time.
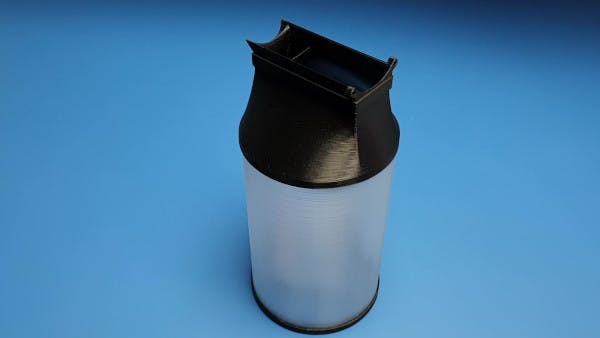
Place the worm gear into the main body, and then insert the funnel with the container into the slot.
1 / 2
Place the Lid on and fasten it with four M2.5/10mm screws.
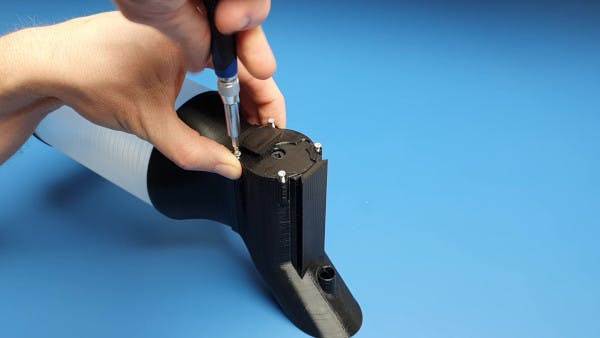
You’re gonna need four M3/6mm screws to attach the PCB.
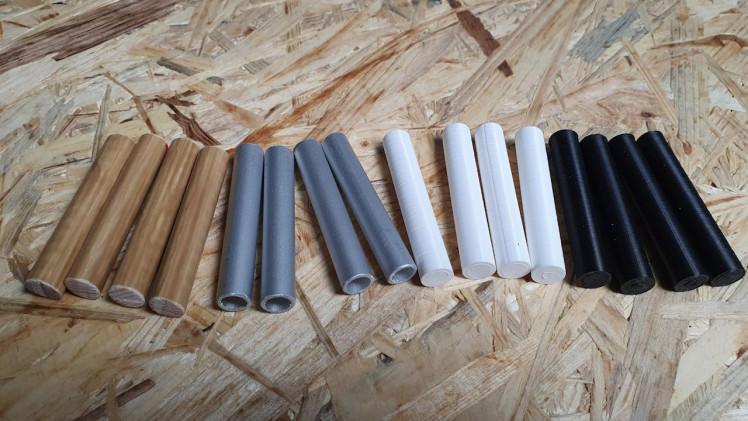
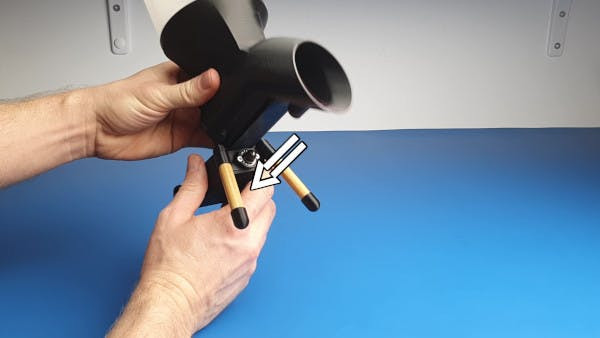
The legs can be made of wood, aluminum, 3D printed, or anything else. The diameter of this should be 10 mm, and the length depends on the high of your pet’s bowl. In my case, 60 mm is the perfect length.
Slide the body into the groove of the top of the PCB box.
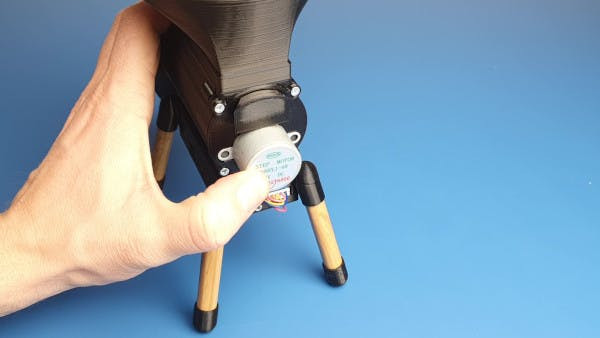
Connect the stepper motor, and slide the motor cover down.
1 / 2
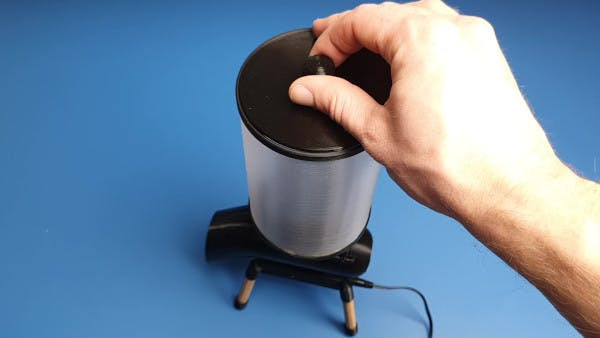
Close the container with the flap, and you’re done.
Because it is a food-related device, it would be appropriate to wash it once in a while. I wanted to be able to separate the electronic part from the “food” part in seconds and without any tools.
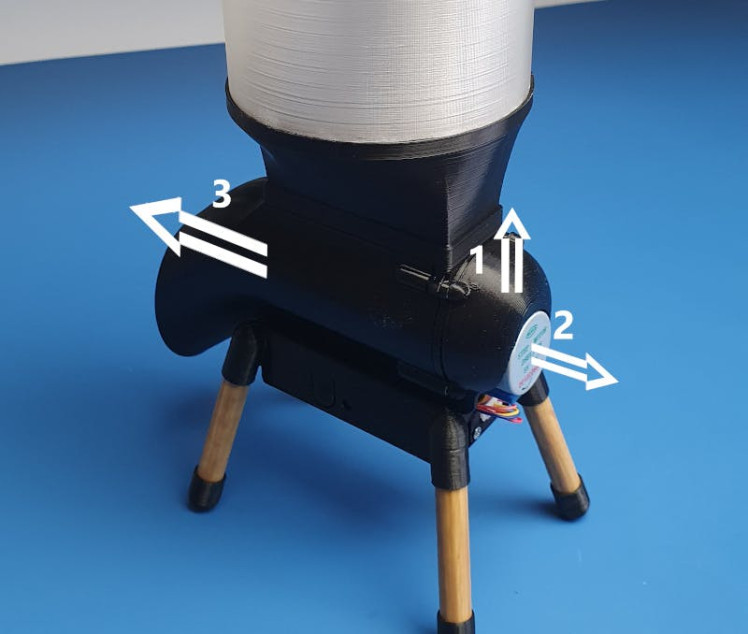
All you need is three steps:
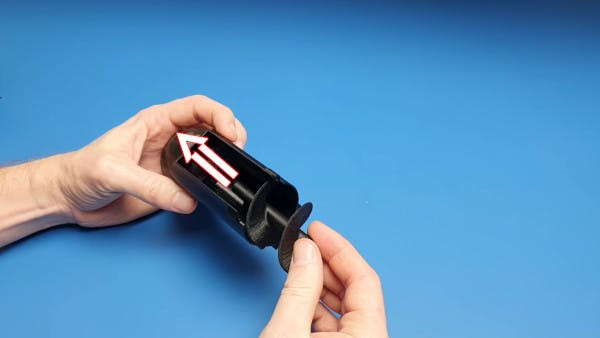
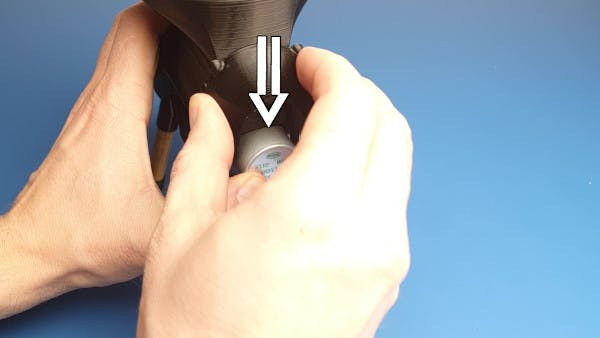
- Slide the stepper motor cover upwards.
- Pull out the stepper motor.
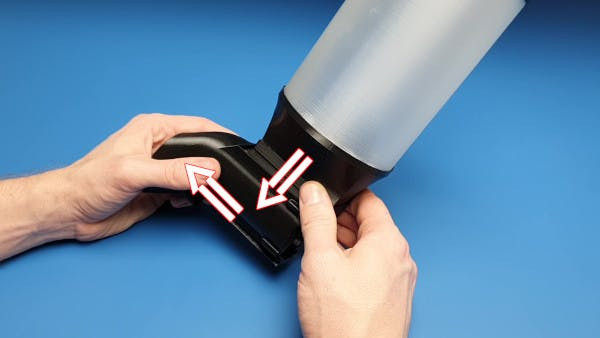
- Pull the entire body of the device forward.
This way, you can safely wash the inside of the device without the fear of getting the electronics wet.
That's it! :)
You can introduce your new, fully functional Smart Pet Feeder to your furry friend. I think he'll appreciate it, especially when they get a meal during the day, even though there's no one at home. :)
Schematics, diagrams and documents
CAD, enclosures and custom parts
Code
Credits
sokolsok
I'm an electronics engineer by education and passion, who loves to create. I enjoy coming up with new things, taking existing solutions and improving them, and I also love to take some commercial and expensive device and prove that you can make it yourself for a fraction of the cost, DIY style! :) I have a blog: https://smartsolutions4home.com ,and a YouTube channel: https://www.youtube.com/smartsolutionsforhome
Related products


Leave your feedback...