


Musclescroll:emg-powered Tab Navigation On Raspberry Pi 🔺🔻

Made by Aula_Jazmati / Environmental Sensing / Games & Gaming / Kids & Family / Sensors / Wearables
About the project
This innovative project harnesses the power of EMG signals to enable intuitive and seamless navigation between web tabs & other interfaces.
Project info
Difficulty: Moderate
Platforms: Raspberry Pi, SparkFun, STMicroelectronics
Estimated time: 1 hour
License: MIT license (MIT)
Items used in this project
Hardware components
Software apps and online services
Story
💻 Project Overview:
MuscleScroll leverages electromyography (EMG) signals to create a unique, hands-free navigation system. By detecting muscle activity, this project allows users to control web tabs and other interfaces effortlessly. This is particularly beneficial for accessibility, providing an intuitive method for individuals with mobility challenges to interact with their devices.
💪 What is EMG?Electromyography (EMG) is a technique for evaluating and recording the electrical activity produced by skeletal muscles. EMG is performed using an instrument called an electromyograph to produce a record called an electromyogram. An electromyograph detects the electric potential generated by muscle cells when these cells are electrically or neurologically activated. The signals can be analyzed to detect abnormalities, activation level, or recruitment order, or to analyze the biomechanics of human or animal movement. Needle EMG is an electrodiagnostic medicine technique commonly used by neurologists. Surface EMG is a non-medical procedure used to assess muscle activation by several professionals, including physiotherapists, kinesiologists and biomedical engineers. In computer science, EMG is also used as middleware in gesture recognition towards allowing the input of physical action to a computer as a form of human-computer interaction.
Electromyography (EMG)
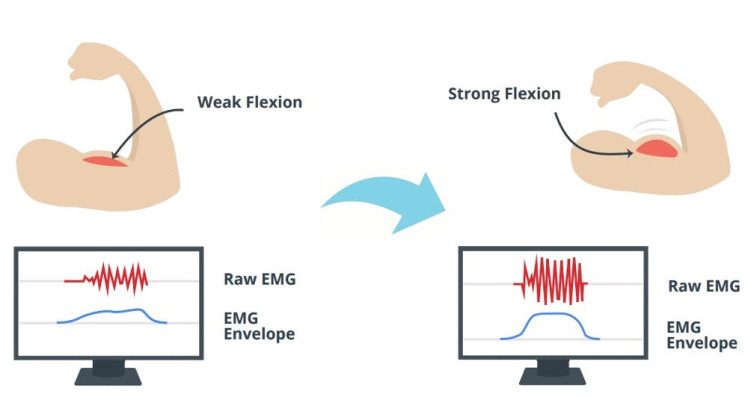
Electromyography (EMG)
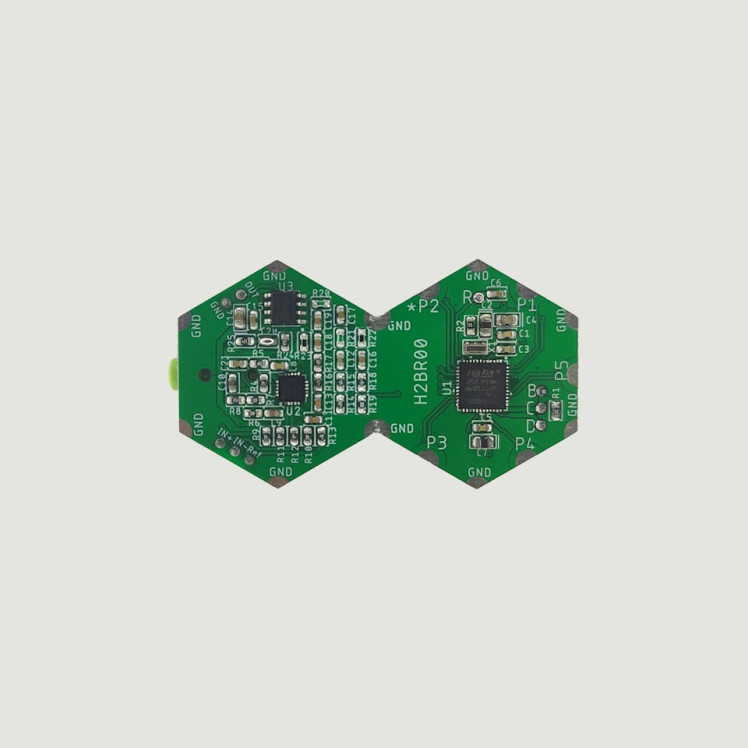
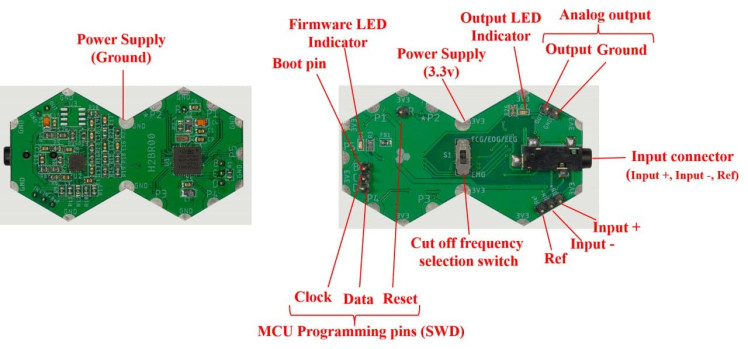
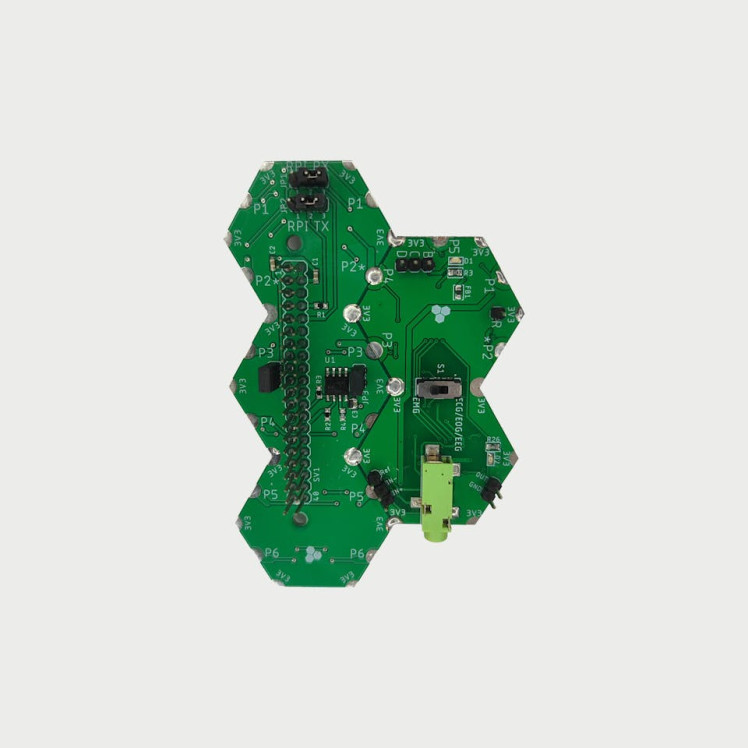
🌟 Single-Lead, EXG Monitor (H2BR0x):Hexabitz Single-Lead, EXG Monitor Module (H2BR0) is one of a kind module that can record publication-grade biopotential signals from your body be it from the heart (ECG), brain (EEG), eyes (EOG), and muscles (EMG).
What makes it different?
- Record publication-quality biopotential signals like ECG, EMG, EOG, or EEG.
- Small size allows easy integration into mobile and space-constrained projects.
- H2BR0 is based on STM32G0 MCU.
- Program advanced C code with our easy-to-use APIs.
- You can connect to external hardware or combine with other Hexabitz modules!
- The module is equipped with an open source MATLAB interface.
1 / 3 • H2BR0
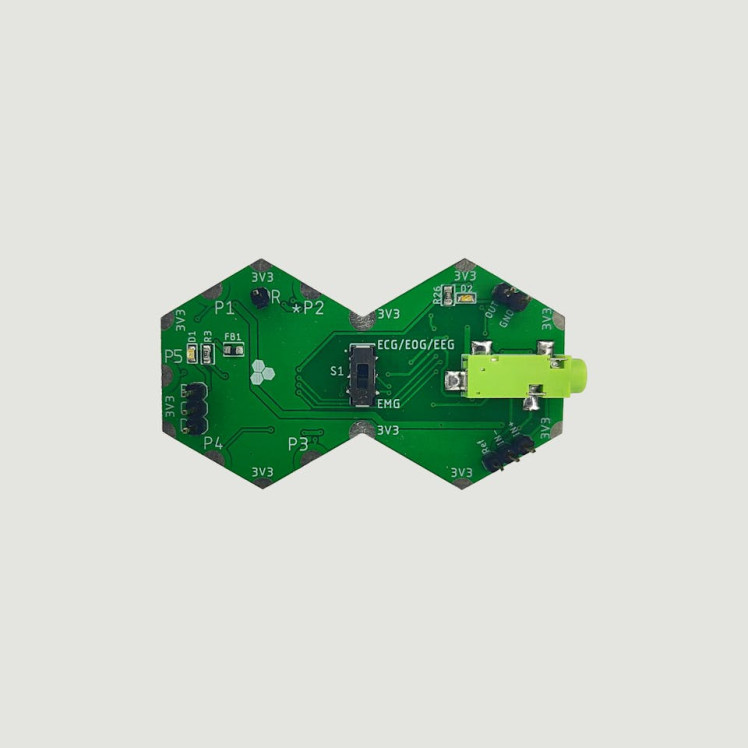
H2BR0
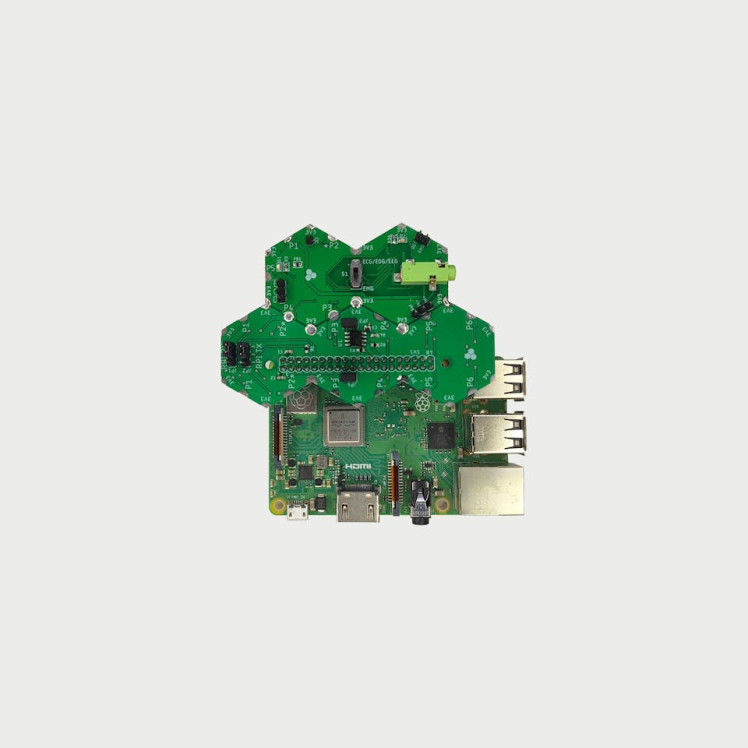
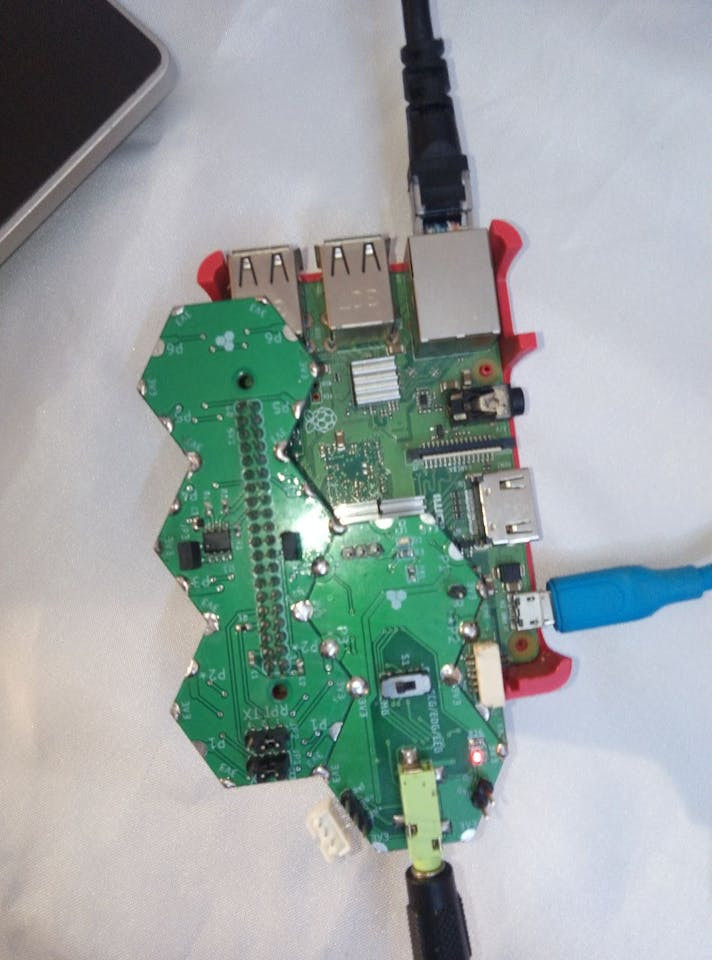
1- Setup the Raspberry Pi:
1 / 3
- Check out this article for writing code with STM32CubeIDE.
The ExG module main code:
This code is designed for interfaces with an EMG sensor, reading muscle signals and transmitting them to a Raspberry Pi via serial communication ( It initializes the sensor, reads samples, and sends them to port P4) 😊
- The `UserTask` function is the main user-defined task.
- It initializes the EMG (Electromyography) sensor using `EXG_Init(EMG)`.
- Inside the infinite loop, it performs the following steps:
- Reads EMG envelope samples using `EMG_Sample(&sample, &filteredSample, &rectifiedSample, &envelopeSample)`.
- Converts the envelope sample value to a byte array (`uint8_t *temp = (uint8_t *)&envelopesample`).
- Writes the envelope sample data to port P4 using `writePxITMutex(P4, (char *)&temp[0], 4 * sizeof(uint8_t), 10)`.
Notes:
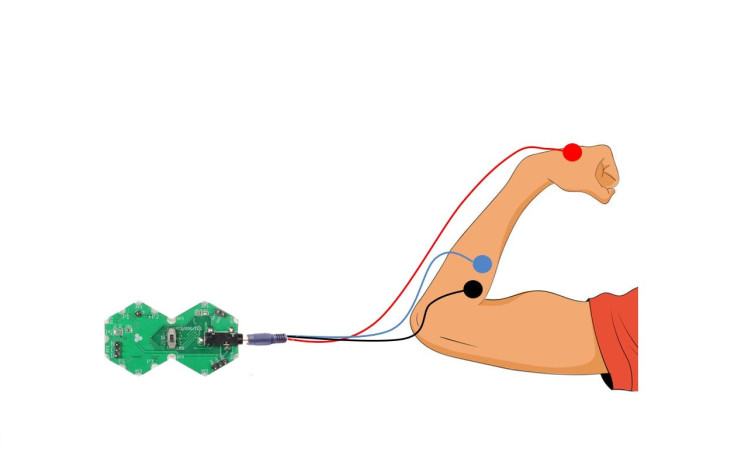
- Connect the EXG module to HF1R0 module.
- Make sure to connect your Hexabitz module at the right spot or left spot then put the Jumper JP1 and JP2 at right position.
- Be sure to download the firmware on the module before soldering.
2- Setup the Raspberry Pi:
🔺🔻 Install Required Libraries:
⬇️ Python pyserial: This module encapsulates the access for the serial port. It provides backends for Python running on Windows, OSX, Linux, BSD (possibly any POSIX compliant system) and IronPython. The module named “serial” automatically selects the appropriate backend.
Depending on the version of python, there are several commands to install the package pyserial.
sudo apt-get install python-serial python3-serialPython code to read the serial port: This section of code primarily instantiates the serial class, setting it up with all the various bits of information that it needs to make the connection with.
port – This defines the serial port that the object should try and do read and writes over.
baudrate – This is the rate at which information is transferred over a communication channel.
parity – Sets whether we should be doing parity checking, this is for ensuring accurate data transmission between nodes during communication.
stopbits – This is the pattern of bits to expect which indicates the end of a character or the data transmission.
bytesize – This is the number of data bits.
timeout – This is the amount of time that serial commands should wait for before timing out.
import serial
ser = serial.Serial(
               port='/dev/ttyUSB0',
               baudrate = 921600,
               parity=serial.PARITY_NONE,
               stopbits=serial.STOPBITS_ONE,
               bytesize=serial.EIGHTBITS,
               timeout=1
           )
⬇️ Python struct Module:This module performs conversions between Python values and C structs represented as Python bytes objects. This can be used in handling binary data stored in files or from network connections, among other sources. It uses Format Strings as compact descriptions of the layout of the C structs and the intended conversion to/from Python values.
We’ve initialized a serial connection to read sensor data. The ser object communicates with a device connected to /dev/ttyS0 (a serial port).
The sensor data is a 4-byte float value.
⬇️PyAutoGUIModule:
PyAutoGUI lets your Python scripts control the mouse and keyboard to automate interactions with other applications. The API is designed to be simple. PyAutoGUI works on Windows, macOS, and Linux, and runs on Python 2 and 3.
To install with pip, run pip3 install pyautogui. See the Installation page for more details.
The source code is available on: https://github.com/asweigart/pyautogui
PyAutoGUI has several features:
- Moving the mouse and clicking in the windows of other applications.
- Sending keystrokes to applications (for example, to fill out forms).
- Take screenshots, and given an image (for example, of a button or checkbox), and find it on the screen.
- Locate an application’s window, and move, resize, maximize, minimize, or close it (Windows-only, currently).
- Display alert and message boxes.
🔺🔻 Code Explanation
This code reads data from an EMG (Electromyography) sensor via a serial port and uses the sensor data to scroll up or down on the screen. The scrolling action is determined based on the processed average EMG value. The moving average is used to smooth out the signal and reduce noise.
1. Import Libraries:
⬆️ `pyautogui`: Used for automating mouse and keyboard actions, such as scrolling.
⬆️ `time`: Provides time-related functions.
⬆️ `numpy`: Provides support for large multi-dimensional arrays and matrices.
⬆️ `serial`: Used to access the serial port.
⬆️ `struct`: Used for converting between Python values and C structs represented as Python bytes objects.
2. Setup Serial Connection:
This section sets up the serial connection to the EMG sensor using the specified parameters (e.g., port, baud rate, parity, stop bits, byte size, and timeout).
3. Processing EMG Values:
def process_emg(emg_value):
    threshold = 2
    if emg_value > threshold:
        return "scroll_up"
    else:
        return "scroll_down"
This function processes the EMG value to determine whether to scroll up or down. If the EMG value is greater than the threshold, the function returns `scroll_up`; otherwise, it returns `scroll_down`.
4. Scrolling Functions:
def scroll_up():
    pyautogui.scroll(100)
    print("Scrolled Up")
def scroll_down():
    pyautogui.scroll(-100)
    print("Scrolled Down")
These functions execute the scrolling action. `scroll_up` scrolls up by 100 units, and `scroll_down` scrolls down by 100 units. They also print a message indicating the action performed.
5. Moving Average Calculation:
def moving_average(values, window_size):
    return np.convolve(values, np.ones(window_size)/window_size, mode='valid')
This function calculates the moving average of the EMG values to smooth out the signal and reduce noise. The moving average is calculated over a specified window size.
6. Main Loop:
ser.flushInput()
emg_values = []
while True:
x = ser.read(4)
if x and len(x) == 4:
sensor_value = list(struct.unpack('f', x))
emg_values.append(sensor_value[0])
if len(emg_values) > 10:  # Use a moving window size of 10
averaged_value = moving_average(emg_values, 10)[-1]
print(f"Averaged EMG Value: {averaged_value}")
action = process_emg(averaged_value)
if action == "scroll_up":
scroll_up()
elif action == "scroll_down":
scroll_down()
emg_values.pop(0)  # Remove the oldest value to maintain window size
time.sleep(0.1)
⬆️ Flush Input Buffer: `ser.flushInput()` clears the input buffer of the serial connection to ensure no old data is being read.
⬆️ Initialize EMG Values List: `emg_values = []` initializes an empty list to store the EMG values.
🔻 Main Loop:
⬇️ Read Sensor Data: `x = ser.read(4)` reads 4 bytes from the serial port.
⬇️ Check Valid Data: If valid data is received (`len(x) == 4`), it is unpacked into a list (`sensor_value`) and appended to `emg_values`.
⬇️ Calculate Moving Average: Once `emg_values` has more than 10 values, the moving average is calculated.
⬇️ Process EMG Value: The averaged EMG value is processed to determine the scrolling action.
⬇️ Execute Scrolling Action: Based on the action returned (`scroll_up` or `scroll_down`), the respective scrolling function is called.
⬇️ Maintain Window Size: The oldest value in `emg_values` is removed to maintain the window size.
⬇️ Delay: `time.sleep(0.1)` adds a short delay between readings to control the loop speed.
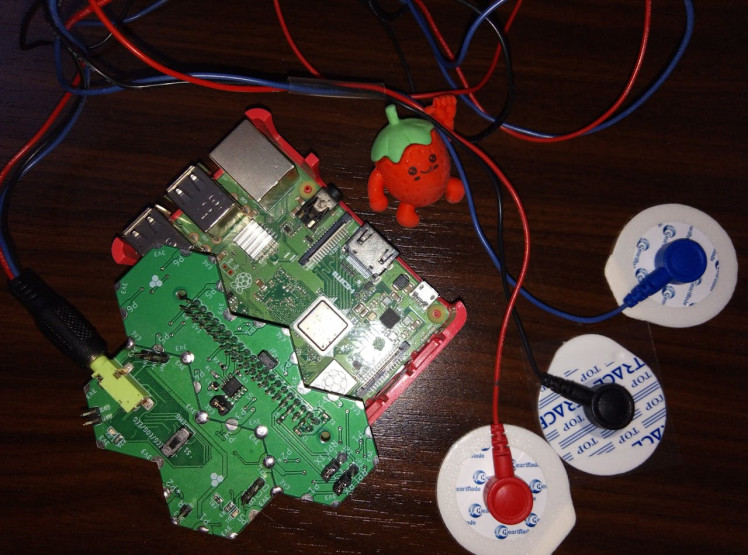
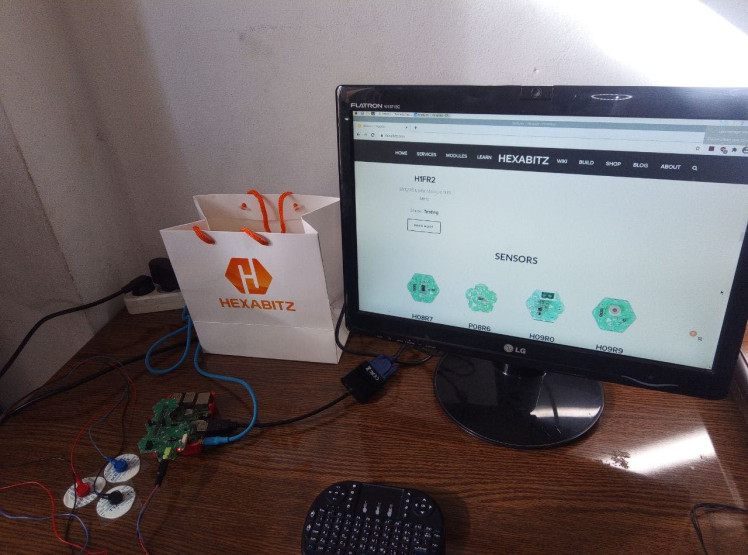
🎚️ Test the System:🔺1. Initial Data Check:

🔺2. Threshold Testing:
🔺3. Scroll Action Verification:
- Implement the `scroll_up` and `scroll_down` functions.
- Trigger these functions based on the processed EMG values.
- Verify that the scroll actions correspond accurately to the muscle movements.
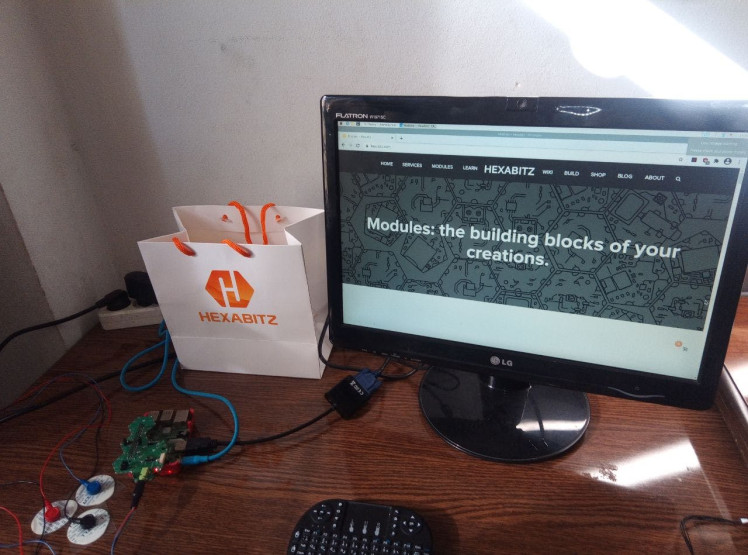
🔺4. End-to-End System Test:
- Expand Control Options: Implement additional gestures and controls for more interactive navigation.
- Improve Signal Processing: Refine the signal processing algorithm for better accuracy and responsiveness.
- Add Visual Feedback: Provide real-time visual feedback on screen to show detected muscle movements and actions.
MuscleScroll demonstrates how EMG signals can be harnessed to create an intuitive, hands-free navigation system. This project not only showcases the potential of EMG technology but also highlights its importance in enhancing accessibility and user experience.
Schematics, diagrams and documents
Code
Credits
Related products


g