
Muscle-powered Pi Music 🎶
About the project
Controlling Raspberry Pi Audio with EMG Signals and Hexabitz Modules 🎶🎵🎚️💪
Project info
Difficulty: Moderate
Platforms: Raspberry Pi, STMicroelectronics, PCBWay
Estimated time: 1 hour
License: MIT license (MIT)
Items used in this project
Hardware components
View all
Story
✨ Introduction:
In a world where technology meets creativity, people are discovering exciting new ways to connect with their surroundings. One fascinating approach involves using electromyography (EMG) signals from arm muscles to control audio playback on a Raspberry Pi. By tapping into the electrical activity produced during muscle movements, users can easily adjust music volume. With the help of Hexabitz modules, this innovative project transforms the simple act of flexing an arm into a powerful audio control tool, blending physical motion with the magic of sound. The future of interaction promises to be both dynamic and harmonious 🎶🎵🎚️💪
✨ Description:Imagine you're in a room with your friends and you want to play some music. However, the music is too low and you can't hear it properly. You don't want to get up and adjust the volume manually, so what do you do? This is where the EMG signal and Hexabitz modules come into play.
The EMG signal is a measure of the electrical activity produced by muscle contractions. By measuring this signal, we can determine the movement of our arm muscles. The Hexabitz modules, on the other hand, are a set of modular electronic components that can be connected together to form a larger system. These modules are designed to be flexible and easy to use, making them perfect for this project.
To start the project, we need to connect the EMG sensor to the Hexabitz module. This can be done using a simple circuit that connects the sensor to the module. Once connected, we can use the EMG signal to control the volume of the music player.
To do this, we need to program the Hexabitz module to read the EMG signal and adjust the volume accordingly. The program should be designed to detect different levels of muscle activity and adjust the volume accordingly. For example, if we move our arm muscles more vigorously, the program should increase the volume of the music player.
💪What is EMG?Electromyography (EMG) is a technique for evaluating and recording the electrical activity produced by skeletal muscles. EMG is performed using an instrument called an electromyograph to produce a record called an electromyogram. An electromyograph detects the electric potential generated by muscle cells when these cells are electrically or neurologically activated. The signals can be analyzed to detect abnormalities, activation level, or recruitment order, or to analyze the biomechanics of human or animal movement. Needle EMG is an electrodiagnostic medicine technique commonly used by neurologists. Surface EMG is a non-medical procedure used to assess muscle activation by several professionals, including physiotherapists, kinesiologists and biomedical engineers. In computer science, EMG is also used as middleware in gesture recognition towards allowing the input of physical action to a computer as a form of human-computer interaction.
Electromyography (EMG) Signals
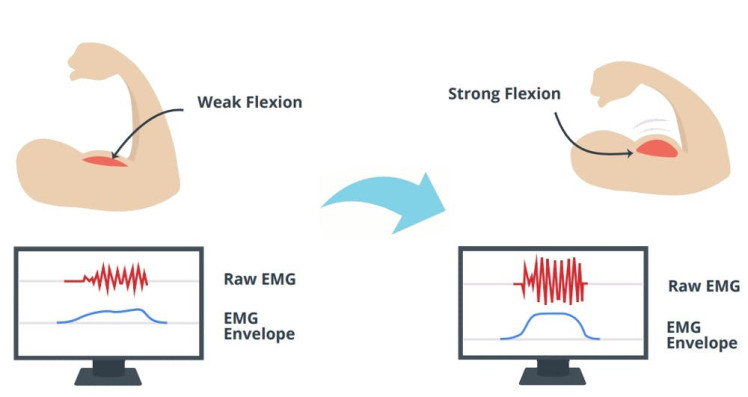
Electromyography (EMG) Signals
🛠️ Tools:🌟 Single-Lead, EXG Monitor (H2BR0x):
Hexabitz Single-Lead, EXG Monitor Module (H2BR0) is one of a kind module that can record publication-grade biopotential signals from your body be it from the heart (ECG), brain (EEG), eyes (EOG), and muscles (EMG).
What makes it different?
- Record publication-quality biopotential signals like ECG, EMG, EOG, or EEG.
- Small size allows easy integration into mobile and space-constrained projects.
- H2BR0 is based on STM32G0 MCU.
- Program advanced C code with our easy-to-use APIs.
- You can connect to external hardware or combine with other Hexabitz modules!
- The module is equipped with an open source MATLAB interface.
Single-Lead, EXG Monitor Module (H2BR0) 1
Single-Lead, EXG Monitor Module (H2BR0) 2
🌟 Sensor Cable – Electrode Pads (3 Connector):
This is a simple three conductor sensor cable with electrode pad leads. The cable is 24˝ long and feature a 3.5mm audio jack connector on one end with snap style receptacles for biomedical sensor pads.
🌟 STLINK-V3MODS Programmer (H40Rx):
H40Rx is a programmer module which contains STLINK-V3MODS stand-alone debugging and programming mini probe for STM32 micro-controllers (Hexabitz modules and other MCUs).
It supports the SWD (Serial Wire Debugging) interface for the communication with any STM32 micro-controller located on an application board.
It also provides bridge interfaces to several communication protocols, allowing for instance the programming of the target through boot-loader.
🌟 10W Stereo Audio Amplifier Module (H07R8x):
The H07R8x is a 10W Stereo Audio Amplifier Module developed by Hexabitz. It’s designed for high-quality sound reproduction and features low Total Harmonic Distortion plus Noise (THD+N) of 0.1%, low Electromagnetic Interference (EMI), and good Power Supply Rejection Ratio (PSRR). You can find detailed information about the firmware on the GitHub repository and explore the hardware design on their hardware repository.
You can use this module to play sounds and tunes stored in the MCU embedded Flash or stream audio from an external hardware source. It’s a versatile module for audio applications, allowing you to amplify and output stereo audio signals 😊🎶
1 / 2 • H07R8x Module
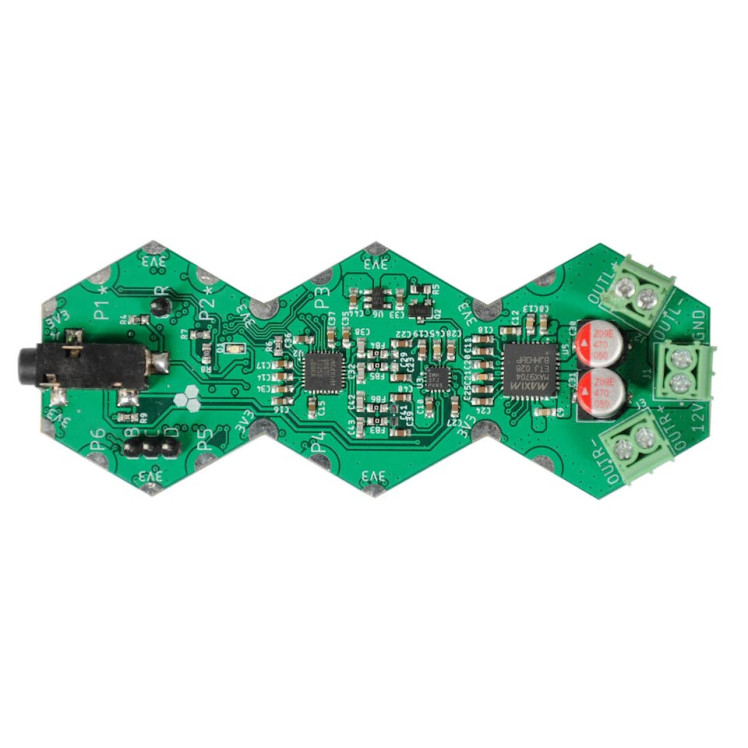
H07R8x Module
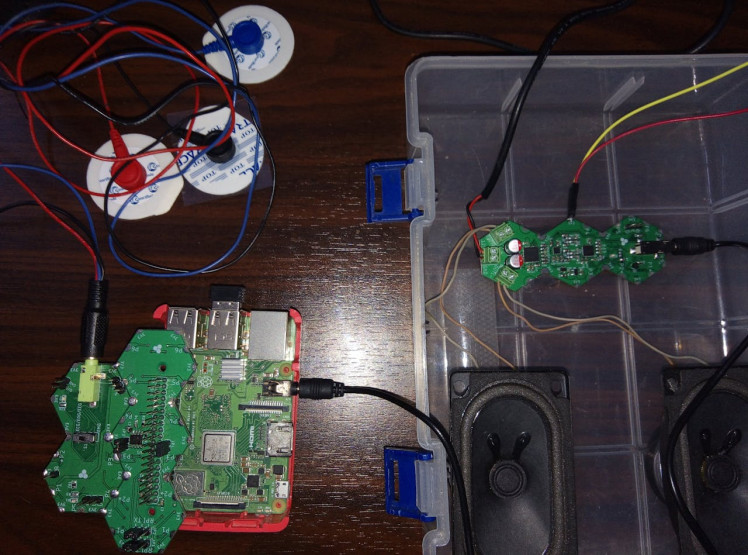
🌟 Raspberry Pi Interface (HF1R0x):
HF1R0x is Hexabitz Raspberry Pi interface module. It interfaces seamlessly to Raspberry Pi 3B/4B single-board computers and enables you to connect and control your favorite Hexabitz modules from the Raspberry Pi operating system and build your own Raspberry Pi Hat. This is the world’s first build-your-own-Pi-Hat system!
Raspberry Pi Interface (HF1R0x)
Notes:
- Connect the EXG module to HF1R0 module.
- Make sure to connect your Hexabitz module at the right spot or left spot then put the Jumper JP1 and JP2 at right position.
- Be sure to download the firmware on the module before soldering.
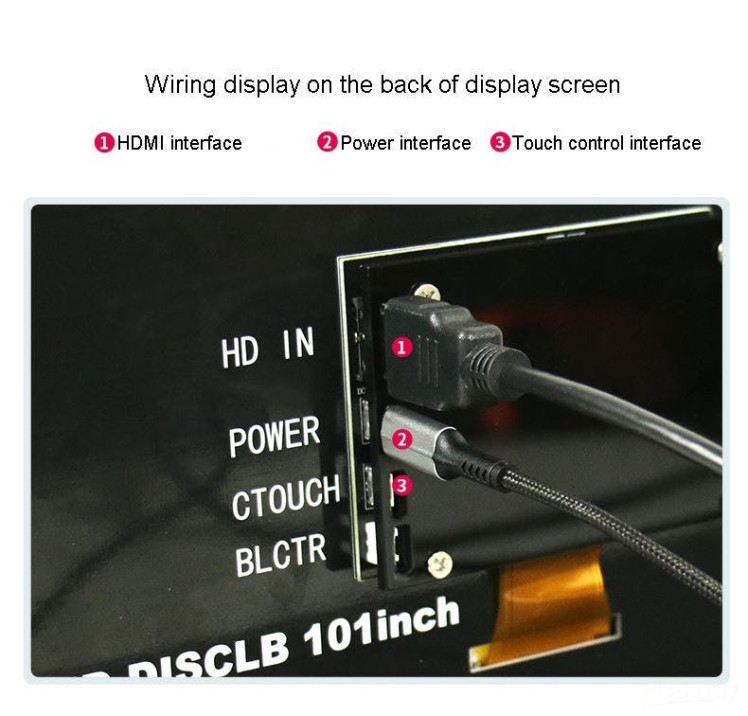
🌟 Raspberry Pi IPS Touch 10-inch Display:
Display size: 10 inch - Resolution: 1024 * 600px - Principle: Touch control - Interface: USB/HDMI/power interface - Suitable for: Raspberry Pi/NVIDIA/Windows - Weight: 550g
1 / 2
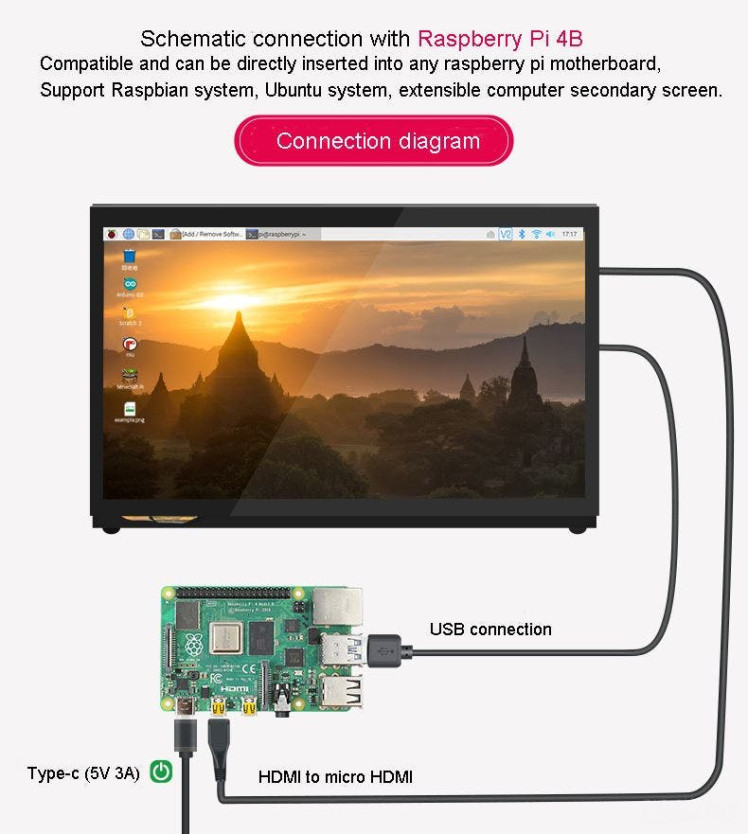
Step 1 :🖥️ Hexabitz Module Setup:
- Check out this article for writing code with STM32CubeIDE.
The ExG module main code:
This code is designed for interfaces with an EMG sensor, reading muscle signals and transmitting them to a Raspberry Pi via serial communication ( It initializes the sensor, reads samples, and sends them to port P4) 😊
- The `UserTask` function is the main user-defined task.
- It initializes the EMG (Electromyography) sensor using `EXG_Init(EMG)`.
- Inside the infinite loop, it performs the following steps:
- Reads EMG envelope samples using `EMG_Sample(&sample, &filteredSample, &rectifiedSample, &envelopeSample)`.
- Converts the envelope sample value to a byte array (`uint8_t *temp = (uint8_t *)&envelopesample`).
- Writes the envelope sample data to port P4 using `writePxITMutex(P4, (char *)&temp[0], 4 * sizeof(uint8_t), 10)`.
1 / 3 • The System
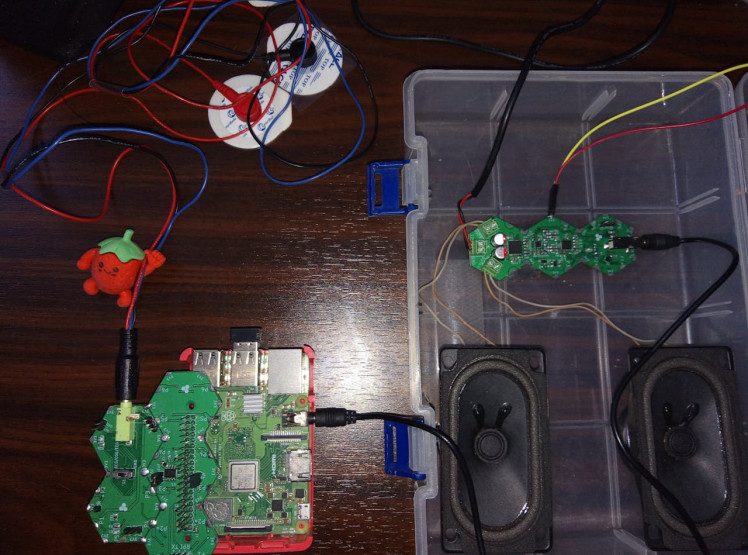
The System
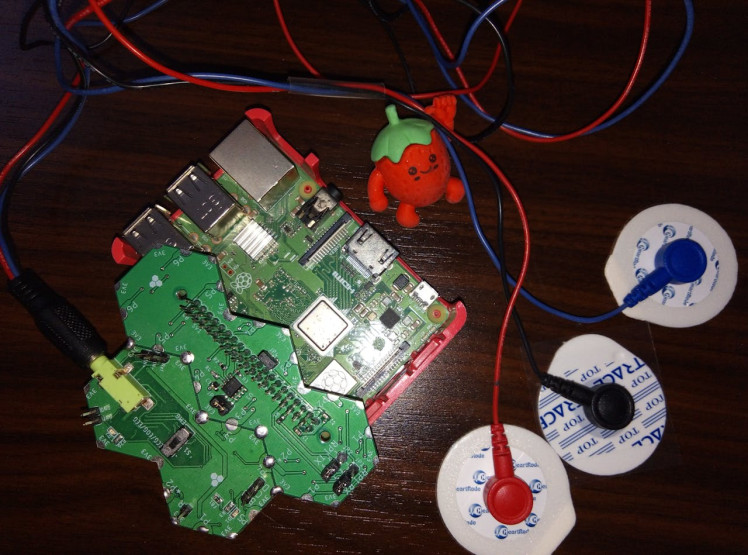
Hexabitz Modules and Raspberry Pi
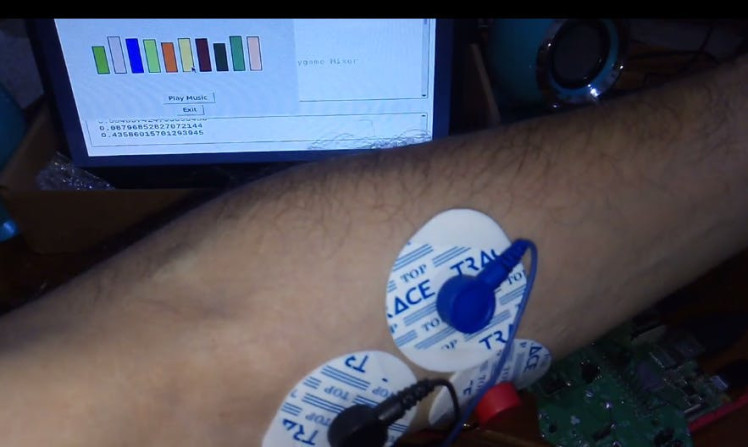
The electrodes
Step 2 : 🖥️ Raspberry Pi Setup:
⭐️Serial Connection Setup:
Python pyserial: This module encapsulates the access for the serial port. It provides backends for Python running on Windows, OSX, Linux, BSD (possibly any POSIX compliant system) and IronPython. The module named “serial” automatically selects the appropriate backend.
Depending on the version of python, there are several commands to install the package pyserial.
sudo apt-get install python-serial python3-serialPython code to read the serial port: This section of code primarily instantiates the serial class, setting it up with all the various bits of information that it needs to make the connection with.
port – This defines the serial port that the object should try and do read and writes over.
baudrate – This is the rate at which information is transferred over a communication channel.
parity – Sets whether we should be doing parity checking, this is for ensuring accurate data transmission between nodes during communication.
stopbits – This is the pattern of bits to expect which indicates the end of a character or the data transmission.
bytesize – This is the number of data bits.
timeout – This is the amount of time that serial commands should wait for before timing out.
import serial
ser = serial.Serial(
               port='/dev/ttyUSB0',
               baudrate = 921600,
               parity=serial.PARITY_NONE,
               stopbits=serial.STOPBITS_ONE,
               bytesize=serial.EIGHTBITS,
               timeout=1
           )
Python struct Module:This module performs conversions between Python values and C structs represented as Python bytes objects. This can be used in handling binary data stored in files or from network connections, among other sources. It uses Format Strings as compact descriptions of the layout of the C structs and the intended conversion to/from Python values.
⭐️ We’ve initialized a serial connection to read sensor data. The ser object communicates with a device connected to /dev/ttyS0 (a serial port).
The sensor data is a 4-byte float value.
Debugging process to compare the sensor value with the value that arrived and processed it with Python code in the Raspberry Pi
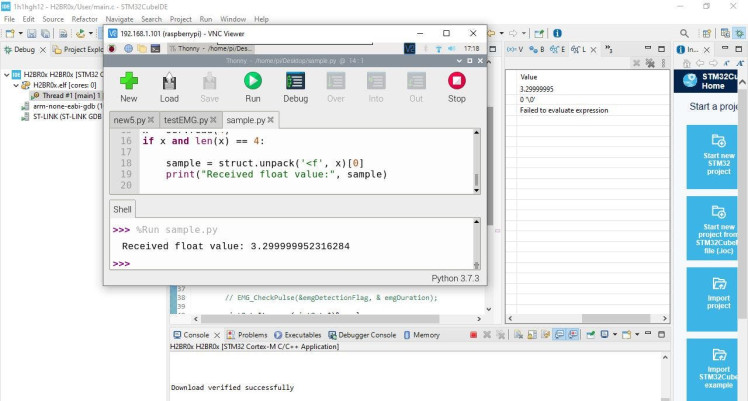
Debugging process to compare the sensor value with the value that arrived and processed it with Python code in the Raspberry Pi
⭐️Volume Control:
The `update_volume` function is designed to adjust the volume of the music based on the sensor value and the previous state of the volume. Here's a step-by-step breakdown:
1. Initialization:
- The function takes two parameters: `value` (the current sensor value) and `previous_value` (the previous sensor value).
- It uses a global variable `volume_state` to track whether the volume should increase, hold, or decrease.
- Another global variable, `hold_start_time`, is used to track when the volume started holding.
2. Initial Volume Setting:
- If `previous_value` is `None`, it sets the initial volume to 0.5 (mid-level).
3. Volume Increase:
- If `volume_state` is 'increase', it increases the volume by 0.3, up to a maximum of 1.0.
- If the volume reaches 1.0, it changes the `volume_state` to 'hold' and records the current time in `hold_start_time`.
4. Volume Hold:
- If `volume_state` is 'hold', it keeps the volume constant.
- It checks if the hold time (2 seconds) has passed. If so, it changes the `volume_state` to 'decrease'.
5. Volume Decrease:
- If `volume_state` is 'decrease', it decreases the volume by 0.1, down to a minimum of 0.0.
- If the volume reaches 0.0, it resets the `volume_state` to 'increase'.
6. Setting the Volume:
- The function sets the new volume using `pygame.mixer.music.set_volume(volume)`.
- It prints the current volume and state for debugging purposes.
7. Return Value:
- The function returns the current sensor value to be used as the `previous_value` in the next call.
This function ensures that the volume changes smoothly based on the sensor input, with periods of holding the volume at maximum before gradually decreasing it.
⭐️Music Playback:
The play_music function opens a file dialog to choose a music file.
It loads the selected music file into Pygame Mixer and starts playing it.
⭐️Visual Effect:
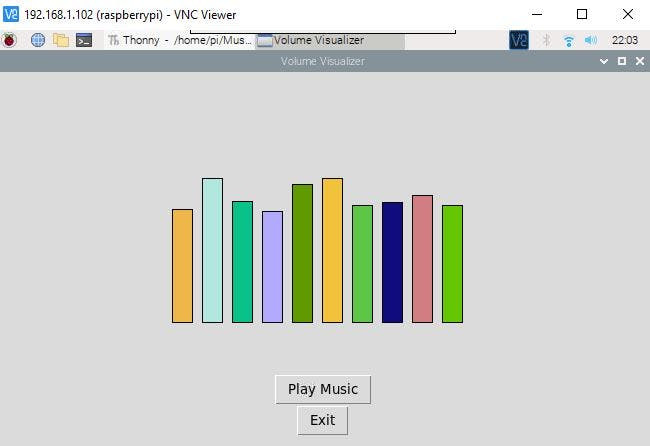
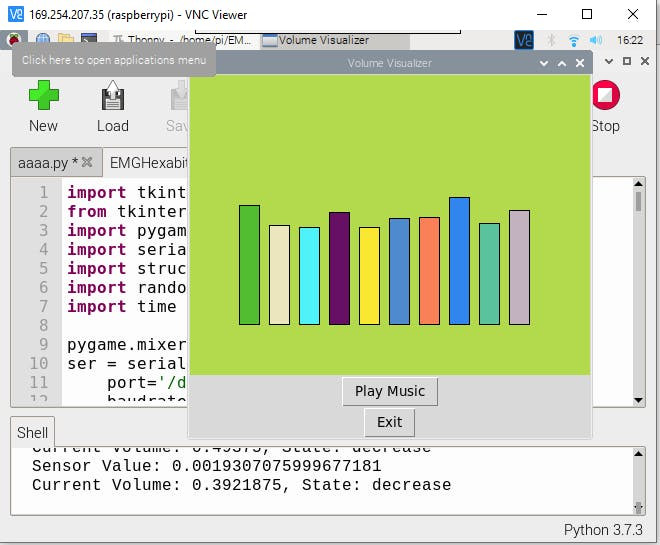
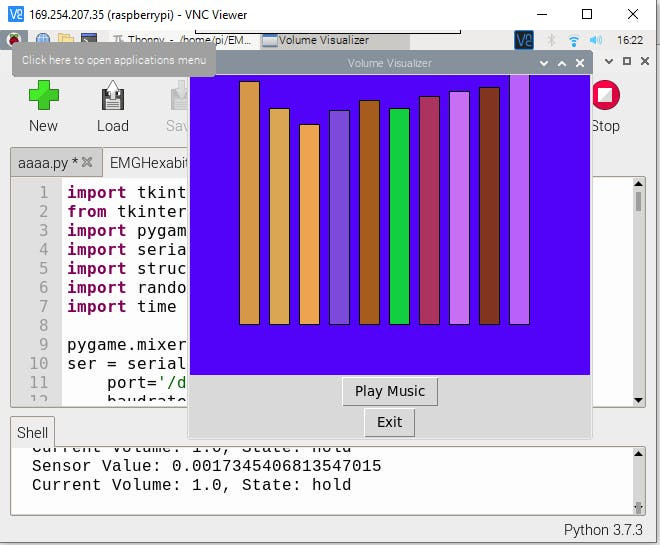
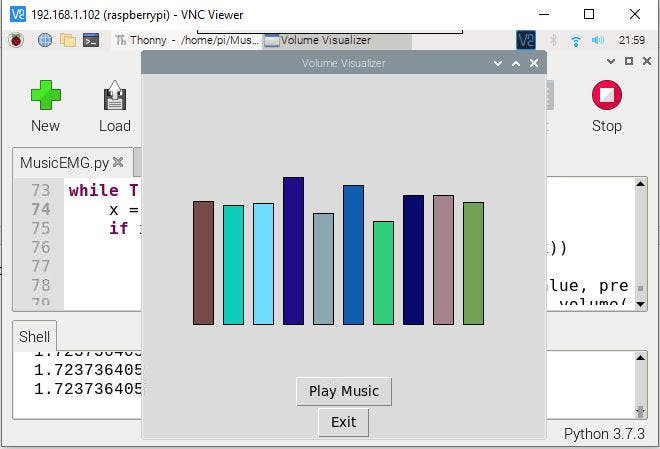
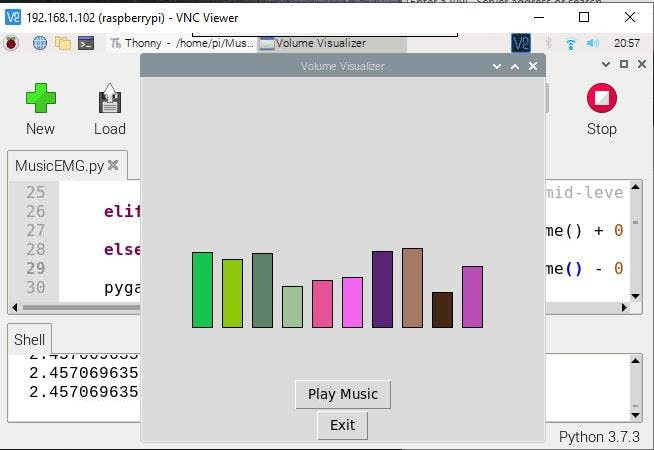
The canvas displays a set of rectangles with random colors. The `update_rectangles` function modifies the height of these rectangles based on the volume level. Specifically, it adjusts the height of each rectangle to reflect the current volume, adding a random factor to create a dynamic visual effect. Additionally, the function changes the color of each rectangle to a new random color every time it is called. This creates a visually engaging representation of the volume changes.
1 / 4 • Visual Effect
Visual Effect

⭐️Main Loop:
The main loop continuously reads sensor data (x) and updates the volume and rectangles accordingly.
The root.update_idletasks() and root.update() lines ensure the GUI remains responsive.
1 / 2 • Tkinter GUI Test
Tkinter GUI Test
GUI Test
✨ Test the System 🎶🎵🎚️💪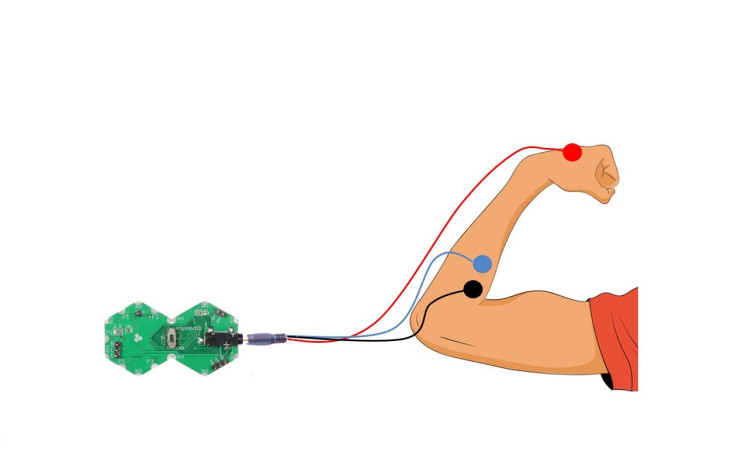
Muscle-Powered Pi Music

✨ You can have interesting applications using this system. Here are some ideas:
Medical Rehabilitation App:
This system can be used in medical rehabilitation applications. For example, it could be part of a muscle rehabilitation device after an injury or surgery.
Patients can track their progress through sound and movement levels.
Sports Training App:
It can be used in sports training applications to measure muscle strength and enhance performance.
Coaches can analyze motion and sound data to improve training techniques.
Artistic Interaction App:
It can be used in art and music applications to create interactive experiences.
For instance, it could be part of a musical instrument that responds to muscle movements.
Gaming App:
Integrate it into motion and sound-based games.
Players can interact with the game through their movements, affecting the sound level.
In conclusion, this project is a great example of how technology can be used to make our lives easier. By using the EMG signal and Hexabitz modules, we can control various devices using our own body movements. This project is a great way to explore the possibilities of this technology and to learn more about how it works.


