


Mr Krab's Tiny Violin

Made by Asthetek / Communication / Kids & Family / Sensors
About the project
Ever wanted to sarcastically empathise with a sob story you dont care about? Then this build is for you. An emote brought to life!
Project info
Difficulty: Easy
Platforms: Arduino
Estimated time: 3 hours
License: GNU General Public License, version 3 or later (GPL3+)
Items used in this project
Hardware components


View all
Hand tools and fabrication machines
Story
Looking to add a touch of sarcasm to your day with the press of a button—or a motion sensor? This fun DIY project lets you build a tiny programmable violin powered by an Arduino. Designed to play a dramatic violin sound when triggered, this gadget combines thermal sensing with audio playback. It’s perfect for comic timing, prank potential, or just having a quirky gadget on your desk. Better yet, it’s fully customisable—meaning you can reprogram it to play any sound you like. In this guide, you’ll learn how to assemble the components, wire everything up, flash the software, and reprogram the sound files using free tools.
Step 1: Prep the Case and Mount Components
Arrange Your Panels
Lay out all six case panels. This will help you stay organised and ensure no parts are missing.
Insert Brackets
Glue small brackets into the holes on the long side panels only. These will hold the lid in place.
Hot Glue the Components
Attach four of the six main components to the designated panels using hot glue. Follow the burned-in guide marks on each panel.
Step 2: Build the Power Cables
Create the Power Line
Cut a female-to-female jumper wire in half and strip both ends.
Twist them together with a cut length of red single-core wire.
Solder the wires and cover the joint with thermal plastic.
Create the Ground Line
Repeat the above process using black wire.
Step 3: Wire the Switch and Resistor
Prepare the Switch
Use your multimeter in continuity mode to identify the correct two contact points.
Solder two wires to the selected contacts.
Add the Resistor
Cut another female-to-female wire (use a colour that stands out, like blue).
Connect one side to a 100k resistor.
Solder the other leg of the resistor to one of the switch wires (not the same side as the female jumper).
Create Two Bundles
Bundle A: The switch wire + resistor combo.
Bundle B: The power cable wires (two females, one male).
Connect bundle A’s switch end to bundle B and seal with thermal plastic.
Step 4: Final Assembly of Electronics
Install the Switch
Insert it from outside the panel, wires first.
Connect Components
Use your “squid wire” bundle to connect:
Ground to the Arduino, thermal sensor, and audio board.
Blue wire to the “GAIN” pin on the audio board.
Red wire (from switch) to the “0” pin on Arduino.
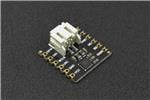
Connect Power (5V)
Male end of red wire to Arduino “5V” header.
Female ends to “VN” on audio board and thermal sensor.
Step 5: Hook Up Signal Wires
Thermal Sensor to Arduino
Use male-to-female cables to connect:
SCL to SCL
SDA to SDA
Audio Board to Arduino
LRC → Pin 3
BCLK → Pin 2
DIN → A6
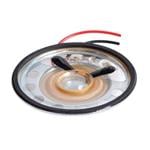
Connect the Speaker
Attach red (positive) and black (negative) wires to the green terminal on the audio board.
Step 6: Upload the Code
Download the Arduino IDE
Install it from the official site.
Open the Code
Download the Tiny Violin code from GitHub (link in the original video description) and open the tiny_violin.ino file.
Connect Your Arduino
Plug in your Arduino MKR Zero and select the correct board in the IDE.
Upload
Click the upload arrow and wait for it to complete.
Add Audio
Copy the included .wav file (e.g., “warriors_me.wav”) to your SD card and insert it into the Arduino.
Step 7: Reprogram Your Violin
Want to change the sound?
Open Audacity
Convert your desired audio clip to WAV with the following settings:
Format: WAV (Microsoft)
Sample Rate: 44,100 Hz
Encoding: 16-bit PCM
Rename and Copy
Make sure the filename matches what’s in the Arduino code. Copy it to your SD card and reboot your violin.
Step 8: Final Assembly
Glue in the Thermal Sensor
Now that you've tested everything, secure the last component.
Assemble the Box
Glue the side panels into a ring, then attach the bottom. Fit the lid and screw it on using M1.7 screws.
Connect the Battery
(Optional: Check the polarity on your battery wires. Some may be reversed!)
You’re Done!
You’ve successfully built your own programmable tiny violin! Play dramatic sounds on cue, or change the file to play any audio effect you want. Let us know how you personalise yours!
Schematics, diagrams and documents
Code
Credits
Related products


Leave your feedback...