

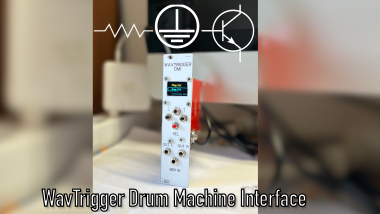
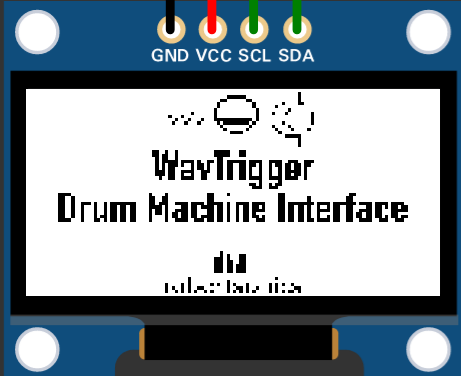
Wavtrigger Drum Machine Interface

About the project
An Arduino interface to turn the Robertsonics/Sparkfun WavTrigger board into a drum machine
Project info
Difficulty: Moderate
Estimated time: 2 days
License: GNU General Public License, version 3 or later (GPL3+)
Items used in this project
Hardware components

View all
Story
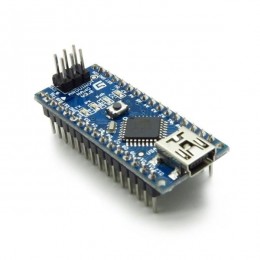
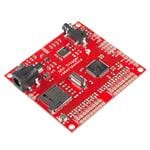
This project turns an Arduino Nano into an interface to make a drum machine using the Robertsonics/Sparkfun WavTrigger board (the OG one)
Demo video:
Features:
- Stereo 44.1 KHz 16 bit CD quality audio
- 16 drum kit pieces
- 14 notes polyphony
- MIDI In
- Sidechain Out
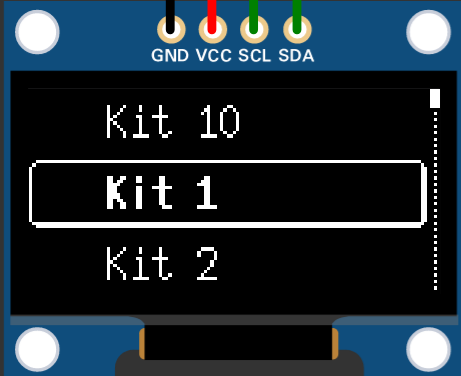
- Up to 10 drum kits can be saved in the Arduino EEPROM and can be recalled from the "Load Kit" menu
Overview
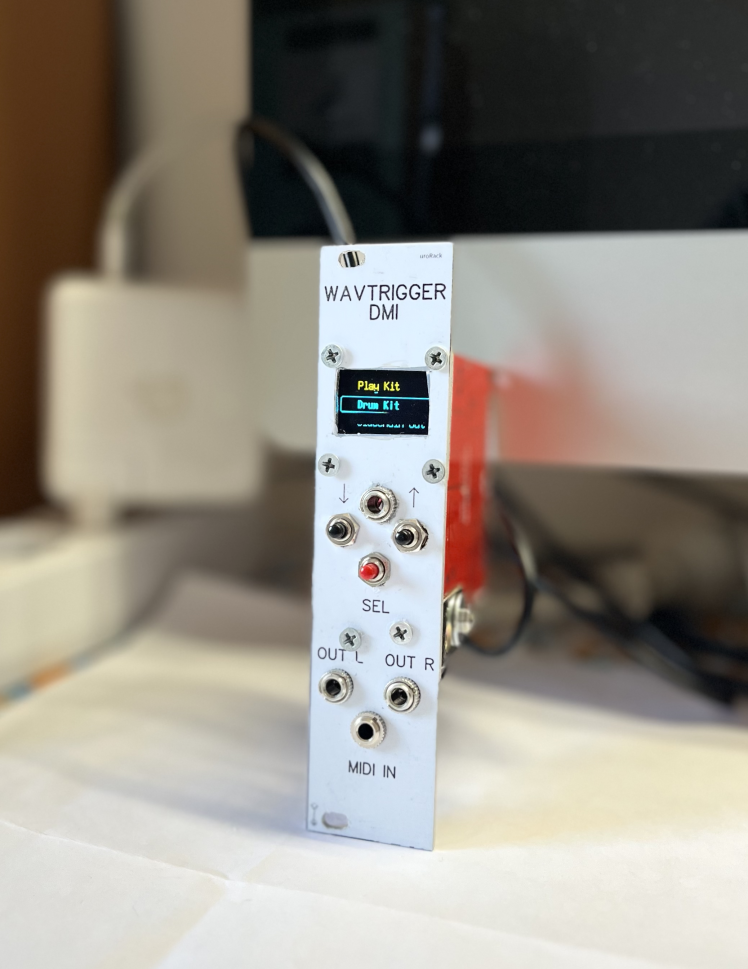
The interface is really simple, I made a menu (inspired by upiir's work) with different sub-menus
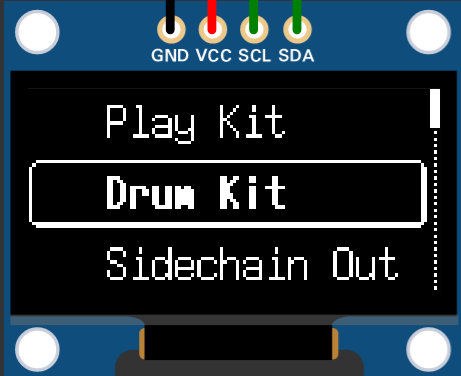
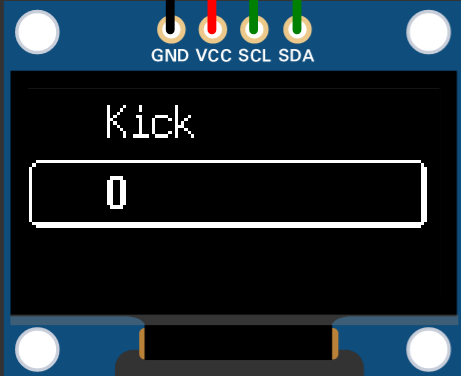
Play Kit
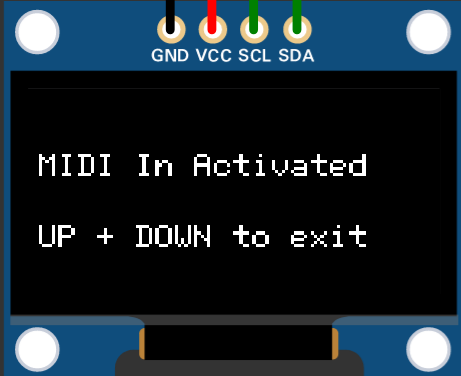
This is where you can make the module play samples by feeding MIDI notes to it.
Standard drum MIDI mapping is used.
  Kick     //C1 --> 36
  Snare    //D1 --> 38
  Clap     //Eb1 --> 39
  C Hat    //F#1 --> 42
  O Hat    //Bb1 --> 46
  Tom 1    //D2 --> 50 (Hi Tom)
  Tom 2    //B1 --> 47 (Low-Mid Tom)
  Tom 3    //G1 --> 43 (Hi Floor Tom)
  Crash    //C#2 --> 49
  Ride     //Eb2 --> 51
  Cowbell  //Ab2 --> 56
  Conga    //Eb3 --> 63 (Hi Conga)
  Flexi 1  // --> 82
  Flexi 2  // --> 83
  Flexi 3  // --> 84
  Flexi 4  // --> 85
Drum Kit
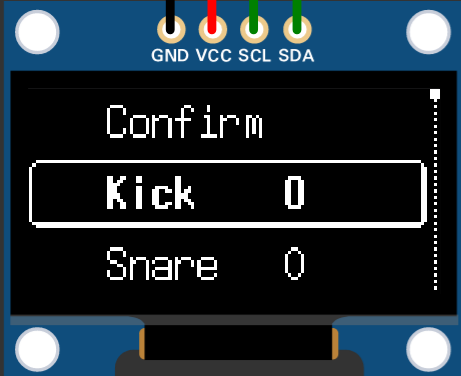
Here you can select the samples, from a minimum of 0 (no sample selected) to a maximum of 2048 (maximum number of samples supported by the Wavtrigger board)
Sidechain Out
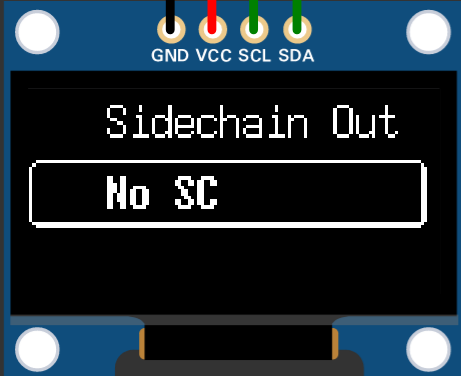
Here you can select which drum out will be your sidechain out. This can be used as an input for compressor and/or ducker modules
Save Kit
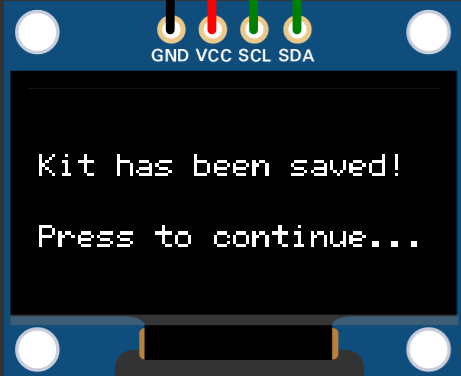
This is the menu section where you can save your kits, choose one of the 10 kits and push "Select". Your kit will be saved in the EEPROM of the Arduino
Load Kit
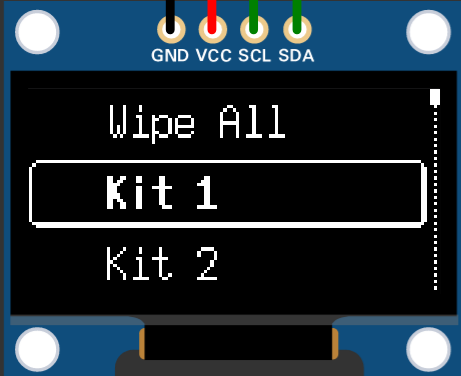

Here is where you can load your saved kits.
There's also another option called "Wipe All" which deletes all the saved kits.

- 1 x Robertsonics/Sparkfun WavTrigger board (the first version)
- 1 x SD Card (I used a 16 GB one)
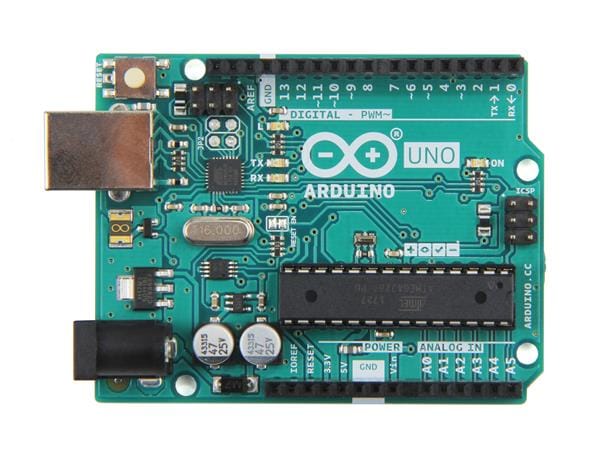
- 1 x Arduino Nano
- 1 x SSD1306 128x64 OLED Screen
- 3 x 3.5mm female mono jacks (Out L, Out R and Sidechain Out)
- 1 x 3.5mm female stereo TRS jack (MIDI In, a standard 5 pin din can be used as well)
- 3 x NO momentary push buttons
- 1 x 6N138 Optocoupler
- 1 x 220 Ohm Resistor
- 1 x 4.7KOhm Resistor
- 1 x 1KOhm Resistor
- 1 x 1N914 Diode
- 2 x BAT43 diodes (these two combined with the 1K resistor are used to protect the Arduino's pin, as in Hagiwo's circuits)
Thanks to:
- upiir, for the menu implementation -> https://github.com/upiir/arduino_oled_menu
Schematics, diagrams and documents
CAD, enclosures and custom parts
Code
Credits
Related products


Leave your feedback...