

M5stack Core2 And Barometric Pressure Unit Using Uiflow 🌤️

Made by CETECH11 / Environmental Sensing / Sensors
About the project
Will guide you to integrate the M5Stack BPS unit with M5Stack Core2
Project info
Difficulty: Easy
Platforms: M5Stack
Estimated time: 1 hour
License: GNU General Public License, version 3 or later (GPL3+)
Items used in this project

Story
In this project, we'll integrate the M5Stack Barometric Pressure Unit (QMP6988) with the M5Stack Core2 using the UIFlow graphical programming language. This setup will allow us to measure atmospheric pressure and temperature, and display the data on the Core2's screen. Let's get started!
Materials Needed:- M5Stack Core2
- M5Stack Barometric Pressure Unit (QMP6988)
- Grove Cable
- USB-C Cable
- Computer with Internet access

You must check out PCBWAY for ordering PCBs online for cheap!
You get 10 good-quality PCBs manufactured and shipped to your doorstep for cheap. You will also get a discount on shipping on your first order. Upload your Gerber files onto PCBWAY to get them manufactured with good quality and quick turnaround time. PCBWay now could provide a complete product solution, from design to enclosure production. Check out their online Gerber viewer function. With reward points, you can get free stuff from their gift shop. Also, check out this useful blog on PCBWay Plugin for KiCad from here. Using this plugin, you can directly order PCBs in just one click after completing your design in KiCad.
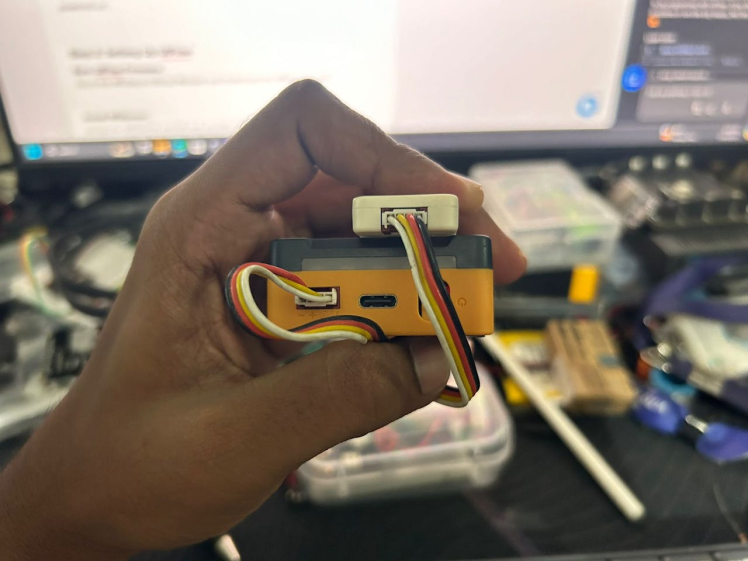
Step 1: Setting Up Your HardwareConnect the Barometric Pressure Unit to the Core2:Use the Grove Cable to connect the Barometric Pressure Unit to one of the Grove ports on the M5Stack Core2. The Grove ports are located on the side of the Core2.
Power Up the Core2:Connect the Core2 to your computer using the USB-C cable. Ensure the Core2 is powered on.
Step 2: Setting Up UIFlowBurn UIFlow Firmware:Go to the M5Stack Official Website and download the M5Burner tool.
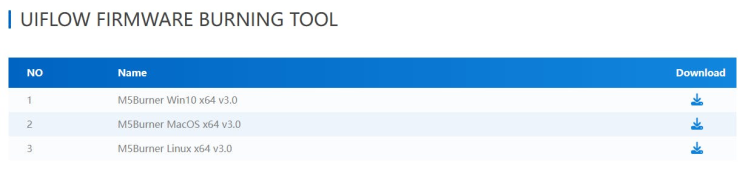
Install M5Burner:Unzip the M5Burner archive and double-click the executable file to install it on your computer.

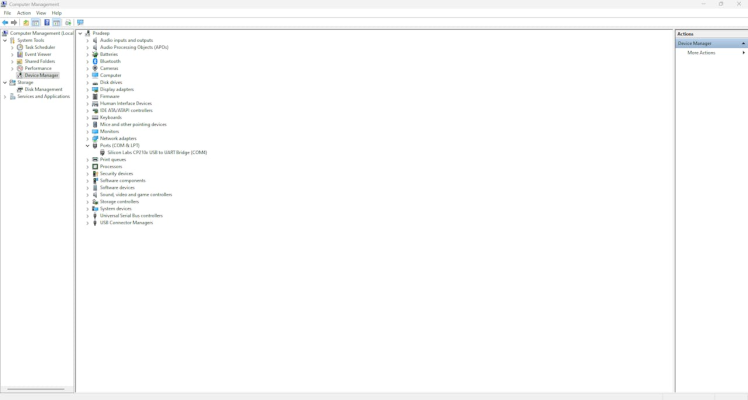
Check the COM Port:Open the Device Manager (Windows) or System Information (macOS) to identify the COM port assigned to your Core2.
Open M5Burner:Launch the M5Burner tool on your computer.
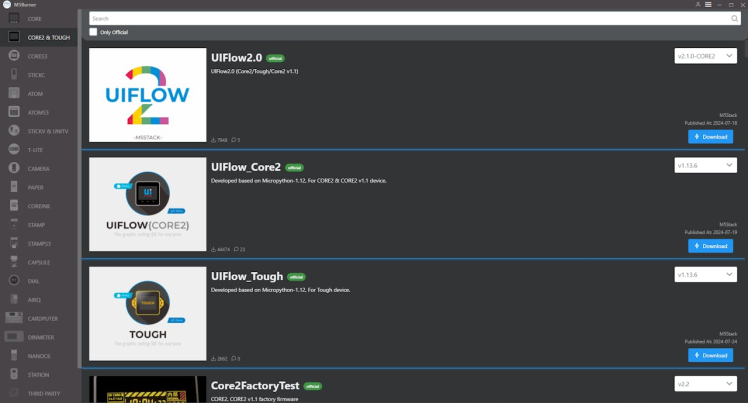
Select the FirmwareIn M5Burner, select the latest version of the UIFlow firmware for M5Stack Core2.
Configure the Settings:Select the correct COM port and set the baud rate.
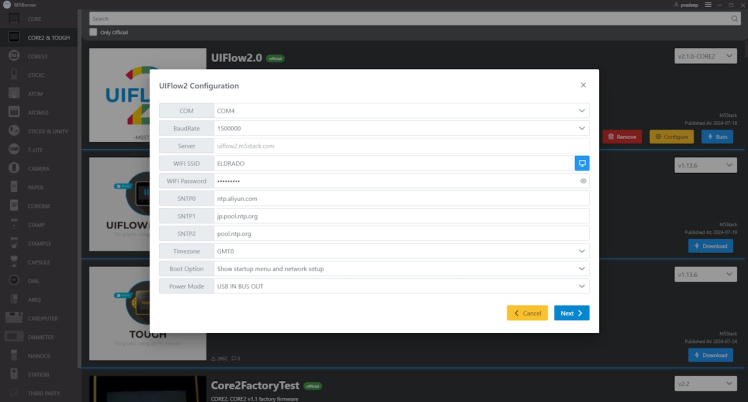
Burn the Firmware:Click the Burn†button to start the firmware burning process. Wait for the process to complete.

Restart the Core2:After burning the firmware, restart your M5Stack Core2 by pressing the red button.

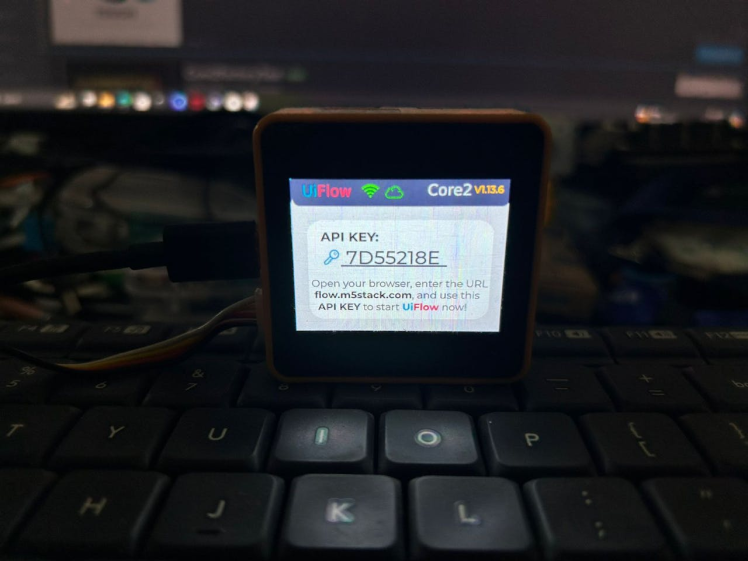
Connect to Wi-Fi:Follow the on-screen instructions to connect the Core2 to your Wi-Fi network. You may need to connect to the Core2's hotspot and configure the Wi-Fi settings via a web browser.

Obtain API Key:Once connected, the Core2 will display an API Key and a QR code. Note down the API Key for later use.
Access UIFlow:.Open your web browser and navigate to UIFlow. Create an account or log in if you already have one.
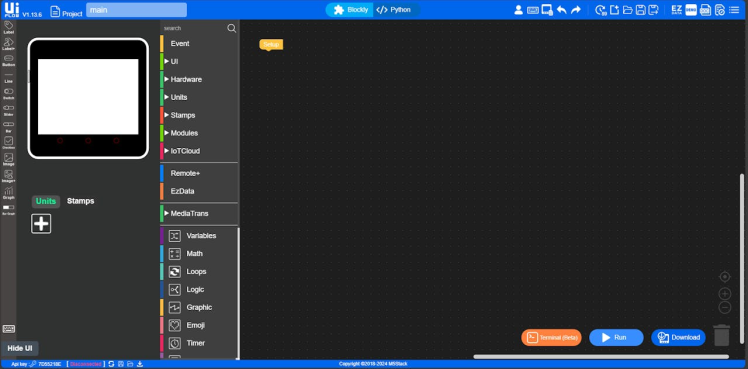
Select Your Device:In UIFlow, select the M5Stack Core2 as your device.
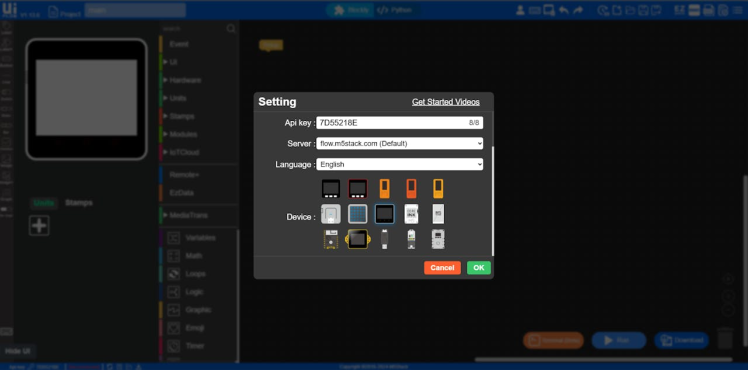
Connect to Your Device:
Click the settings button in the top right corner of the UIFlow page, enter the API Key obtained from your Core2, and click OK†to save
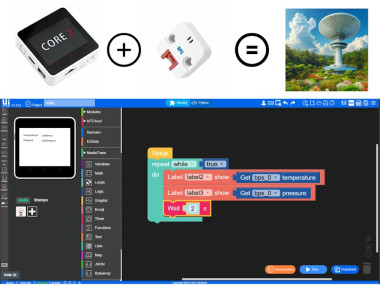
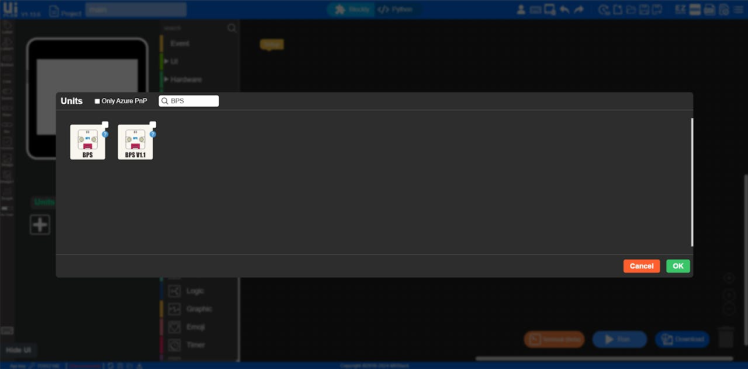
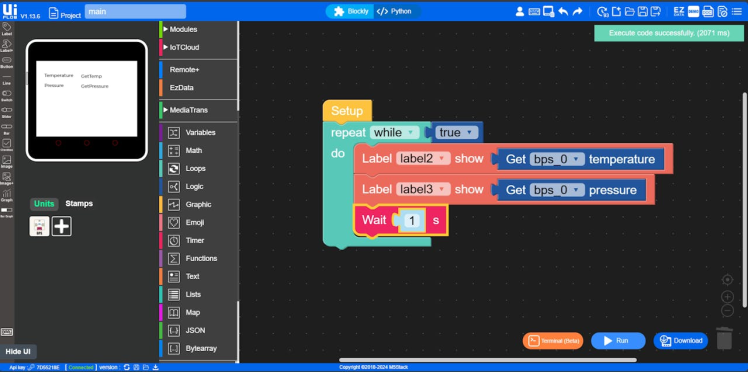
Step 3: Programming with UIFlowInitialize the Barometric Pressure Unit:In the UIFlow interface, go to the Units†section and drag the Barometer†block into the workspace. This block initializes the Barometric Pressure Unit.
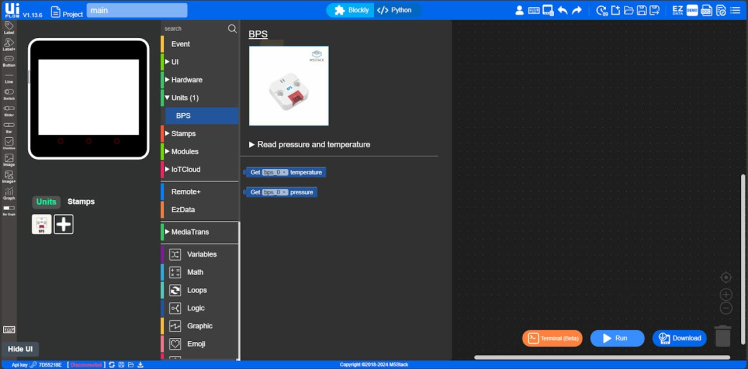
Read Pressure and Temperature:Drag the Get Pressure†and Get Temperature†blocks from the Barometer†section into the workspace. These blocks will read the atmospheric pressure and temperature from the sensor.
Display Data on the Screen:Go to the Display section and drag the Label block into the workspace. Use this block to create labels to display the pressure and temperature readings on the Core2 screen.
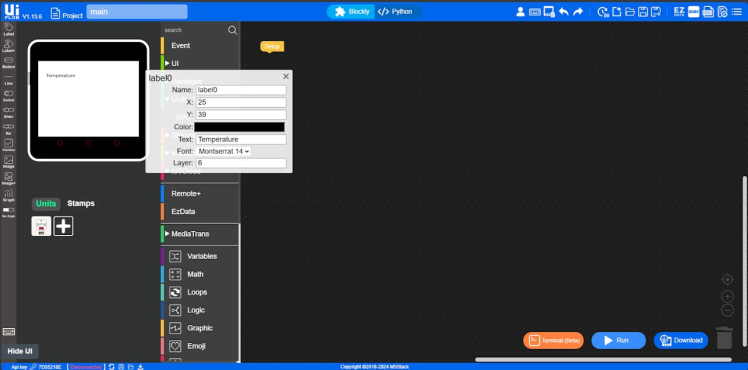
Repeat the same step to add 3 more labels.
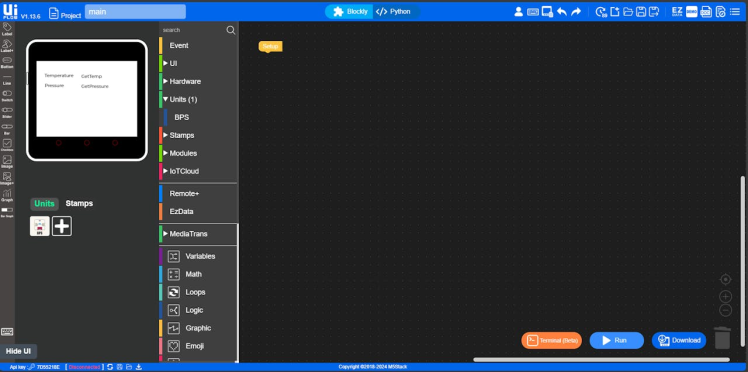
UI Development:
Now click on UI and here you can see all the label-related stuff.
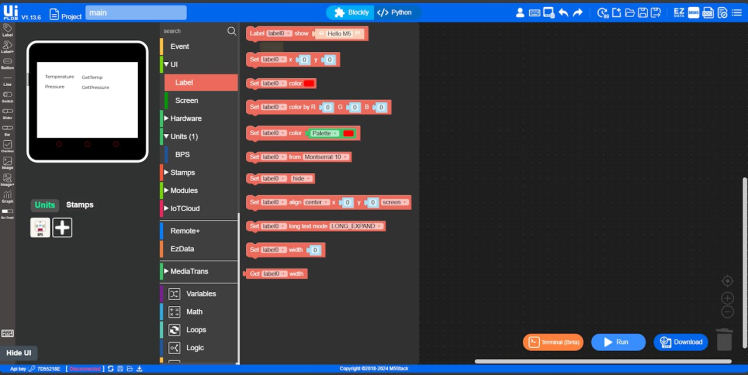
Just add these two cells and hit run.
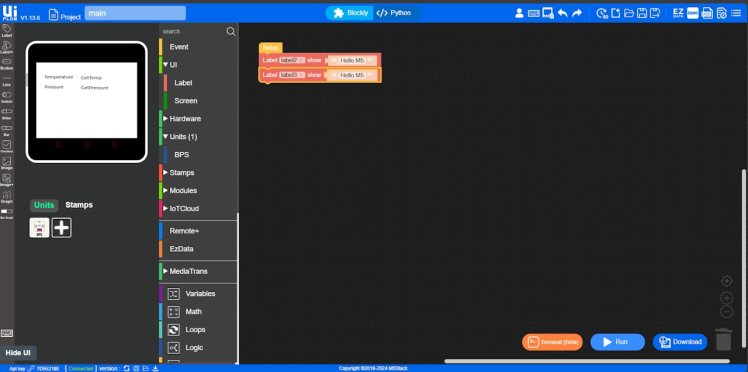
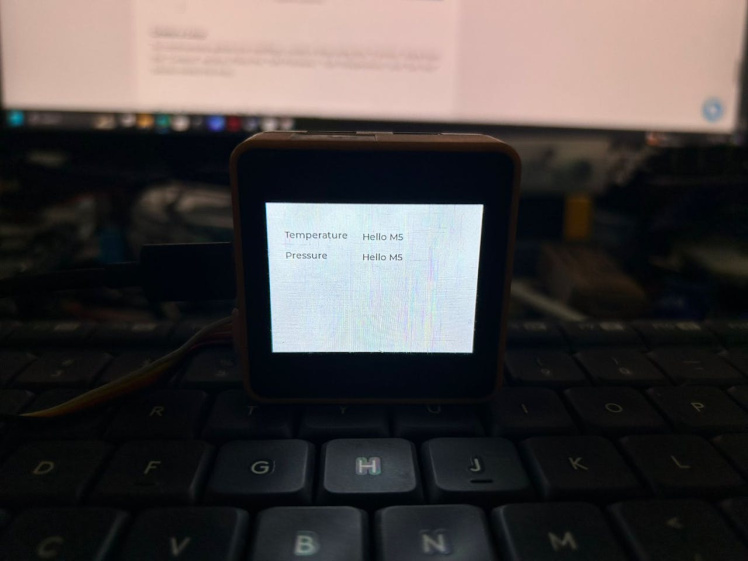
You will see this.
Display sensor data:
Now we can use the BPS unit options here.

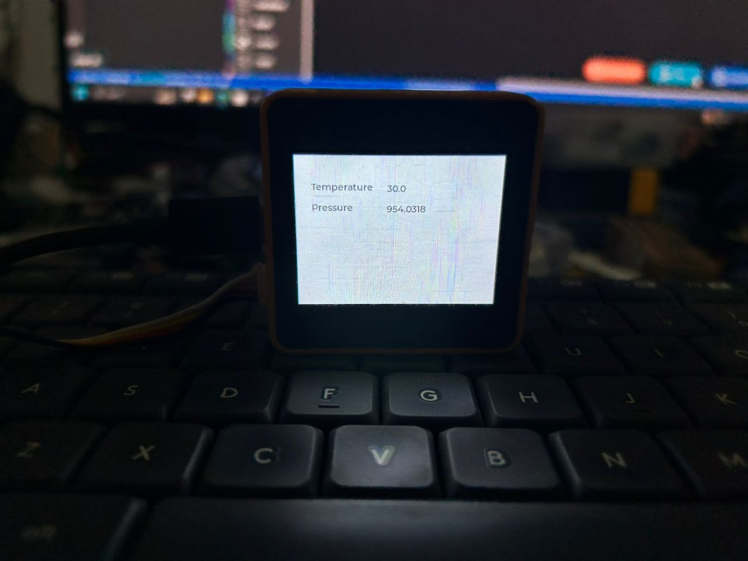
then hit run you will see this response in the M5Stack Core2.

Create a Loop:To continuously update the readings, create a loop and place the Get Pressure, Get Temperature, and Set Text blocks inside this loop.

add some time delay to avoid data transmission issues.
Test the Setup: the program is uploaded, the Core2 should start displaying its screen's atmospheric pressure and temperature readings. You can now monitor the weather conditions in real time! iexcl;
Step 4: Enhancements and CustomizationAdd More Sensors:You can enhance your weather station by adding more sensors, such as humidity or light sensors, to gather additional environmental data.
Data Logging:Use the Core2's storage capabilities to log the sensor data over time. This can help you analyze trends and patterns in the weather data.
Cloud Integration:Integrate your weather station with cloud services to remotely monitor the data. UIFlow supports various cloud platforms for data storage and visualization.
Conclusion:Congratulations! deg; You've successfully built a weather station using the M5Stack Core2 and the Barometric Pressure Unit. This project helps you understand the basics of atmospheric pressure and temperature measurement and introduces you to the powerful UIFlow graphical programming environment. Happy coding! raquo;
Credits
Related products


Leave your feedback...