Led Message Board
About the project
Make a DIY message board out of WS2812b LED strips and a raspberry pi
Project info
Items used in this project
Hardware components
Story
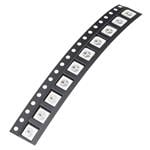
Here's an instructional video on how to make a DIY message board using a raspberry pi and ws2812b led strips. ws2812b leds allow you to control each individual LED based on a data signal that changes based on timing. The raspberry pi sends a data signal to the led strips to display a message to the screen based on the program I wrote in Python: https://github.com/tmckay1/message_board. To control the LEDs from the raspberry pi you need to step up the voltage from the data pin output since it outputs at 3.3v, and the LED strip expects a 5v signal. After configuring the circuit to step up the voltage, you need to install some dependencies to the program I wrote. And that's it. While the code is written for a raspberry pi you could easily adapt it yourself to fit an arduino. Now you can display a message to the board, a great centerpiece for a living room. If you stay tuned, there will also be a series on connecting this to a web service so you can control this from a website.


Leave your feedback...