Items used in this project
Hardware components
Story
Step 1: Background Theory

The Technology behind this project is IOT (Internet ofThings).The above fig. shows basic block diagram shows working of Internet of Things based systems where hardware system contains sensor measure the respective parameters, controllers, required modules which further processed and upload the collected >
In this, we have used Arduino mega as microcontroller unit.All the components and modules are connected as give in a circuit diagram.
For this system we required two types of power supply 5V or 3.3 V because of some components are operated in 3.3 V.All the sensors,which generates the analog output is connected to an analog pin of Arduino's analog pins.And Digital sensors like(Temp.,Humidity) there are connected to digital pins.The Ethernet Shield (HANRUN) is used in this system for internet connectivity.It can be replaced by GSM or Wi-Fi module also.
The analog/digital >
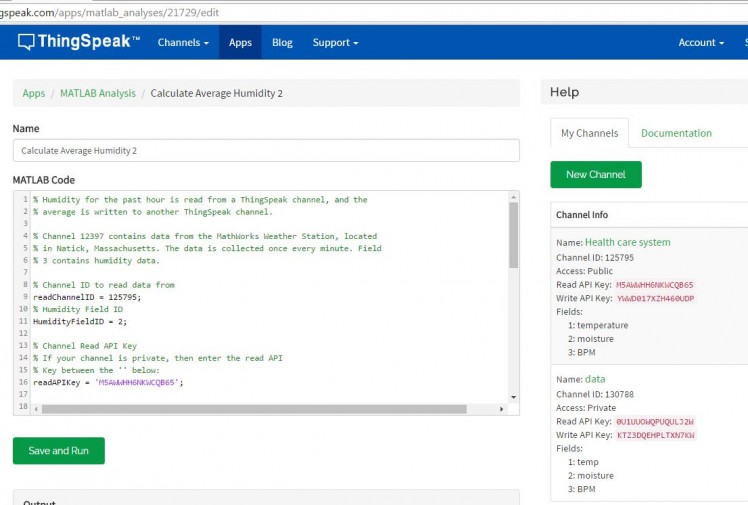
In ThinkSpeak Cloud we can analyze the >
Application Working
· This application can be used by DOCTORS and PATIENTS:
Doctor
In the application, doctor can register themselves with their personal information of their clinic, address, field, etc. and consists of a unique doctor id through application after registration. It can check the status of their entire registered patient in the app. Status means the data of every single patient which is connected to that particular doctor. Each doctor can have multiple patients and every patient has their own unique patient id. This unique id will help doctor and patient to connect with them and doctor can track or check the record of every patient.
Patient
Patient will be provided with the unique id and password while registration of hardware device. Patient will able to see their al personal details and their all data of different fields in the app. This will consists of all historical data till the present date which can be filter according to their requirements. Patient can anytime view their health status data of different field anywhere anytime.
Login Credentials:
Doctor:
Doctor will require 2 credentials for login:
· Doctor Id
· Password Patient:
Patient will require 2 credentials for login:
· Patient Id
· Password
Regisration Credentials:
Doctor:
Doctor need to fill their personal details like:
· Password, Clinic name, Address, profile, etc.
User Interface:
Doctor Interface:
When the doctor will successfully signed in to the app , it will direct to main activity which will consists of navigation drawer and the name of the patient in their main screen.
Navigation Drawer:
(Intro) - The navigation drawer is a panel that displays the app‟s main navigation options on the left edge of the screen. It is hidden most of the time, but is revealed when the user swipes a finger from the left edge of the screen or, while at the top level of the app, the user touches the app icon in the action bar.
In our app, this drawer will consists of the fields which will consists of data at each field respectively. After clicking on any field, the respective data of that field will be displayed to the doctor of a selected patient.
A simple and designed data will be displayed to the doctor in their activity which will consist of all the historical data of every field of every connected patient.
Patient Interface:
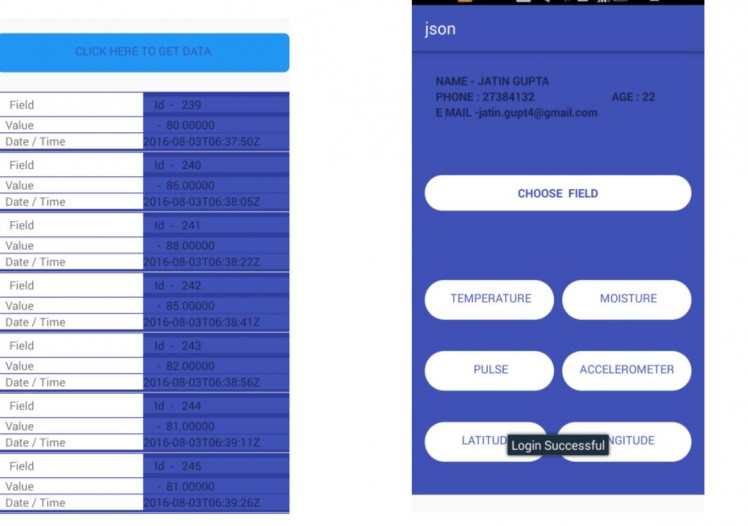
After successfully login of patient, it will direct to main screen which will consists of the personal information of a patient and ask for a selection of field to get the data of a particular field.
After selecting the particular field, the all historical data will be shown to the patient on their screen in a design view which will also allow patient to filter the date and time according to their requirements. This data can be share with any of their relatives or family members.
Andoride app is developed by JATIN GUPTA (Application Virtical for this Project)
Step 8: CONCLUSION AND FUTURE ENHANCEMENTS
Future enhancements:
For more reliable and low complexity of the system the controller section can be replaced by other Advanced Microcontrollers.
The applications can be added by adding the more modules and sensors.
Accuracy can be increased by using high sensitive sensors and more reliable modules.
For more security and functionality in the cloud can be increased by using paid clouds or won cloud.
Using the X-bee Module we can create a wireless zone and this device may communicate with the other devices also in big hospitals.
Ethernet Module can be replaced by Wi-Fi module and GSM module for Internet Connectivity.
For simpler GUI we can draw Sketches and Graphs in the Mobile applications.
Conclusion:
IOT platform provides a simple environment to connect the hardware devices through the cloud and users. Then by using IOT we can make any type of devices by different type of sensors and modules.
This project is useful for Patient who required regular check the parameters.
The previous data storage facility provides to the doctors to better treatment environment by this friendly device.
The simpler working and Mobile app GUI provides the friendly connection between the devices to users.
As device also provides the location updates, body condition status and medicine alerts, it is very useful for take care the patients by doctors and relatives.
Finally we can say, this is a complete healthcare device.
Step 9: About Project Team :
This project had completed during our summer internship 2016 under the CONSORTIUM FOR INNOVATION,DELHI,INDIA.
For Completion this project there are different verticals from each domain:
Team Members:
1) Sachin Kr. Verma (Hardware Vertical)
Student - ECE,Dronacharya Group of Institutions,Gr. Noida
Mobile: +919015238515 ,Mail: vsachin094@gmail.com
Role: Reseach Work,Hardware Simulation,PCB Design,Testing
2)Saurabh Jiwal (Coding Vertical)
Student -ECE,Dronacharya Group of Institutions,Gr, Noida
Role: Coding,Cloud Connectivity,Testing Software
3) Jatin Gupta (Mobile App Vertical)
Student-CSE,DGI,Gr. Noida
Role: Mobile app development,Research work
Find the attached code of this project.
Thanks to all .........
Kindly give your valuable suggestions about this projects.
Vote for this project...........


Leave your feedback...