
Home Assistance with ESP32 Dev Kit
About the project
Will guide you to integrate the ESP32 Dev kit with Home Assistance
Project info
Difficulty: Easy
Platforms: Home Assistant, Espressif
Estimated time: 1 hour
License: GNU Lesser General Public License version 3 or later (LGPL3+)
Items used in this project
Story
The ESP32 Dev Kit is a versatile microcontroller that has become a favorite among tech enthusiasts for its powerful features, including Wi-Fi and Bluetooth capabilities. When paired with Home Assistant, an open-source home automation platform, the ESP32 can transform your living space into a smart home paradise. This blog will guide you through integrating the ESP32 Dev Kit with Home Assistant, unlocking endless possibilities for automation and control.
Why Choose ESP32 and Home Assistant?The ESP32 is a cost-effective, feature-rich microcontroller that supports various sensors and devices. Home Assistant, on the other hand, is a robust platform that allows you to control and automate smart devices from a single interface. Together, they offer:
- Flexibility: Customize your smart home setup to suit your needs.
- Cost-Effectiveness: Build powerful automation systems without breaking the bank.
- Local Control: Keep your data private by running everything locally.
Before diving into the integration, gather the following:
- ESP32 Dev Kit: The microcontroller you'll be programming.
- Home Assistant: Installed and running on a Raspberry Pi, PC, or server.
So, in this blog, I'm going to show you how you can make your first 3D-printed case for ESP32 for Home Assistance.
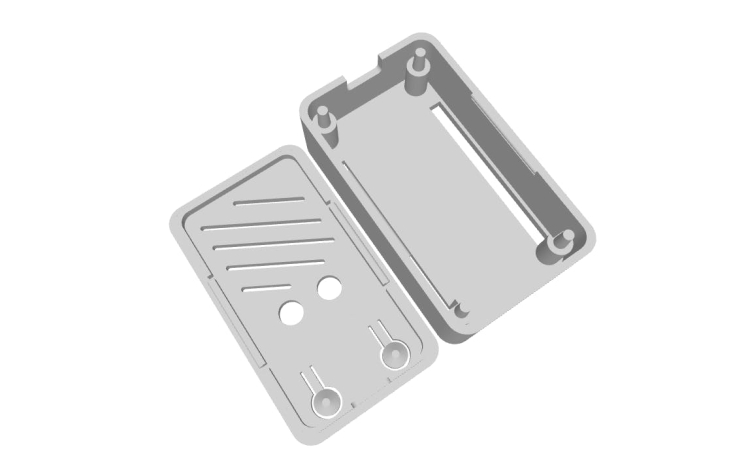
3D Model Development:First, we need a better 3D print case for our project and that should contain lots or holes to get better air ventilation.
Here is my 3D mode, I have referred to this design from Thingiverse and this is one of the simple and good case with better airflow.
As you can see here there are lots of airflow vents.
Next, we need to print our model but the issue is as a beginner, I'm not sure about print settings and other parameters. So, I just used JUSTWAY, you may have heard the same name PCBWAY. But JUSTWAY is service provider an the are providing all the hardware prints like 3D and CNS.
Unlock the Future of Manufacturing with Justway's 3D Printing Service!Experience the pinnacle of innovation and efficiency with JUSTWAY's top-tier 3D Printing Service. Whether you're looking to create detailed prototypes, functional parts, or custom designs, we have you covered.

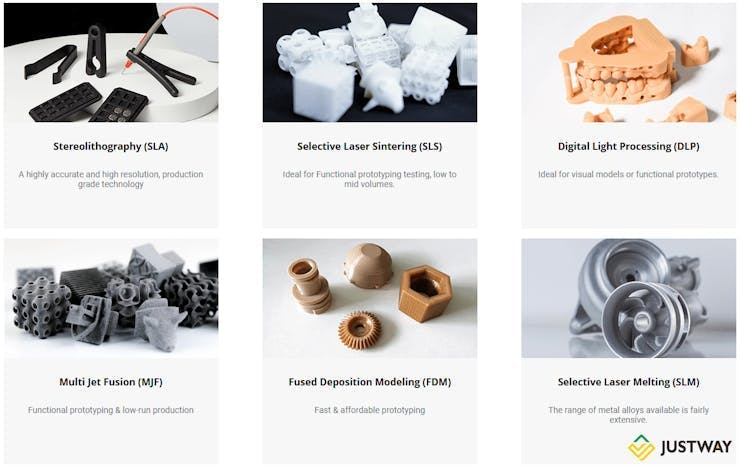
JUSTWAY's cutting-edge technologies, including SLA, SLS, DLP, MJF, FDM, and SLM, ensure precision and quality in every print. Choose from a wide range of materials such as resins, nylons, metals, and more to bring your vision to life.
Benefit from instant quotes, seamless online order tracking, and professional post-processing services. With rapid production and reliable delivery, JUSTWAY Is your go-to partner for all your 3D printing needs.
But wait, there's more! JUSTWAY also offers an array of other top-notch metal 3D printing services to complement your manufacturing requirements:
- CNC Machining Service: High-precision milling, turning, and electrical discharge machining (EDM) for intricate parts.
- Sheet Metal Fabrication Service: Custom sheet metal parts tailored to your specifications.
- Injection Molding Service: High-quality, mass-production parts made from various materials.
- Surface Finishing Service: Enhance the appearance and durability of your parts with professional finishing options.
Elevate your manufacturing game with JUSTWAY—where innovation meets perfection!
How to Place an Order on JUSTWAY for Your 3D ModelOrdering your 3D model on JUSTWAY Is simple. Start by preparing your 3D CAD file in an accepted format.
Step 1: Visit the JUSTWAY website, sign in or create an account, and upload your design in the "Get Instant Quote" section.

Step 2: Select your manufacturing process, customize your order with the desired materials and finishes, and receive an instant quote.
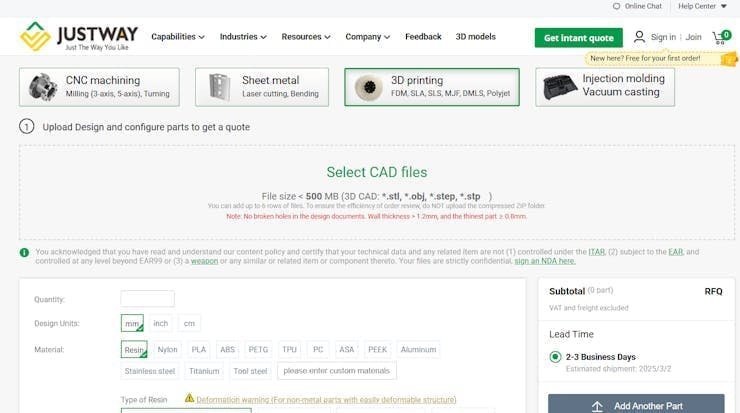
Step 3: Confirm the details,
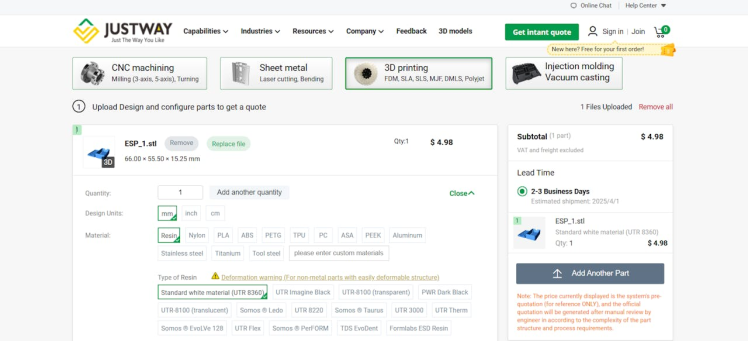
Step 4: You can review the design files.
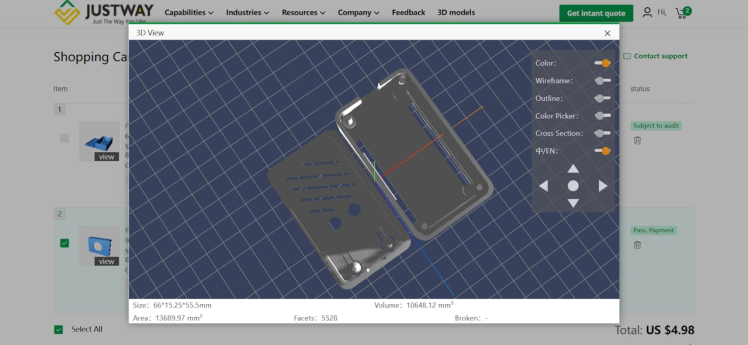
Step 5: Review the order details and make a payment.
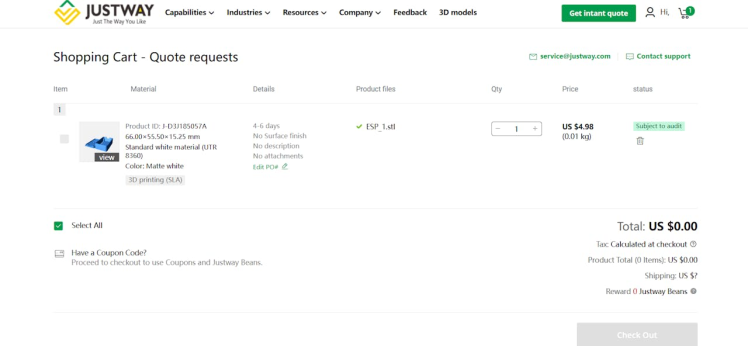
Once your order is placed, JUSTWAY will ensure high-quality production with strict quality control checks. Expect your 3D model to be delivered within the specified lead time. Enjoy the convenience and efficiency of bringing your 3D model to life with JUSTWAY!
Final Product and Assembly:JUSTWAY's service has been exceptional. Their customer support team was responsive and helpful, ensuring all my queries were resolved quickly. The delivery was also on time, and the packaging was excellent
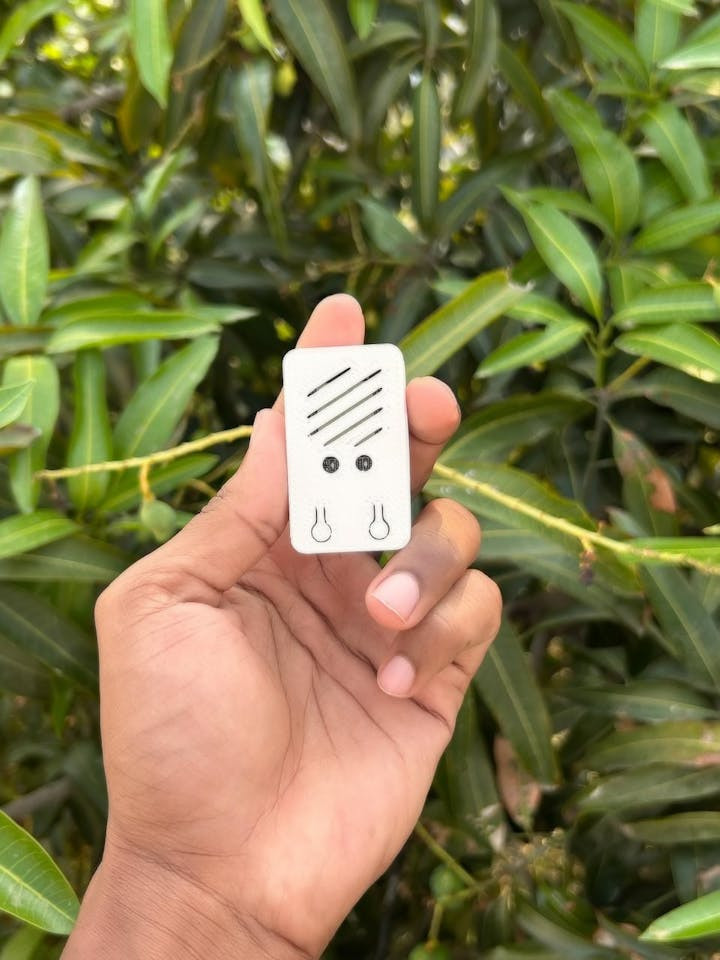
My experience after placing the order was smooth and satisfying. I was kept updated about the status of my order through timely notifications, and the product arrived in perfect condition. The entire process was hassle-free.

You just need to put your ESP32 inside the case and attach the front panel. That's all no screw is needed
Step-by-Step Integration1.Set Up Home Assistant
Install Home Assistant on your preferred device. Follow the official guide for installation.
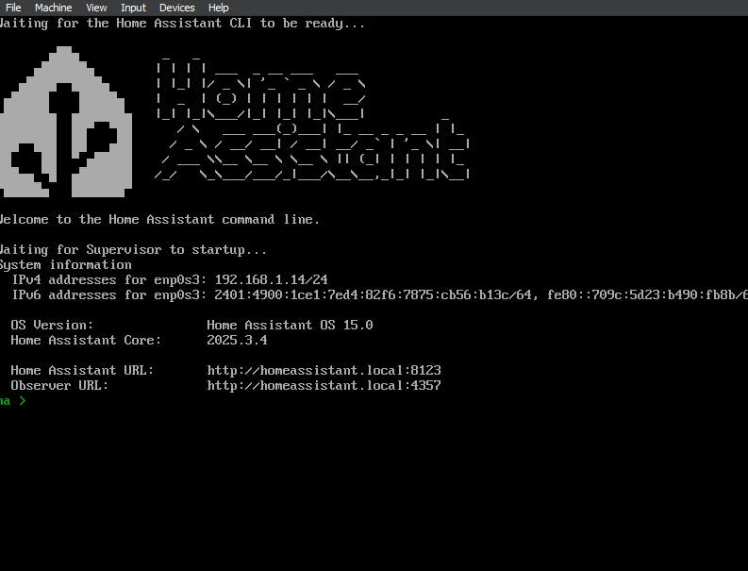
Once installed, access the Home Assistant dashboard via your browser.

2.Install ESPHome
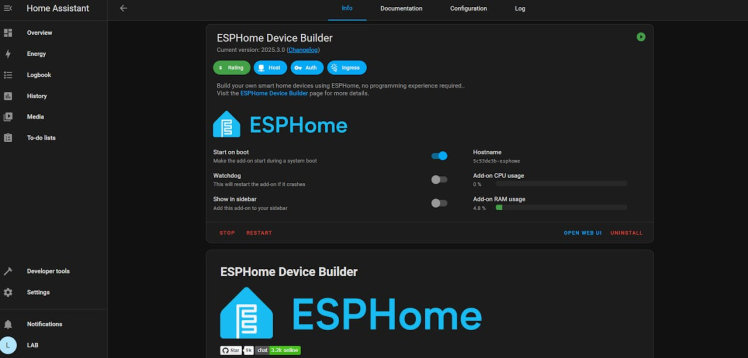
In-Home Assistant, navigate to Settings > Add-ons > Add-on Store.

Search for ESPHome, install it, start the ESPHome add-on, and open its web interface.
3.Connect and Configure ESP32
Plug the ESP32 Dev Kit into your computer using a USB cable.
In the ESPHome interface, click New Device and follow the prompts:
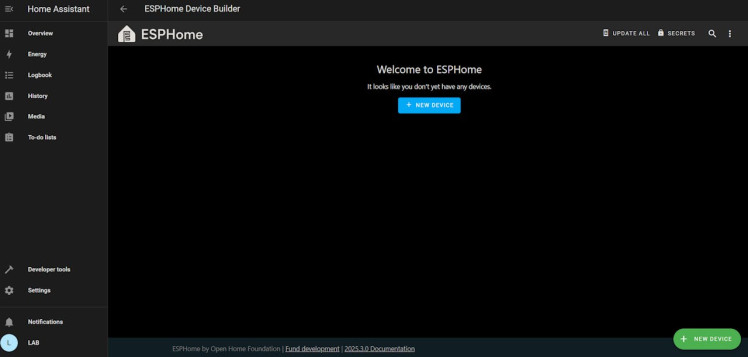
Name your device.
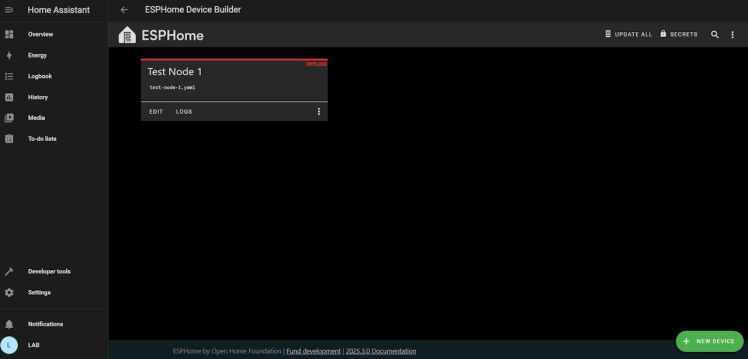
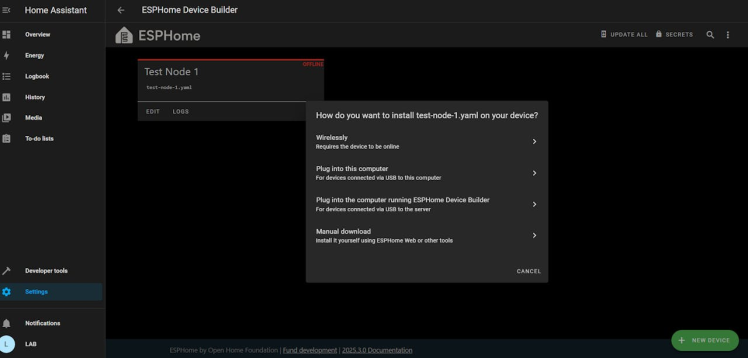
Download the configuration file and flash it to the ESP32 using the ESPHome tool.
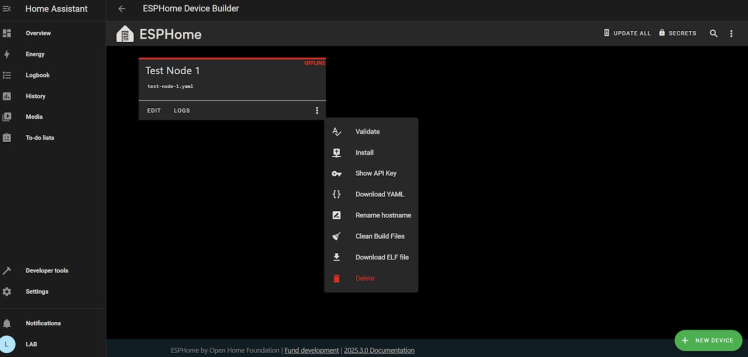
Click on manual, download, and download the bin file.
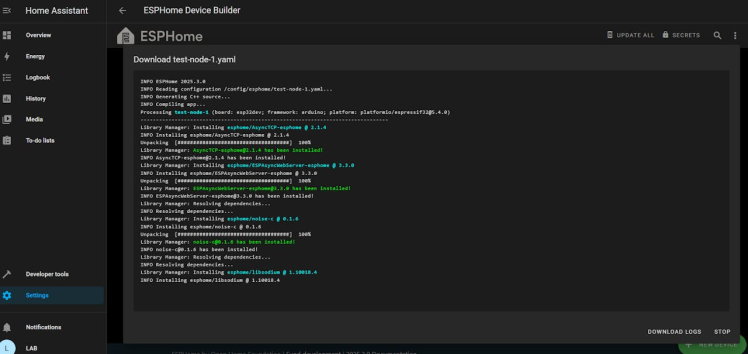
Add ESP32 to Home Assistant
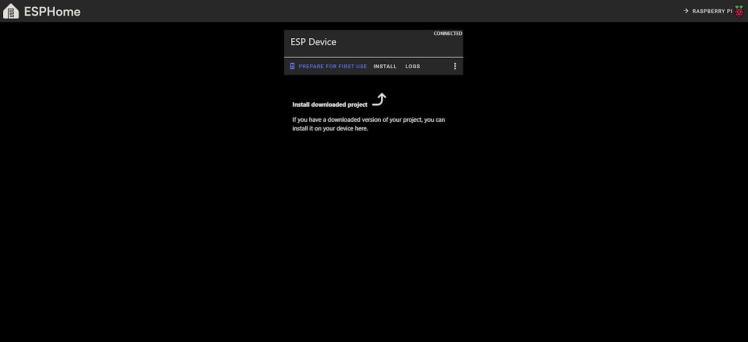
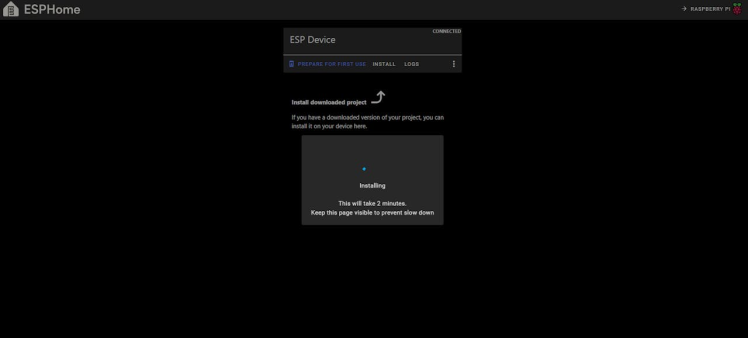
Once you have downloaded the bin file open the ESPHome Web and connect and flash the bin file.
Then click on install
Next, select the bin file.
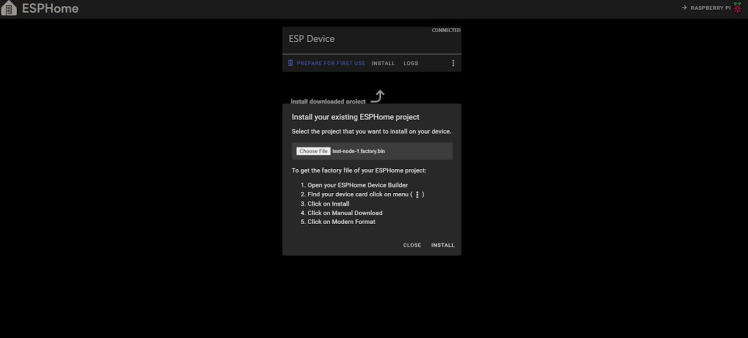
It will erase and flash the bin.
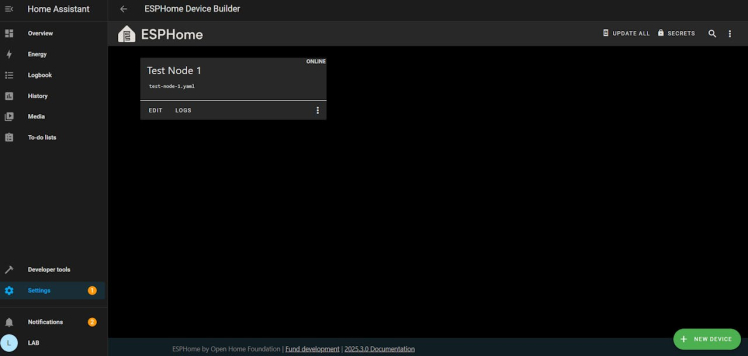
You can see the New device which is online in the Home Assistance.
Customize Your Automation
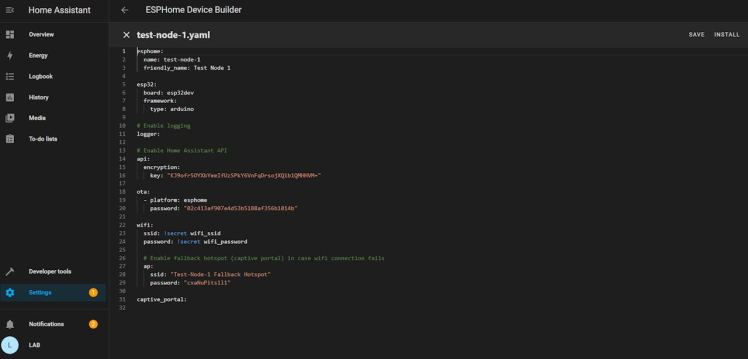
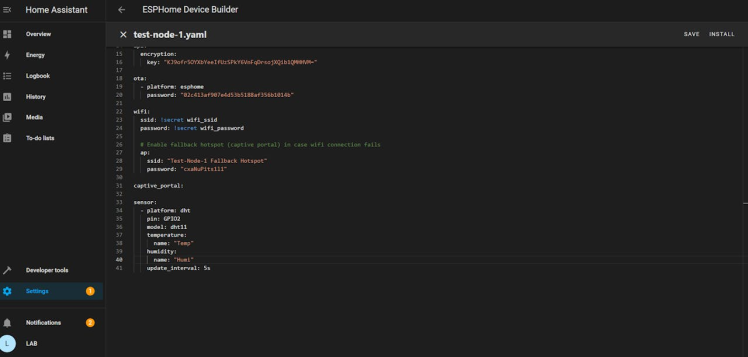
Use YAML configuration files in ESPHome to define the behavior of your ESP32.
For example, you can connect and configure a temperature sensor to send data to the Home Assistant.
Here are some exciting projects you can build with ESP32 and Home Assistant:
- Smart Lighting: Control LEDs or light strips based on time, motion, or voice commands.
- Climate Monitoring: Use temperature and humidity sensors to monitor and control your home's climate.
- Security Systems: Integrate motion sensors and cameras for enhanced security.
- Appliance Control: Automate devices like fans, heaters, or coffee makers.
Integrating the ESP32 Dev Kit with Home Assistant is a rewarding experience that empowers you to create a truly smart home. With a little effort and creativity, you can automate tasks, enhance security, and improve energy efficiency. The combination of ESP32's hardware capabilities and Home Assistant's software flexibility makes this integration a game-changer for DIY enthusiasts.
So, what are you waiting for? Grab your ESP32 Dev Kit, fire up Home Assistant, and start building your dream smart home today!
Let me know if you'd like help with specific configurations or project ideas! 🚀


