Elderly Activity Monitoring Using Agile Smartedge
About the project
The robots are entering our society more and more, they help us in our daily tasks. This robot monitors the exercises of older people.
Project info
Difficulty: Expert
Platforms: Avnet, NXP, Raspberry Pi, SparkFun
Estimated time: 3 weeks
License: MIT license (MIT)
Items used in this project
Hardware components
View all
Story
Story
In recent years there has been anincrease in applications related to Internet objects (IoT), the vast majority ofthese applications focus primarily on the control of our homes, themotorization of environmental data, intelligent cities, and so on. At the sametime, we have seen that these new devices are increasingly powerful, whichallows to incorporate automatic learning algorithms. These algorithms allow usto recognize patterns and learn autonomously using information from sensors, images, signals, etc. One of the problems observed today is the existence ofelderly people who live alone and need continuous monitoring.
Objective
The objective of this project is to be able to use the Agile SmartEdge system as an exercise monitoring system for older people and link it to an assistant robot that I did during my doctorate. The robot will be used as an activity recommendation tool and the Agile SmartEdge system will monitor whether the activity has been performed correctly. This will be done using all its sensors (3D accelerometers, a 3D gyroscope, a 3D magnetometer, a pressure sensor, a humidity and temperature sensor, a microphone, an ambient light sensor and a proximity sensor) and its motion recognizer (Brainium).
Problem to be Solved
The problem we are trying to solve is to detect and monitor the activities carried out by older people living alone. As in some cases they live alone and have no one to take care of them, stop performing the activities suggested by doctors or physiotherapists. Activities such as walking or gentle exercises that help the proper functioning of their joints and thus try to prevent possible problems in the future.
Elderly Activity Monitoring Using Agile SmartEdge
In order to do this, a robot has been developed capable of connecting to the service offered by Brainium through a raspberry pi, to make this connection is necessary to activate the gateways. These are the steps to be taken:
1. InstallBluez 5.50 to do it, connect through SSH and write the following:
wget https://brainium.blob.core.windows.net/public/raspberry/bluez.run sudo sh bluez.run
2. Fromthe same SSH connection we receive the following:
wgethttps://brainium.blob.core.windows.net/public/raspberry/brainium-gateway-gtk-latest.runsudo sh ./brainium-gateway-gtk-latest.run
3. Toopen the Manage GUI type the following:
brainium-gateway-gtk
It is important to note that toperform step 3, it is necessary to have our raspberry connected to a monitor orLCD screen. Since when executing the command of step 3, we will open aninterface like the one shown in the following Figure 1.
Figure 1, Brainium LoginIn this interface it will benecessary to authenticate ourselves with our credentials, it is assumed that wehave already linked our device to our brainium account. The only thing we willdo is change the Gateway to which our device was connected (Figure 2).
Figure 2, Searching Device Figure 3, Adding Device Figure 4, Selecting the GatewayOnce our device is linqueado andwith the correct Gateway activated in our console, the next step is to startcapturing the information (exercises). It is important to point out that theexercises to be classified are exercises in which the movement of the chest isinvolved, this is why it is necessary to use a harness. This harness willattach our sensor to the chest as shown in the Figure 5.
Figure 5, Sensor and Harness JoinedOnce the sensor is in position, the next thing to do is to start capturing the data, for which the differentexercises were performed. Performing 5 sessions of 10 repetitions per exercise shown in the Figure 6.
Figure 6, Section of the 5 exercises Figure 7, Graph of one of the exercisesAt the end of the dataacquisition phase, the next step is to train the model. To do this, select allthe samples from each of the sessions and click on general model (Figure 8).
Figure 8, Model GenerationOnce the model is generated, we will see a screen like the one shown in the following Figure 9.
Figure 9, Generated modelThe next step is to apply ourmodel to our device (Figure 10).
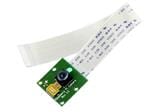
Figure 10, Applying the model to the device Figure 11, Tested the modelOnce the configuration of thesensor and the acquisition of the data to be trained has been carried out, thenext step is to use the robot to track the activities. The robot used can be seen in thefollowing Figure 12, this robot was built using a raspberry pi 3, a 7" LCDscreen, a camera, some makebeam for the structure, a mega arduino (motorcontrol) and two DC motors. The robot responds to voice command, using the Snips system (https://snips.ai/). Using this voice recognitionsystem, the user can interact with the robot using his voice. In this way, theuser can request a recommendation for some type of physical activity. Three mqtt clients have beencreated to control the robot, one that controls voice recognition andrecommends activities. The next client controls the motors and the camera andfinally a third client acquires the information from the environmental sensors ofthe Rapid IoT device.To launch these clients, a"sh" file called "./run_snips_emir.sh" was created, whichautomatically executes the three python scripts:
#!/bin/bash
python3 action_emir_v_0.0.1.py &
python3 mqtt_iot_publish_data.py &
python3 mqtt_robot_publish_data.py &
wait
The robot has 4 ultrasonicsensors, which are located at the front of the robot, right, left and one atthe back. These sensors are controlled through an Arduino mega and thedistances are sent through the serial port to the raspberry pi to the client mqtt_robot_publish_data.py. Once the client receives the information from the sensors, it publishes them tothe main client. At the same time, the client mqtt_robot_publish_data.py is incharge of controlling the engines, sending the different commands by voice, such as move forward, backward, left and right.
Figure 12, Assitant robot Figure 13, Robot CircuitBelow is a description of the process that the user performs for the recommendation of an activity:
1: It asks the robot to recommend a physical activity.
2: The robot shows the 4 exercises that it has registered.
3: The robot recommends that you use the sensor and the harness.
4: The sensor recognizes the movement and sends it to the robot, which is responsible for counting them.
5: Once the exercise is finished, the robot encourages you with encouraging words so that you can continue performing the exercises.
Note: Since the images explaining theexercises are copyrighted, I will only give the names of the exercises. If youwant more information and see the images of the respective exercises, inreferences I leave the links.
Exercise Nº 1: Clock Reach
Exercise Nº 2: Balancing Wand
Exercise Nº 3: Wall Pushups
Exercise Nº 4: Mini Squats
Figure 14, The robot shows the different exercises Demo VideoReferences
https://www.lifeline.ca/en/resources/14-exercises-for-seniors-to-improve-strength-and-balance/ (exercises)
https://spa.brainium.com/apps/linux
https://www.element14.com/community/roadTestReviews/2982/l/brainium-smartedge-agile-review




Leave your feedback...