Darkness Sensor And Led Using Bh1750 And Arduino
About the project
In this tutorial we will learn how to turn the LED ON when darkness is detected. Watch the Video!
Project info
Difficulty: Easy
Platforms: Adafruit, Arduino, Visuino
Estimated time: 1 hour
License: GNU General Public License, version 3 or later (GPL3+)
Items used in this project
Story
In this tutorial we will learn how to turn the LED ON when darkness is detected.
Watch the Video!
Step 1: What You Will Need
1 / 4

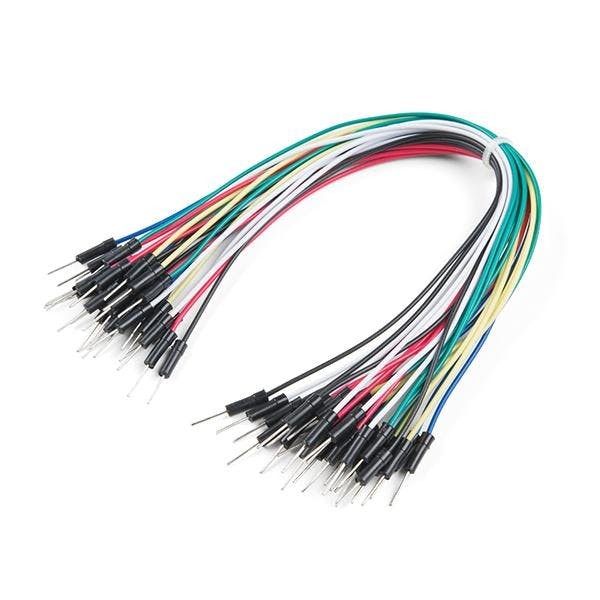
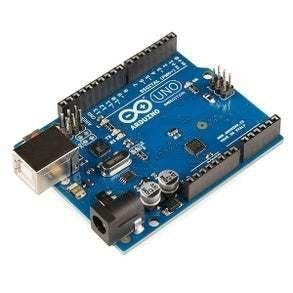
- Arduino UNO or any other Arduino board
- LED
- BH1750 Ambient Light Sensor (I2C)
- Jumper wires
- Visuino software: Download here
Step 2: Circuit
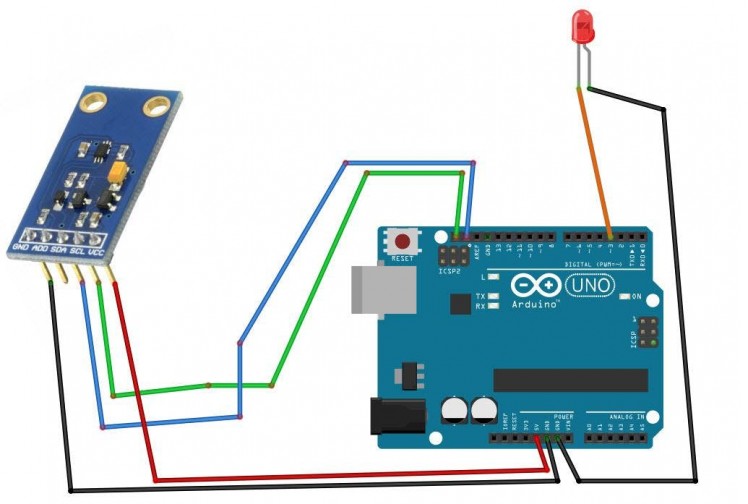
- Connect Light Sensor pin [SCL] to Arduino pin [SCL]
- Connect Light Sensor pin [SDA] to Arduino pin [SDA]
- Connect Light Sensor pin [VCC] to Arduino pin [5v]
- Connect Light Sensor pin [GND] to Arduino pin [GND]
- Connect LED positive pin {Long leg} to Arduino Digital pin 3
- Connect LED negative pin {Short leg} to Arduino pin [GND]
Step 3: Start Visuino, and Select the Arduino UNO Board Type
1 / 2
The Visuino: https://www.visuino.eu also needs to be installed. Download Free version or register for a Free Trial.
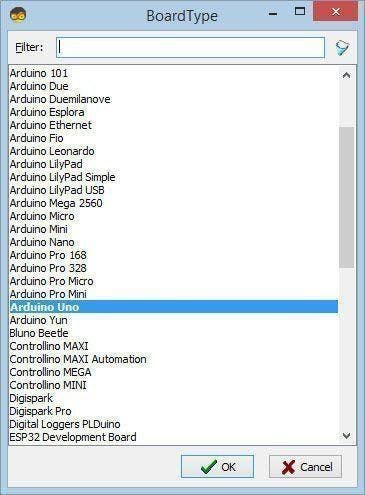
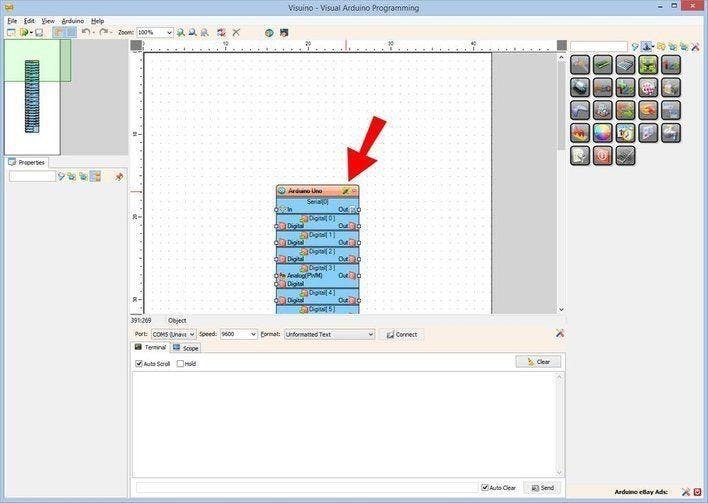
Start Visuino as shown in the first picture Click on the "Tools" button on the Arduino component (Picture 1) in Visuino When the dialog appears, select "Arduino UNO" as shown on Picture 2
Step 4: In Visuino ADD Components
1 / 4
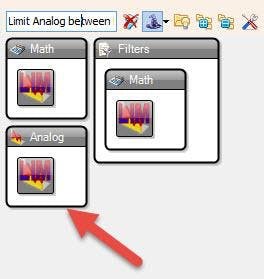
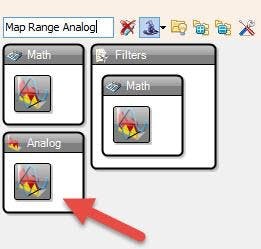
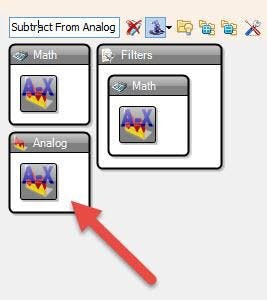
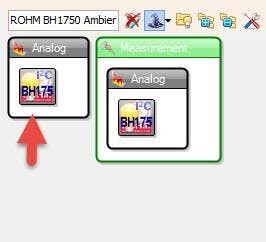
- Add "ROHM BH1750 Ambient Light Sensor (I2C)" component
- Add "Limit Analog between Min and Max" component
- Add "Map Range Analog" component
- Add "Subtract From Analog Value" component
Step 5: In Visuino Set & Connect Components
1 / 4
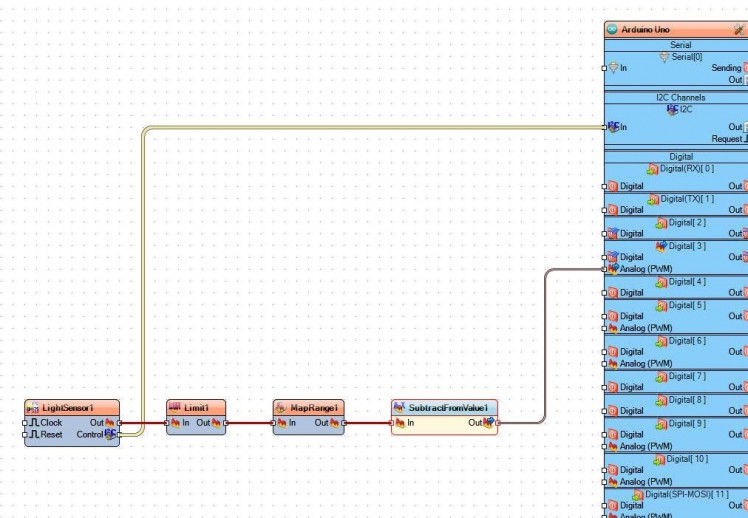
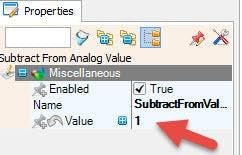
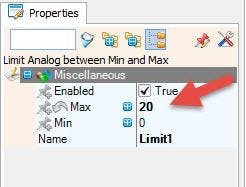
- Select "Limit1" and in the properties window set Max to 20
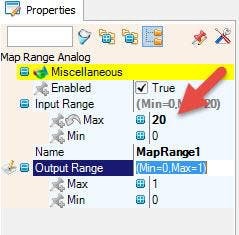
- Select "MapRange1" and in the properties window set Input Range > Max to 20
- Select "SubtractFromValue1"and in the properties window set Value to 1
- Connect "LightSensor1" pin I2C Control to Arduino I2C In
- Connect "LightSensor1" pin Out to "Limit1" pin In
- Connect "Limit1" pin Out to "MapRange1" pin In
- Connect "MapRange1" pin Out to "SubtractFromValue1" pin In
- Connect "SubtractFromValue1" pin Out to Arduino digital pin 3 >> Analog (PWM)
Step 6: Generate, Compile, and Upload the Arduino Code

In Visuino, at the bottom click on the "Build" Tab, make sure the correct port is selected, then click on the "Compile/Build and Upload" button.
Step 7: Play
If you power the Arduino module the LED will start to shine if you cover the sensor so that it can detect darkness. /the LED will shine more if there is more darkness.
Congratulations! You have completed your project with Visuino. Also attached is the Visuino project, that I created for this tutorial, you can download it and open it in Visuino: https://www.visuino.eu


Leave your feedback...