

Building A Fun Timelapse Camera With Xiao Esp32 S3 Sense

Made by CETECH11 / Environmental Sensing / Security
About the project
Will guide you to build a simple timelapse camera with Xiao ESP32 S3 Sense.
Project info
Difficulty: Easy
Platforms: Seeed Studio
Estimated time: 1 hour
License: GNU General Public License, version 3 or later (GPL3+)
Items used in this project

Story
Ever wanted to capture the beauty of a sunset, the hustle and bustle of a busy street, or the growth of a plant in a fun and creative way? With the Xiao ESP32 S3 Sense, you can build your very own timelapse camera! This tiny yet powerful board is perfect for capturing stunning timelapse videos. Let’s dive into this exciting project step-by-step. 🚀
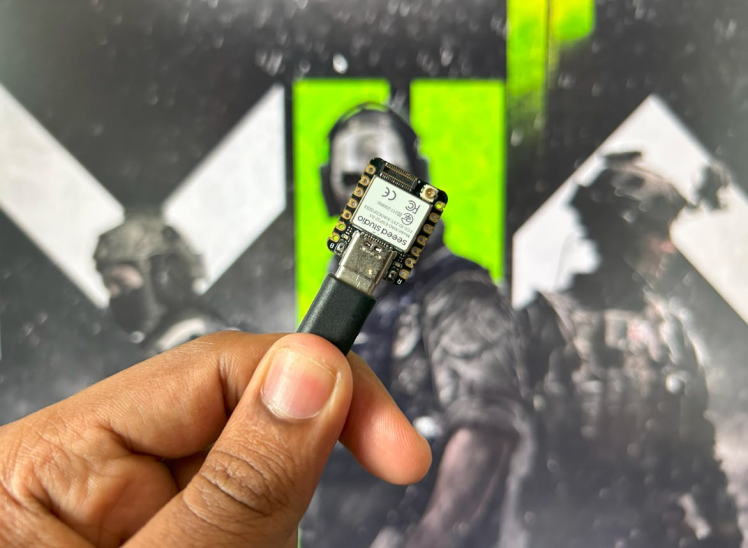
Materials Needed 🛠ï¸Â- Xiao ESP32 S3 Sense: The brain of our project.
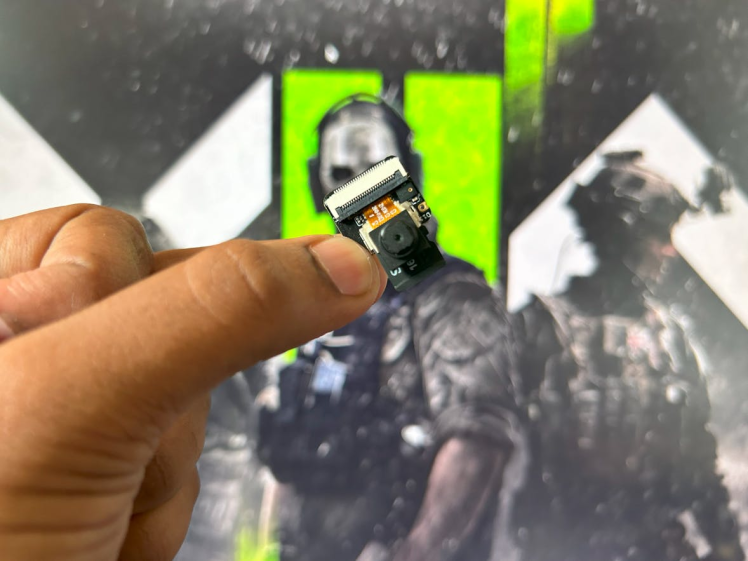
- Camera module: Included with the Xiao ESP32 S3 Sense.
- MicroSD card: For storing your amazing timelapse photos (formatted to FAT32).
- USB Type-C cable: To power up your board.
- Power source: A battery or USB power bank for portability.

You must check out PCBWAY for ordering PCBs online for cheap!
You get 10 good-quality PCBs manufactured and shipped to your doorstep for cheap. You will also get a discount on shipping on your first order. Upload your Gerber files onto PCBWAY to get them manufactured with good quality and quick turnaround time. PCBWay now could provide a complete product solution, from design to enclosure production. Check out their online Gerber viewer function. With reward points, you can get free stuff from their gift shop. Also, check out this useful blog on PCBWay Plugin for KiCad from here. Using this plugin, you can directly order PCBs in just one click after completing your design in KiCad.
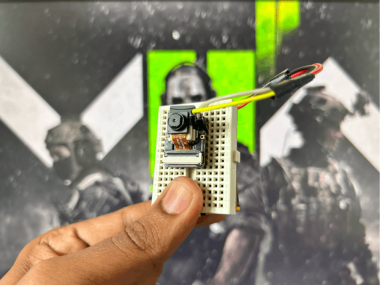
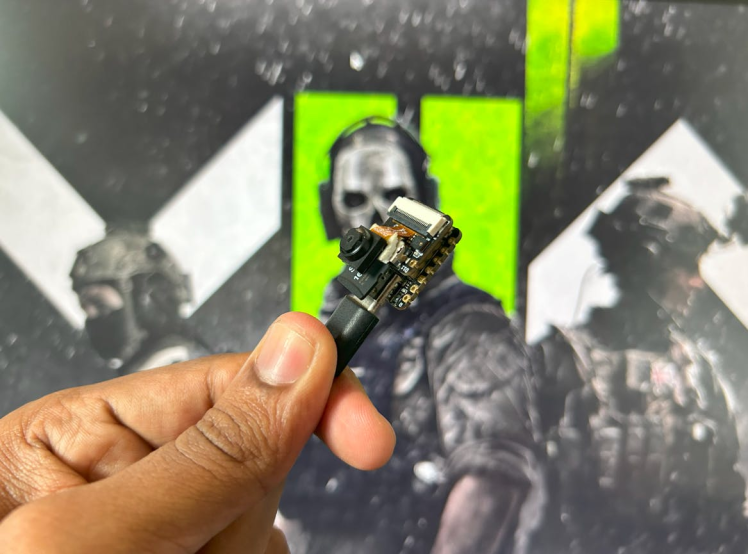
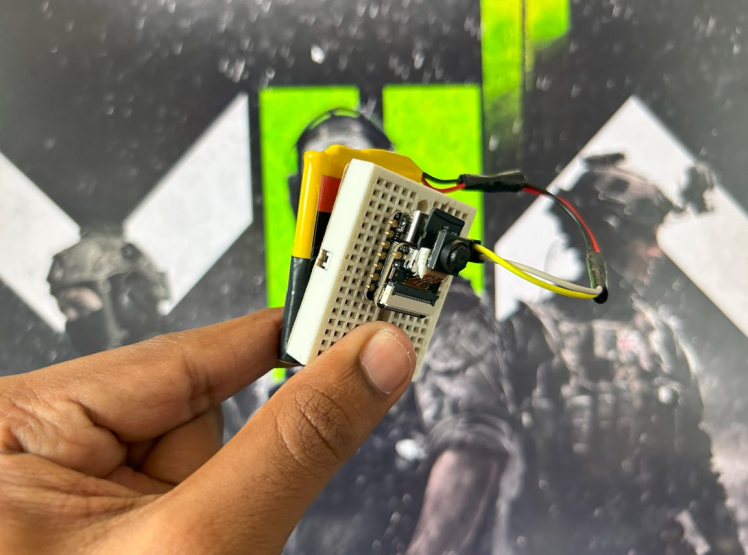
Step 1: Hardware Setup ðŸâ€Â§- Connect the Camera Module: Attach the camera module to the Xiao ESP32 S3 Sense board. Make sure it’s snug and secure.
- Insert the MicroSD Card: Pop the formatted MicroSD card into the slot on the Xiao ESP32 S3 Sense.
- Power the Board: Plug in the Xiao ESP32 S3 Sense using the USB Type-C cable. You can use a battery or a USB power bank if you want to take your camera on the go.
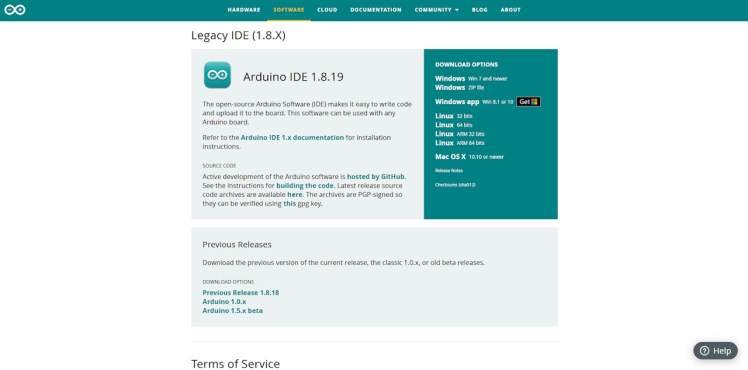
- Install Arduino IDE: If you haven’t already, download and install the Arduino IDE from the official website.
Add ESP32 Board to Arduino IDE:
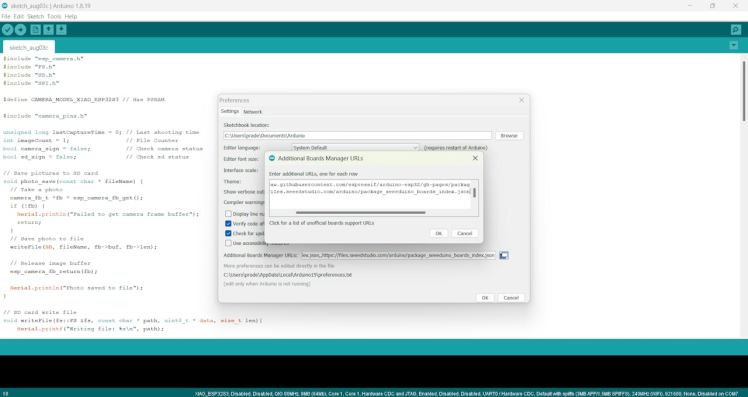
- Open Arduino IDE and go to
File > Preferences. - In the “Additional Board Manager URLs†field, add:
https://raw.githubusercontent.com/espressif/arduino-esp32/gh-pages/package_esp32_index.json.
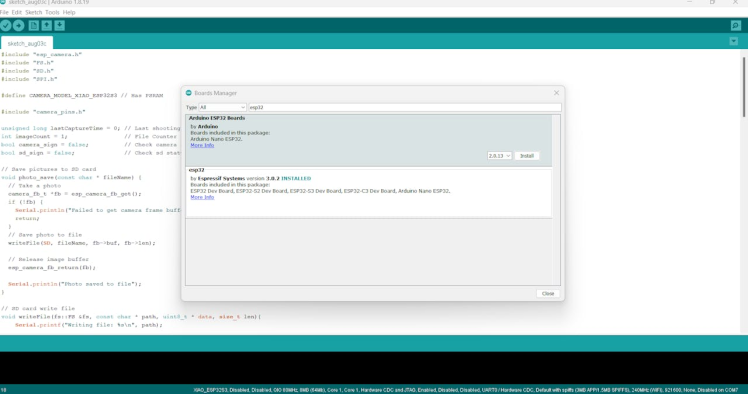
- Go to
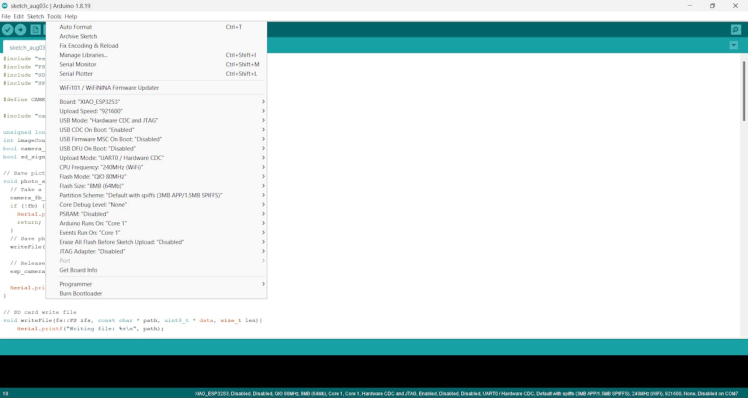
Tools > Board > Board Manager, search for “ESP32â€Â, and install the ESP32 board package.
Select the Xiao ESP32 S3 Sense Board:
- Go to
Tools > Boardand selectXiao ESP32 S3 Sense.
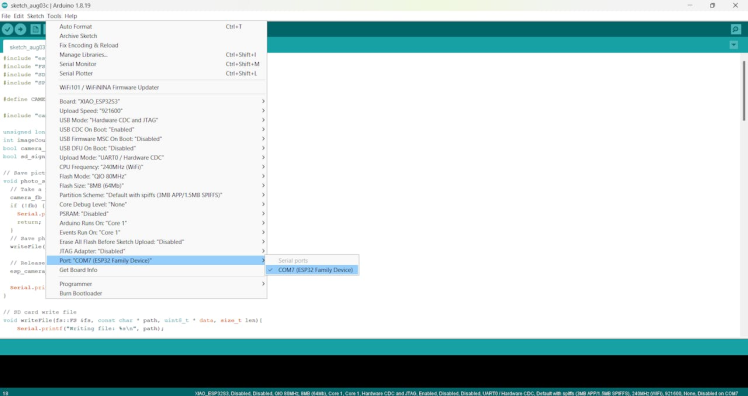
- Choose the correct port from
Tools > Port.
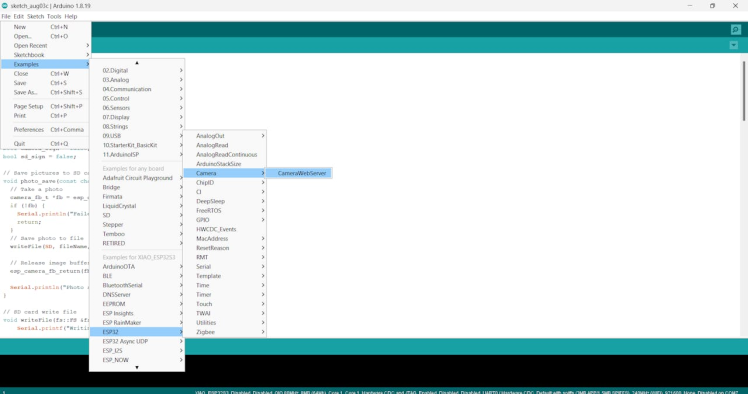
Install Required Libraries:
Open Arduino IDE and go to examples and ESP32 CAM then Camera Web Server: Just replace the complete ino file with the following code
Arduino Code:
#include "esp_camera.h"
#include "FS.h"
#include "SD.h"
#include "SPI.h"

#define CAMERA_MODEL_XIAO_ESP32S3 // Has PSRAM

#include "camera_pins.h"

unsigned long lastCaptureTime = 0; // Last shooting time
int imageCount = 1;                // File Counter
bool camera_sign = false;          // Check camera status
bool sd_sign = false;              // Check sd status

// Save pictures to SD card
void photo_save(const char * fileName) {
  // Take a photo
  camera_fb_t *fb = esp_camera_fb_get();
  if (!fb) {
    Serial.println("Failed to get camera frame buffer");
    return;
  }
  // Save photo to file
  writeFile(SD, fileName, fb->buf, fb->len);

  // Release image buffer
  esp_camera_fb_return(fb);

  Serial.println("Photo saved to file");
}

// SD card write file
void writeFile(fs::FS &fs, const char * path, uint8_t * data, size_t len){
    Serial.printf("Writing file: %sn", path);

    File file = fs.open(path, FILE_WRITE);
    if(!file){
        Serial.println("Failed to open file for writing");
        return;
    }
    if(file.write(data, len) == len){
        Serial.println("File written");
    } else {
        Serial.println("Write failed");
    }
    file.close();
}

void setup() {
  Serial.begin(115200);
  while(!Serial); // When the serial monitor is turned on, the program starts to execute

  camera_config_t config;
  config.ledc_channel = LEDC_CHANNEL_0;
  config.ledc_timer = LEDC_TIMER_0;
  config.pin_d0 = Y2_GPIO_NUM;
  config.pin_d1 = Y3_GPIO_NUM;
  config.pin_d2 = Y4_GPIO_NUM;
  config.pin_d3 = Y5_GPIO_NUM;
  config.pin_d4 = Y6_GPIO_NUM;
  config.pin_d5 = Y7_GPIO_NUM;
  config.pin_d6 = Y8_GPIO_NUM;
  config.pin_d7 = Y9_GPIO_NUM;
  config.pin_xclk = XCLK_GPIO_NUM;
  config.pin_pclk = PCLK_GPIO_NUM;
  config.pin_vsync = VSYNC_GPIO_NUM;
  config.pin_href = HREF_GPIO_NUM;
  config.pin_sscb_sda = SIOD_GPIO_NUM;
  config.pin_sscb_scl = SIOC_GPIO_NUM;
  config.pin_pwdn = PWDN_GPIO_NUM;
  config.pin_reset = RESET_GPIO_NUM;
  config.xclk_freq_hz = 20000000;
  config.frame_size = FRAMESIZE_UXGA;
  config.pixel_format = PIXFORMAT_JPEG; // for streaming
  config.grab_mode = CAMERA_GRAB_WHEN_EMPTY;
  config.fb_location = CAMERA_FB_IN_PSRAM;
  config.jpeg_quality = 12;
  config.fb_count = 1;

  // if PSRAM IC present, init with UXGA resolution and higher JPEG quality
  //                      for larger pre-allocated frame buffer.
  if(config.pixel_format == PIXFORMAT_JPEG){
    if(psramFound()){
      config.jpeg_quality = 10;
      config.fb_count = 2;
      config.grab_mode = CAMERA_GRAB_LATEST;
    } else {
      // Limit the frame size when PSRAM is not available
      config.frame_size = FRAMESIZE_SVGA;
      config.fb_location = CAMERA_FB_IN_DRAM;
    }
  } else {
    // Best option for face detection/recognition
    config.frame_size = FRAMESIZE_240X240;
#if CONFIG_IDF_TARGET_ESP32S3
    config.fb_count = 2;
#endif
  }

  // camera init
  esp_err_t err = esp_camera_init(&config);
  if (err != ESP_OK) {
    Serial.printf("Camera init failed with error 0x%x", err);
    return;
  }

  camera_sign = true; // Camera initialization check passes

  // Initialize SD card
  if(!SD.begin(21)){
    Serial.println("Card Mount Failed");
    return;
  }
  uint8_t cardType = SD.cardType();

  // Determine if the type of SD card is available
  if(cardType == CARD_NONE){
    Serial.println("No SD card attached");
    return;
  }

  Serial.print("SD Card Type: ");
  if(cardType == CARD_MMC){
    Serial.println("MMC");
  } else if(cardType == CARD_SD){
    Serial.println("SDSC");
  } else if(cardType == CARD_SDHC){
    Serial.println("SDHC");
  } else {
    Serial.println("UNKNOWN");
  }

  sd_sign = true; // sd initialization check passes

  Serial.println("Photos will begin in one minute, please be ready.");
}

void loop() {
  // Camera & SD available, start taking pictures
  if(camera_sign && sd_sign){
    // Get the current time
    unsigned long now = millis();

    //If it has been more than 1 minute since the last shot, take a picture and save it to the SD card
    if ((now - lastCaptureTime) >= 60000) {
      char filename[32];
      sprintf(filename, "/image%d.jpg", imageCount);
      photo_save(filename);
      Serial.printf("Saved picture:%sn", filename);
      Serial.println("Photos will begin in one minute, please be ready.");
      imageCount++;
      lastCaptureTime = now;
    }
  }
}
If you want you can change the time interval.
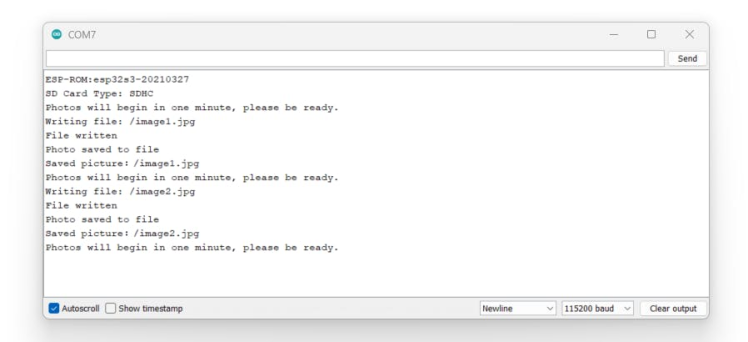
Step 4: Upload and Test 🚀- Upload the Code: Connect your Xiao ESP32 S3 Sense to your computer, Select the correct COM port, and upload the code using the Arduino IDE.
- Test the Camera: Once the code is uploaded, the camera will start capturing images at regular intervals and saving them to the MicroSD card. You can open the serial terminal and look for the response.
- Retrieve Images: Remove the MicroSD card from the Xiao ESP32 S3 Sense and transfer the images to your computer.
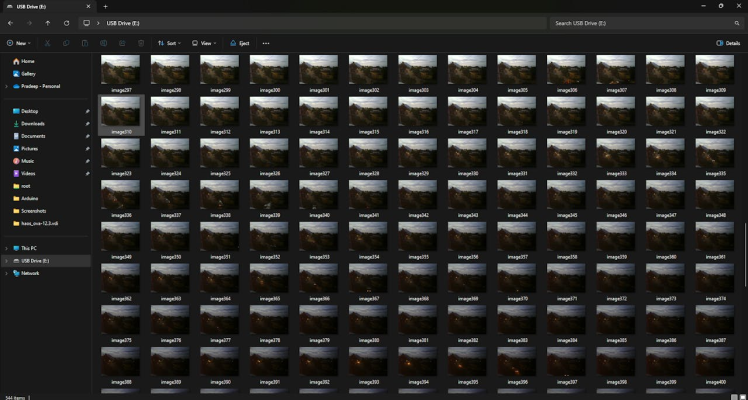
- Compile the Timelapse Video: Use video editing software like Adobe Premiere Pro, Final Cut Pro, or free alternatives like OpenShot or Shotcut to compile the images into a timelapse video. Or you can simply use a python script to do that.
Here is the Python code to convert jpeg to video:
import cv2
import numpy as np
import time
import os
nframes = 500
interval = 0.5
fps=100

print("XIAO ESP32 S3 Sense TimeLapser")

# Define the path to the photos folder
photos_path = "photos/"
# Get the list of photo filenames
photos = os.listdir(photos_path)
# Sort the photos by name
photos.sort()
# Create a video writer object
video = cv2.VideoWriter("video.avi", cv2.VideoWriter_fourcc(*"MJPG"), 100, (800, 600))

# Loop through the photos
for photo in photos:
    # Read the photo as an image
    image = cv2.imread(photos_path + photo)
    # Resize the image to fit the video frame
    image = cv2.resize(image, (800, 600))
    # Write the image to the video
    video.write(image)

# Release the video writer object
video.release()
print("Video Build Completed")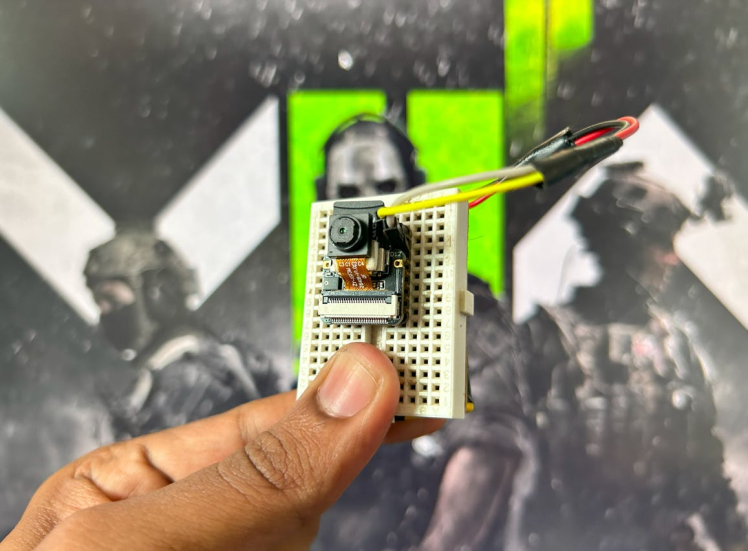
Congratulations! You’ve successfully built a small timelapse camera using the Xiao ESP32 S3 Sense. This project can be expanded further by adding features like remote control, different capture intervals, or even uploading images to the cloud.
Feel free to share your timelapse videos and any modifications you make to this project. Happy building! 🛠ï¸Â
Credits
Related products


Leave your feedback...