Blues Remote Temperature Monitoring System Using Blynk Iot
About the project
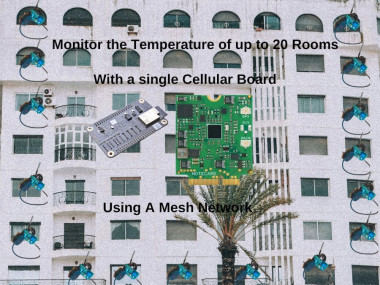
Remotely monitor the temperature of more than 20 rooms in a large building with a mesh network.
Project info
Items used in this project
Hardware components
Story
Monitoring temperature remotely is not a new thing, you can just connect an ESP32 to your router and make it push the data to the cloud, but what if you don’t have a router with a reliable connection or your router is 5ghz and your Wi-Fi chip only works with 2.4ghz networks? Well, we can use cellular; but what if you need 30 devices monitoring temperature and pushing it to the cloud? We can use cellular for each device, but this would mean we have to manage 30 SIM cards, 30 mobile data plans, and 30 cellular connectivity boards.
We could try to have only one device with cellular connectivity and all other device report their temperature to that one device and then that device sends all the temperature readings to the cloud. This method would be more cost-effective and easier to manage.
We will call this device the router device and call the other device non-router devices
But how do we get the sensor readings from non-router devices to the router device? With ESP32 we could use Wi-Fi to create an access point on the router device and connect all non-router devices to the router device.
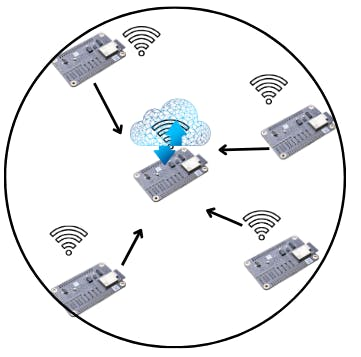
The above method would work but will present a range problem because some of the non-router devices could be at locations not in range to connect to the router device access point as I plan to monitor the temperature of various rooms in a large building.
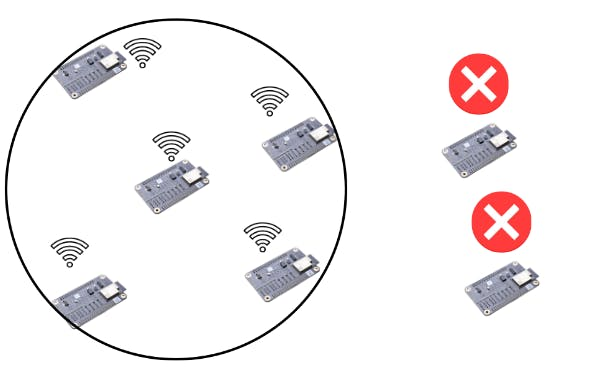
To solve this problem I created a mesh network consisting of the router device and the non-router devices. A mesh network allows devices to communicate with each other directly, without needing to rely solely on a central hub or router. In this setup, each device acts as both a transmitter and a receiver, forwarding data from one device to another. This effectively extends the range of the network, as each device helps relay information across the network. In our case, the router device can collect temperature readings from non-router devices even if they are far apart because the data hops between devices until it reaches the router device.

So the more devices we add the bigger the network range.
Painless Mesh LibraryTo build a mesh network on the ESP32 I used the Painless Mesh Library.
“painlessMesh is a library that takes care of the particulars of creating a simple mesh network using esp8266 and esp32 hardware. The goal is to allow the programmer to work with a mesh network without having to worry about how the network is structured or managed."from Painless Mesh GitHub repository.
Note: painlessMesh only works on ESP32 version 2. I used version 2.0.17
Blues Notecard
To be able to push the temperature readings to the cloud we would be using the Blues Notecard.
With Blues Notecards we can easily send and receive information to and from any device, anywhere, and at any time, via either cellular, Wi-Fi, Lora or Satellite without having to change a single line of code. The same code will work for whatever connectivity option you choose.
While building this project I used the Blues Wi-Fi notecard and when I was done, I switched to Cellular without having to change a single line of code.
One particular feature I love about the Blues Notecard is that whenever I send a piece of data to the Notecard to be routed to the cloud if there is no internet connection the data is queued on the Notecard and when the internet connection is back it sends it; unlike when I am building with other boards If I try to send data when there is no internet connection it either fails and moves on or keeps trying and blocks my whole code from running; hence causing me to have to write some parallel processing code to allow my code to run while my data is still trying to get sent and also reserve some memory to queue data that failed to be sent so they can be resent later. To know about Blues and the products there offer visit https://blues.com
Setting Up Your Blues Notecard
Key Concepts to KnowBefore you dive in, it's important to understand a few key concepts:
- The Notecard is a device-to-cloud data pump that reduces the complexity of building connected solutions with a secure, reliable cellular, Wi-Fi, or LoRa connection. It's a System-on-Module (SOM) that's ready for embedding into any project.
- Notecarriers are development boards that help you get started quickly with the Notecard. There are a variety of Notecarriersdesigned to fit different needs, from prototyping with a Feather-based MCU to deploying a production solution.
- Notehub is the cloud service the Notecard uses to securely send and receive data. Notehub also provides a console for fleet management and secure connectors for routing data to 3rd-party cloud applications.
- A Note is a JSON object containing developer-provided content. A Note is the primary means of sending data to/from a Notecard.
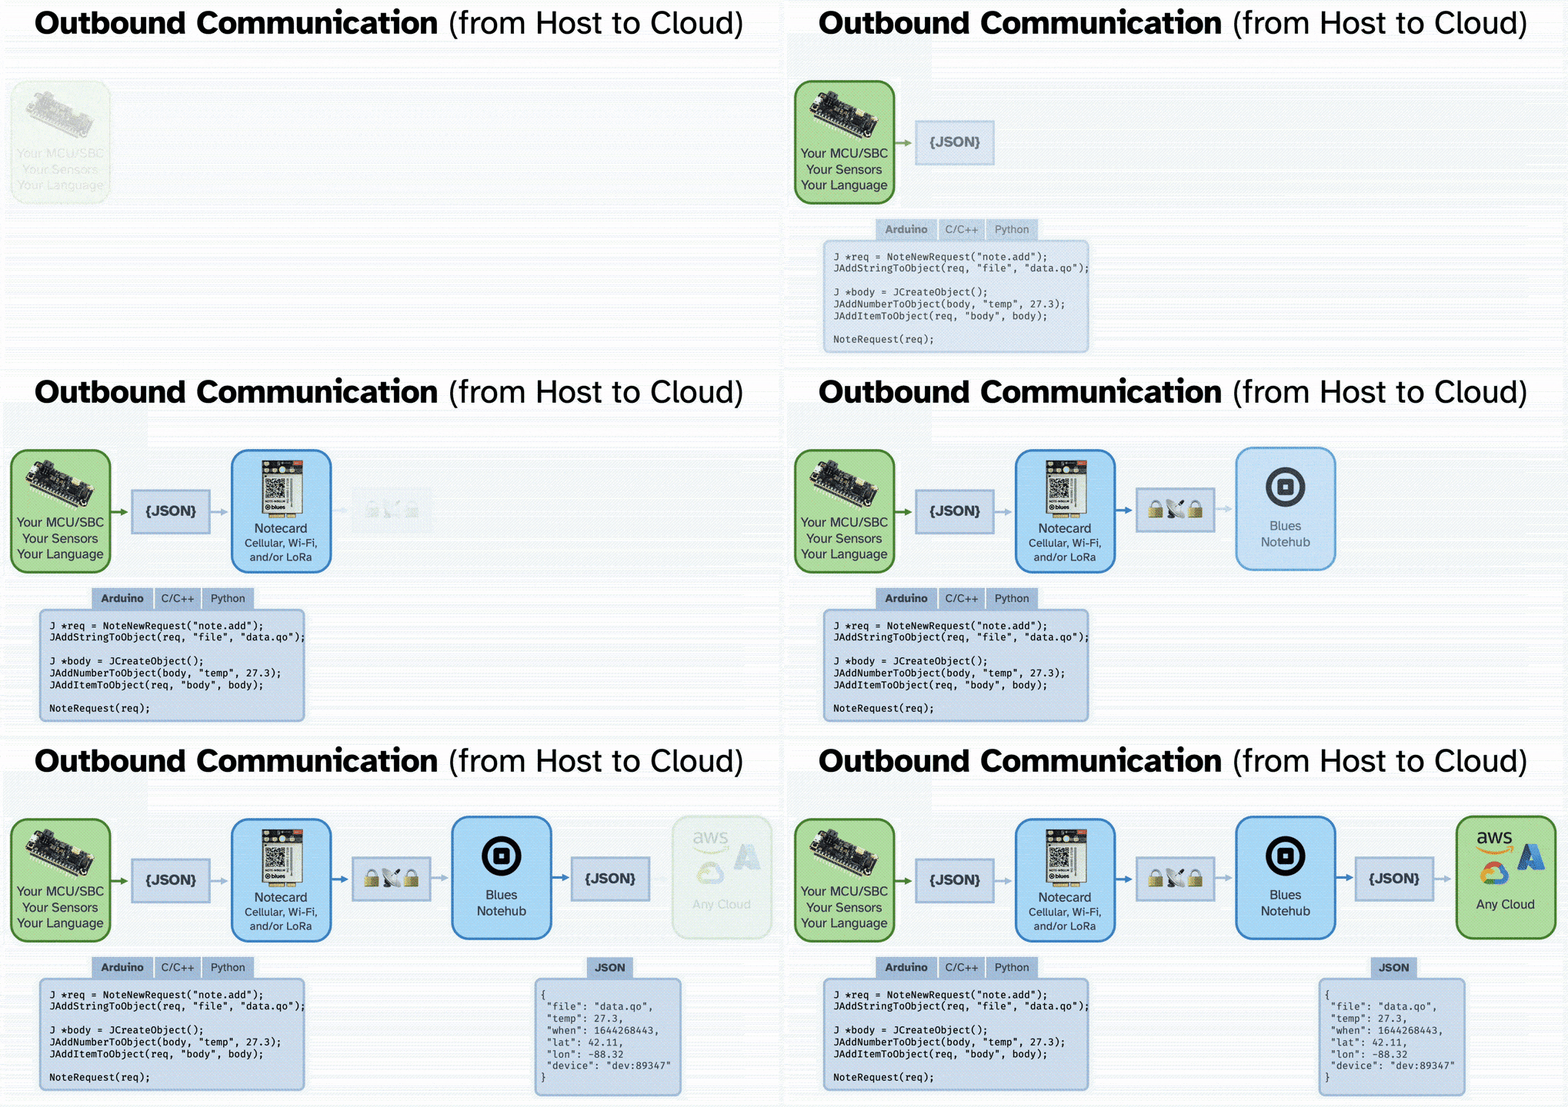
Notecard and Notehub work together to provide bidirectional wireless communication capabilities, both outbound (from your microcontroller or single-board computer to the cloud):
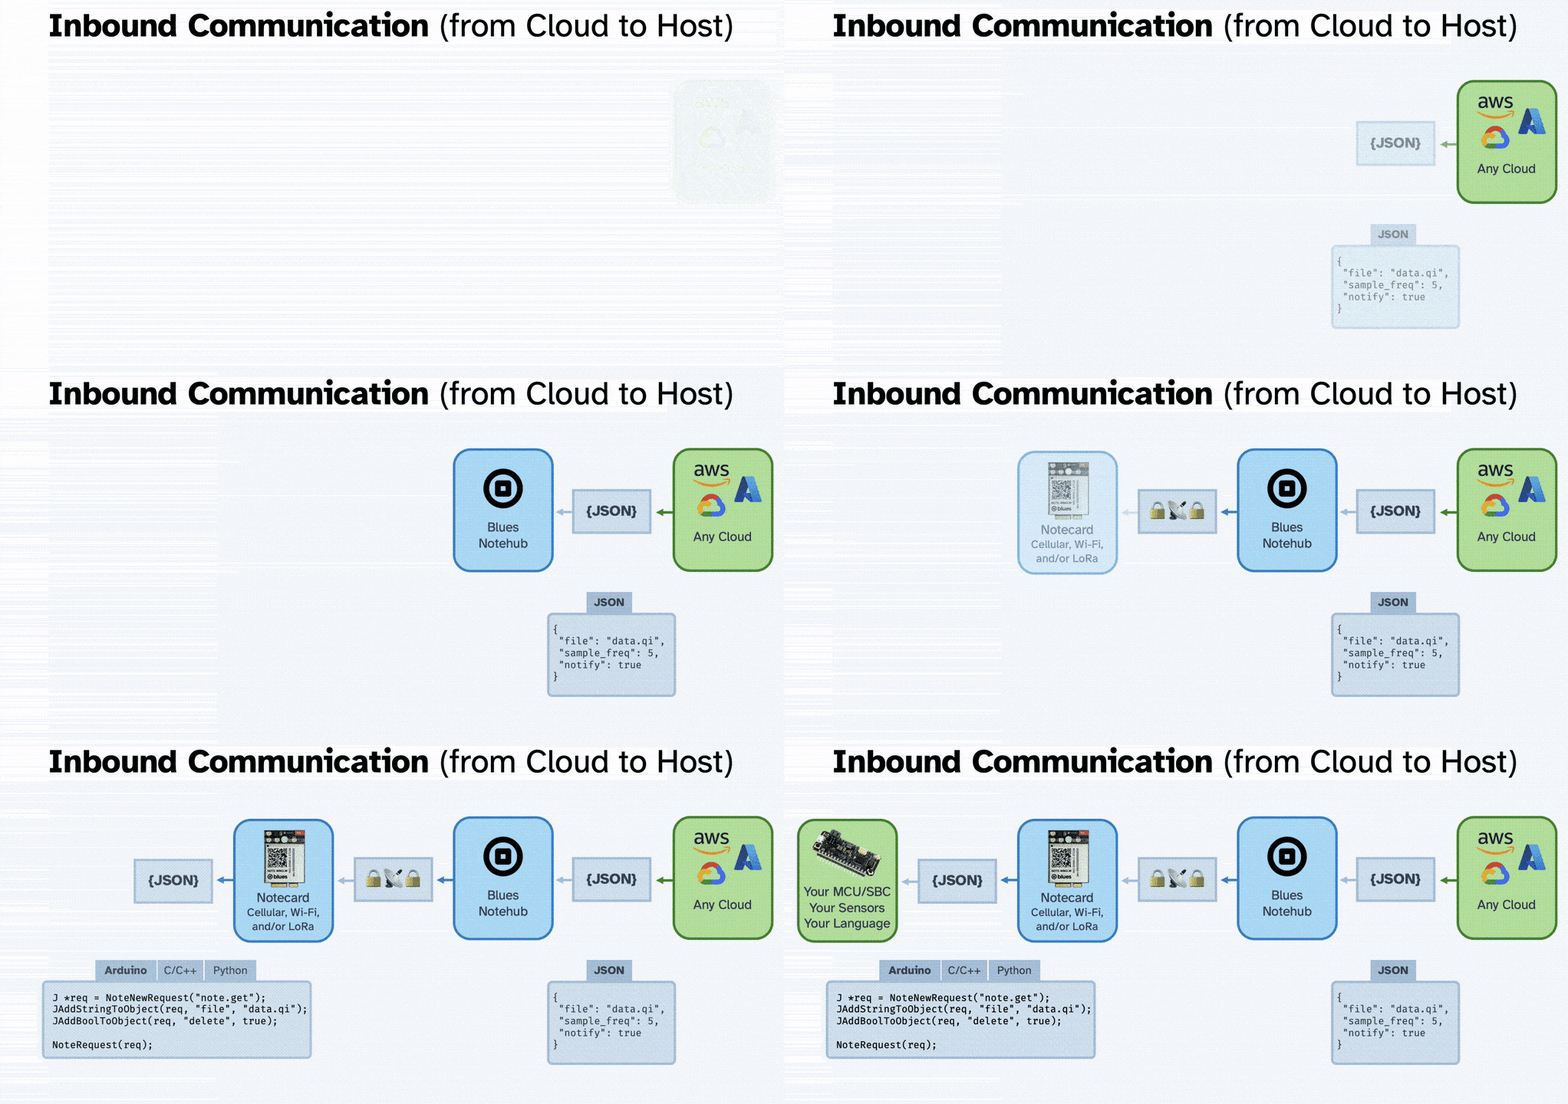
And inbound(from the cloud to your microcontroller or single-board computer):
For this project, we will be using the Notecarrier A. The Notecarrier A includes two u.FL cables for cellular and GPS with one side connected to the Notecarrier and one side free.
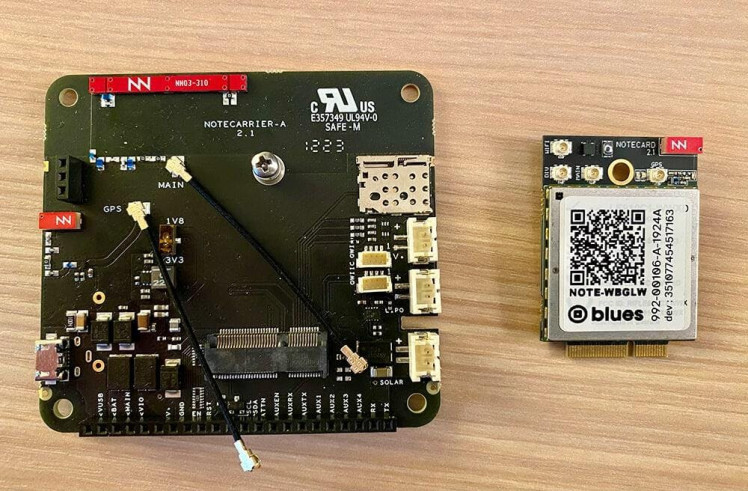
First, Remove the screw from the mounting receptacle on the Notecarrier and rotate the U.FL cables away from the M.2 socket.
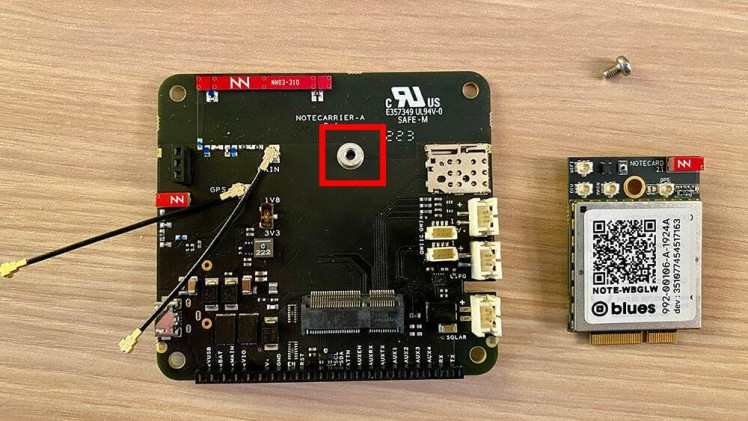
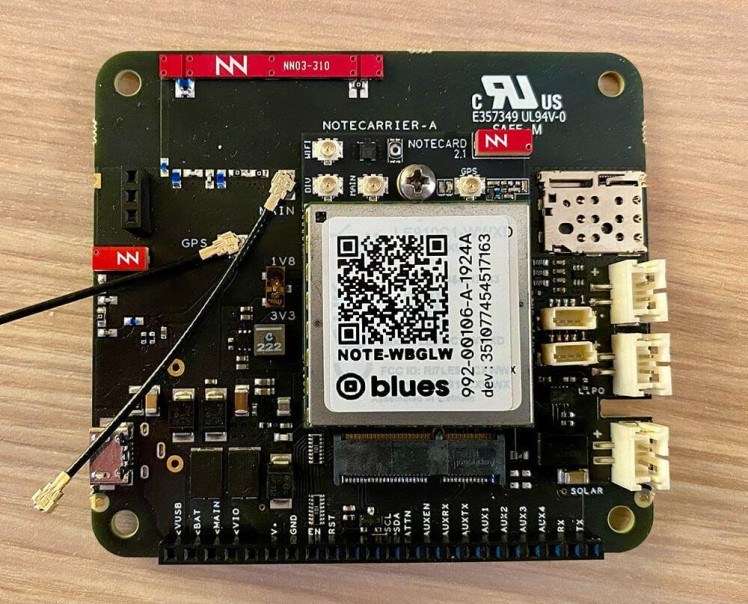
Place the Notecard into the M.2 slot on the Notecarrier. Once inserted, press gently until the Notecard is inserted and the screw receptacle hole is completely visible.
Re-insert the screw into the mounting receptacle and tighten to secure the Notecard to the Notecarrier. Be sure to not overtighten the screw.
Secure the free end of the u.FL cable connected to the socket labelled MAIN on the Notecarrier to the MAIN socket on the Notecard.
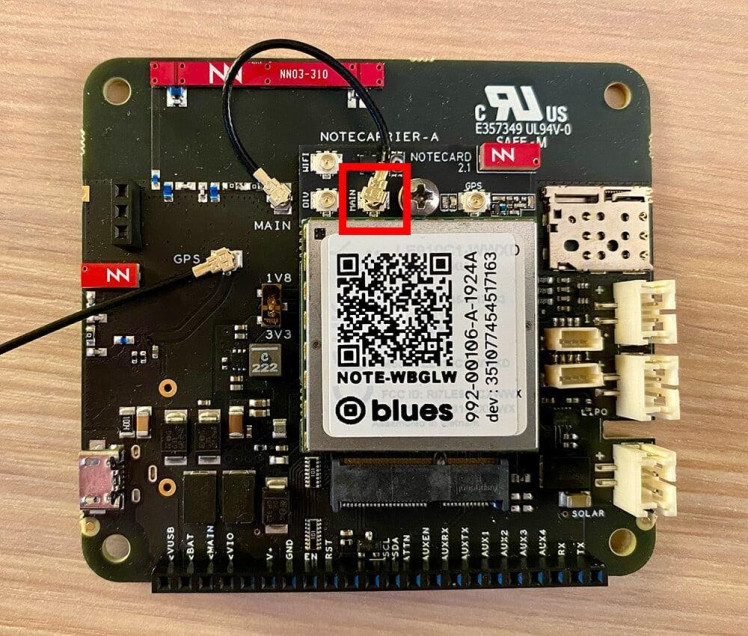
Now your Notecard is ready.
Blynk
To be able to visualise our temperature reading we will be using Blynk. Blynk is a platform that allows you to build IoT (Internet of Things) applications quickly and easily. It provides tools for controlling and monitoring IoT devices via a smartphone or web dashboard.
To use Blynk head to blynk.io and create an account if you don’t have or otherwise log in.
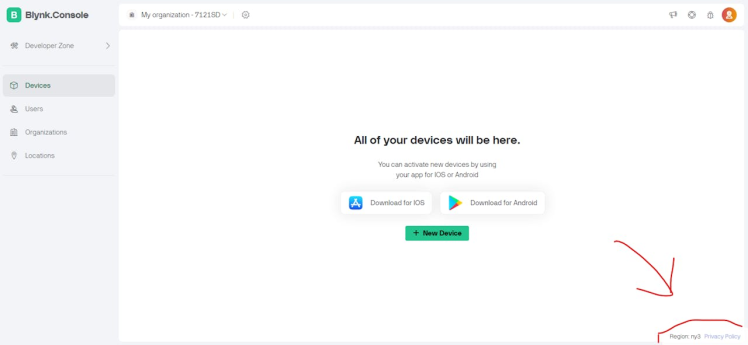
When you are in, you should be directed to the Blynk Console.
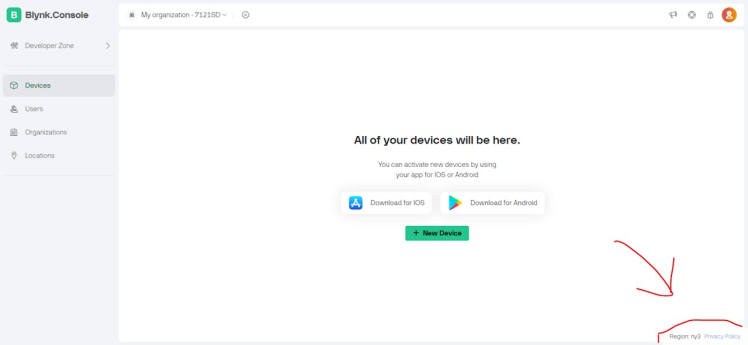
Take note of the region code we will need it in Notehub. Let’s leave Blynk Console for now and move to Notehub
NotehubOn the Notehubpage click on Create Project
A form should pop up. The form should look like this:
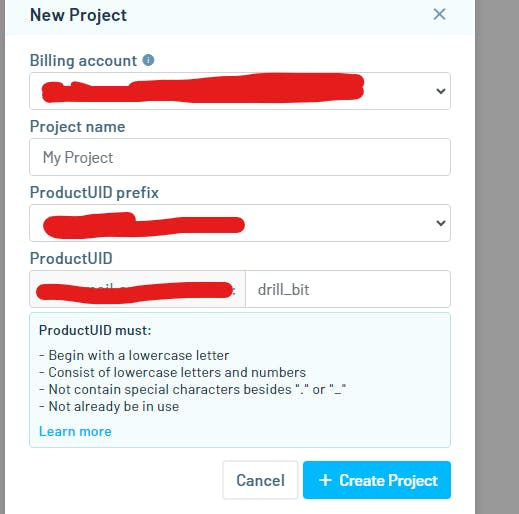
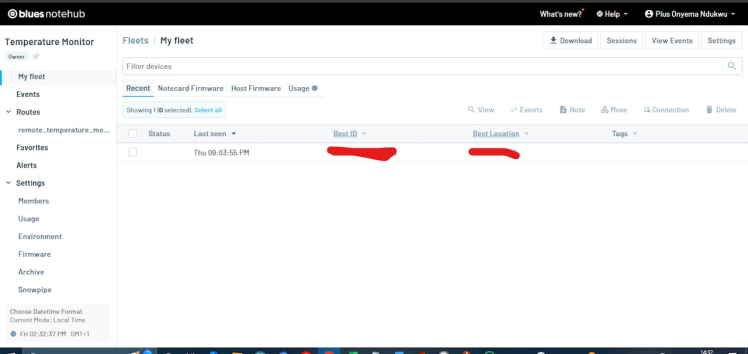
Type in your project name, any name of your choice, and click Create Project. You should see the following screen below.
I have already connected a device to my project, which is why you can see a device there, but your device list should be empty for you. Your device will be automatically added when you upload the code to the board, which we will do in the next section."
Next, we need to create a route to Blynk. A Route is an external API, or server location, where Notes can be forwarded upon receipt.
Routes are defined in Notehub for a Project and can target Notes from one or more Fleets or all Devices. A Project can have multiple routes defined and active at any one time. For our project, we will create a Blynk route on Blues to route a note containing our temperature readings to Blynk’s server.
On the left side of Notehub, click on Routes. Then click on + Create Route. Find Blynk and click on Select.
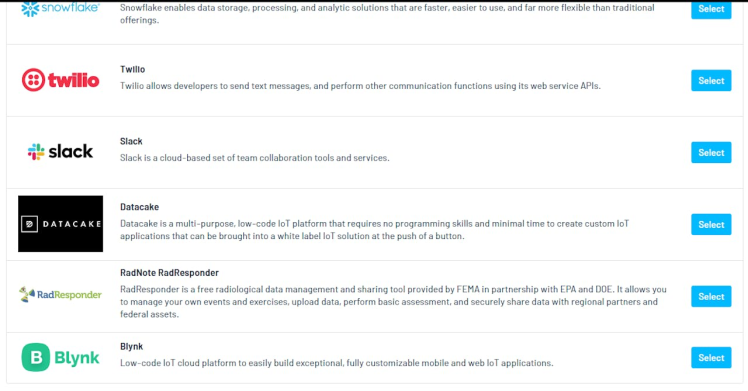
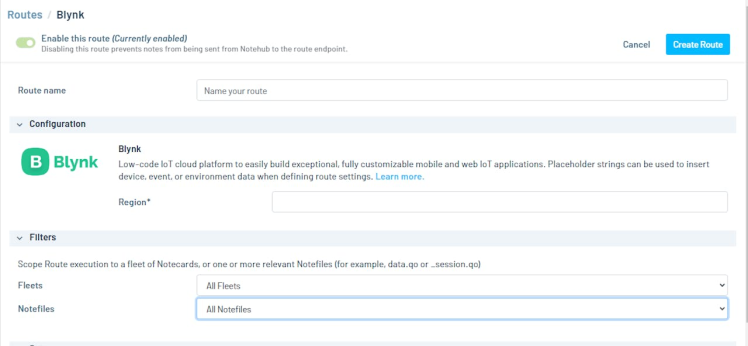
Give your Route any name of your choice and type in the region code I asked you to take note of earlier. If you have forgotten it, it is at the bottom of your Blynk console.
Now, click on the Notefiles drop-down and select Selected Notefiles. If temperature.qo Notefiles exist click on its check box, otherwise, type it out in the textbox.
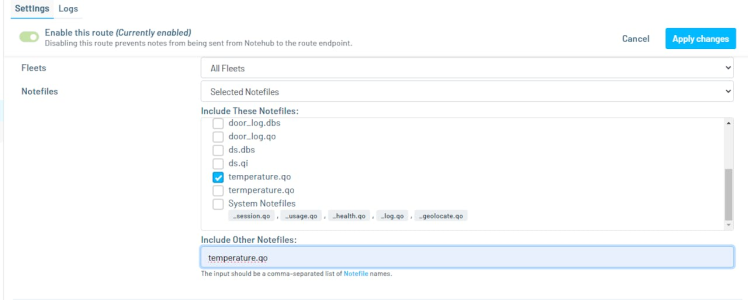
temperature.qo notefile should not exist for you. Since this is your first time interacting with it, mine already exists because I had to run some tests while building this project. So for you, just type our temperature.qo in the Include Other Notefiles text field.
Then click Apply Changes. That is all we need to do for Blues.
Let’s leave Notehub for now and get to the actual devices.
The Hardware
Before we dive into the circuit, let’s explain how the Non-router and Router devices work together to achieve our goal.
When powered on, the Router broadcasts its ID to all Non-router devices in the mesh network. Each Non-router device that receives this ID lights up an LED to indicate it has connected to the Router and begins sending its temperature readings to the Router using this ID.
Upon receiving these temperature readings, the Router stores them in a hashmap and updates each entry as new readings arrive. The Router doesn’t immediately push these readings to the Notecard; instead, it waits for a signal from the ATTN pin on the Notecard.
The ATTN pin on the Notecard is triggered when an inbound `blynk.qi` note arrives, which happens whenever the refresh button is pressed. It may take a short delay (less than a minute) for the Notecard to receive this note, so it’s not instantaneous.
Once the ATTN pin is triggered, the Router pushes the contents of the hashmap to the Notecard, which then sends the data to Notehub. Notehub then routes this data to Blynk.
Non-Router
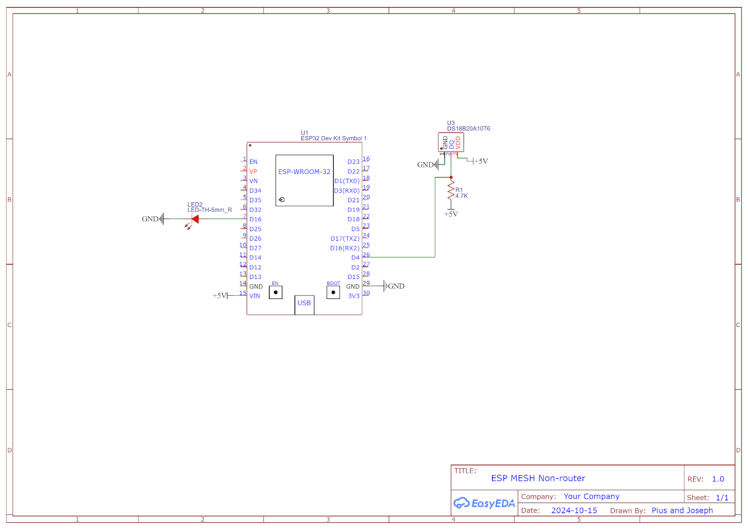
The Non-router is an ESP32 connected to a DS18B20 temperature sensor. Connect the temperature sensor to the ESP32 according to the schematic diagram below:
code
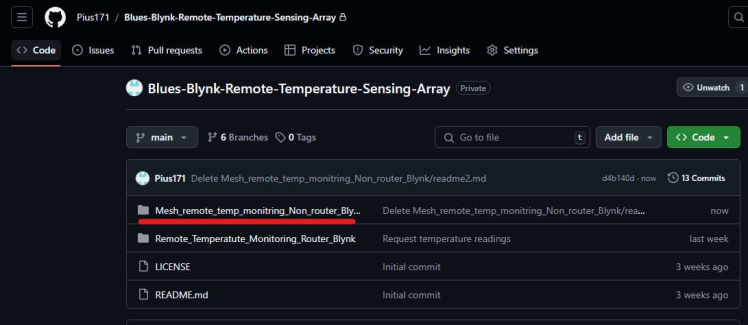
The code for the Non-router can be found in my GitHub repository here.
Router
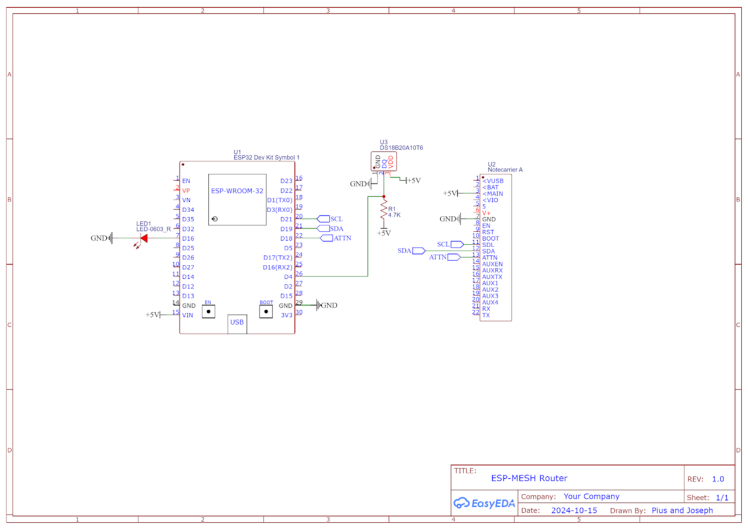
The Router is an ESP32 connected to a DS18B20 temperature sensor and a Blues Notecarrier. Connect the temperature sensor and the Notecarrier to the ESP32 according to the schematic diagram below:
The code for the Router can be found in my GitHub repository here.
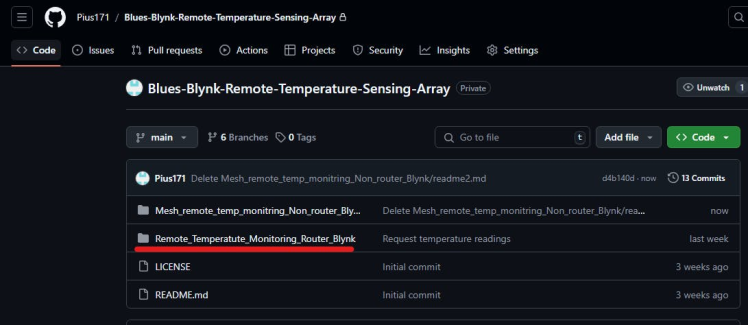
Before you upload the code, change the following:

You can find your productUID in Notehub under settings.

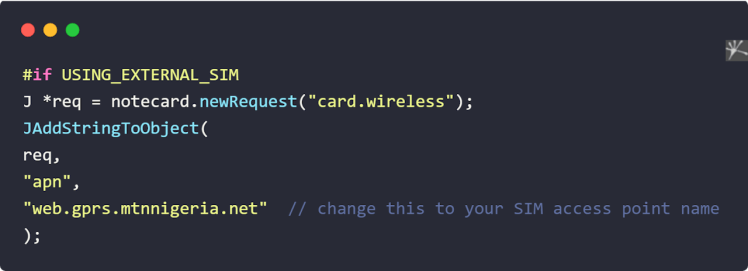
The cellular Notecard has an embedded SIM which it uses by default; however, If you are using an external SIM card, like me there are some variables you need to change in the code.
leave the macro below as true if you are using an external SIM card.

change the APN name from "web.gprs.mtnnigeria.net" to your cellular carrier’s APN.
After uploading the codes to the devices, go to Notehub you should see your device in the Devices section.

Your device must show up on the Notehub before you move on to the next step, skipping this could cause some communications problems with Blynk. If you are having an issue with this check the debugging section at the end of this article.
Setting up Blynk
The first thing we have to do on Blynk is to set up Blues integration on Blynk.
In the blynk console click on Developer Zone and select Templates.

Click on + New Template and input your device name, in the boards' section select other and for connection type choose GSM.
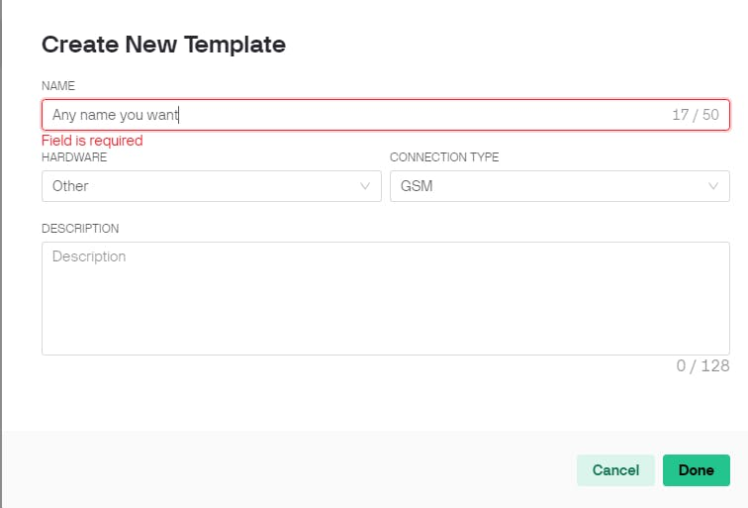
You should see the page below:
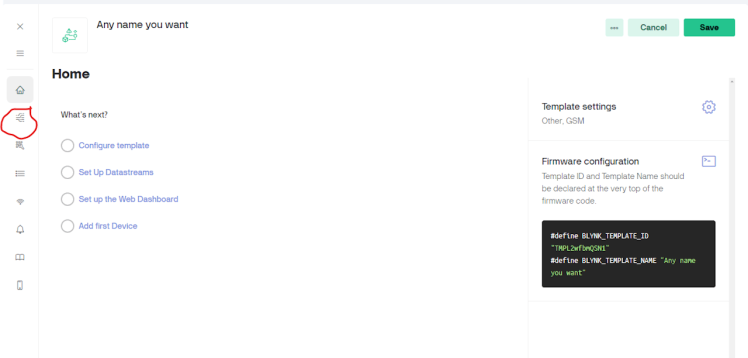
Click on Datastreams. I circled it in the image.
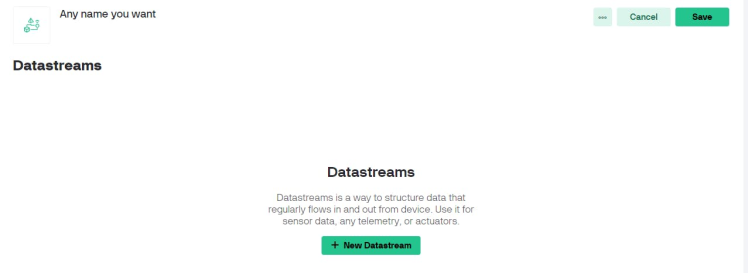
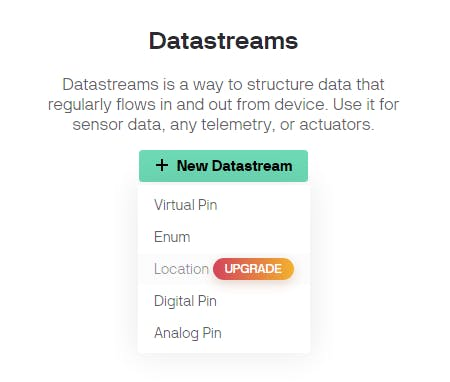
Click + New Datastream and select Virtual Pin.
A pop-up form should appear just like the one below:
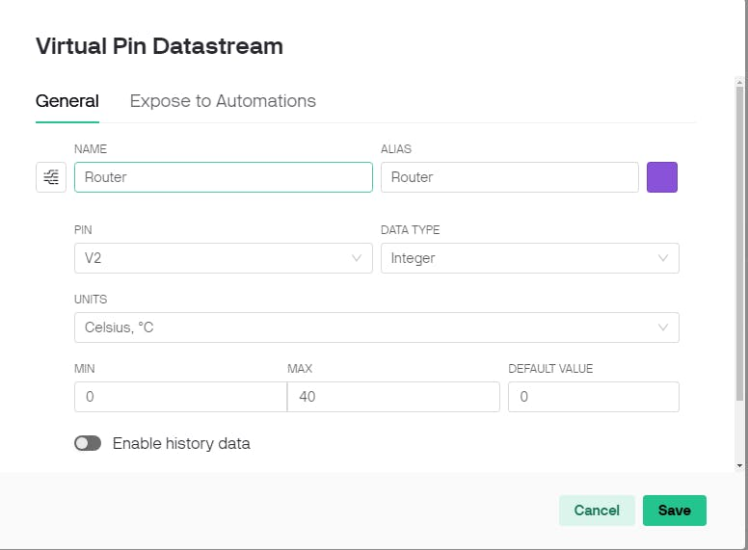
Give your Datastream the same name as the device you want it to represent. For example, for the Router, the DEVICE_NAME is Router, which is the same name as the Datastream above. This means the temperature readings of the Router Device will be published to the Datastream Router.
Set the PIN to V2, leave the DATA TYPE as Integer and set the MIN and MAX to 0 and 40 respectively.
Each device in our mesh network node will have an associated datastream, so if you have 30 devices you will need to create 30 datastreams, just like the one above.
For this project, I will have just 3 devices, a Router and two Non-router devices; however, you can have more than three. We will also create a refresh button, which will be attached to a datastream called Switch, to update temperature readings with the latest value. I chose not to continually stream temperature readings straight to Notehub as they would be routed immediately to Blynk this could quickly deplete our Notehub credits as each route costs a credit. In Notehub your account gets topped up to 5000 credits every month, but if we stream the readings continually we could end up using it all up, you could also set up automatic top-up so you never run into a scenario where you don’t have credits.
To view your Notehub credit click on your name at the top right corner of Notehub and select Billing.

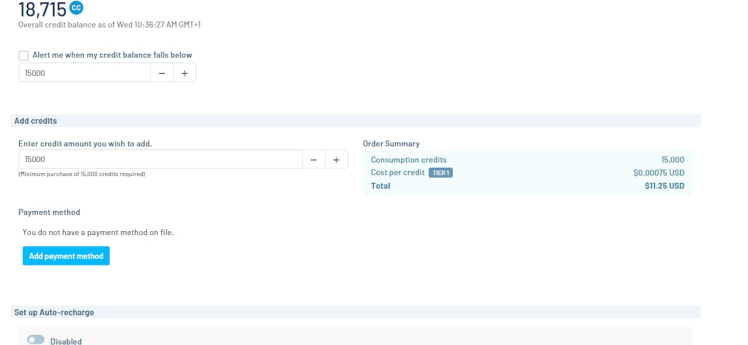
For the first iteration of this project, I was constantly streaming. See how many credits I used.
So, to create the refresh button, select + New Datastream and virtual pin. Fill out the form that pops up according to the image below:
Setting up Blynk's DashboardNow that we are done with our Datastreams let’s create a nice UI for the dashboard. Click on the Web Dashboard on the left side of the screen as seen in the image below:
In the widget box at the side of the screen search for Label drag and drop three of them into the Widget dashboard.
Hover over any of the Labels and click on the gear icon that shows up:
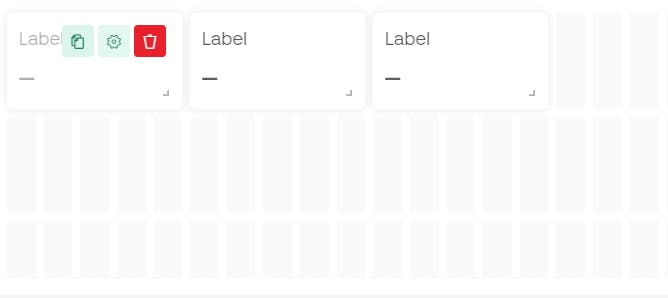
You should see a page called Label setting.
Fill out the form on the page as in the image. Do the same for the remaining labels, but assign them their proper Datastream. Your label name doesn't have to match with the datastream's name.
For the refresh button, add a switch to your dashboard. Click on its gear Icon and input as seen in the image below:
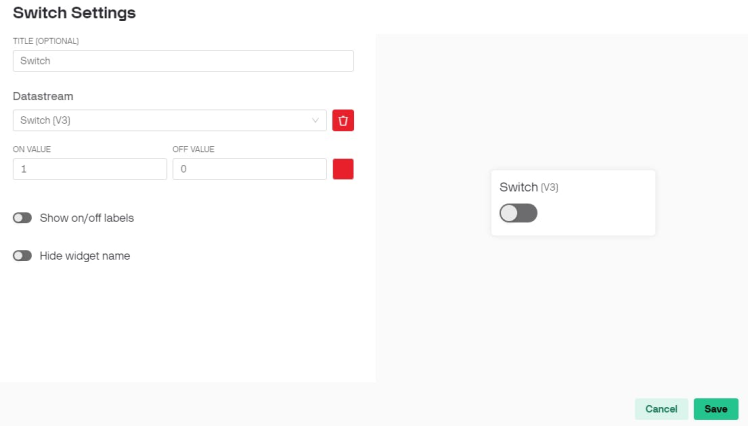
Click Save.
Linking Blynk to Blues
In the Blynk console click on Developer Zone and select Integrations.
The next dialogue will ask for a Client ID and Client Secret. To get them, return to your Notehub project, go to the Settings screen, scroll down, and then click the Generate programmatic access button.
I know it looks like a drop-down but it is clickable, so click on it and scroll down till you find
The next screen will display your Notehub Client ID and Client Secret. Copy those values into the corresponding inputs back in Blynk. Console, and then click Connect.
After connecting, scroll down in the dialogue and find your Blues ProductUID. On this section's dropdown select the template you created earlier, and then click the Add button.
Click import devices
If all went well, Blynk should've found your device and imported it into Blynk. You can see your device if you go to the Devices screen in Blynk.Console.
if not, don't worry we can add devices manually. On the left side of the screen click on Developer Zone under templates and click on the template we created earlier. on the left side of the screen click on Metadata
click on edit and click on the Blues Device ID metadata
add your Blues Device ID and save. You can find your Blues Device ID in Notehub under the Devices section.
Now click on Save and Apply in the Blynk Console to save your changes. Next, we create a device; In the Blynk Console click on Devices.
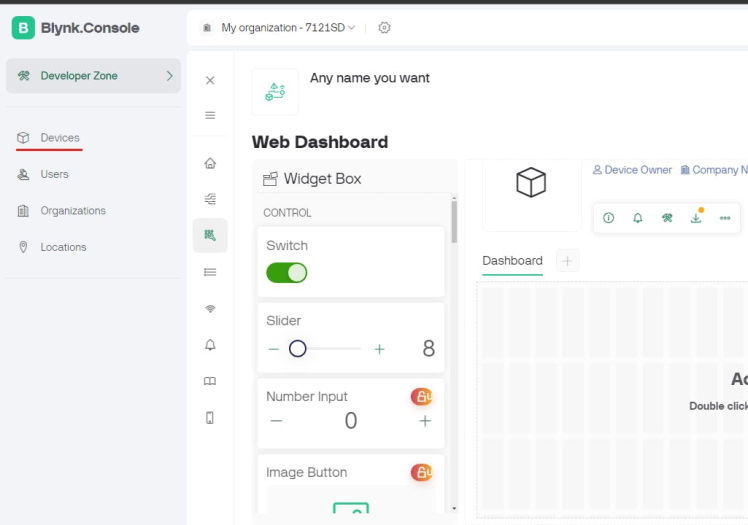
Then click on + New Device
From the pop-up that appears select From template
Select your Template and type a device name of your choice
Your screen should be like the one below with your device name in bold:
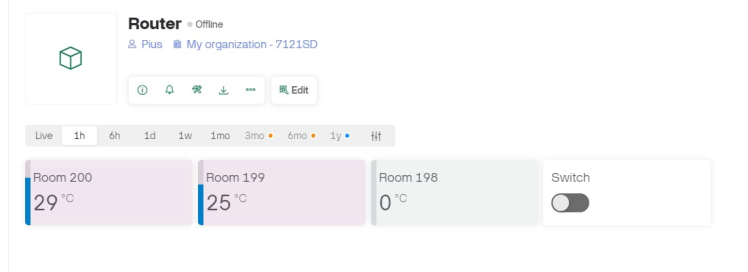
Note: Your device must already exist in Notehub before you try to create a device on Blynk.
Also if you open the Blynk mobile app with your account signed in you should see your device there.
click on your device, and add the required widgets: the labels and a button for refresh. To add the label widget click on the plus icon at the bottom of the screen
Scroll down, under Display select Value Display. In the labelled Value WIdget select Choose the datastream that will be label will be attached to.
Next, click on design at the bottom of the screen and give the label a title.
Click the X icon at the top of the screen when done. Repeat it for other labels. Recall each label represents a datastream and each data stream represents a device on our mesh network. So if you have 20 devices, you should have 20 datastreams (+ 1 datastream for the refresh button) and 20 Labels.
For the refresh button, choose a button widget and configure it according to the image below:
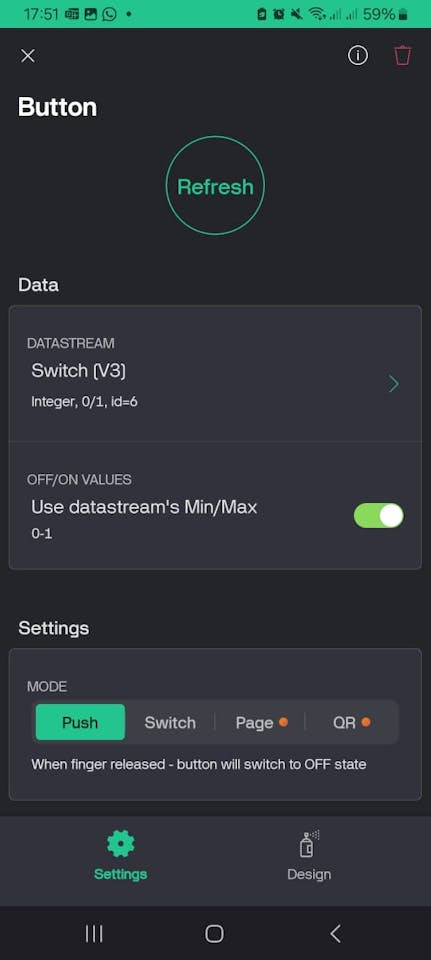
Blynk Button Widget
Device Provisioning
With all the setup we have done above, our Router device can push all the temperature readings to Blynk via Notehub., but there is a problem. When you click the refresh button. This is what is sent to Blynk:
Notehub event for temperature readings

Notehub event for temperature readings
The device ID and its recorded temperature. Blynk will receive this but it won't reflect on our dashboard, because according to Blynk’s documentation on its Blues integration.

It means our keys must have the same name as our datastream. My initial idea was to create a config portal on each device so you can connect to them individually and name them, but if you have 30 devices this means you have to connect to 30 different devices, that's a lot of work.
Thankfully Blues has a feature called environment variables. Environmental variables allow you to manage application state or configuration settings across multiple devices, even after those devices have been deployed into the field. Rather than forcing you to implement your own state management system,
So I used the environmental variables such that all Non-router devices send their temperature readings to the Router device, and the Router device tells each Non-router device apart based on their ID. Before it uploads the temperature readings to Notehub it first checks if check the environmental variables to see if the ID has a corresponding name; if yes it will send the temperature reading with the device name to Notehub, else it sends with just the ID.

As you can see in the image above, one of the devices does not have a name in the environmental variables.
To set this up, go, click on Devices in Notehub then double click on your device, at the top of your screen you should see a tab called Environment.
Device Environmental Variables
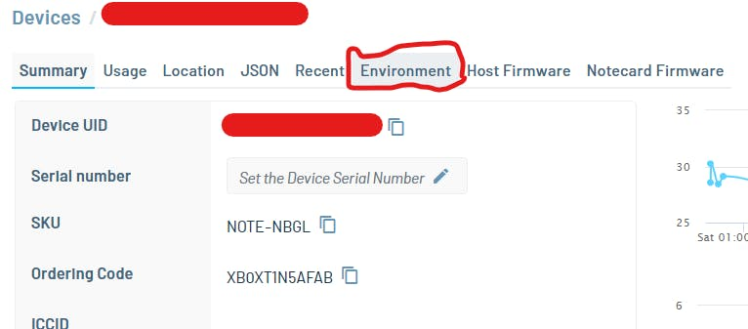
Device Environmental Variables
Click on it,

Then name your devices just as I did. Remember the Values must match the name of the datastream you want the device temperature reading to go to.
Environmental Variables

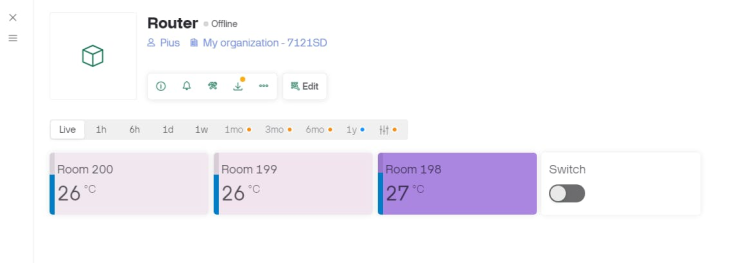
Then click Apply Changes. It takes a while (less than a minute) for the Notecard to get updated, once updated you should be able to see something like this below when the next temperature readings are sent.

With that our Mesh Remote Temperature Monitoring Project is ready
Debugging
Can't Communicate with Blynk
If you are having any issues communicating with Blynk it means you did not follow the order stipulated above when building this project. The order is as follows:
- Create your template
- Make your Notecard is available on Notehub
- Add your Blues Device ID to your template’s metadata
- Create a device on Blynk based on that template.
If it was successful you should see your Blynk device token in the Environmental variables of your device.
Blynk device token not found
It means you did not follow the order above. Although you can add the token manually, in my experience inbound communication from Blynk won't work, blynk has to be one to add the token to Notehub.
The device is not showing up on Notehub
This could be due to the following:
- incorrect project UID, check your Router code
- No internet connection, it could be your Cellular Notecard can’t connect to the internet which could be due to poor connectivity or you have run out of data
- You are using the Blue Notecard embedded SIM and didn't change the USING_EXTERNAL_SIM macro to false.

Code
Credits

Pius4109
Let’s see… I’ll skip to the best parts. I am an aspiring embedded software engineer passionate about creating a sustainable embedded system ecosystem in Nigeria. I have been tinkering with embedded systems since my high school days until the present. My fascination with robotics brought about my interest in embedded systems. I have always wondered how GOD made humans walk, and it still fascinates me when I sit and watch people walking. So, I decided to delve into robots and stumbled upon a video on YouTube on how to make a robot with Arduino. That was it; I have been writing codes since then. However, now, my interest is in becoming an embedded software engineer rather than focusing on robots. Robots just served as a means to introduce me to embedded systems.




Leave your feedback...