Beating My Girlfriend At Scrabble With Raspberry Pi!
About the project
Ever wanted a way of telling you all the words you could use with your tiles on scrabble? What if it even told you how much those word scores? And you can built it completely yourself with Raspberry Pi? Well this is the tutorial for you
Project info
Difficulty: Moderate
Platforms: Raspberry Pi
Estimated time: 1 day
License: GNU General Public License, version 3 or later (GPL3+)
Items used in this project
Hardware components
Story
Intro
So you want some help beating your friends or family at Scrabble? Well this may be the answer.
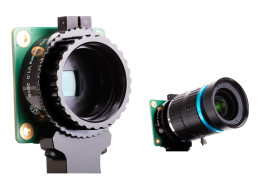
Using just a bit of Python code, running on a Raspberry Pi with a HQ Camera Module, you can read your scrabble tiles, and have a display show you the top highest scoring words that you could play.
Video Tutorial
Here's the video I made for my Devscover YouTube Channel:
Gathering Components
First you are going to want to gather all your components. Note the High Quality camera isn't essential, you can use the older camera modules for Raspberry Pi. The advantage this new one gives you, is that it has a really good depth of field, so you can have your tiles in focus while the background is blurry.
Connect It Up
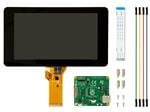
- Connect the display to the Raspberry Pi's DSI Screen Port, and required jumper cables as per the included instructions
- Connect the HQ camera to the Raspberry Pi's Camera port (this can look the same as the DSI one)
- [Optionally] Attach a tripod to the camera for easier mounting
- Get out your scrabble board and some tiles
Install Dependencies
You may or may not need to install the following dependencies, which allow Optical Character Recognition:
sudo apt install libsm6 libxrender1 libfontconfig1 libatlas3-base libqtgui4 libqt4-test libwebp6 libtiff5 libjasper1 libilmbase12 libopenexr22 libilmbase12 libgstreamer1.0-0 libavcodec57 libavformat57 libavutil55 libswscale4 libqtgui4 libqt4-test libqtcore4
You may also need to run a sudo apt update
Install Pytesseract
This assumes you have Python 3 installed.
Installation is complicated, because the default way of installing should be
sudo apt-get install tesseract-ocr
however, that installs (at time of writing) version 4 of tesseract, which does not work with a whitelist.
Many attempts were made to use --oem 0 with tesseract 4 to enable whitelisting, but then more errors sprang up about needing dictionaries.
Therefore the solution was to compile the library locally from the source using these commands:
- git clone --depth 1 https://github.com/tesseract-ocr/tesseract.git
- cd tesseract-ocr/
- ./autogen.sh
- ./configure
- make
- sudo make install
- sudo ldconfig
- tesseract -v
Then you must download the english trained data from: https://github.com/tesseract-ocr/tessdata/blob/master/eng.traineddata
Next, set an environment variable to the location of that english trained data.
You can use export TESSDATA_PREFIX=/home/pi/tesseract/tessdata (replacing the location with the location of the folder you downloaded the traineddata into) in your CLI or add this to your ~/.bashrc to ensure it is set on startup
Install Python packages
You also need to use pip3 to install required packages. Use this command
pip3 install opencv-python==3.4.6.27 pip3 install pytesseract pip3 install time pip3 install PySimpleGUI pip3 install ImageGet the code
You can find the code here: https://github.com/wazcov/devscover-youtube/tree/master/scrabble
Git clone to download the repository to your Raspberry Pi
Modify the code
Next, you might want to alter a few bits to get it working for you...
Specifically this line that alters the point at which it decides what is black and what is white
- blackwhite = img.point(lambda x: 0 if x < 166 else 255, '1')
the 166 worked very well for the light source I had. However, as the day progressed the light changed and it made pytesseract unable to read the tiles. This number is therefore very fickle - you may need to do a lot of tweaking to get it to read the image.
Line up the image
To line up the image, I recommend using raspistill. This will preview for 15 seconds and save a picture to testImage.jpg
- raspistill -t 15000 -o testImage.jpg
Run It!
Simply runpython3 scrabbleWordFinder.py
How did it go?
Let me know here or as a comment on my YouTube Channel, and I'll try and get back to you with tweaks and advice! Also, do subscribe on YouTube for plenty more cool tutorials like this!
You can also find me on my website Devscover.com


