Battery Powered Wifi Button To Control Hue Lights
About the project
This project demonstrates how to build a battery powered IoT Wi-Fi button in less than 10 min. The button controls HUE lights over IFTTT.
Project info
Difficulty: Easy
Platforms: IFTTT, Philips hue, SparkFun, Things On Edge, Espressif
Estimated time: 1 hour
License: GNU General Public License, version 3 or later (GPL3+)
Items used in this project
Hardware components
Story
Today we can build electronic devices and connect them to other smart home devices literally in minutes. What's more we can do it without dedicated programmers and writing a single line of code. In this project we show a battery powered Wi-Fi Smart Button, which controls HUE lights remotely over the internet. It can be built effortlessly by developers at all skills level.
The button can send 15k activation events on 2xAAA lithium batteries - this is by far the best low-power smart button. If we take into account 8x pushes/events a day it will last 5+ years. It is due to the IoT module, which is used in this project, doesn't drain any current when is not activated - true 0A.
This instruction comprises with the following steps:
- Assembly using bread board
- Setting-up IFTTT and HUE service
- Configuring IoT module
- Connecting IoT module to the internet
Everything can be done under 10 minutes without a single line of code or cloud knowledge.
This video also demonstrates all steps described in this projects
Assembly
Solder Pin Header PCB breakaway connector to Cricket module. The header makes it easier to connect Cricket module to breadboard.
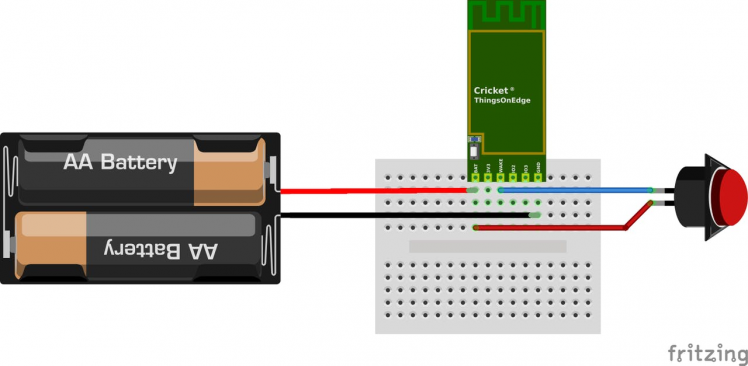
- Connect 1st pin from the button to battery VCC (+)
- Connect 2nd pin from the button to WAKE_UP port on Cricket module
- Connect battery VCC (+) to BATT port on Cricket module
- Connect battery GND (-) to GND port on Cricket module
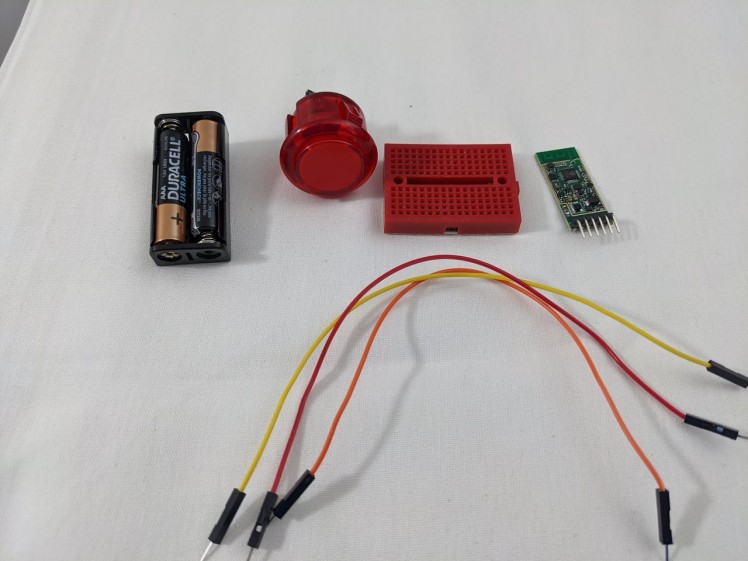
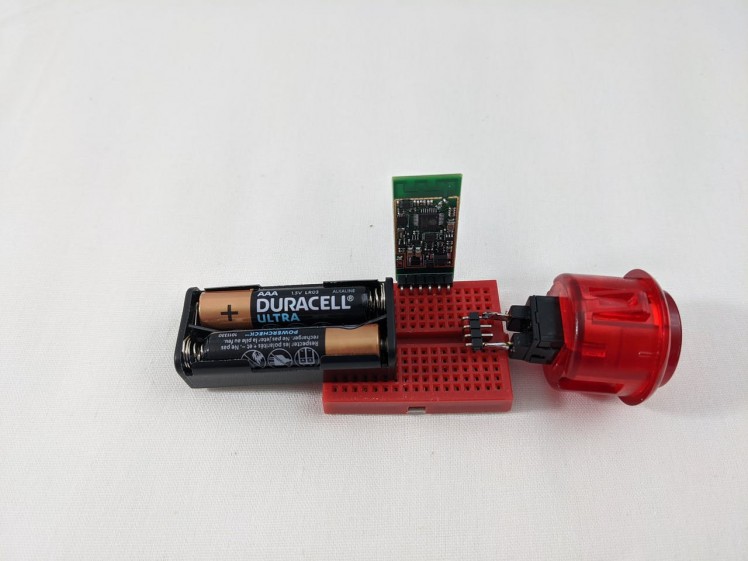
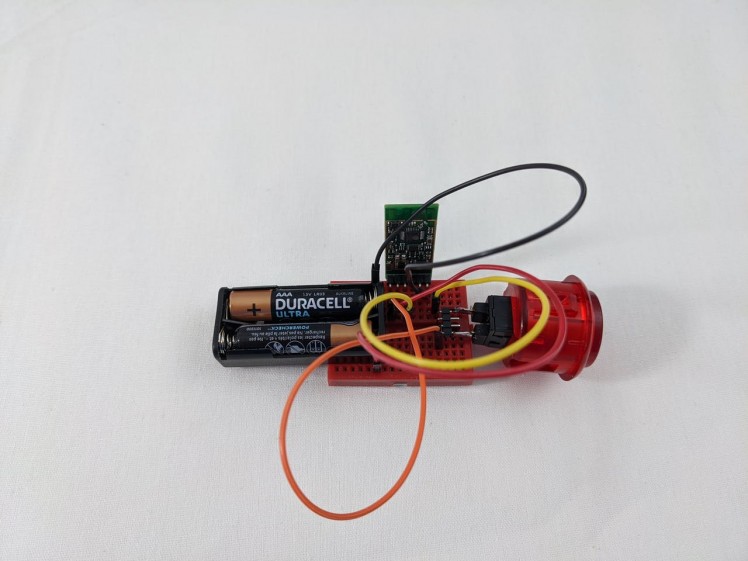
Now we need to configure both IFTTT and Cricket.
IFTTT setup
Steps to follow:
- Go to: ifttt.com
- Login or register
- Click Create from User / Account menu (top right corner)
- Click + to create new source event
- Select Webhooks service
- Click Continue
- Click Receive a web request (on the left hand side)
- Create event name e.g. button_event
- The source event should be set-up now, click + after Then event
- Search HUE service
- Select HUE service event
- if you do not have yet HUE you need to add by -> Connect
- Select device (light) to which this event will be attached
- Click Finish
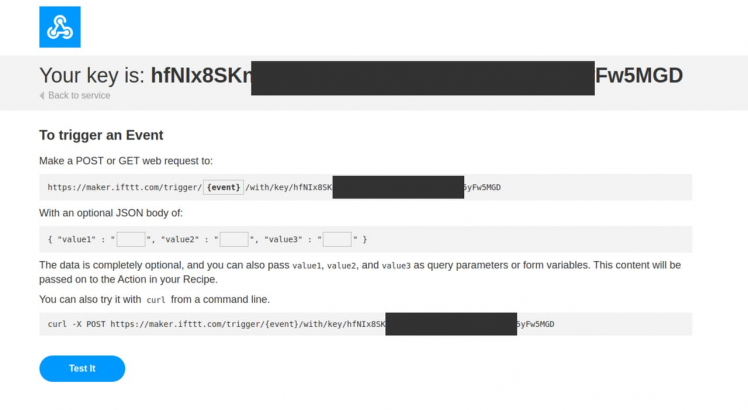
Nearly done, we need to get a HTTP address to which we can post event from IoT module.
Search for Webhooks service and click in document ion in the right up corner.

Next copy web links under "Make a POST or GET web request to:" you will need it latter.
Connect your device to WiFi
In a few steps you will connect your device to the internet over your Wi-Fi network. All you need to do is to activate Cricket's private Wi-Fi hotspot and then open a private web page to pass your Wi-Fi network credentials. Please follow the steps below:
- Press and hold a button on the module for 5 seconds until the LED is constantly lit.
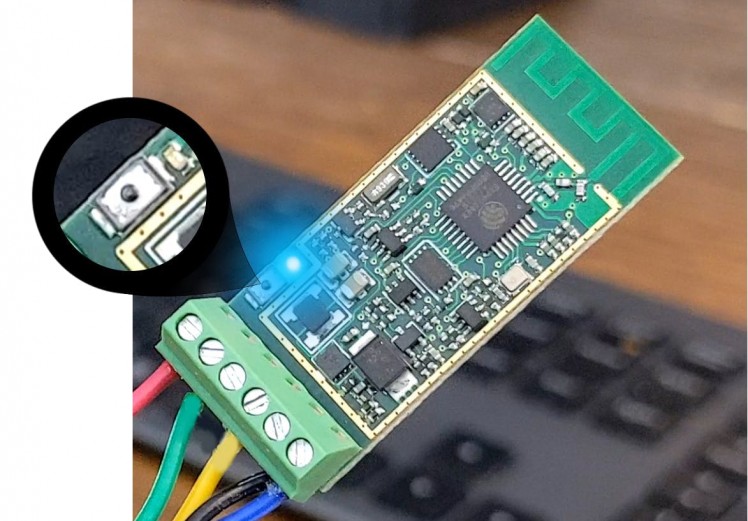
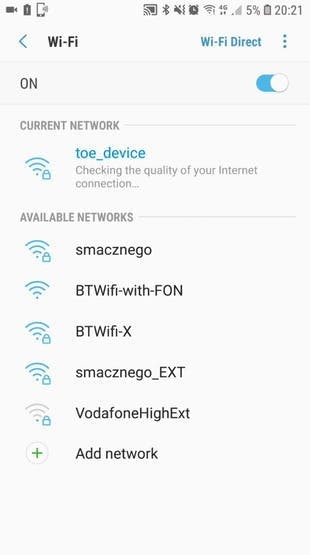
- Once the LED is constantly lit Cricket opened a private Wi-Fi hot spot. Connect from either a laptop or smartphone to the hot spot with the following credentials:
SSID: toe_device
No password is required
Select "toe_device" network
- Once connected, open a private web page: http://192.168.4.1/inex.html
NOTICE: make sure LED is still ON! If is OFF repeat the steps from the beginning
- Enter your WiFi credentials
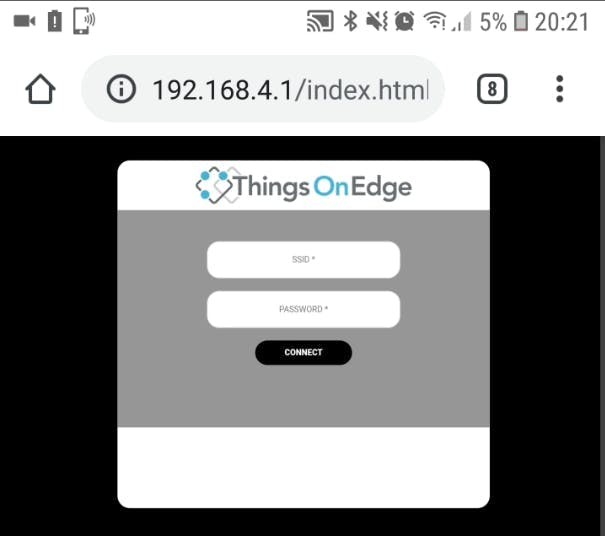
- Now you can pass your Wi-Fi network credentials and click CONNECT. If you passed correct SSID and Password then after few seconds the device should report it is online and the LED will be OFF.
Configure your device
Cricket is entirely configured OTA (Over The Air). We need to configure Cricket to send POST HTTP request when is woken up by high signal on WAKE_UP pin. This signal is provided when the button is pressed.
Set the following configuration:
- RTC: OFF
- IO2: OFF
- IO3: Off
- Battery monitor: OFF
- Force updates on - IO1 Wake Up: On
- Force updates on - RTC Wake Up: OFF
- Post Events: see below
Paste the link you copied from Webhooks in io1_wakeup and leave data empty
- replace https to http
- replace event to button_event
The link should look like below:
http://maker.ifttt.com/trigger/button_event/with/key/hfNIx8SKn_xxxxxxxxxxxxxxxxxxxxxx_YW3xx5yFw5MGD
More information how to configure Cricket can be found in the documentation here.
Now you can switch on/off HUE light with your button device.
You can find more information about Cricket module from Things On Edge page.
Credits

THINGS ON EDGE
Things On Edge provides plug and play, ultra-low power Wi-Fi modules, which can run directly on AAA batteries for years. Designed for makers at all skill levels from advanced to those who just start building IoT devices.


Leave your feedback...