Esp32 Connect To Wifi
About the project
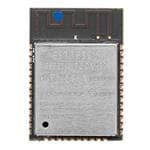
This tutorial is about how to get started using the WiFi function of the ESP32. You can choose specific WiFi network and connect to it. You can monitor the connection status via serial monitor. All the tests performed here using ESP32 NodeMCU module.
Project info
Difficulty: Easy
Platforms: Arduino, Blynk, Espruino, Everything ESP
Estimated time: 1 hour
License: GNU General Public License, version 3 or later (GPL3+)
Items used in this project
Software apps and online services
Story
This tutorial about how to setup your ESP32 NodeMCU to connect with you home wifi.
How It's work.
Start by including the necessary libraries.
- #include "WiFi.h"
In the following variables, define your access point network credentials:
- const char* ssid = "yourNetworkName";
- const char* password = "yourNetworkPass";
For example, your wireless SSID is "KakiGodek-WiFi" and your password is "kakigodek123". So you need to replace "yourNetworkName" to "KakiGodek-WiFi" for the SSID, and "yourNetworkPass" to "kakigodek123" for the password.
In the setup(), initialize the Serial Monitor for demonstration purposes.
- Serial.begin(115200);
Set your ESP32 as an access point with the SSID name and password defined earlier.
- WiFi.begin(ssid, password);
Then we do a while loop until the connection is establish. We can call the status method on the WiFi object and wait for the result to match the WL_CONNECTED enum. We put a small delay to avoid a constant poll.
- while (WiFi.status() != WL_CONNECTED) {
- delay(500);
- Serial.println("Connecting to WiFi..");
- }
When ESP32 successful connected to you WiFi, you can see the result via serial monitor
- Serial.println("Connected to the WiFi network");
- // Print local IP address and start web server
- Serial.println("");
- Serial.println("WiFi connected.");
- Serial.println("IP address: ");
- Serial.println(WiFi.localIP());


