

Arduino Scale With Hx711 Using Visuino

Made by Ron
About the project
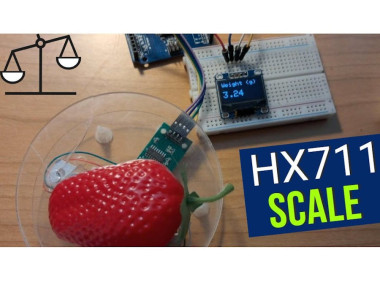
In this tutorial we will learn how to use a HX711 Load Cell and ADC module to build the scale with Arduino, OLED Display and Visuino.
Project info
Difficulty: Easy
Platforms: Arduino, SparkFun, Visuino
Estimated time: 1 hour
License: GNU General Public License, version 3 or later (GPL3+)
Items used in this project
Hardware components

Story
Watch the video!
Also make sure to check out this tutorial for more details: Arduino Nano and Visuino: Measure Weight With HX711 Load Cell Amplifier and ADC
Step 1: What You Will Need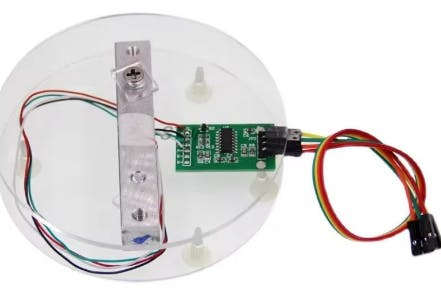


Arduino board (or any other board)
- Breadboard
- One Weight Load Cell
- One HX711 ADC Sensor Module for Load Cells
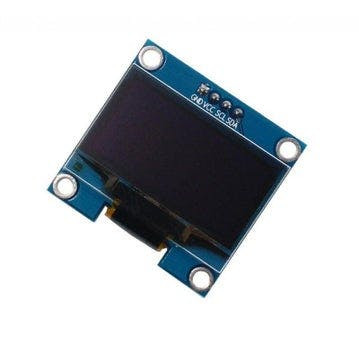
- OLED Display
- Jumper wires
- Visuino program: Download Visuino
Note: You can purchase online Weight Load Cell and HX711 ADC Sensor Module together already as a kit.
Step 2: The Circuit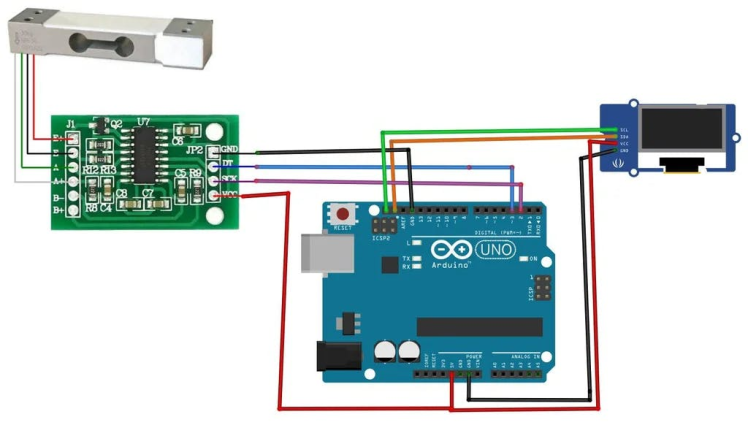
- Connect the Red wire from the Load Cell (Picture 1) to the E+ pin of the HX711 module
- Connect the Black wire from the Load Cell (Picture 1) to the E- pin of the HX711 module
- Connect the White wire from the Load Cell (Picture 1) to the A- pin of the HX711 module
- Connect the Green wire from the Load Cell (Picture 1) to the A+ pin of the HX711 module
- Connect HX711 ADC Sensor ModuleGround wire(Black wire) to Ground pin of the Arduino board
- Connect HX711 ADC Sensor ModulePower wire(Red wire) to 5V pin of the Arduino board
- Connect HX711 ADC Sensor ModuleDT wire(Green wire) to Digital pin 3 of the Arduino Nano board
- Connect HX711 ADC Sensor ModuleSCK wire(Yellow wire) to Digital pin 2 of the Arduino Nano board
- Connect OLED Display pin [SCL] to Arduino pin [SCL]
- Connect OLED Display pin [SDA] to Arduino pin [SDA]
- Connect OLED Display pin [VCC] to Arduino pin [5v]
- Connect OLED Display pin [GND] to Arduino pin [GND]
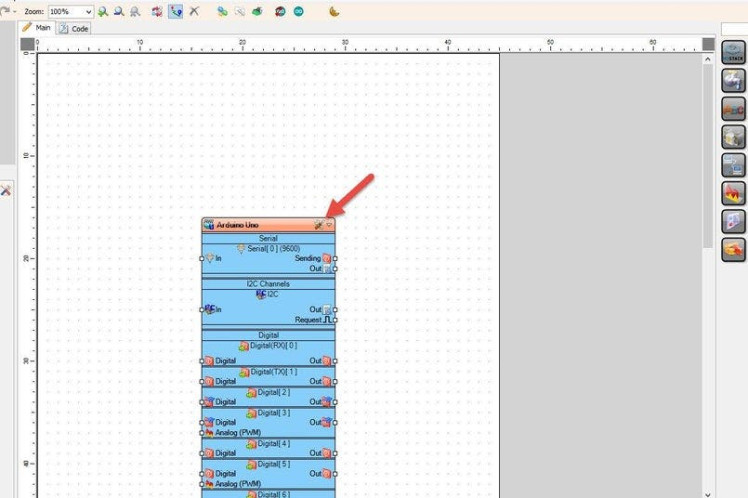
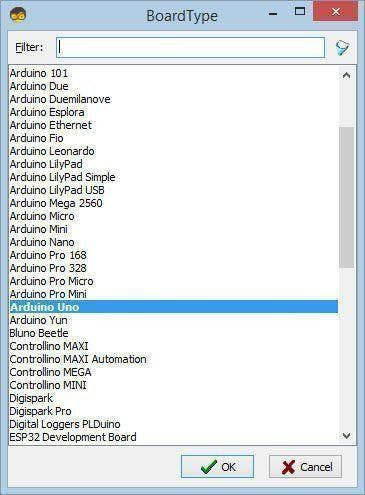
Start Visuino as shown in the first picture Click on the "Tools" button on the Arduino component (Picture 1) in Visuino When the dialog appears, select "Arduino UNO" as shown on Picture 2
Step 4: In Visuino Add Components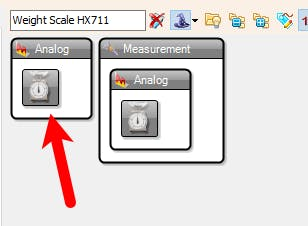
- Add "Weight Scale HX711" component
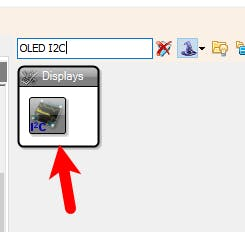
- Add "OLED I2C" component
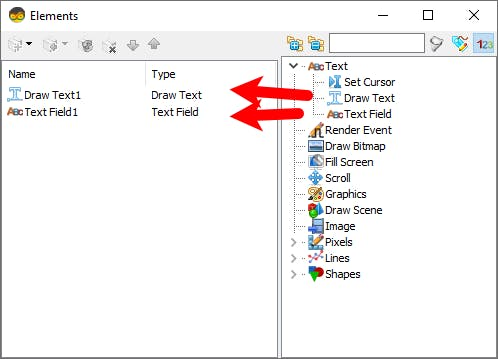
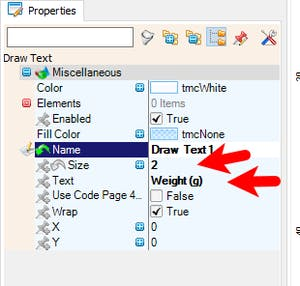
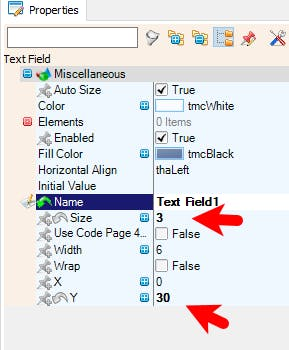
- Double click on the "DisplayOLED1" and in the "Elements" window drag "Draw Text" to the left side and in the "Properties" window set "Size" to 2 and "Text" to "Weight (g)"
- In the "Elements" window drag "Text Field" to the lefty side and in the "Properties" window set "Size" to 3 and "Y" to 30
- Close the "Elements" window
After Uploading the Project we will start with the Calibration.
Step 6: In Visuino Connect Components1 / 2
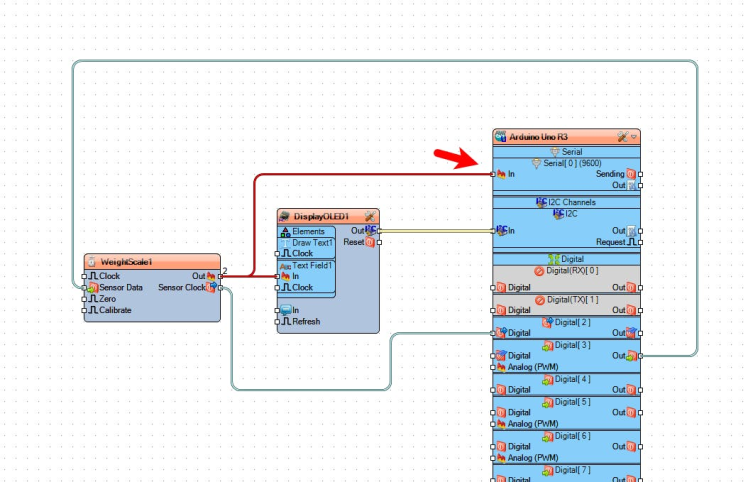
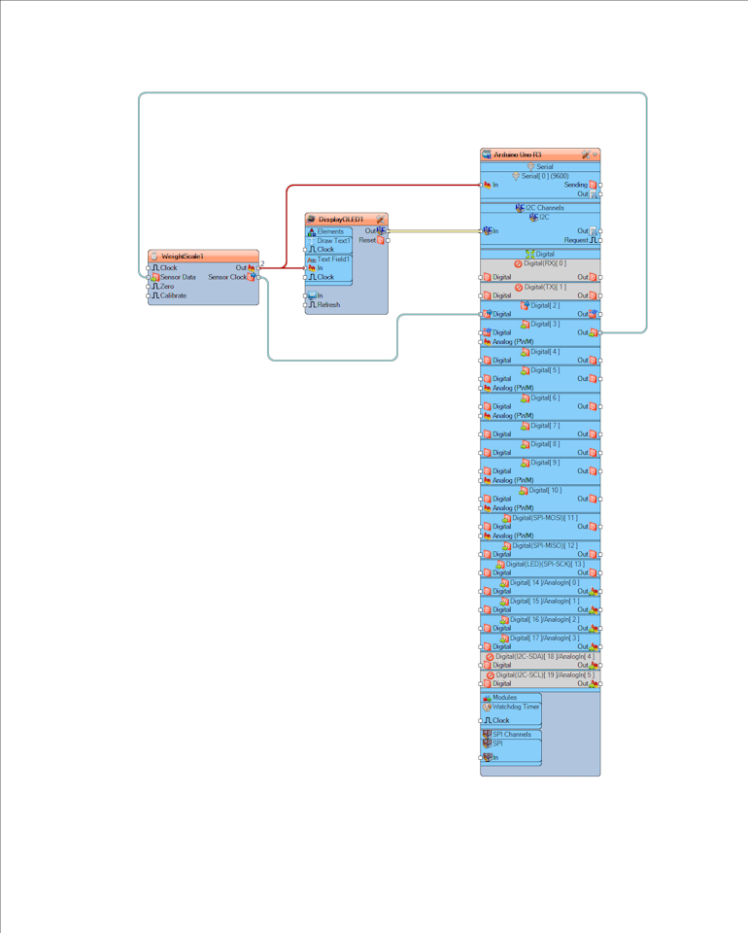
- Connect Arduino Digital pin [2] to "WeightScale1" pin [Sensor Data]
- Connect "WeightScale1" pin [Sensor Clock] to Arduino Digital pin [2]
- Connect "WeightScale1" pin [Out] to "DisplayOLED1" > "Text Field1" pin [In]
- Connect "DisplayOLED1" pin I2C [Out] to Arduino pin I2C [In]
- For Calibration only also Connect "WeightScale1" pin [Out] to Arduino Serial Pin [In]

In Visuino, at the bottom click on the "Build" Tab, make sure the correct port is selected, then click on the "Compile/Build and Upload" button.
Step 8: In Visuino: Set the Weight Zero Offset for the HX711 Component

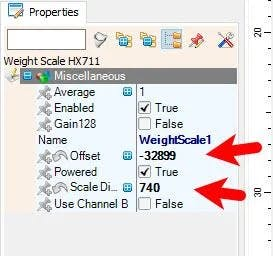
- Open Serial Terminal Tab in Visuino, Set the correct Port, Click "Connect" button and you will see the value measured by the HX711 module
- Copy one Value in our case it is 104216 and in Visuino select "WeightScale1" component and in the "Properties" window set "Offset" to Minus the value, in our case: -32899
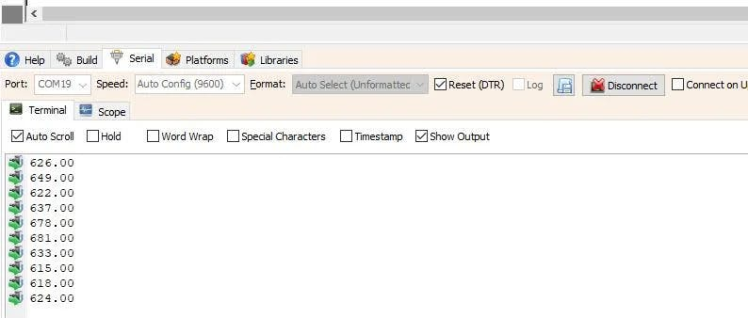
Upload the Project to the Arduino Board and Open and Connect the Serial
- Now place a 1 gram weight on the Weight Load Cell In my case I just placed a 1000mg Vitamin C pill, but you can place any other object for example 100g chocolate and divide the final value by 100 to get the 1g value out.
- The value that you now see in the Serial window put in the "Properties" window under "Scale Divider" in my case it is 740
- Now the Scale is more or less calibrated, of course you can play with the values to really Fine Tune it.
- You can now disconnect the wire going from "WeightScale1" pin [Out] to Arduino Serial Pin [In]
Upload the Project again to the Arduino Board and you should see the weight Value on the OLED Display
Step 9: PlayCongratulations! You have completed your project with Visuino. Also attached is the Visuino project, that I created for this tutorial, you can download it and open it in Visuino: https://www.visuino.eu
Schematics, diagrams and documents
Code
Credits
Related products


Leave your feedback...