
Arduino And Visuino: Measure Weight With Hx711 And Load Cell
About the project
Make you own Arduino Weight Scale with HX711 Load Cell Amplifier and ADC module - Quick and Easy!
Project info
Difficulty: Easy
Estimated time: 1 hour
License: GNU General Public License, version 3 or later (GPL3+)
Items used in this project
Software apps and online services
Story
HX711 Load Cell Amplifier and ADC modules make it very easy to build your own scale with Arduino. With the help of Visuino the task is so easy that you can complete it in just couple of minutes.
In this Tutorial, I will show you how to connect the load cell to the HX711 Load Cell Amplifier, how to connect the HX711 to Arduino, how to program it with Visuino, and how to calibrate your newly created scale.
Step 1: Components
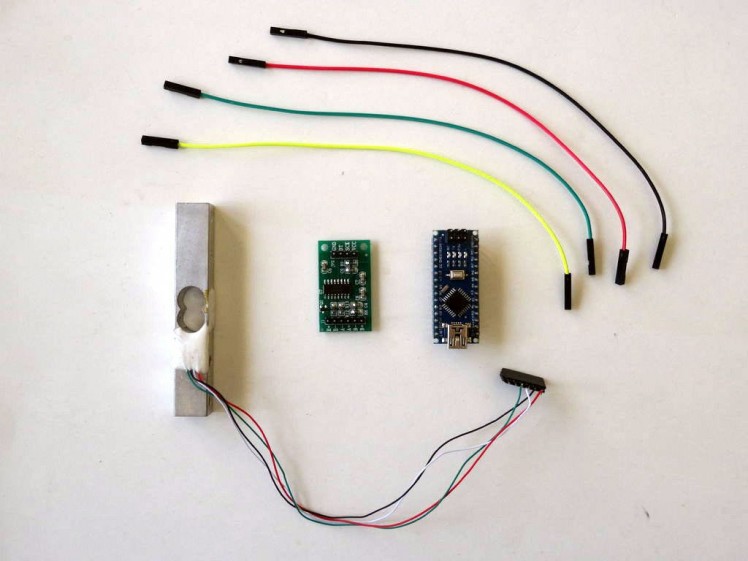
- One Arduino compatible board (I use Arduino Nano, because I have one, but any other will be just fine)
- One Weight Load Cell
- One HX711 ADC Sensor Module for Load Cells
- 4 Female-Female jumper wires
1 / 2 • Picture 1
Picture 1
Picture 2
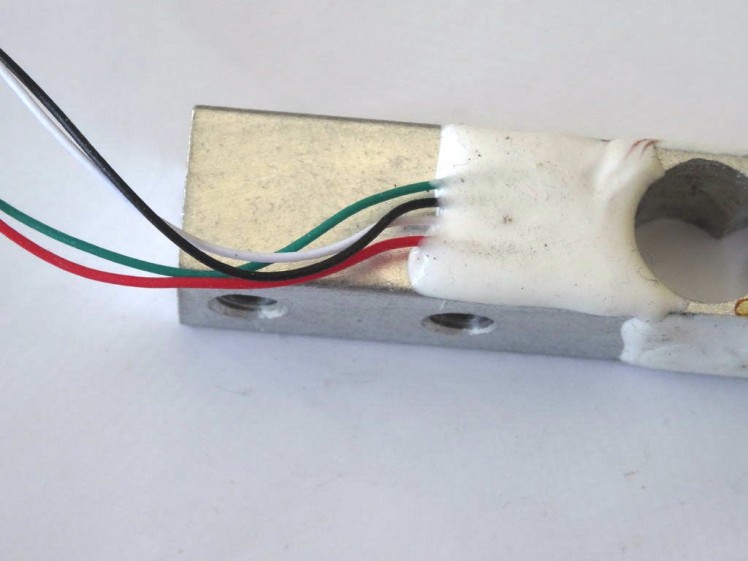
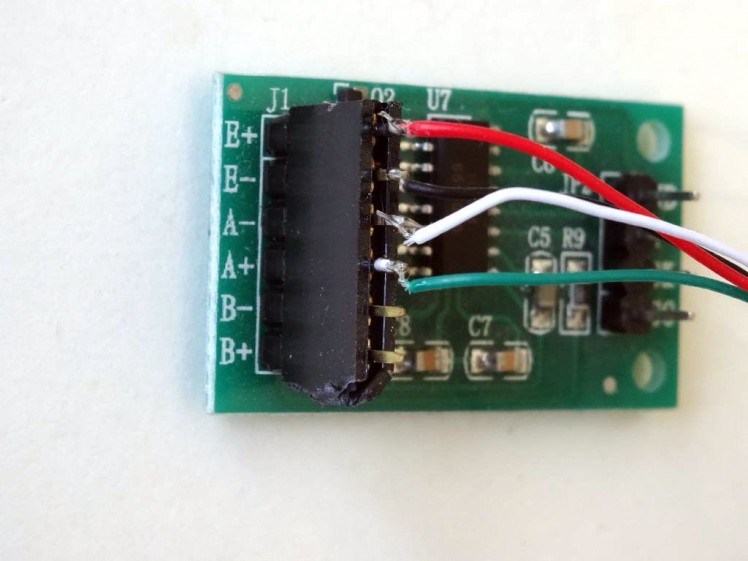
- Connect the Red wire from the Load Cell (Picture 1) to the E+ pin of the HX711 module (Picture 2)
- Connect the Black wire from the Load Cell (Picture 1) to the E- pin of the HX711 module (Picture 2)
- Connect the White wire from the Load Cell (Picture 1) to the A- pin of the HX711 module (Picture 2)
- Connect the Green wire from the Load Cell (Picture 1) to the A+ pin of the module (Picture 2)
1 / 4 • Picture 1
Picture 1
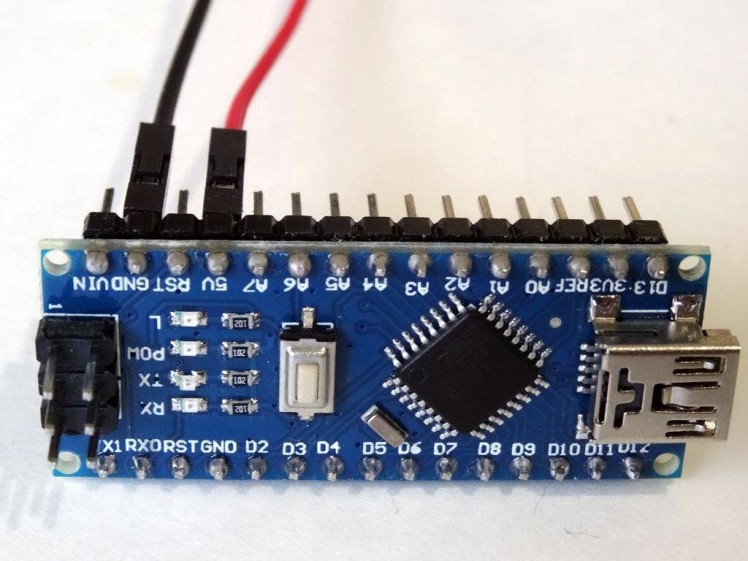
Picture 2

Picture 3
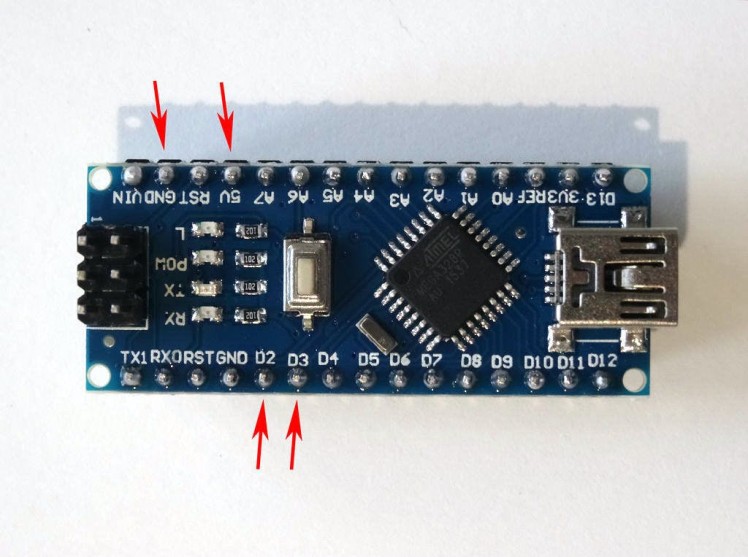
Picture 4
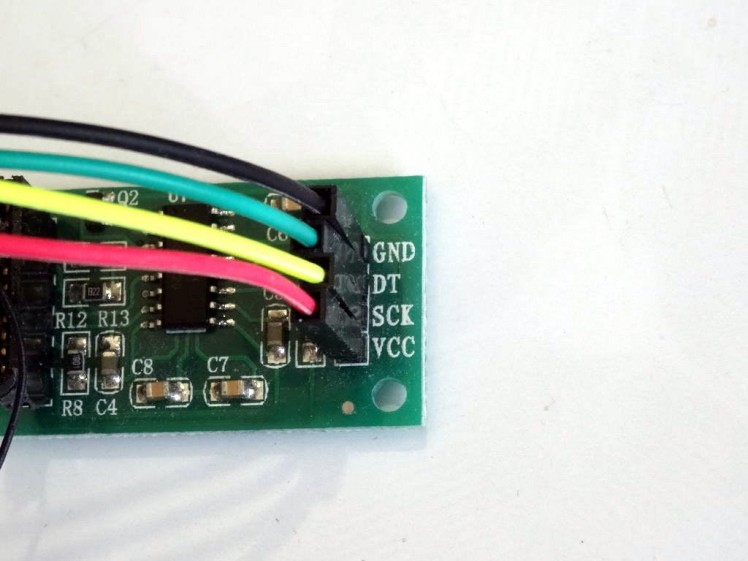
- Connect 5V VCC Power (red), SCK (yellow), DT (green), and Ground (black), to the HX711 ADC Sensor Module (Picture 1)
- Connect the other end of the Ground wire (black) to Ground pin of the Arduino board (Picture 2)
- Connect the other end of the 5V VCC Power wire (red) to the 5V power pin of the Arduino board (Picture 2)
- Connect the other end of the DT wire (green) to Digital pin 3 of the Arduino Nano board (Picture 3)
- Connect the other end of the SCK wire (yellow) to Digital pin 2 of the Arduino Nano board (Picture 3)
- Picture 4 shows where are the Ground, 5V Power, Digital pin 2, and Digital pin 3, pins of the Arduino Nano
1 / 2 • Picture 1
Picture 1
Picture 2
To start programming the Arduino, you will need to have the Arduino IDE installed from here: http://www.arduino.cc/.
Please be aware that there are some critical bugs in Arduino IDE 1.6.6.
Make sure that you install 1.6.7 or higher, otherwise this Tutorial will not work!
The Visuino: https://www.visuino.com also needs to be installed.
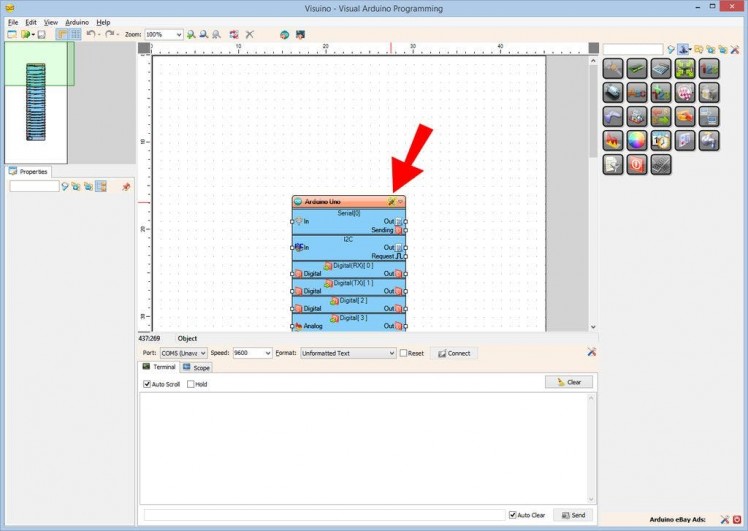
- Start Visuino as shown in the first picture
- Click on the "Tools" button on the Arduino component (Picture 1) in Visuino
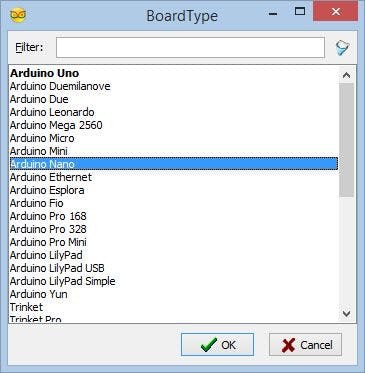
- When the dialog appears, select "Arduino Nano" as shown in Picture 2
1 / 4 • Picture 1
Picture 1
Picture 2
Picture 3
Picture 4
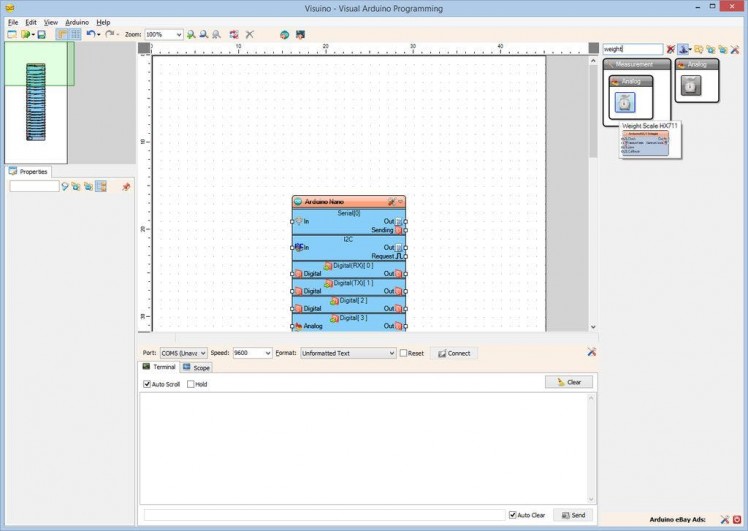
- Type "weight" in the Filter box of the Component Toolbox then select the "HX711 Weight Scale" component (Picture 1), and drop it in the design area
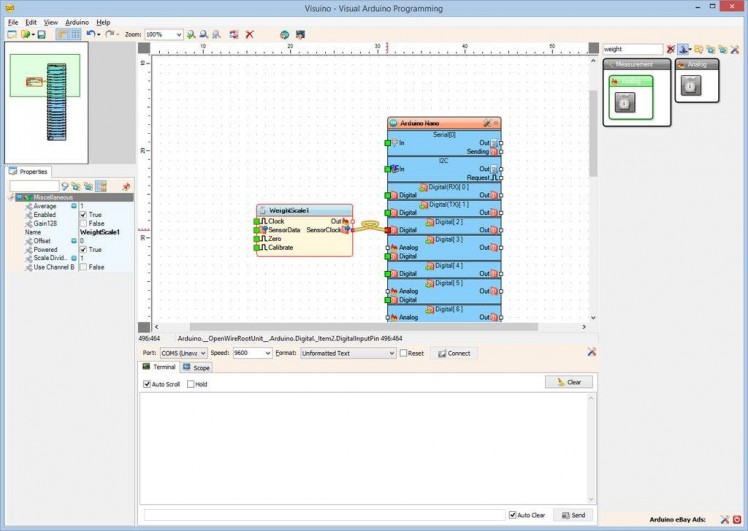
- Connect the "SensorClock" pin of the WeightScale1 component to the to the "Digital" input pin of the "Digital[ 2 ]" channel of the Arduino component (Picture 2)
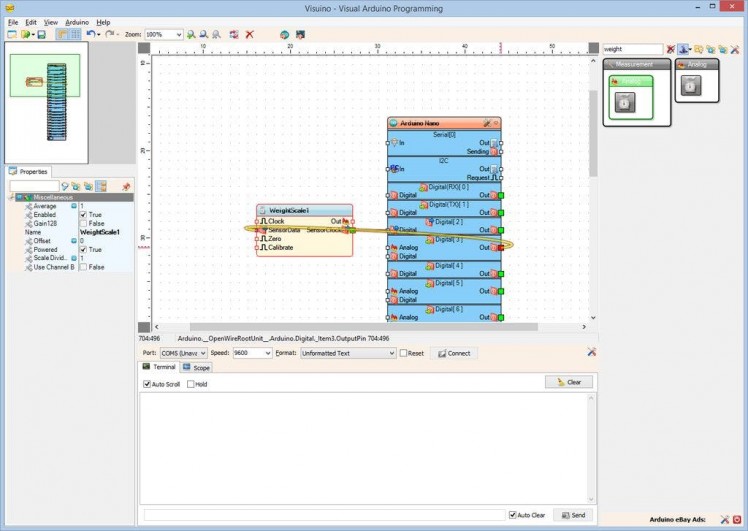
- Connect the "SensorData" input pin of the WeightScale1 component to the "Out" output pin of the "Digital[ 3 ]" channel of the Arduino component (Picture 3)
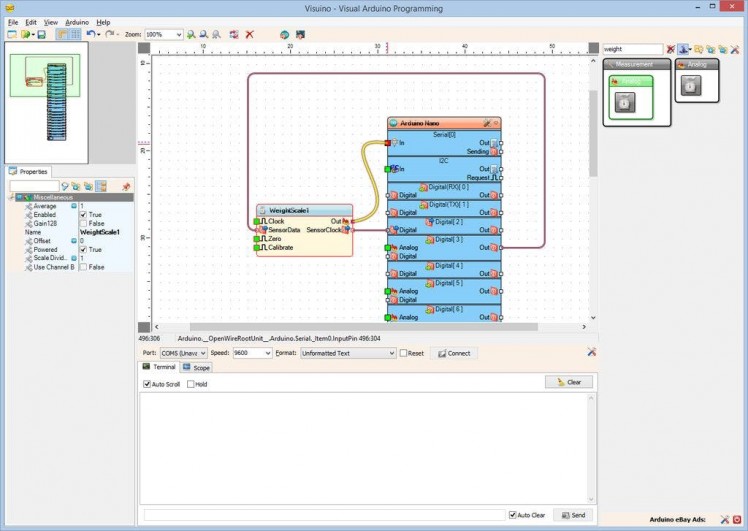
- Connect the "Out" output pin of the WeightScale1 component to the "In" input pin of the "Serial[ 0 ]" channel of the Arduino component (Picture 4)
1 / 2 • Picture 1
Picture 1
Picture 2
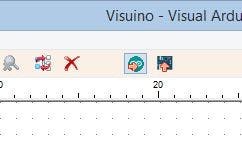
- In Visuino, Press F9 or click on the button shown on Picture 1 to generate the Arduino code, and open the Arduino IDE
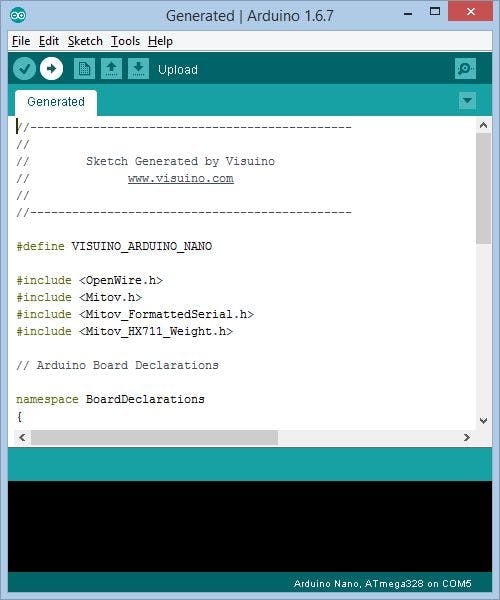
- In the Arduino IDE, click on the Upload button, to compile and upload the code (Picture 2)
1 / 2 • Picture 1
Picture 1

Picture 2
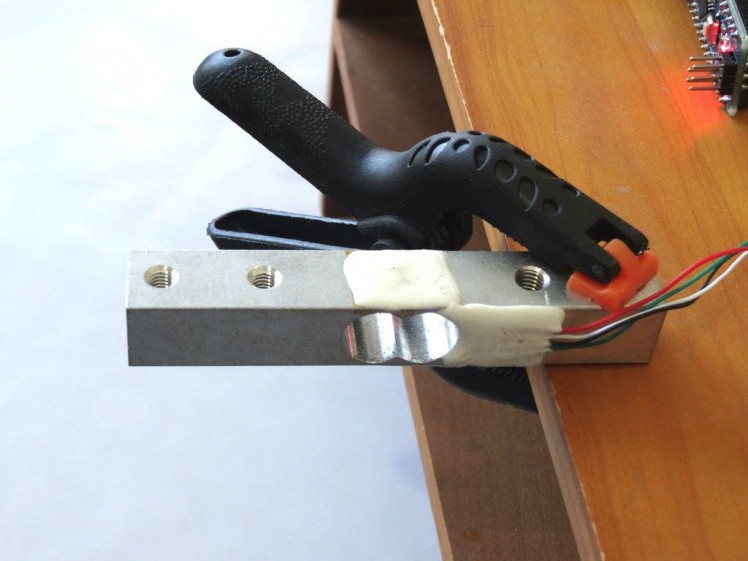
- Mount one end of the Weight Load Cell to some surface, as example the corner of a desk or table with clamp or in any other way (Picture 1)
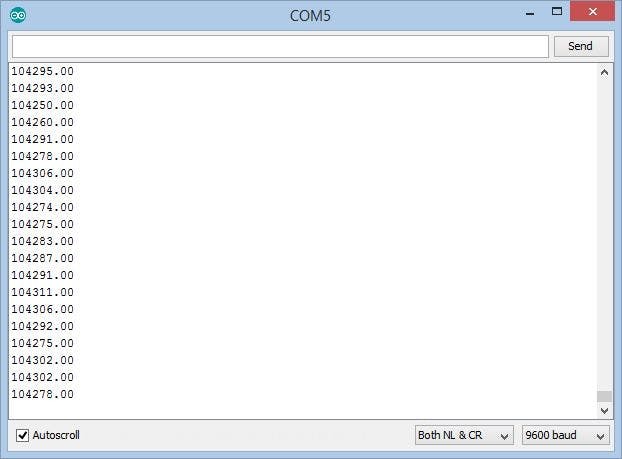
- If you open Serial Terminal in the Arduino IDE or Visuino, you will see the value measured by the (Picture 2)
- The values will have little meaning at the moment, as we have not calibrated the scale. Continue with the next step to see how to calibrate the scale
1 / 3 • Picture 1
Picture 1
Picture 2
Picture 3
The first step in the calibration is to Zero the scale:
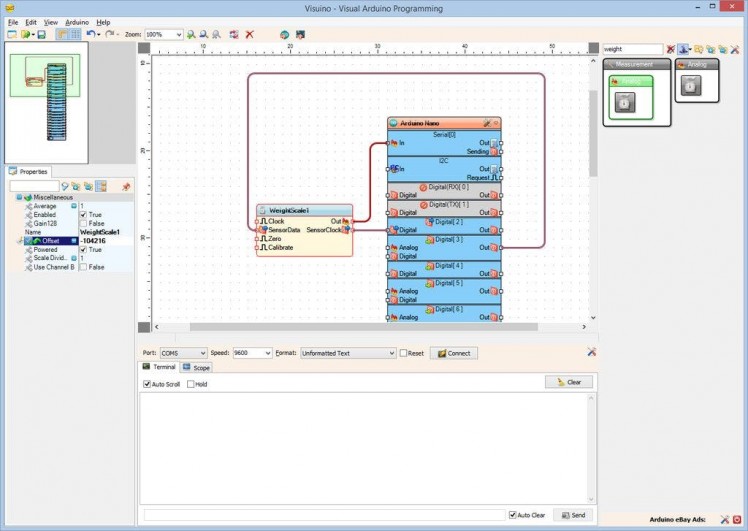
- In the design area select the WeightScale1 component (Picture 2)
- In the Object Inspector set the value of the "Offset" property to minus the value from the Serial Terminal (Picture 1) in my case -104216 (Picture 2)
- Generate, Compile, and Upload the Arduino code as you did in Step 6
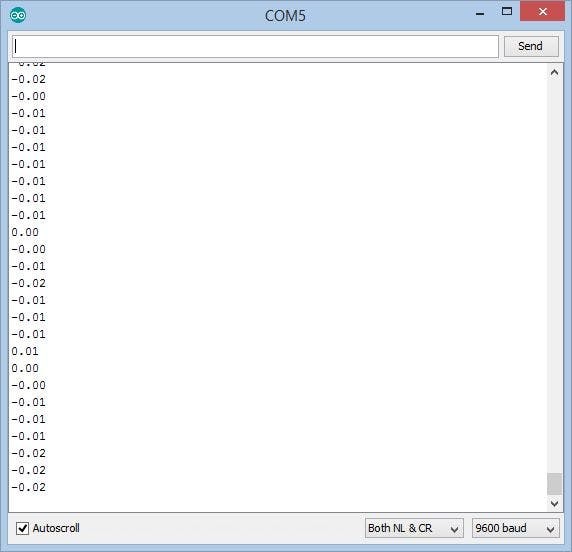
- If you connect with the Serial Terminal again, you will see that the values are around Zero (Picture 3)
1 / 4 • Picture 1

Picture 1
Picture 2
Picture 3
Picture 4
The second step in calibration is to calibrate with some known weight:
- Place a 1 gram weight on the sticking end of the Weight Load Cell (Picture 1). In my case I just placed a USB flash memory (Picture 1) to show the process, but for real calibration you will need to place exactly one gram object. To have precise measurement you will need to mount a table on the weight cell, but I will leave you to design it yourself. There are a lot of resources on how to mechanically design scale
- Connect to the Arduino with Serial Terminal (Picture 2)
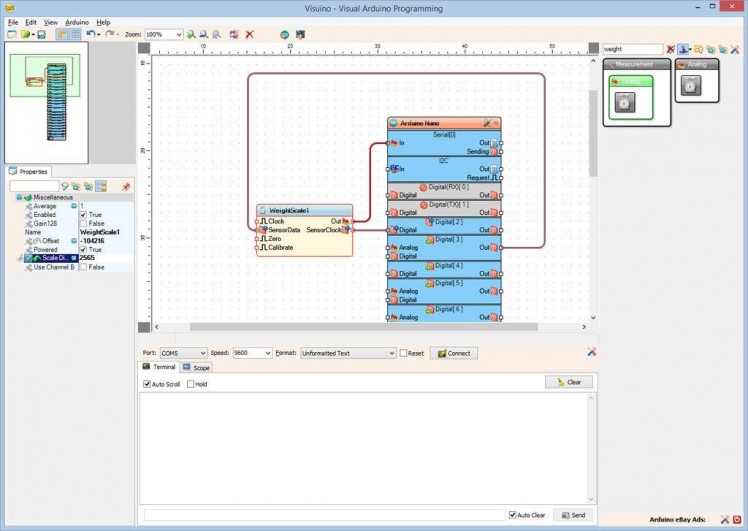
- In the design area select the WeightScale1 component (Picture 3)
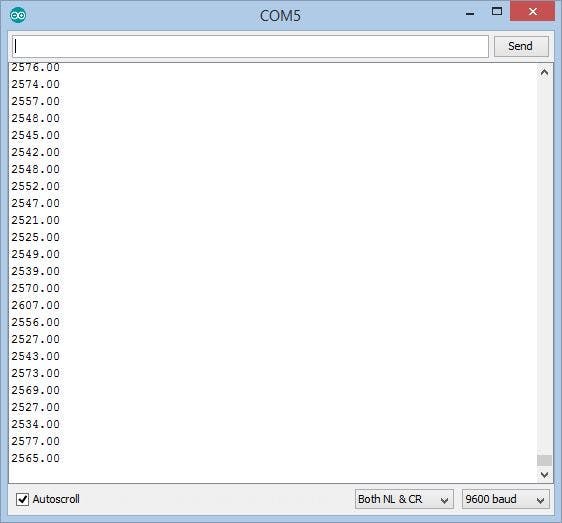
- In the Object Inspector set the value of the "Scale Divider" property to the value from the Serial Terminal (Picture 2) in my case 2565 (Picture 3)
- Generate, Compile, and Upload the Arduino code as you did in Step 6
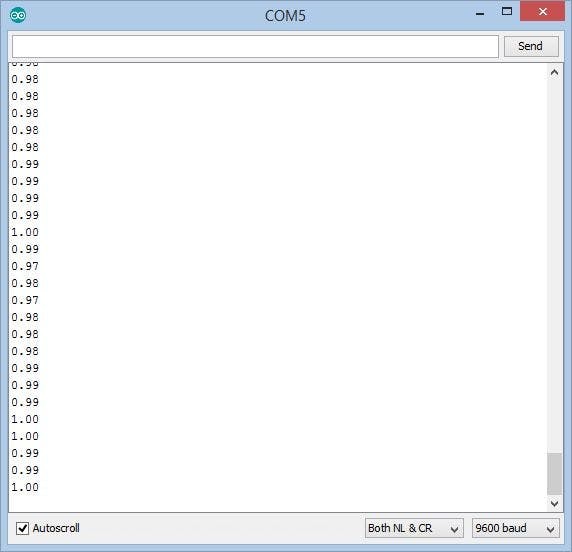
- If you connect with the Serial Terminal again, you will see that the values are around One (Picture 4)
1 / 4 • Picture 1
Picture 1
Picture 2

Picture 3
Picture 4
Congratulations! You have created your first Digital Scale with Arduino and HX711 ADC Weight Sensor module.
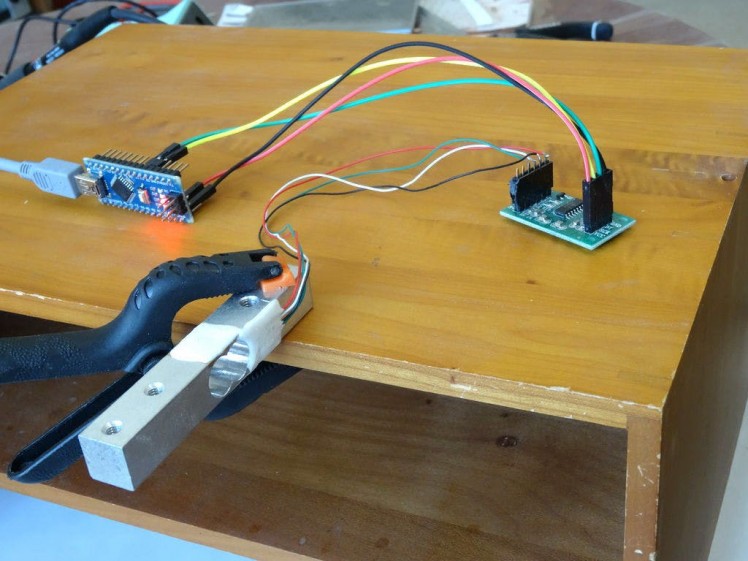
Picture 1 shows the connected and powered up project.
The Video shows the running project and the serial terminal, as different weights are placed on the Load Cell.
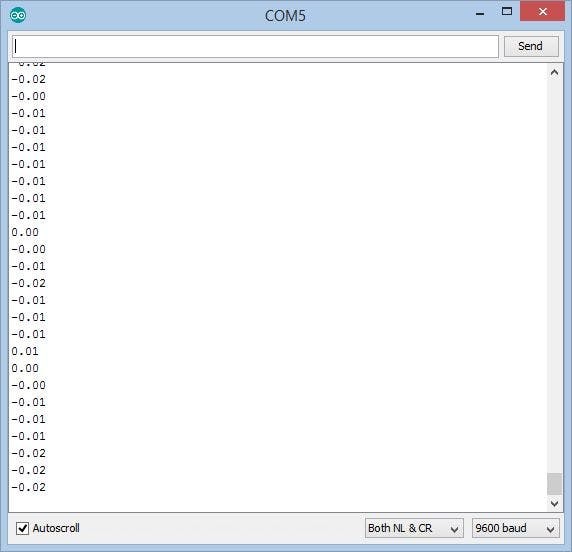
If you open the Serial Terminal in the Arduino IDE or Visuino, and there is no weight on the Load Cell, you will see values around zero displayed (Picture 2)
If you place some weight, you will see it displayed on the terminal (Picture 3)
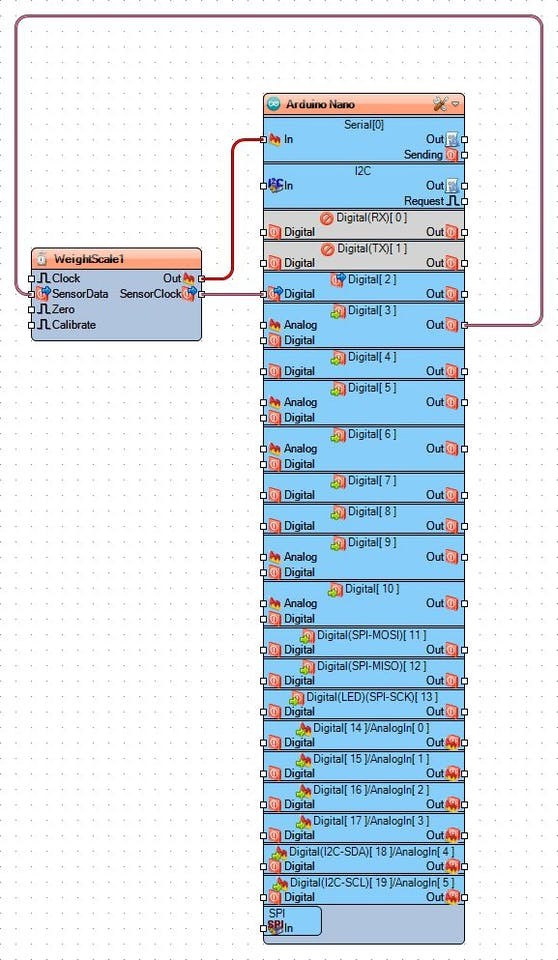
On Picture 4 you can see the complete Visuino diagram.Also attached is the Visuino project, that I created for this Tutorial. You can download and open it in Visuino: https://www.visuino.com


