Animated E-paper Badge
About the project
An animated e-paper display badge for Hacksters.
Project info
Difficulty: Easy
Estimated time: 6 hours
License: GNU General Public License, version 3 or later (GPL3+)
Items used in this project
Hardware components
Story
Intro
E-paper displays are fantastic for visual art but not fast enough for video or animation. Yet, I wanted to animate something in black and white canvas in slow motion. So, I made this badge!
Video Demonstration
Animated real-time speed!Hardware: Initial Build
To build the hardware, two pieces of 2cmx8cm protoboards are glued side by side. Next, the XMC2Go board, LiPo battery, and 1.54-inch e-paper display are placed on the top of the protoboards.
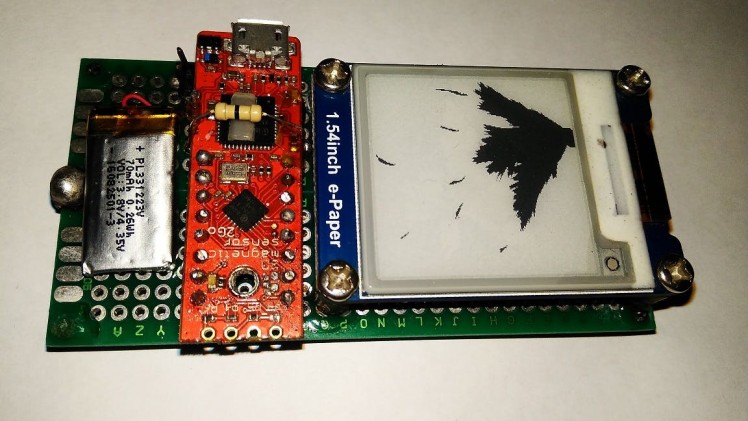 XMC2go (XMC1100 MCU board), paper display and battery
Inter-connections are made according to the schematic (below) and soldered with soldering iron.
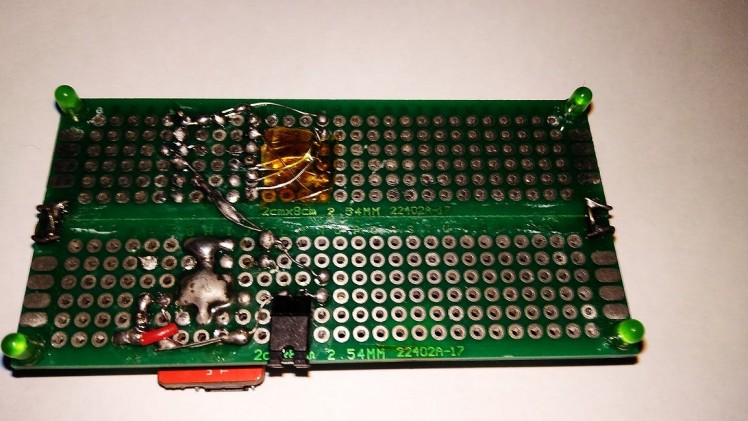 Soldering and interconnection on backside
Hardware Updated
Following updates are made later to the badge :-
- LiPo battery is placed under the display
- ADC sense (voltage divider) 5 user push switches installed
- Buzzer added for melody playback option with jumper to PWM pin
- I/O pins (ADC 1, PWM, I2C, Serial & Gnd) are routed for further development
Programming
To program the system in Arduino IDE, the 2Go kit's board support must be added. This is done by following these steps:
- Install and run Arduino IDE 1.8.7
- Go to File > Preferences > Additional Board Manager URLs and paste https://github.com/Infineon/Assets/releases/download/current/package_infineon_index.json
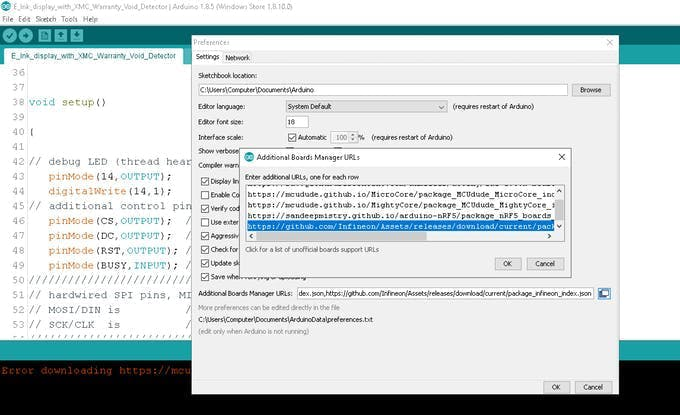
Adding 2Go kit support on Arduino IDE
- Now go to Tools > Board Manager > type "xmc" in search box and download board support files
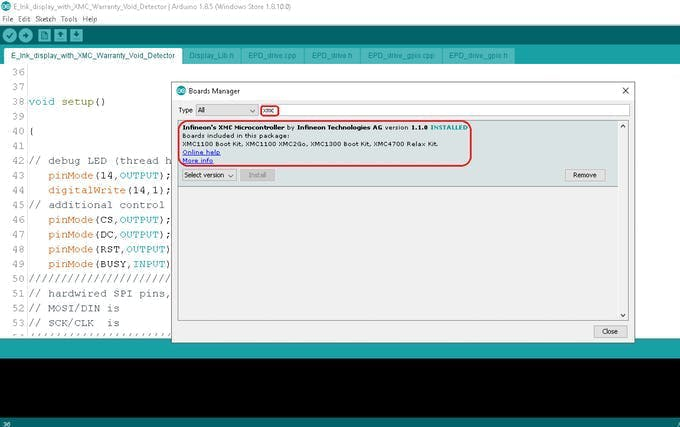
Install board files for version 1.1.0
- Next, Install Segger Link for communication between kit and IDE from here:
https://www.segger.com/downloads/jlink/JLink_Windows_beta.exe
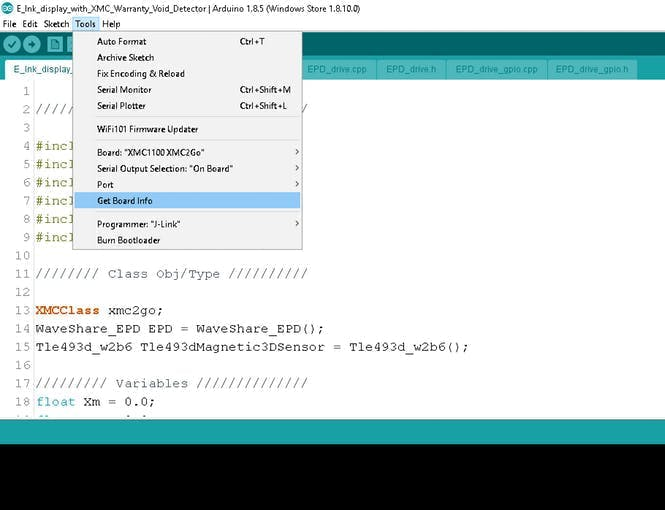
- Then, go to tools and set
Board: XMC1100XMC2Go
Serial Output Selection: On-board
Port: Port 4 (select whichever new port appears after plugging kit to usb )
Artistic Images
Following images are printed one after another to create the illusion!
Scroll to right faster to see the effect of animation.
 1 / 14 • 1
Image to Code Conversion
Monochromatic Bitmap images of 200 x 200 pixels are converted to code with Image2Lcd program according to following settings.
Image 2 LCDThese settings are critical, any deviation from these settings (marked in red polygon) might corrupt/mirror/rotate image output.
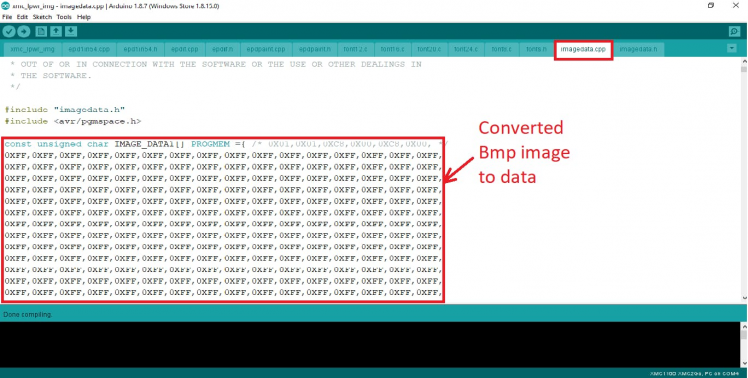 Placing image data in code imagedata.cpp
Technical Info
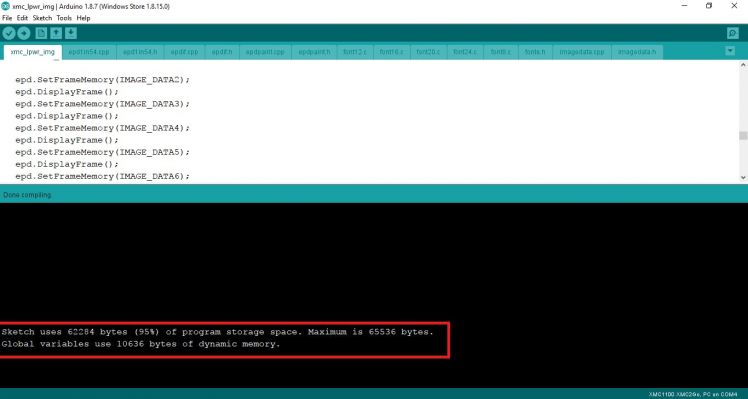
- The XMC2Go kit (XMC1100 mcu) has 16k RAM and 64k Flash for code.
- Each image frame (200 x 200 pixel) require about 4k Flash
- For the E-Paper display's memory buffer, 8k RAM is allocated
- Maximum 13 Frames can be stored inside program memory
- Power consumption during display update is 7.6 - 9.1 mA and during deep sleep 1.8 - 2.4 mA
 RAM and FLASH Limit !
References
- XMC2Go in Arduino: https://github.com/Infineon/XMC-for-Arduino
- Segger J-Link: https://www.segger.com/downloads/jlink/
- Demo Code: https://waveshare.com/wiki/1.54inch_e-Paper_Module
- Image Source: https://daankusen.wordpress.com/2014/09/10/flying-is-easy/
- Gif to Bitmap: https://ezgif.com/split
- Bitmap to C : https://www.waveshare.com/wiki/File:Image2Lcd.7z
- Mario Melody: https://www.hackster.io/jrance/super-mario-theme-song-w-piezo-buzzer-and-arduino-1cc2e4
2Go Kit Modification for power source selection and LiPo Charging :- https://www.infineon.com/dgdl/Board_Users_Manual_XMC_2Go_Kit_with_XMC1100_R1.0.pdf
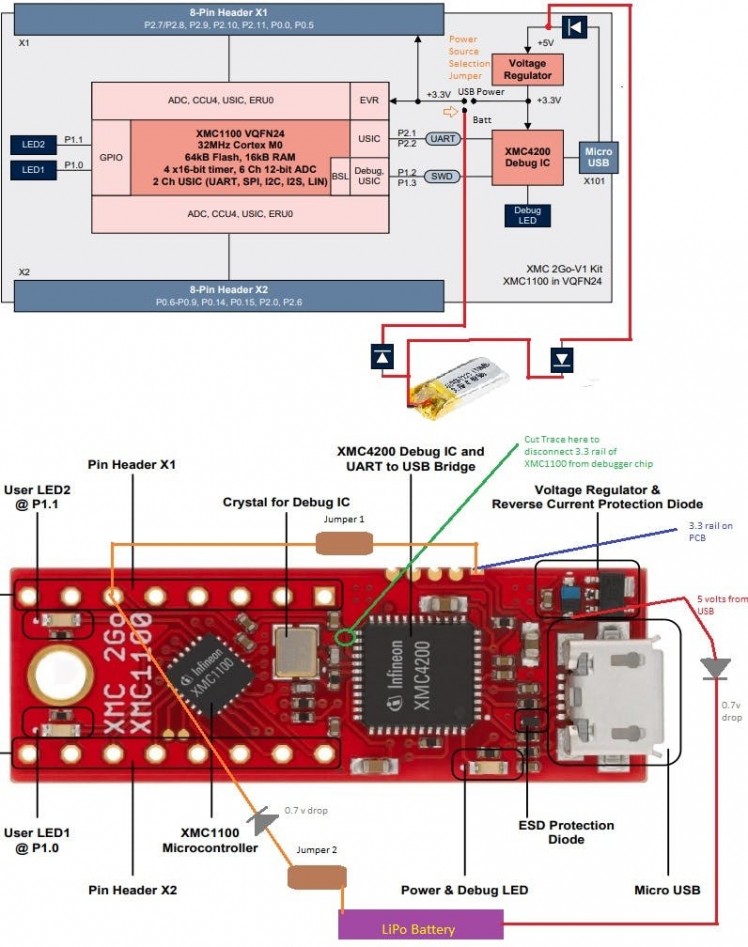 Power Selection between USB and LiPo
Badge Capabilities : Build Something That Matters
The badge says " Build Something That Matters " It's not just a badge. It will be used to make another project. The badge has following capabilities :
- Low Power Display Project
- Midi Playback
- I2C/ADC/Serial/PWM Breakout for add-on board support
- 5 User button for Game Development and Menu Scrolling
- USB Charging for LiPo Battery
Calligraphy on E-Paper
I was wondering, how cool it would be to do some calligraphy on large touch e-paper, something like this :
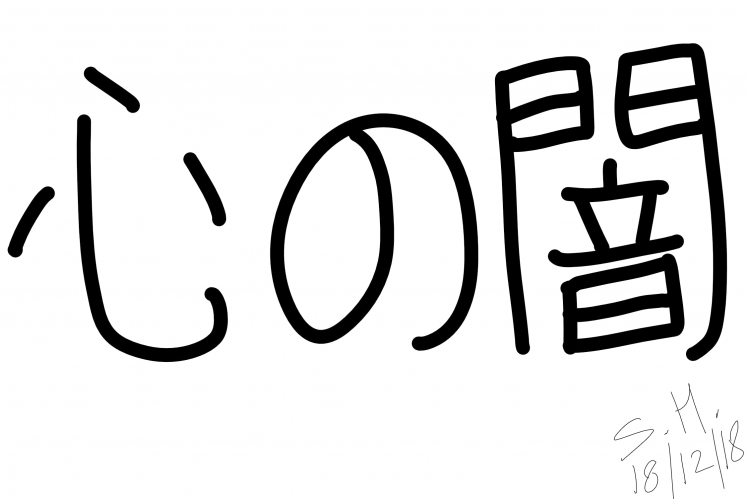 Darkness of Heart






Leave your feedback...