
Ai-driven Ble Travel Emergency Assistant W/ Twilio
About the project
Detect keychains to inform emergency contacts via WhatsApp / SMS. Display results via BLE. Let contacts request location info from Maps API.
Project info
Difficulty: Expert
Platforms: Android, Autodesk, Google, Microsoft, Seeed Studio, Twilio, Anycubic, Edge Impulse, MIT App Inventor
Estimated time: 6 hours
License: Creative Commons Attribution CC BY version 4.0 or later (CC BY 4+)
Items used in this project
Hardware components
Software apps and online services
|
|
Microsoft Visual Studio 2017 | |
|
|
Ultimaker Cura | |
|
|
Autodesk Fusion 360 | |
|
|
Google Maps | |
|
|
Twilio SMS Messaging API | |
|
|
Twilio API for WhatsApp | |
|
|
MIT App Inventor 2 | |
|
|
Android Studio | |
|
|
Edge Impulse Studio |
View all
Story
Heartbreakingly and unfortunately, people with disabilities are more likely to be victims of violence, theft, verbal abuse, and neglect while traveling, especially travelers with mobility impairments. In overall crime estimations, people with disabilities have a higher risk, at least four to ten times, of being a victim[1]. Considering the discouragement of these heinous crimes hurting vacation plans of people with mobility impairments, it has become necessary to provide them with state-of-the-art assistive devices so as to preclude offenders from committing crimes against people with disabilities.
While traveling alone and feeling in danger, one of the most crucial steps to prevent a potential crime is to let your emergency contacts know your whereabouts with a brief explanation of your situation. Although smartphones provide various features regarding location tracking and wireless communication, they might still be not suitable since reaching and utilizing a smartphone may be time-consuming and arduous in a time of crisis for people with mobility impairments. In light of recent developments in machine learning and IoT, there is a surge in devices enhancing smartphone features in the form of automated notifications and additional sensors, e.g. smartwatches and fitness wearables. Thus, in this project, I focused on developing an AIoT assistive device that improves smartphone features to inform emergency contacts automatically and instantly of the user's situation.
Approximately 15% of the population is affected by some kind of disability, and this number is rising exponentially due to aging populations and the spread of chronic diseases, according to WHO reports[2]. In this regard, budget-friendly and accessible AIoT assistive devices should be versatile and provide various features in a broader spectrum, considering people with disabilities and special needs.
After inspecting recent research papers on assistive devices, I noticed there are nearly no wearable appliances focusing on detecting personalized items to execute some predefined functions covertly, such as automated notifications, by utilizing smartphone features. Therefore, I decided to build a user-friendly and accessible assistive device to detect customized keychains (tokens) with object detection and inform emergency contacts of the user's situation automatically.
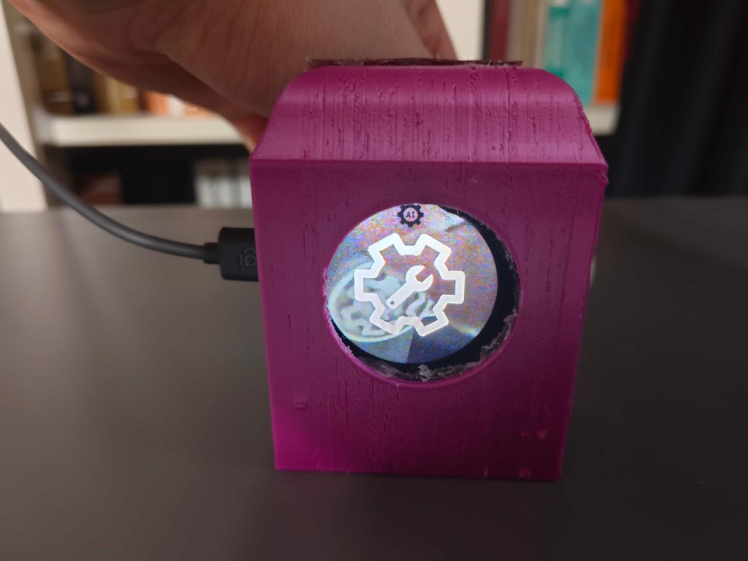
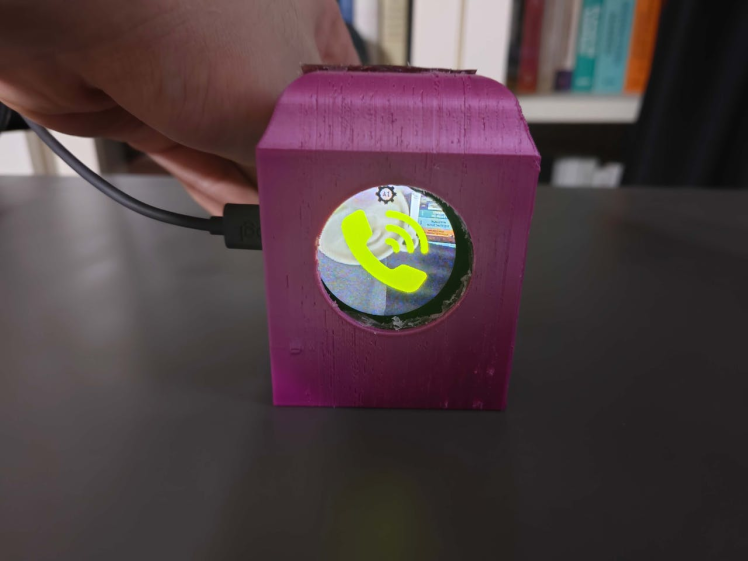
Since XIAO ESP32S3 Sense is an ultra-small-sized IoT development board providing a built-in OV2640 camera and a microSD card module on its expansion board, I decided to utilize XIAO ESP32S3 in this project. Thanks to the integrated modules on the expansion board, I was able to capture images and save them to the SD card as samples without requiring any additional procedures. Furthermore, XIAO ESP32S3 comes with integrated Wi-Fi/BLE connectivity and 8MB PSRAM. Therefore, I was also able to run my object detection model consecutively. Then, I connected the XIAO round display to XIAO ESP32S3 in order to notify the user of the current saved sample numbers on the SD card and the ongoing operation by showing assigned icons.
Since I wanted to capitalize on smartphone features (e.g., GPS, GPRS, BLE) to build a capable assistive device, I decided to develop an Android application from scratch with the MIT APP Inventor. As the user interface of the assistive device, the Android application can utilize the celluar network connection to transfer data packets to a web application via GPRS, obtain precise location data via GPS, and communicate with XIAO ESP32S3 via BLE so as to get model detection results and transmit commands for data collection.
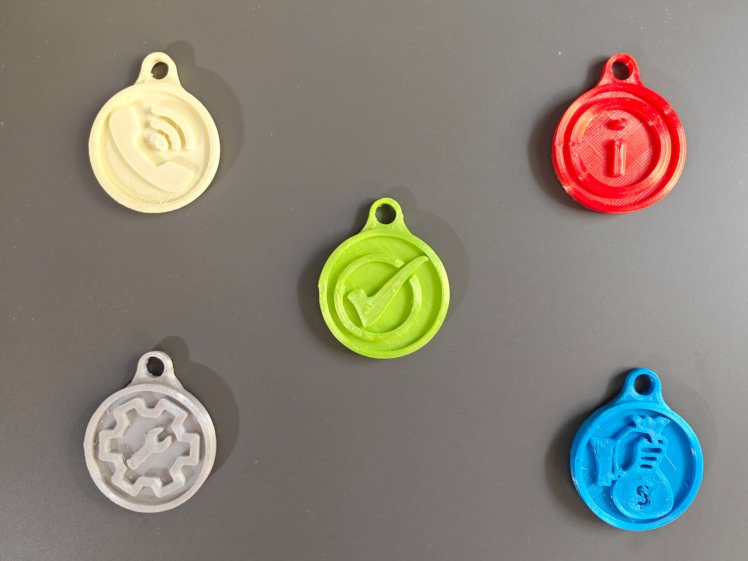
After developing my Android application, I designed various keychains (tokens) denoting different emergencies and printed them with my 3D printer. Then, I utilized the Android application to transfer commands to XIAO ESP32S3 via BLE to capture images of these customized keychains so as to construct a notable data set.
After completing my data set, I built my object detection model with Edge Impulse to detect customized keychains (tokens) denoting different emergencies. I utilized Edge Impulse FOMO (Faster Objects, More Objects) algorithm to train my model, which is a novel machine learning algorithm that brings object detection to highly constrained devices. Since Edge Impulse is nearly compatible with all microcontrollers and development boards, I have not encountered any issues while uploading and running my model on XIAO ESP32S3. As labels, I utilized the names of emergency situations represented by customized keychains:
- Fine
- Danger
- Assist
- Stolen
- Call
After training and testing my object detection (FOMO) model, I deployed and uploaded the model on XIAO ESP32S3 as an Arduino library. Therefore, this assistive device is capable of detecting keychains (tokens) by running the model independently without any additional procedures or latency.
After running the object detection model successfully, I employed XIAO ESP32S3 to transfer the model detection results to the Android application via BLE. Since I focused on building a full-fledged AIoT assistive device, supporting only BLE data transmission with an Android application was not suitable. Therefore, I decided to develop a versatile web application from scratch and utilize the Android application to transmit the model detection results, the current location parameters (GPS data), and the current date to the web application via an HTTP GET request (cellular network connectivity). After receiving a data packet from the Android application, the web application saves the model detection results, location parameters (latitude, longitude, and altitude), and the current date to the MySQL database for further usage.
Then, I utilized the web application to inform the emergency contacts selected by the user of detected emergency classes via WhatsApp or SMS immediately. In this regard, I needed to utilize Twilio's WhatsApp and SMS APIs simultaneously. Also, I employed the web application to obtain inquiries from emergency contacts over WhatsApp in order to send thorough location inspections generated by Google Maps with the location information stored in the database table as feedback.
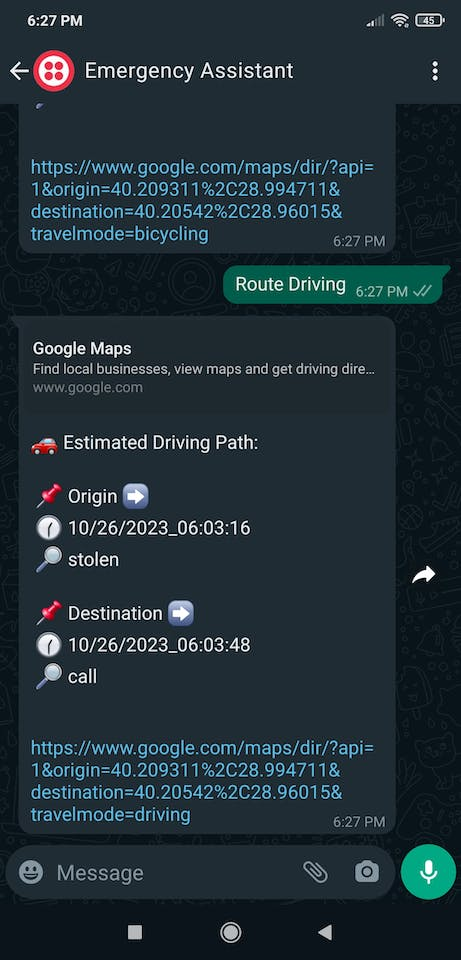
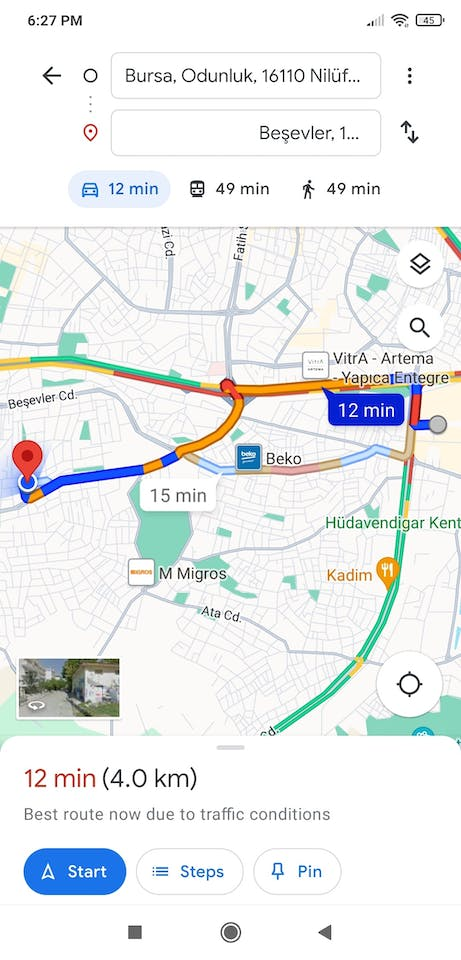
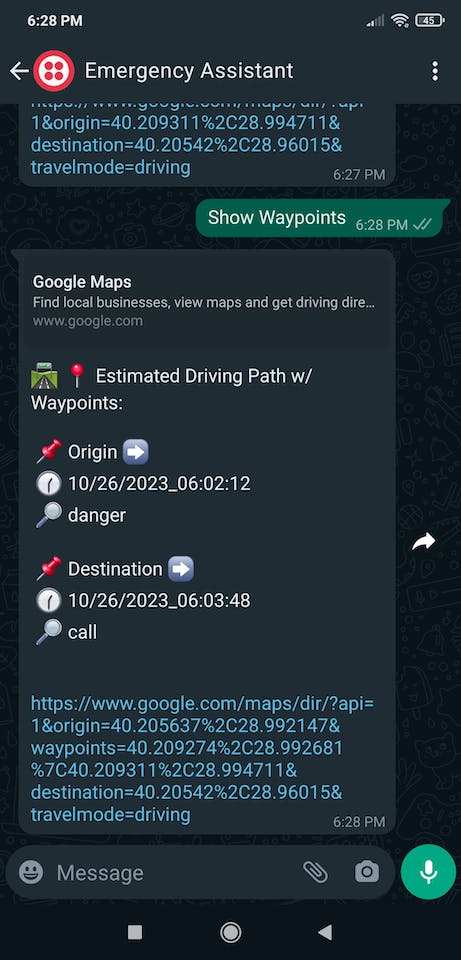
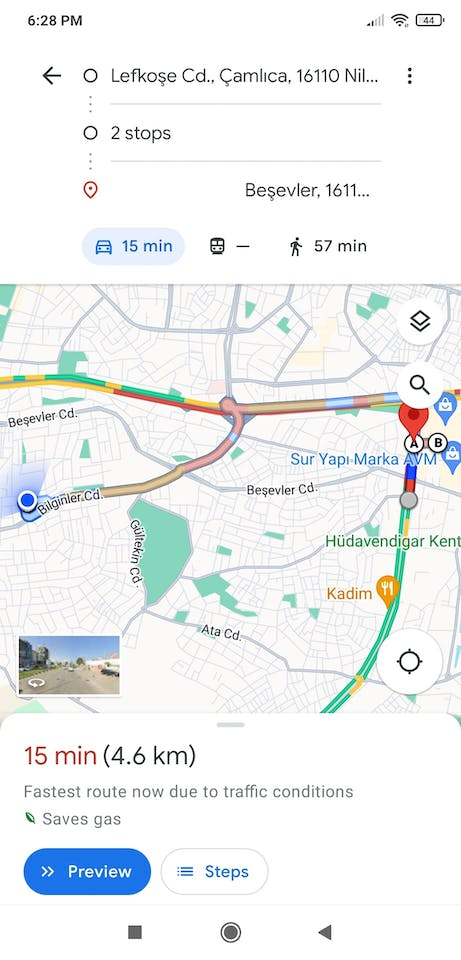
As shown below, the assistive device allows the user to apply the Fine emergency class to save location parameters as breadcrumbs to the database table. Therefore, the web application can generate travel itineraries with different methods of travel related to previously visited destinations, depending on the inquiries (commands) requested by emergency contacts through WhatsApp.
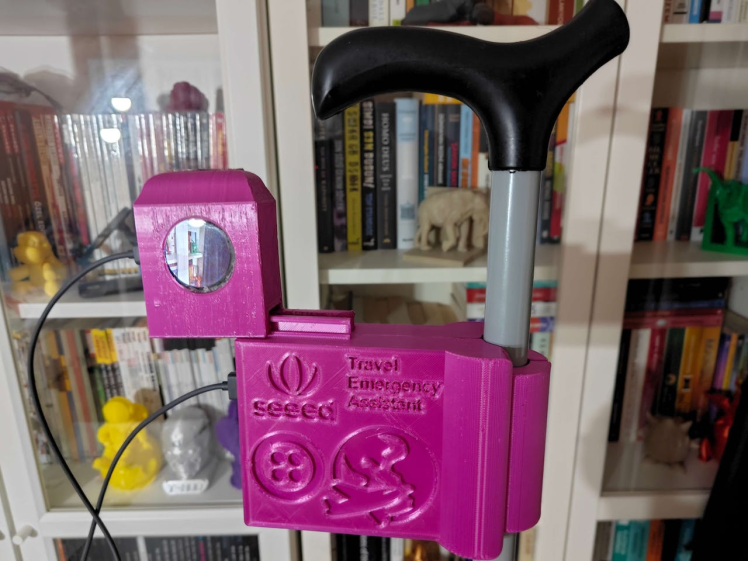
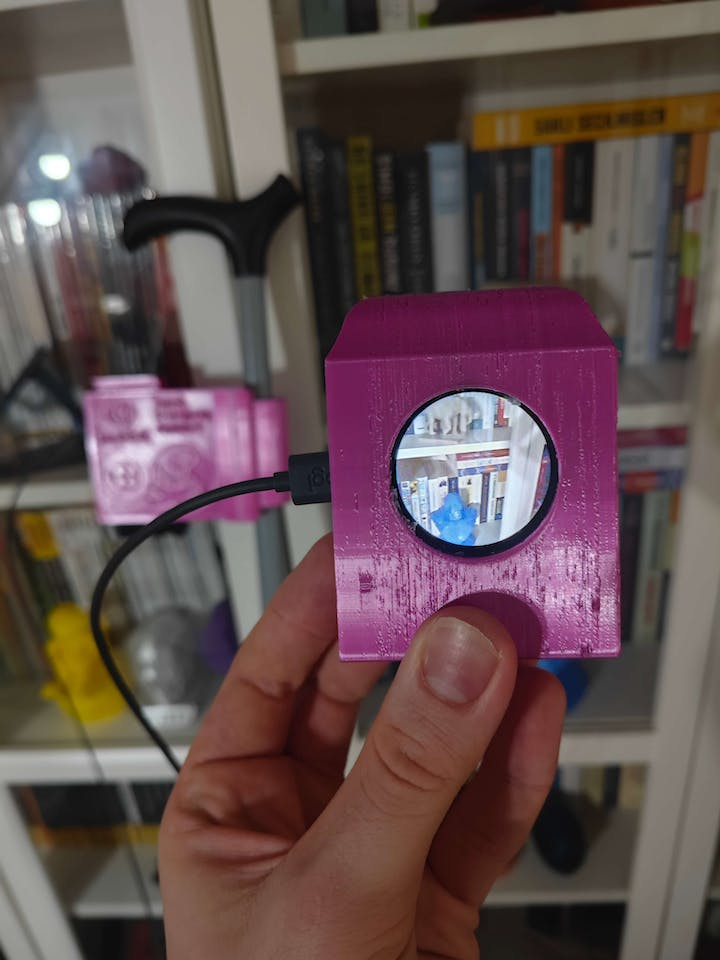
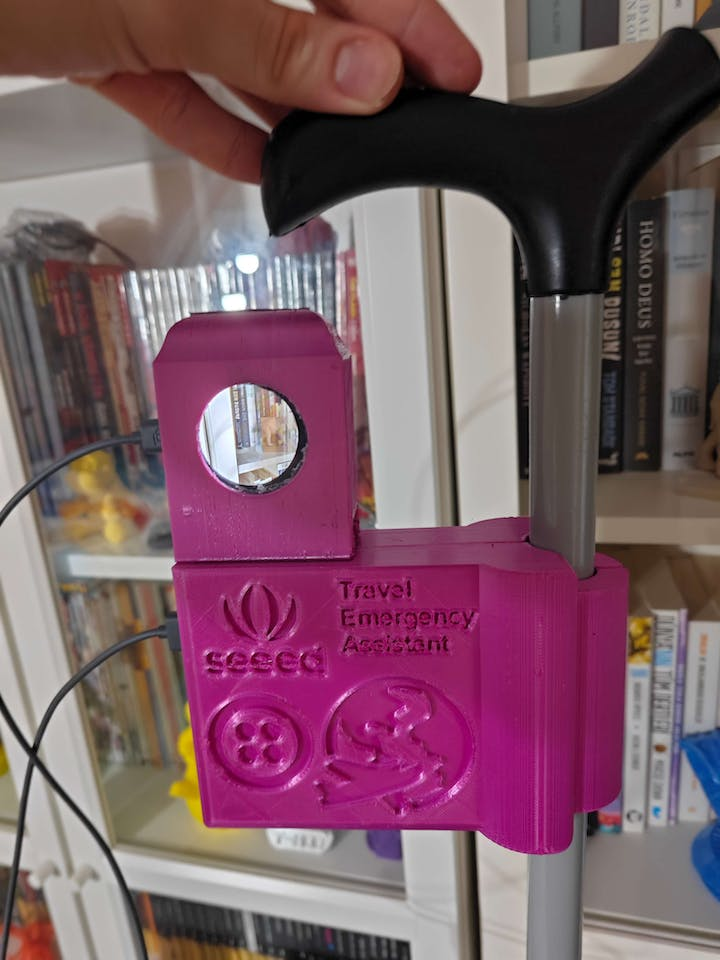
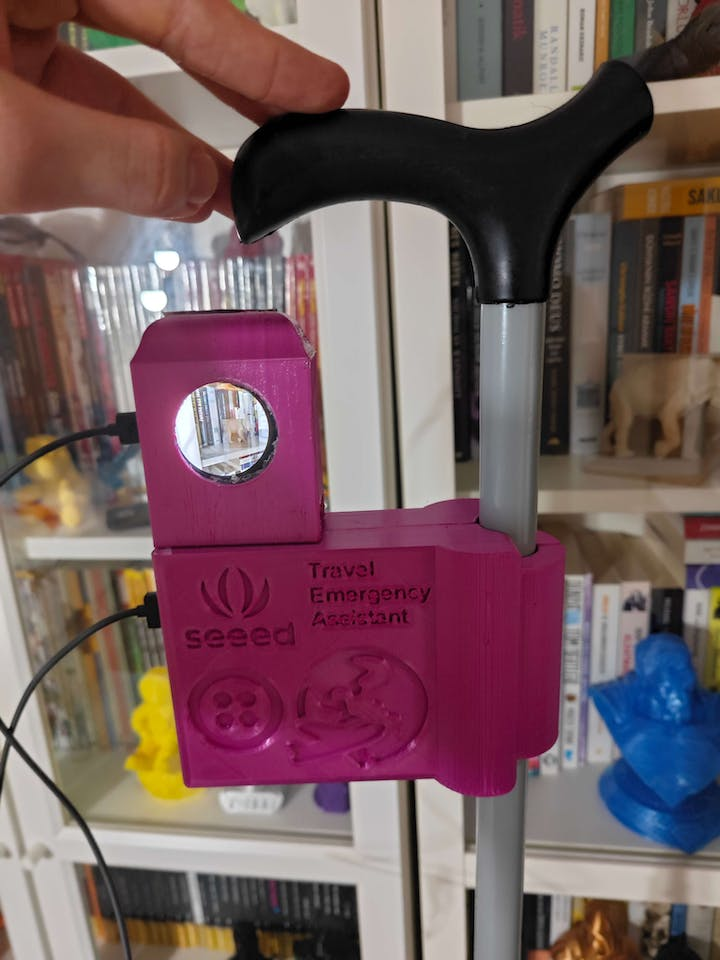
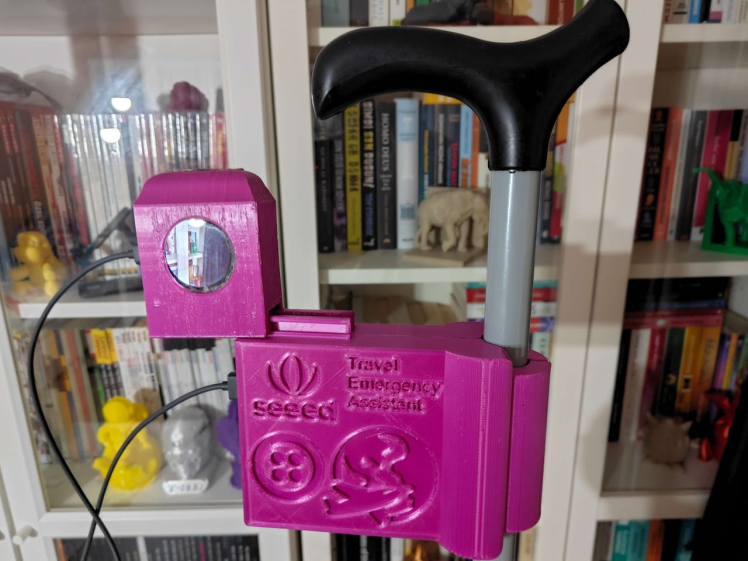
Considering harsh operating conditions, I designed a smartwatch-inspired case with a modular part (3D printable) that allows the user to attach the assistive device to various mobility aids, such as wheelchairs, scooters, walkers, canes, etc. The modular part is specifically designed to contain XIAO ESP32S3, its expansion board, and the XIAO round display.
So, this is my project in a nutshell 😃
In the following steps, you can find more detailed information on coding, capturing customized keychain images, building an object detection model with Edge Impulse, running the model on XIAO ESP32S3, and developing full-fledged Android and web applications to inform emergency contacts via WhatsApp or SMS.
🎁🎨 Huge thanks to Seeed Studio for sponsoring these products:
⭐ XIAO ESP32S3 Sense | Inspect
⭐ XIAO Round Display | Inspect
🎁🎨 Also, huge thanks to Anycubic for sponsoring a brand-new Anycubic Kobra 2.
Step 1: Designing and printing a smartwatch-inspired case
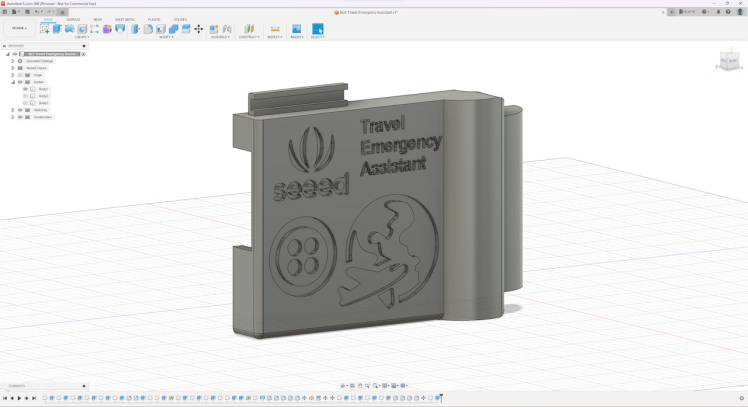
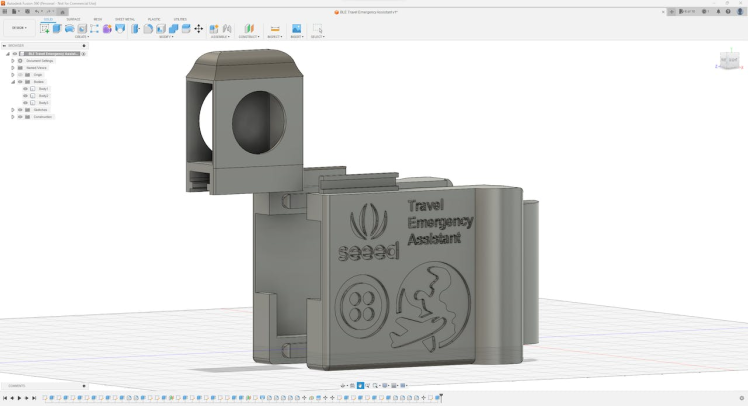
Since I focused on building a budget-friendly and accessible assistive device that enables the user to inform emergency contacts effortlessly via WhatsApp or SMS, I decided to design a robust and compact case that allows the user to attach the mechanism to various mobility aids, such as wheelchairs, scooters, walkers, canes, etc. Since I wanted to make the main case compatible with different battery options, I designed the main case as two parts connected with snap-fit joints. To avoid overexposure to dust and prevent loose wire connections, I added a modular part specifically designed for XIAO ESP32S3 Sense and XIAO round display. Then, I added dents on the main case and the modular part, which lets the user connect the modular part to the main case or position the built-in camera freely while scanning keychains or collecting samples. Also, I decided to inscribe the Seeed Studio logo, the Twilio logo, and the traveling airplane icon on the main case to highlight the capabilities of this assistive device.
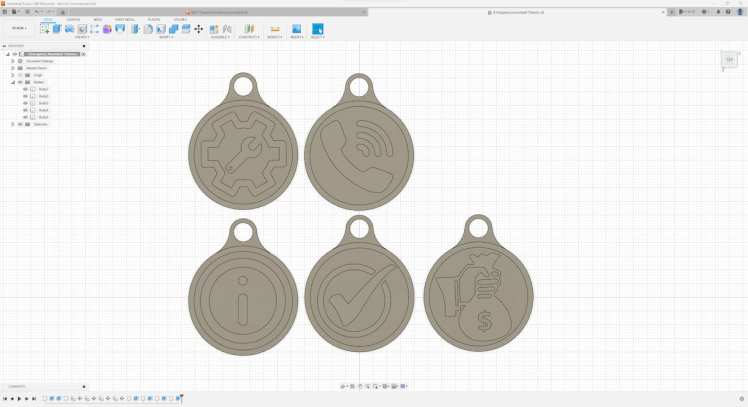
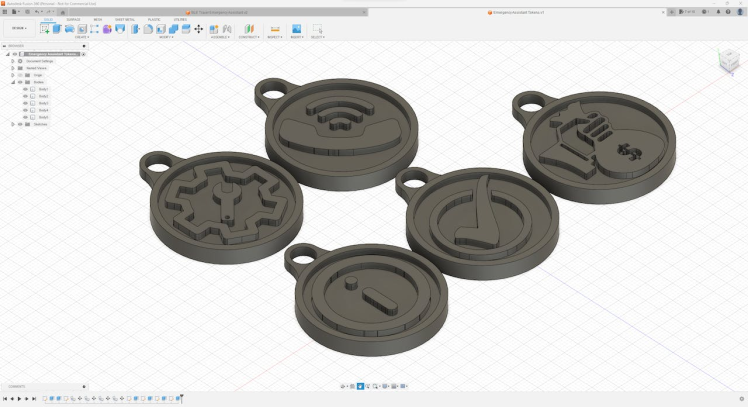
Since I needed unique keychains (tokens) for each feature I wanted to add to this assistive device, I decided to design customized keychains in addition to the 3D parts of the main case. For each keychain, I utilized different icons related to their assigned features.
I designed the main case, its modular part, and the customized keychains in Autodesk Fusion 360. You can download their STL files below.
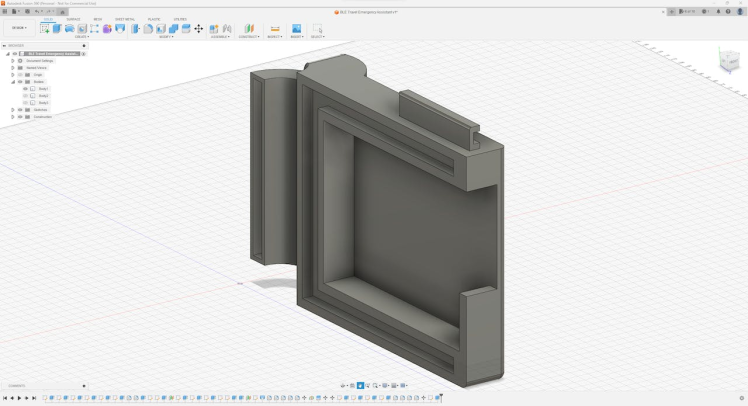
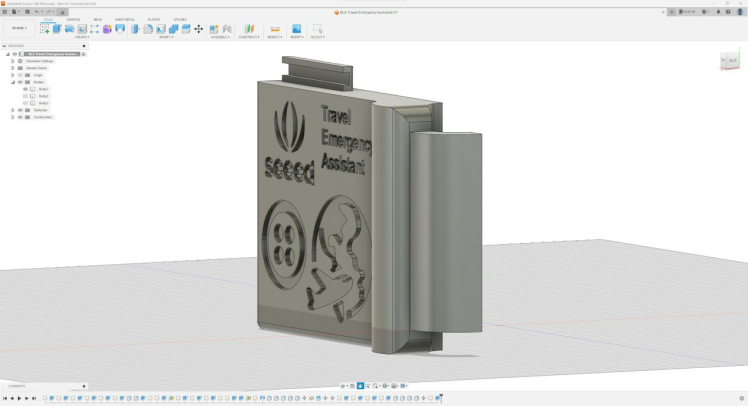
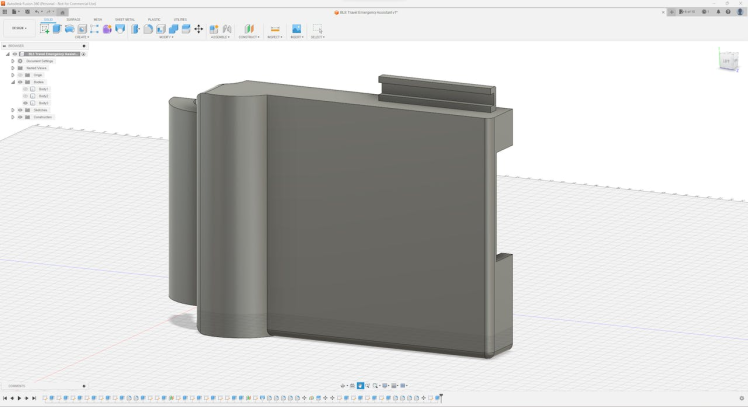
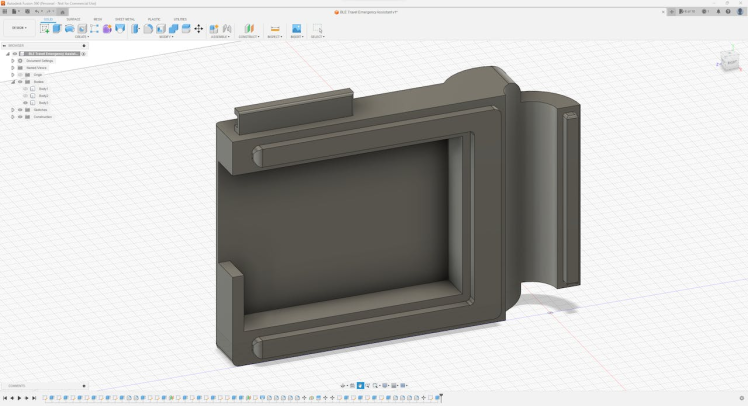
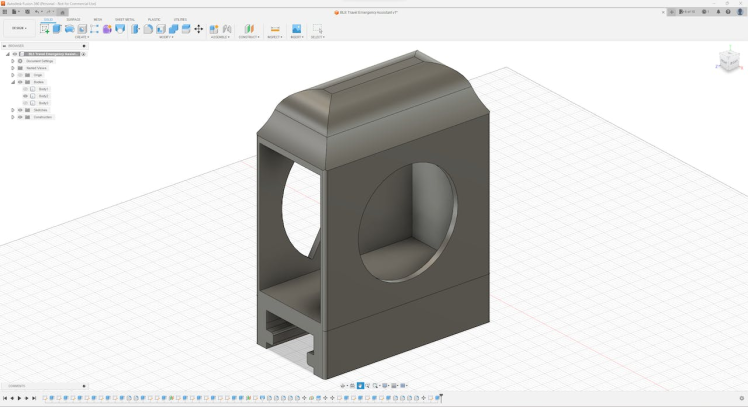
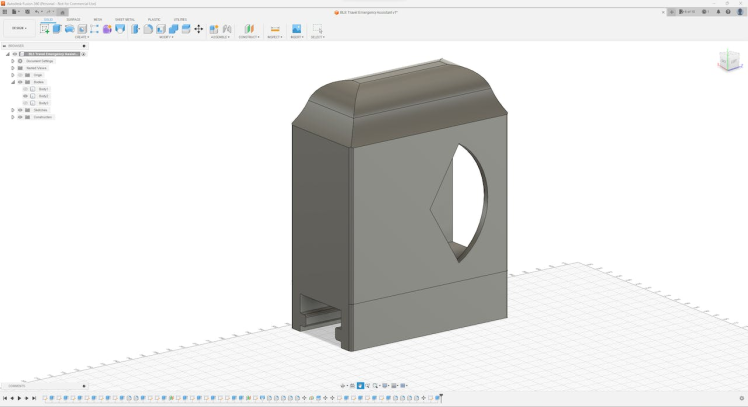
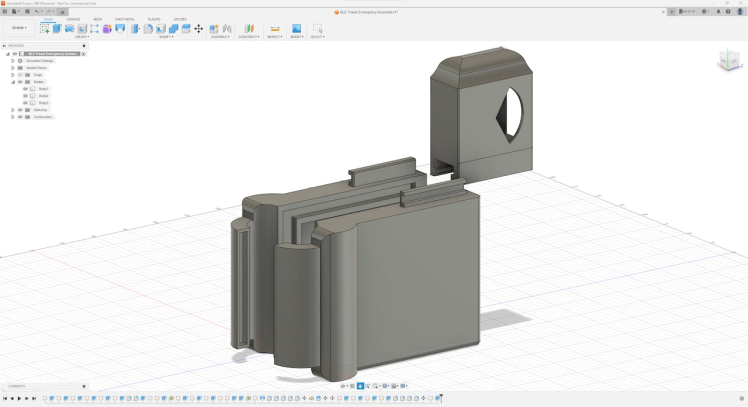
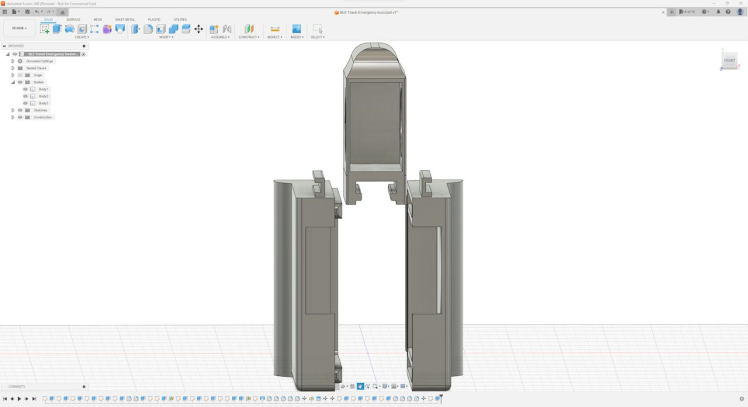
Then, I sliced all 3D models (STL files) in Ultimaker Cura.
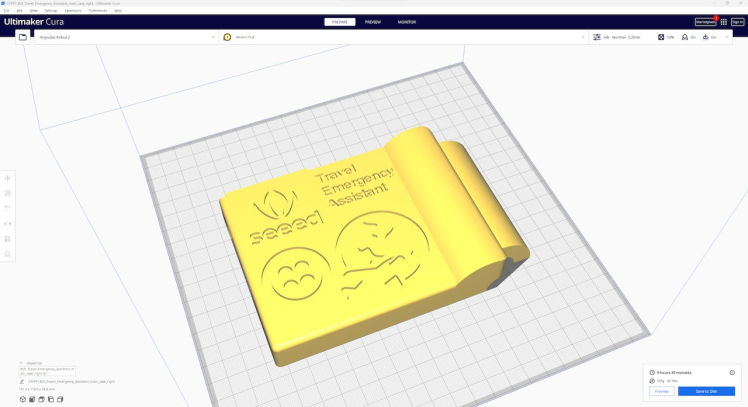
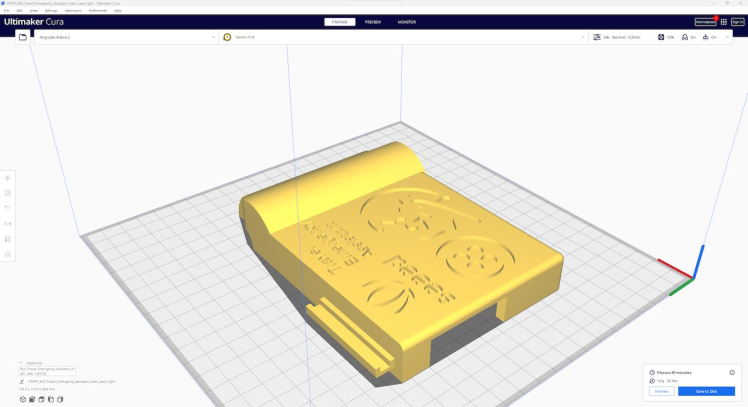
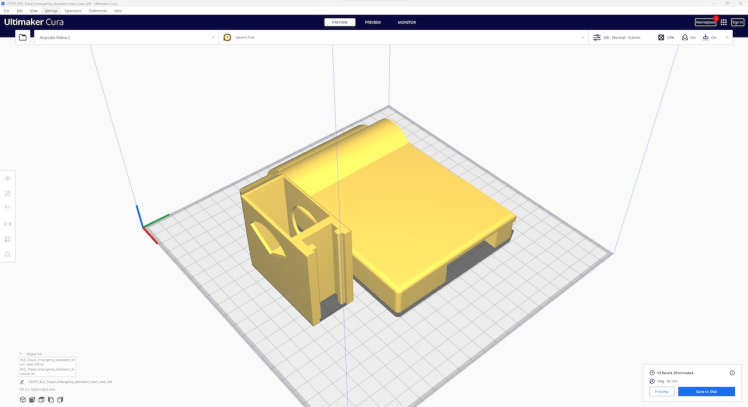
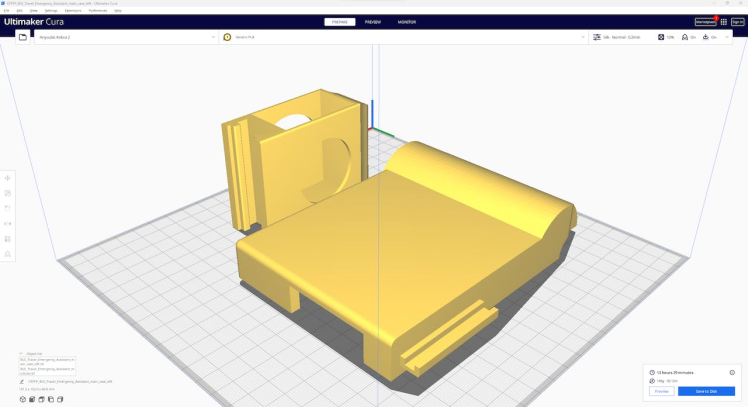
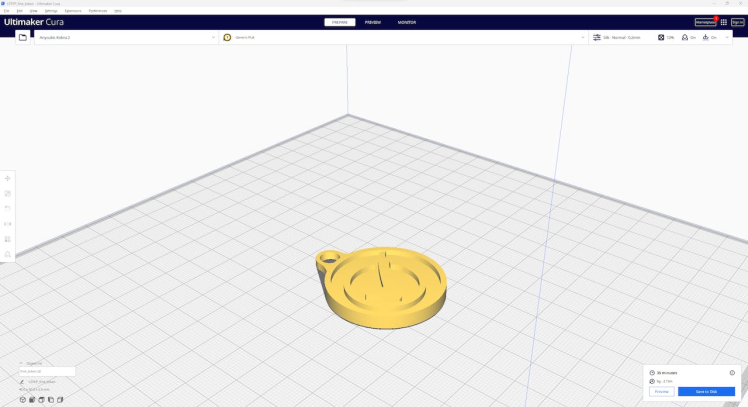
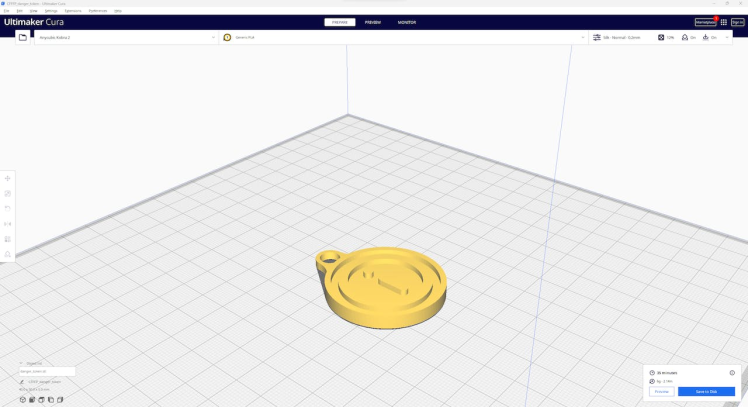
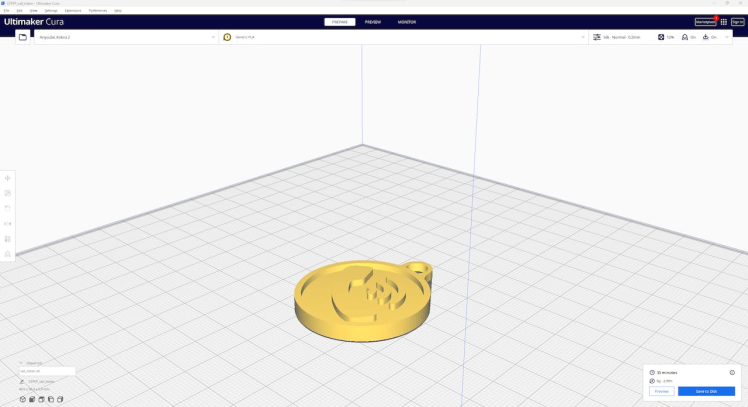
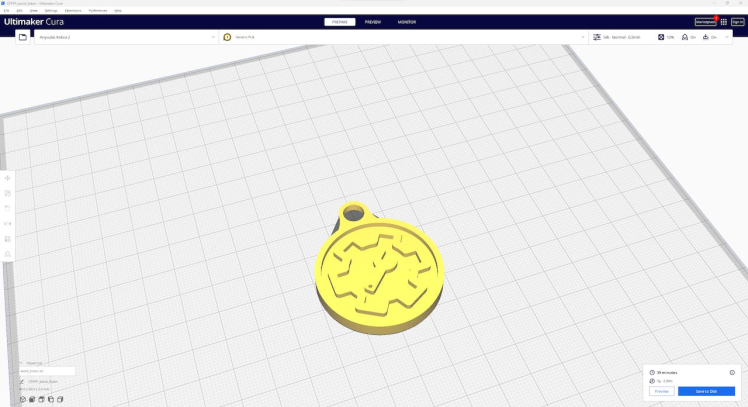
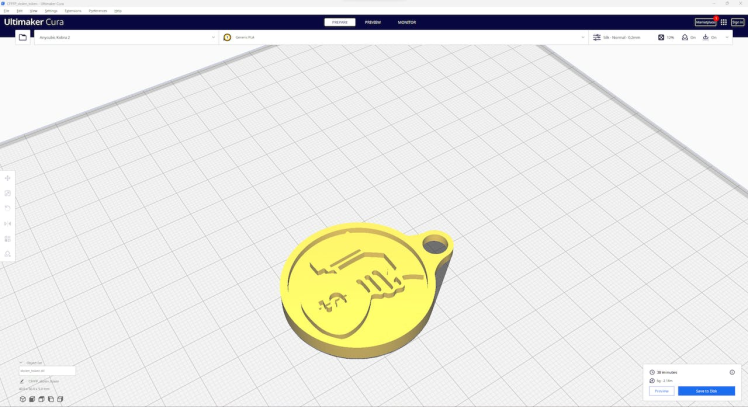
Since I wanted to create a metallic structure for the main case and apply a unique flashy theme representing a smartwatch case due to the round display, I utilized this PLA filament:
- eSilk Violet
I decided to give each keychain a unique color to make them easily recognizable by my object detection model. Thus, I utilized these PLA filaments:
- eSilk Lime
- eSilk Jacinth
- eSilk Silver
- eSilk Cyan
- ePLA-Matte Almond Yellow
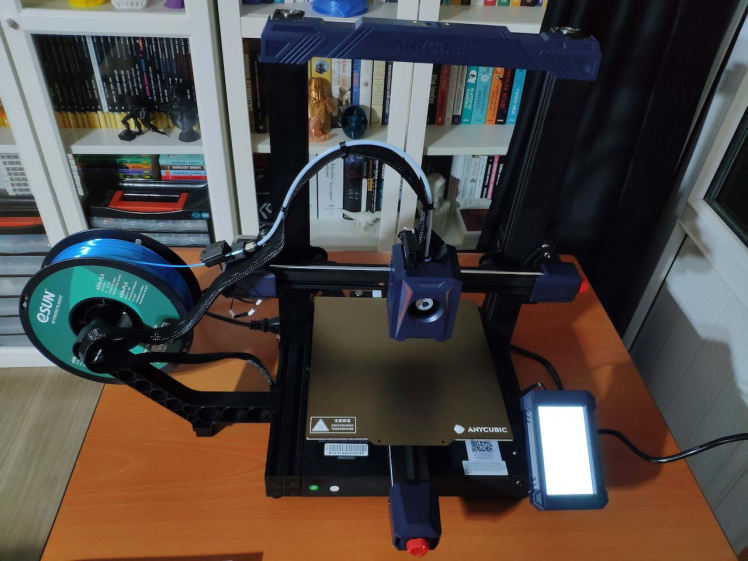
Finally, I printed all parts (models) with my brand-new Anycubic Kobra 2 3D Printer.
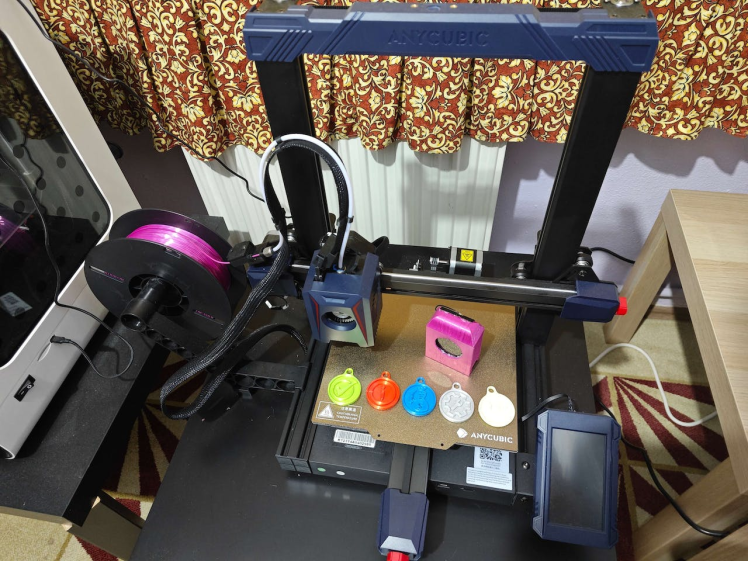
Since Anycubic Kobra 2 is budget-friendly and specifically designed for high-speed printing, I highly recommend Anycubic Kobra 2 if you are a maker or hobbyist needing to print multiple prototypes before finalizing a complex project.
Thanks to its upgraded direct extruder, Anycubic Kobra 2 provides 150mm/s recommended print speed (up to 250mm/s) and dual-gear filament feeding. Also, it provides a cooling fan with an optimized dissipation design to support rapid cooling complementing the fast printing experience. Since the Z-axis has a double-threaded rod structure, it flattens the building platform and reduces the printing layers, even at a higher speed.
Furthermore, Anycubic Kobra 2 provides a magnetic suction platform on the heated bed for the scratch-resistant spring steel build plate allowing the user to remove prints without any struggle. Most importantly, you can level the bed automatically via its user-friendly LeviQ 2.0 automatic bed leveling system. Also, it has a smart filament runout sensor and the resume printing function for power failures.
#️⃣ First of all, install the gantry and the spring steel build plate.
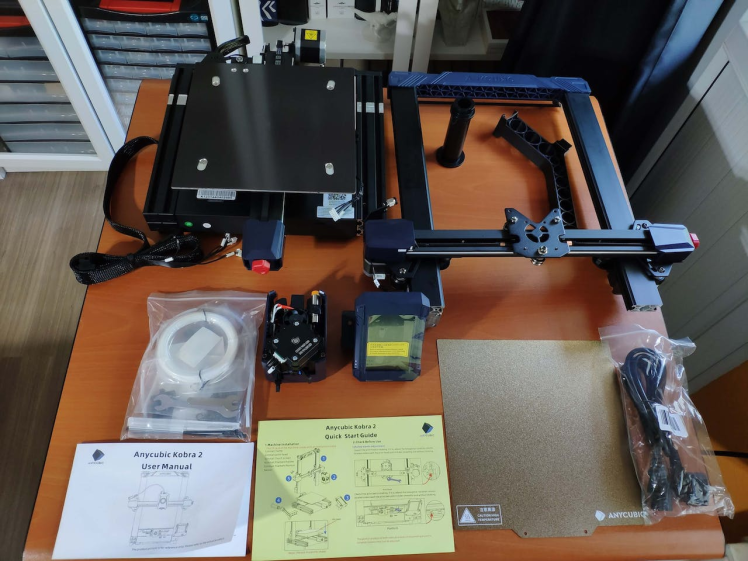
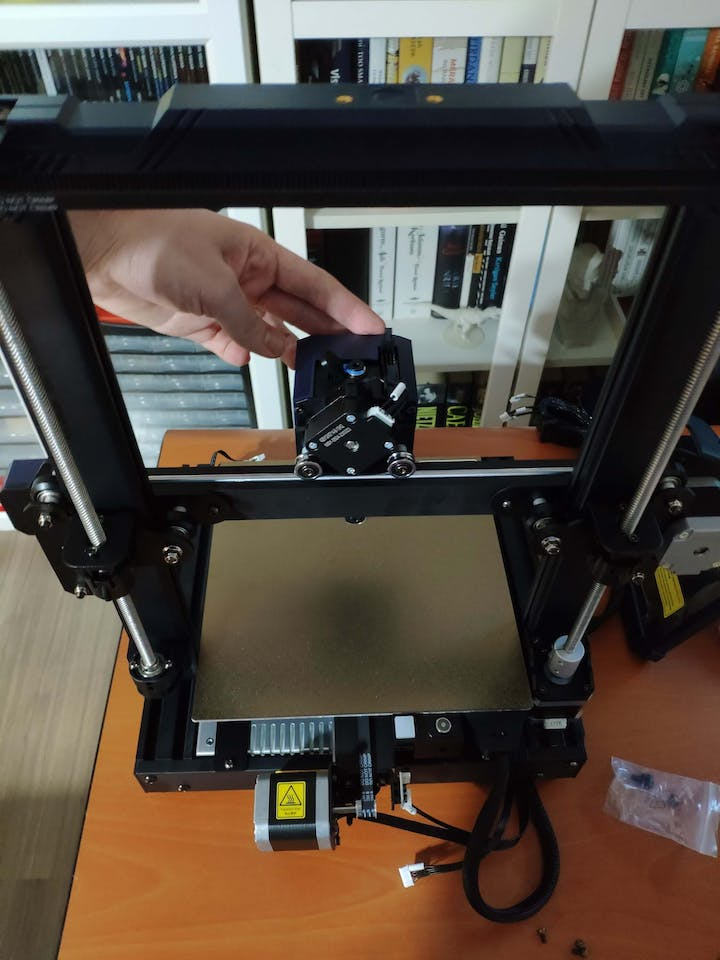
#️⃣ Install the print head, the touch screen, and the filament runout sensor.
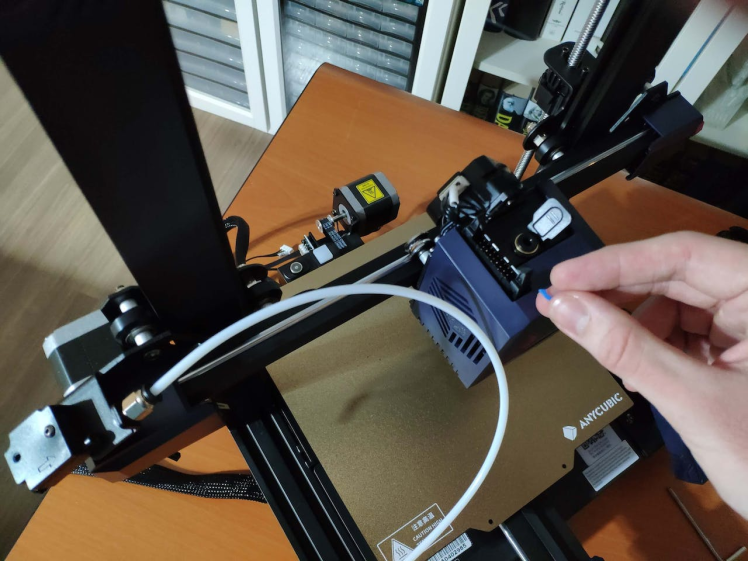
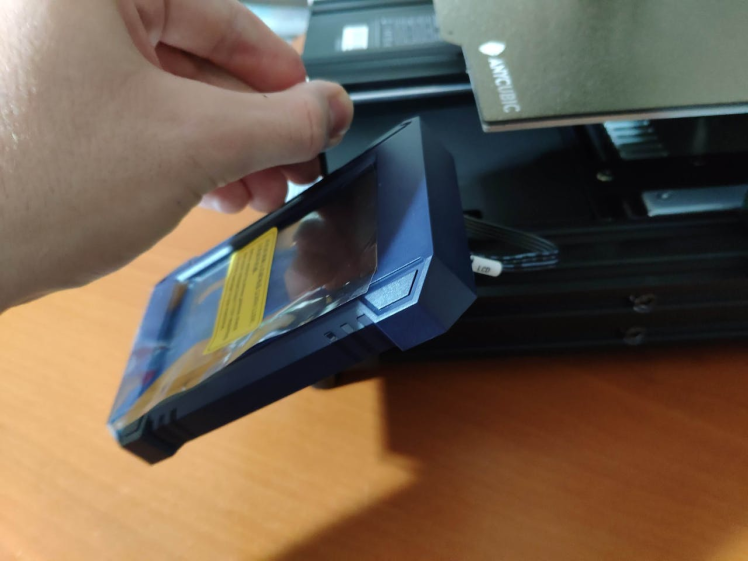
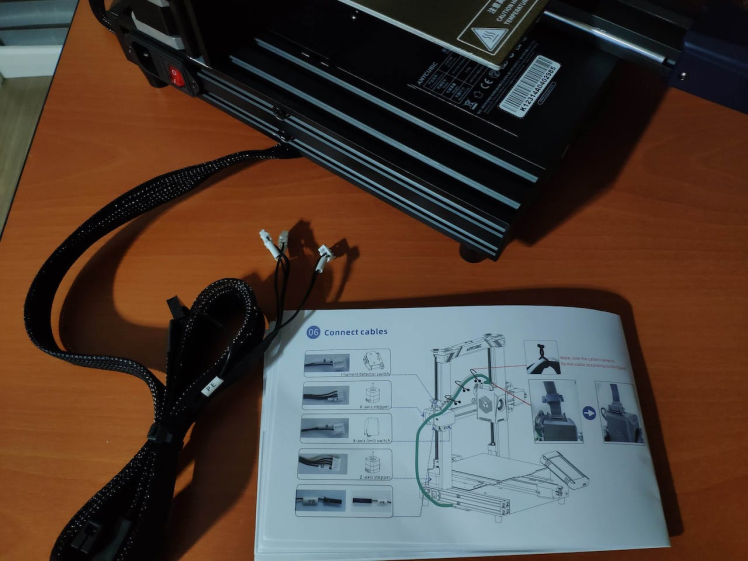
#️⃣ Connect the stepper, switch, screen, and print head cables. Then, attach the filament tube.
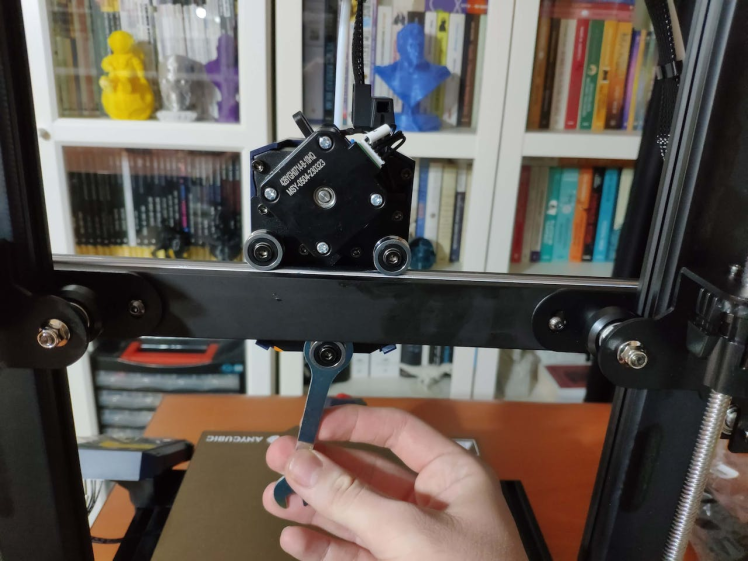
#️⃣ If the print head is shaking, adjust the hexagonal isolation column under the print head.
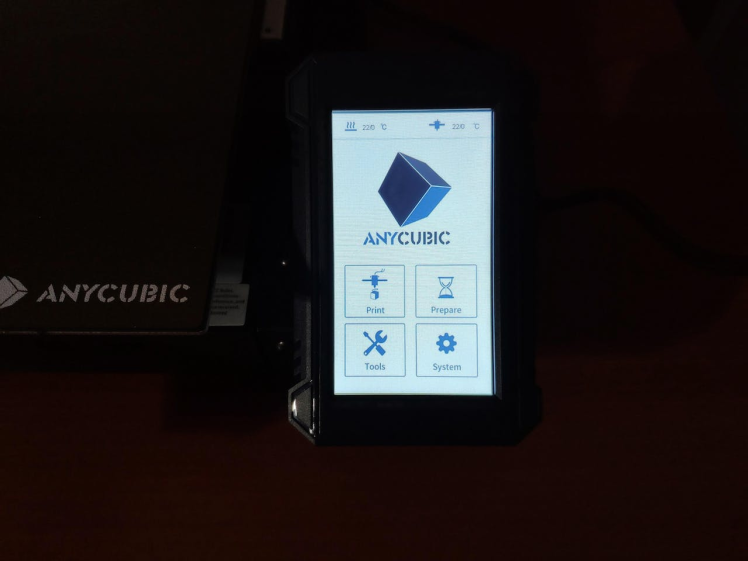
#️⃣ Go to Prepare➡ Leveling ➡ Auto-leveling to initiate the LeviQ 2.0 automatic bed leveling system.
#️⃣ After preheating and wiping the nozzle, Anycubic Kobra 2 probes the predefined points to level the bed.
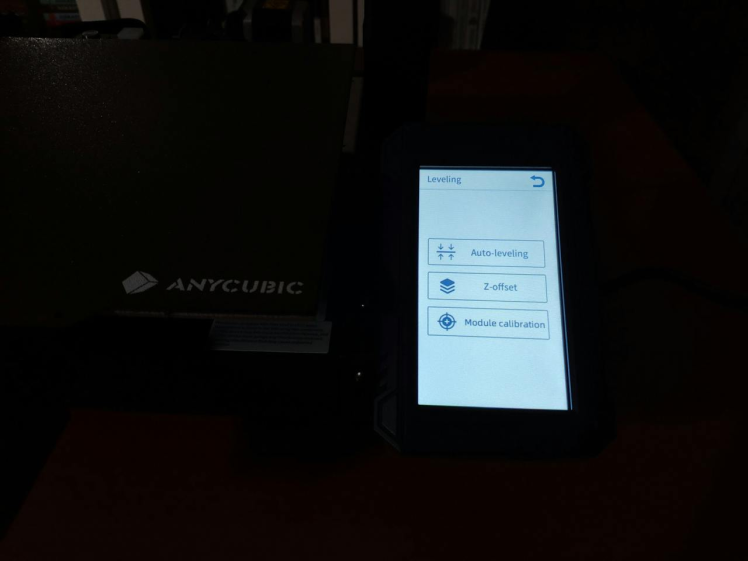
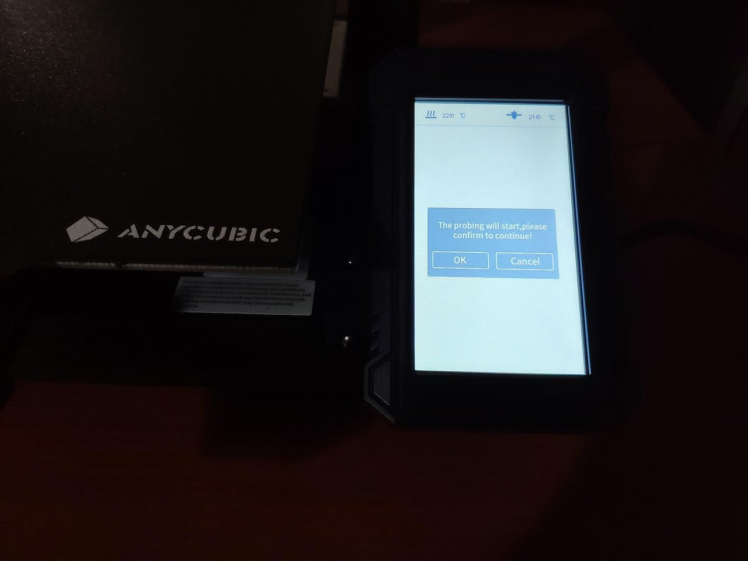
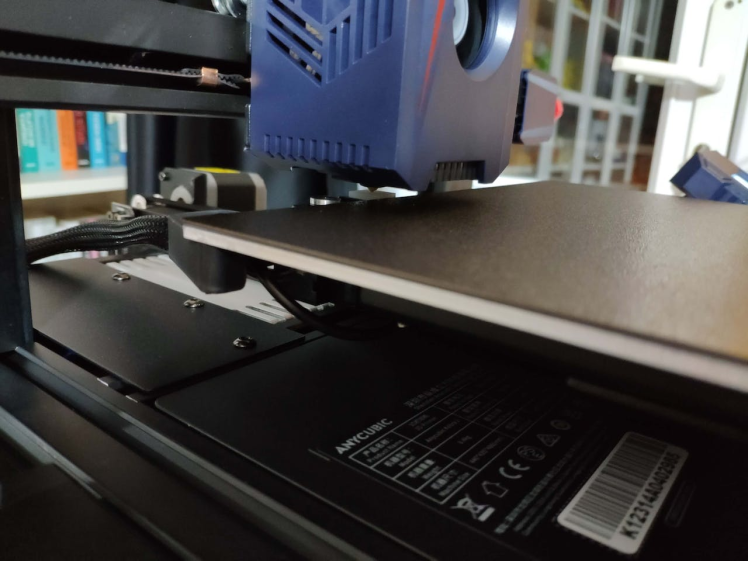
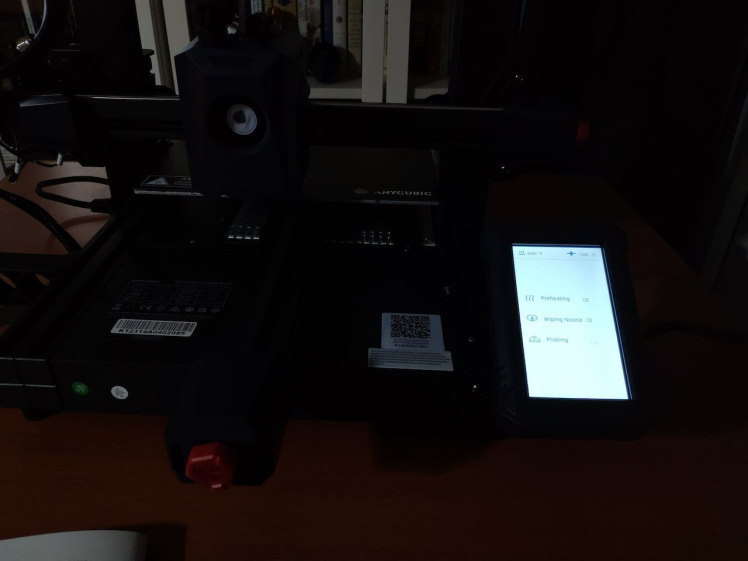
#️⃣ Finally, fix the filament tube with the cable clips, install the filament holder, and insert the filament into the extruder.
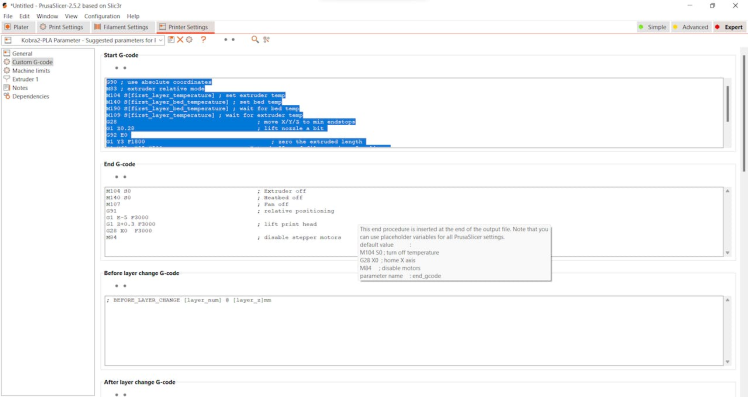
#️⃣ Since Anycubic Kobra 2 is not officially supported by Cura yet, download the latest PrusaSlicer version and import the printer profile (configuration) file provided by Anycubic.
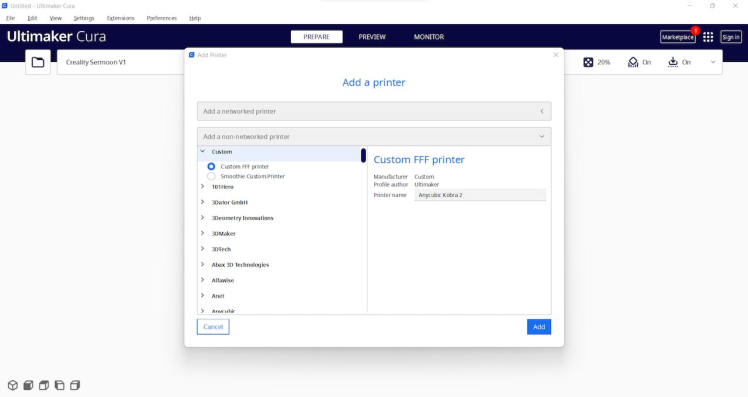
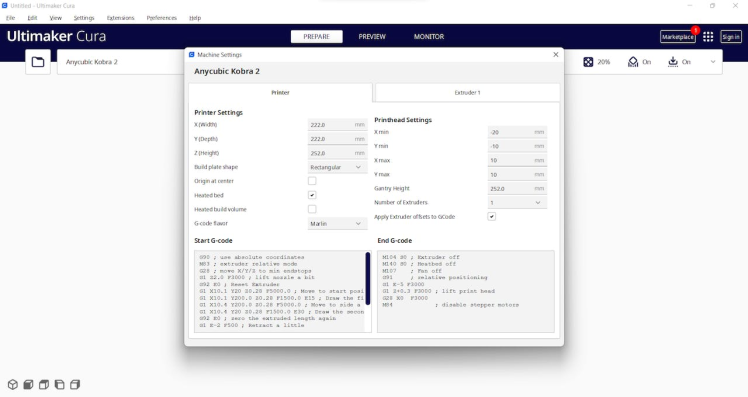
#️⃣ Then, create a custom printer profile on Cura for Anycubic Kobra 2 and change Start G-code and End G-code.
#️⃣ Based on the provided Start G-code and End G-code in the configuration file, I modified new Start G-code and End G-code compatible with Cura.
Start G-code:

G90 ; use absolute coordinates
M83 ; extruder relative mode
G28 ; move X/Y/Z to min endstops
G1 Z2.0 F3000 ; lift nozzle a bit
G92 E0 ; Reset Extruder
G1 X10.1 Y20 Z0.28 F5000.0 ; Move to start position
G1 X10.1 Y200.0 Z0.28 F1500.0 E15 ; Draw the first line
G1 X10.4 Y200.0 Z0.28 F5000.0 ; Move to side a little
G1 X10.4 Y20 Z0.28 F1500.0 E30 ; Draw the second line
G92 E0 ; zero the extruded length again
G1 E-2 F500 ; Retract a little
M117
G21 ; set units to millimeters
G90 ; use absolute coordinates
M82 ; use absolute distances for extrusion
G92 E0
M107

End G-code:

M104 S0 ; Extruder off
M140 S0 ; Heatbed off
M107    ; Fan off
G91     ; relative positioning
G1 E-5 F3000
G1 Z+0.3 F3000 ; lift print head
G28 X0  F3000
M84            ; disable stepper motors
#️⃣ Finally, adjust the official printer settings depending on the filament type while copying them from PrusaSlicer to Cura.

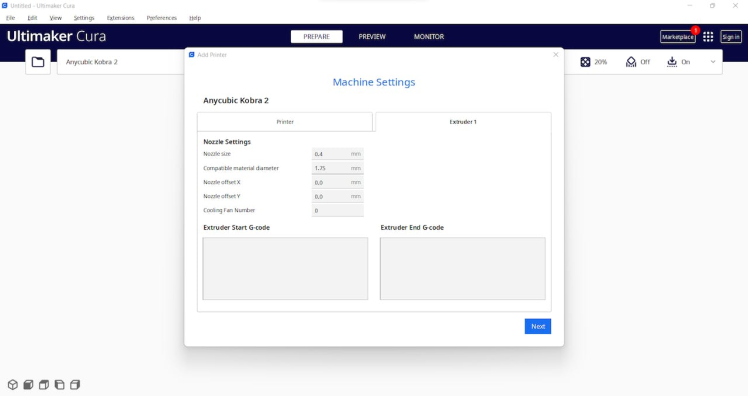
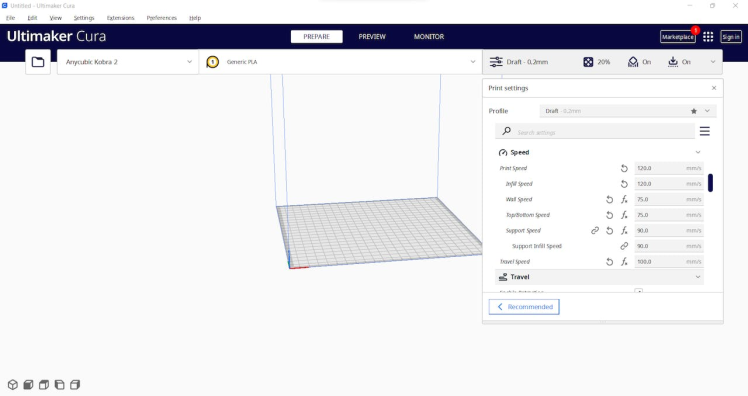
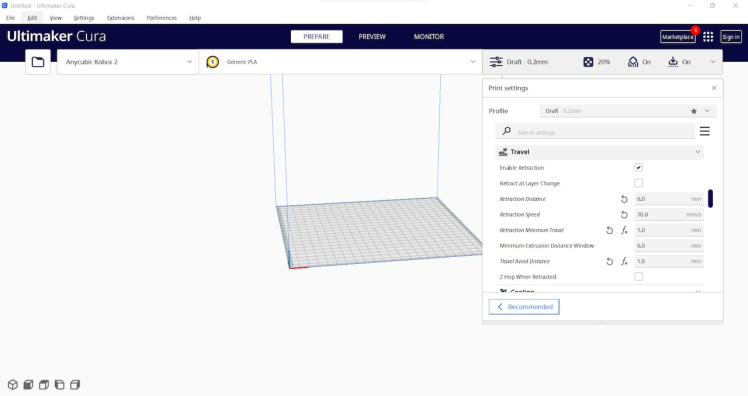
Step 1.1: Assembling the case and making connections & adjustments
// Connections
// XIAO ESP32S3 (Sense) :
//                                XIAO Round Display
// https://wiki.seeedstudio.com/seeedstudio_round_display_usage/#getting-started
Since I utilized XIAO ESP32S3 Sense and the XIAO round display compatible with XIAO development boards out of the box, I did not need to use a breadboard to test my prototype's wire connections. I just made some adjustments before proceeding with the following steps.
#️⃣ First of all, I soldered male pin headers to XIAO ESP32S3. Then, I installed the expansion board (for Sense) to XIAO ESP32S3 via the B2B connector on the development board.
#️⃣ After installing the expansion board, I connected the XIAO round display to XIAO ESP32S3 via the built-in female headers on the round display.
#️⃣ Then, I inserted a microSD card into the SD card reader on the expansion board. Since the round display also has an SD card reader, I modified the pin configuration on the code file to avoid any conflict between the modules.
#️⃣ Finally, I attached the antenna via the built-in WiFi/BT antenna connector on XIAO ESP32S3.
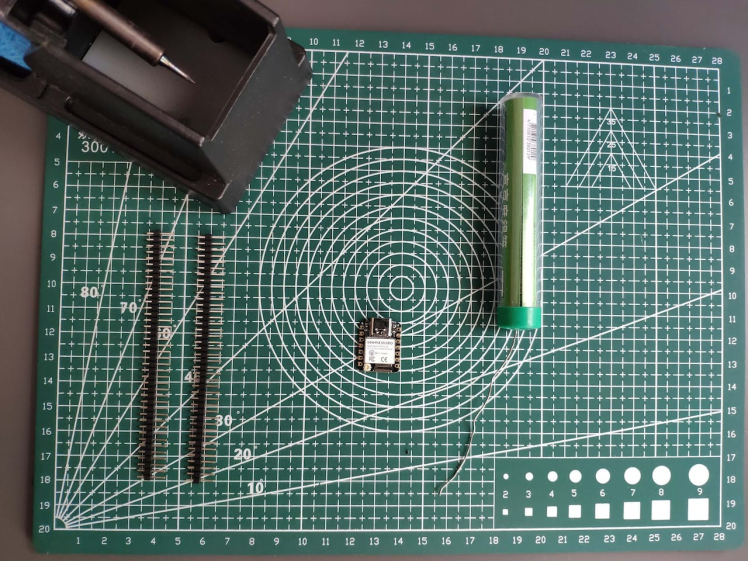
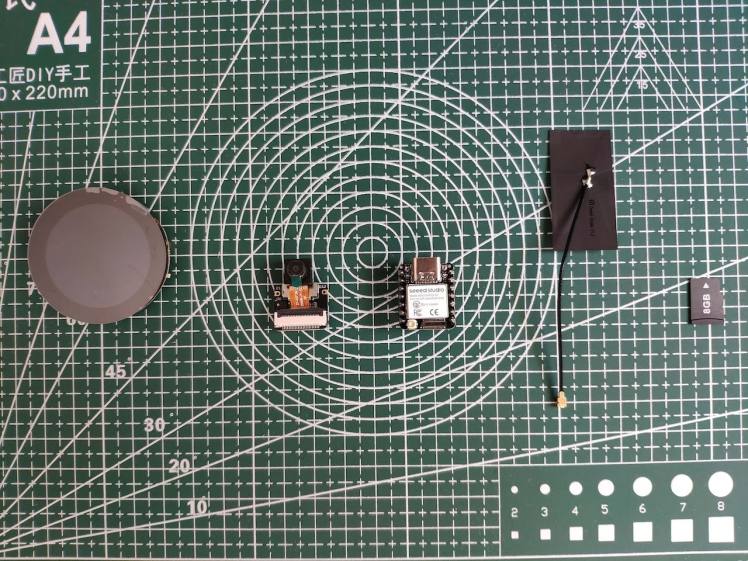
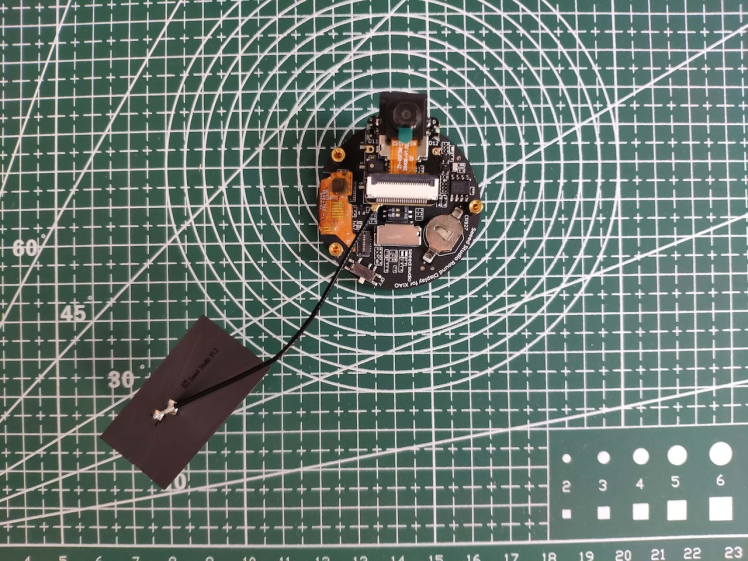
After printing all parts (models), I fastened the battery into the right part of the main case via a hot glue gun. I decided to utilize a Xiaomi 10000 mAh power bank to supply this assistive device since it is designed to accompany the user during long travels without requiring recharging.
Then, I aligned the right and left parts of the main case on an assistive cane via their extended hollow cylindrical joints. After aligning the parts, I connected them via their snap-fit joints. I used a walking cane since it was the only available mobility aid to me, but this assistive device can be connected to various mobility aids.
Finally, I attached XIAO ESP32S3 Sense and the round display to the modular part via the hot glue gun.
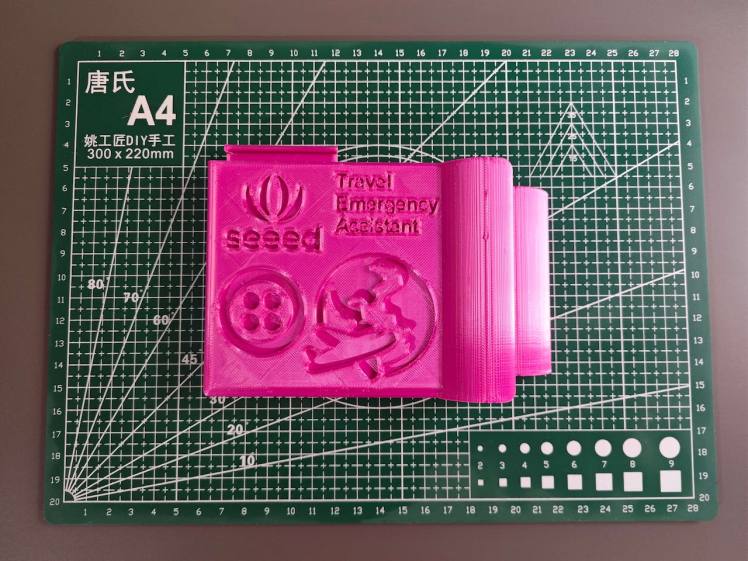
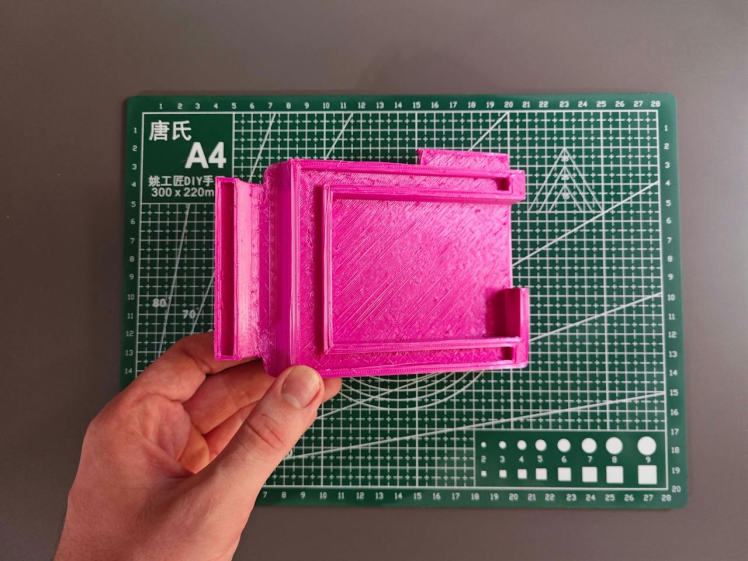
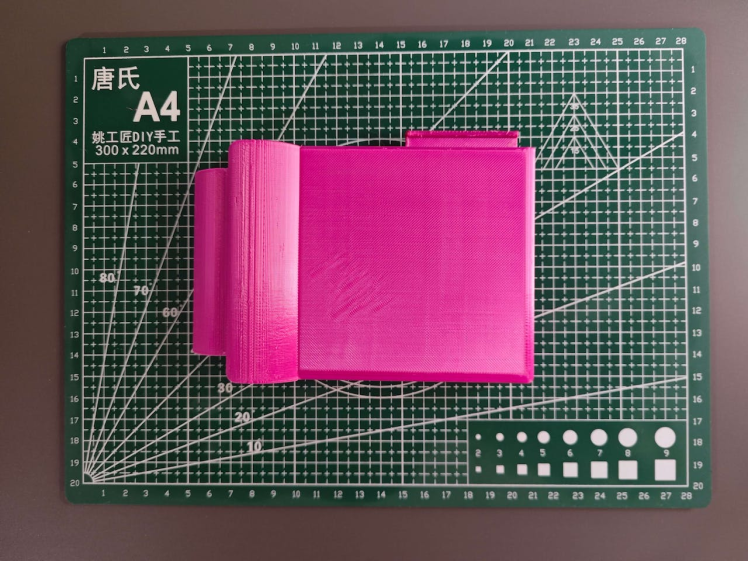
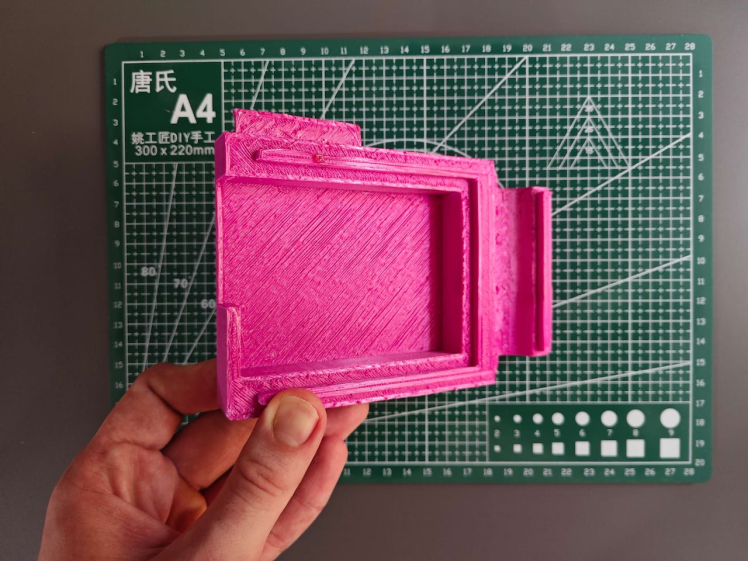
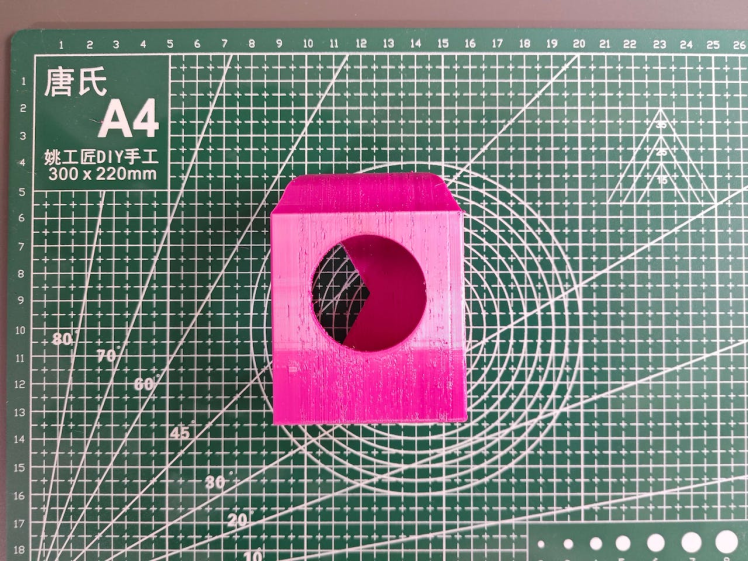
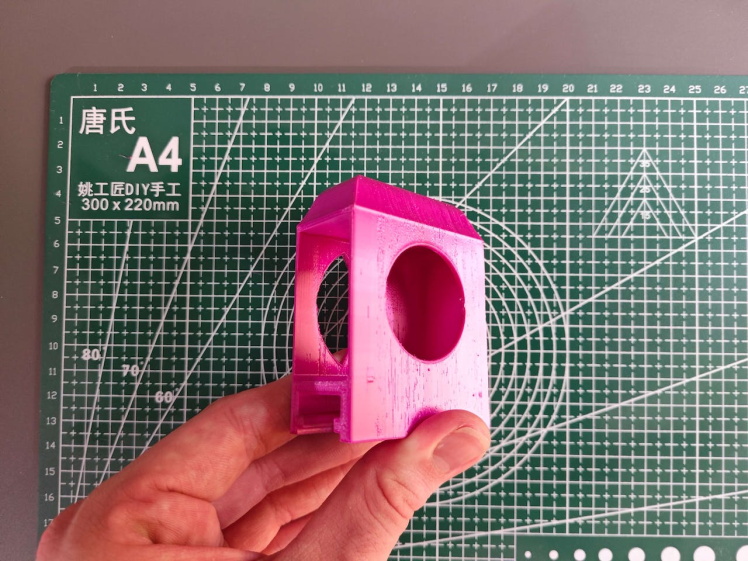
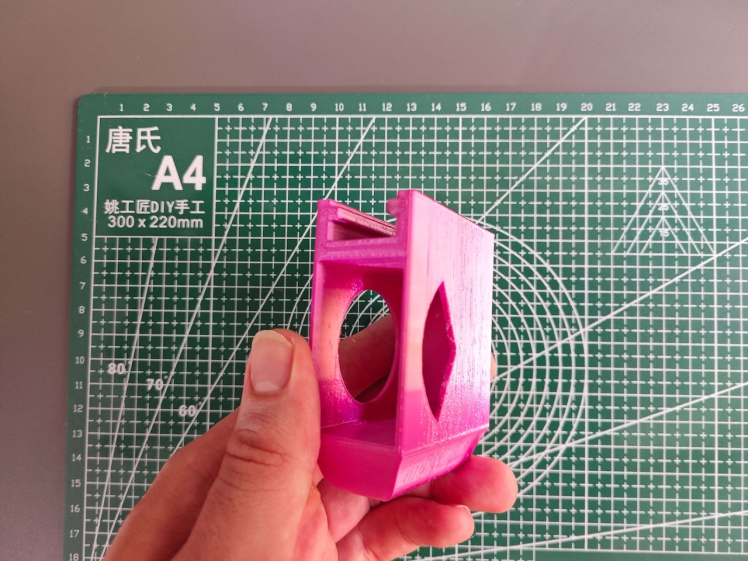
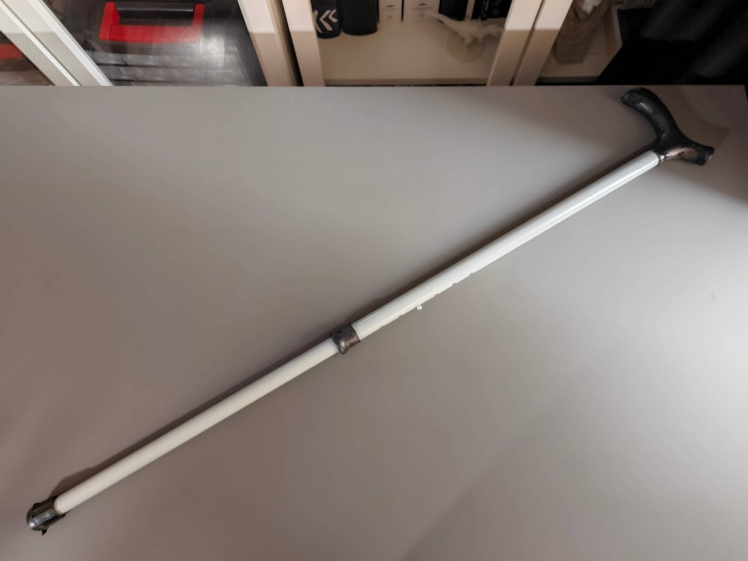
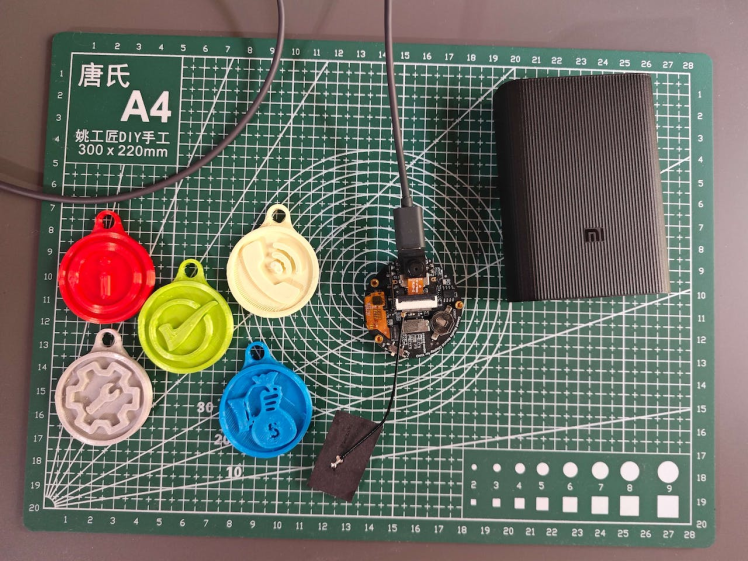
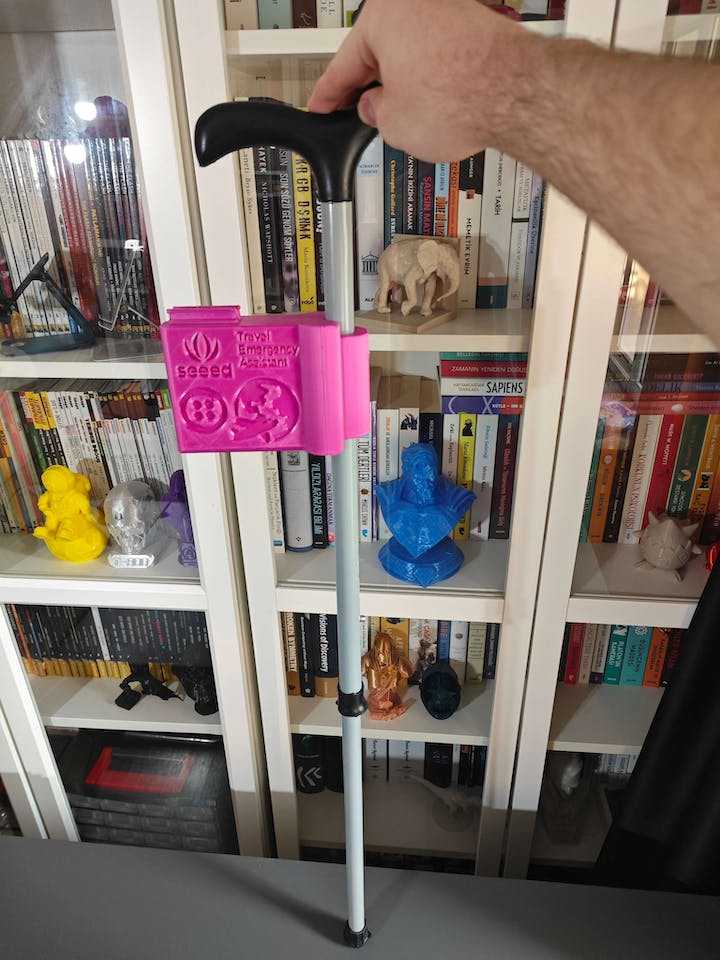
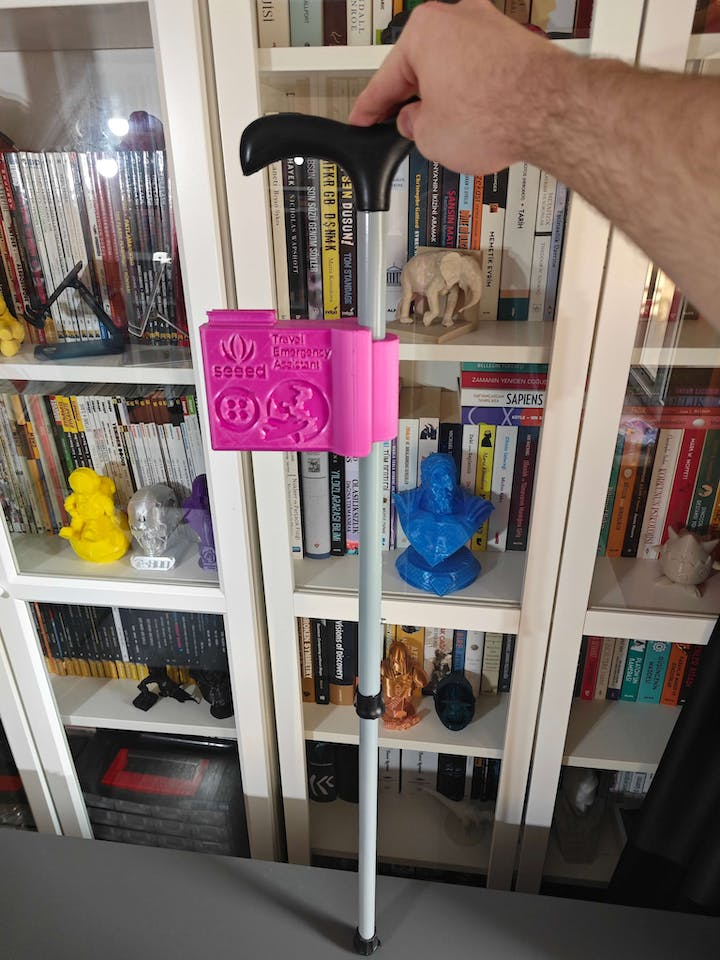
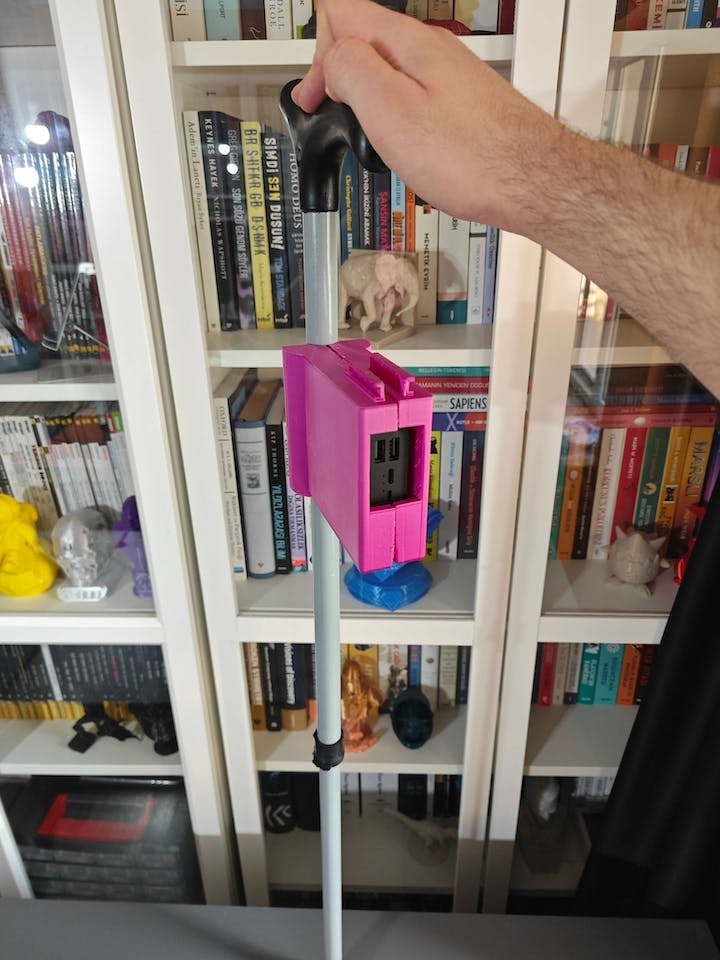
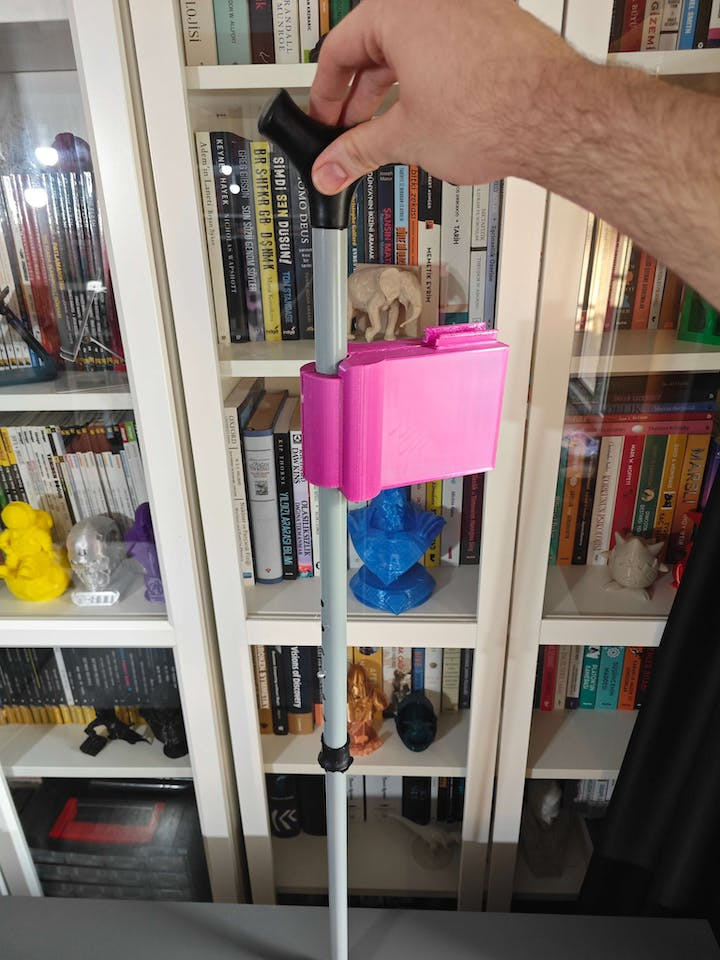
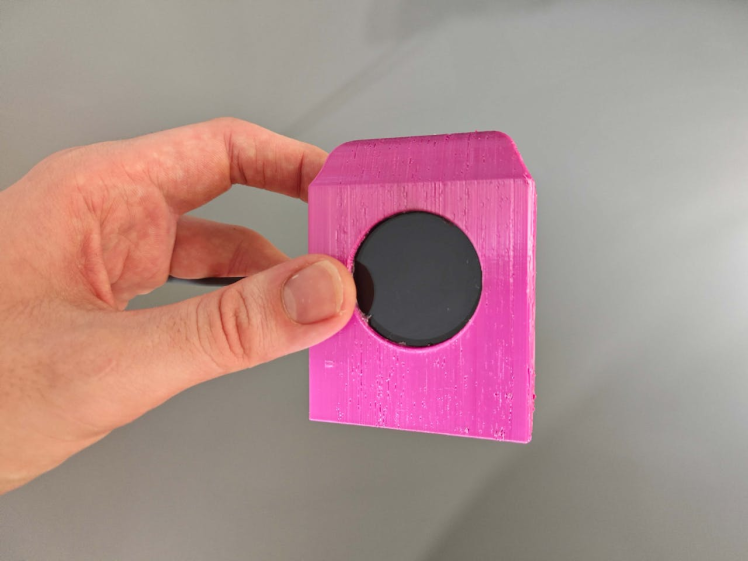
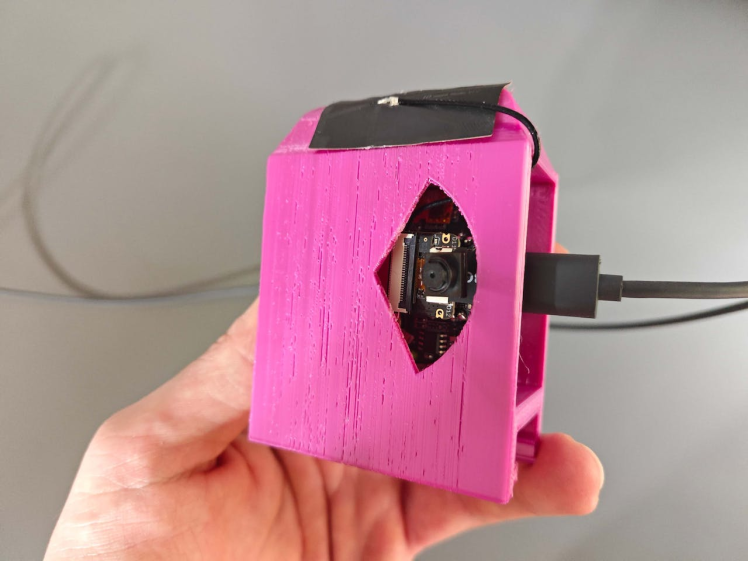
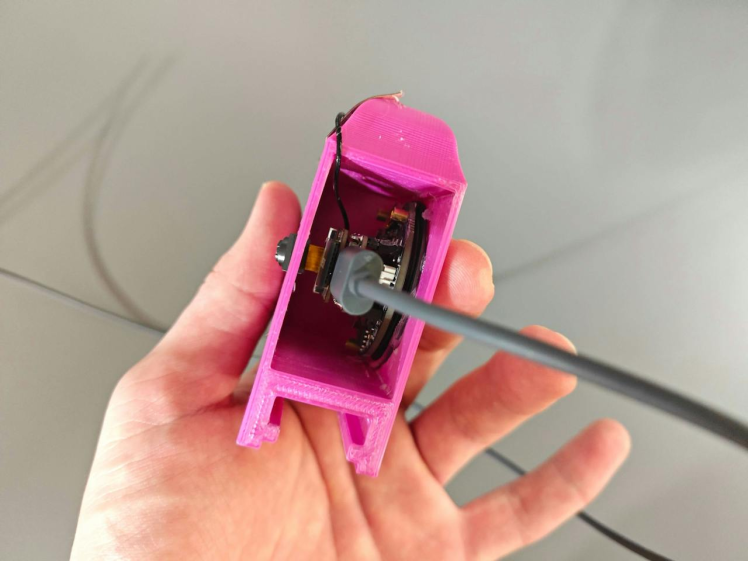
Thanks to the dents on the main case, the modular part can be removed from the main case to position the built-in camera at different angles while scanning keychains.
Since I connected XIAO ESP32S3 to the power bank via a long USB Type-C cable, the modular part can move in a 40 cm diameter.
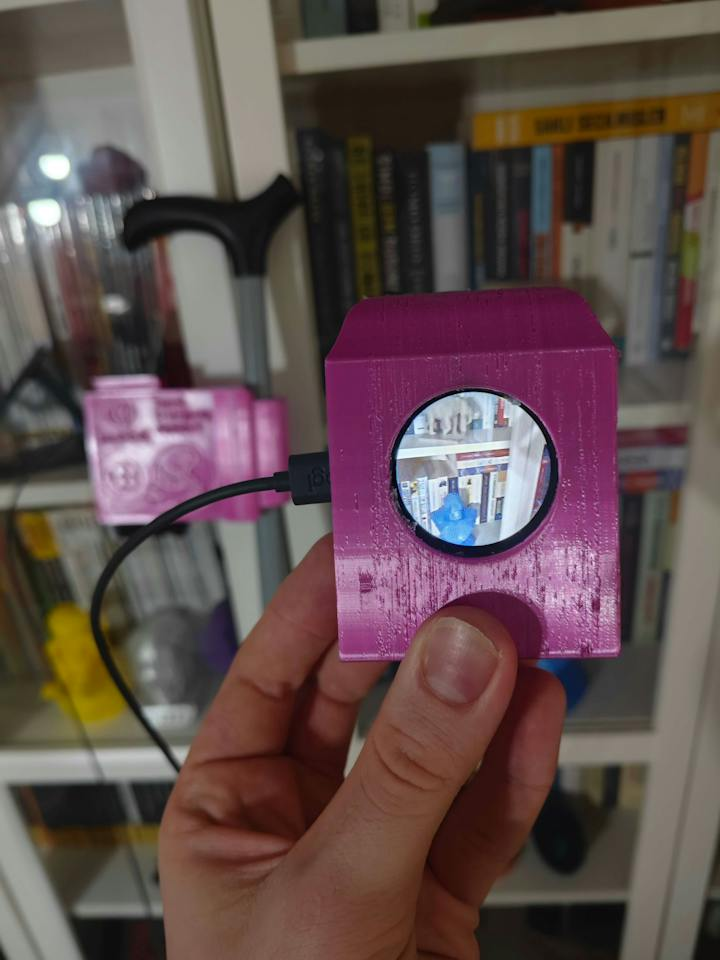
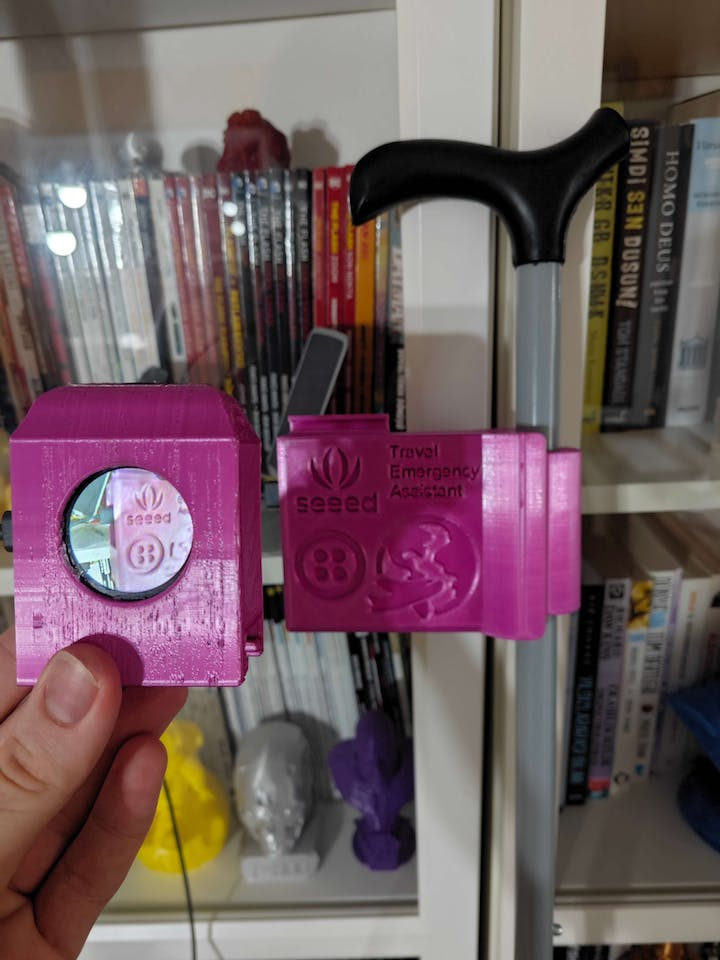
Step 2: Developing a GPS, GPRS, and BLE-enabled Android application w/ the MIT APP Inventor
Since I wanted to make this assistive device operate without requiring a Wi-Fi connection to transfer data packets to the web application, I decided to develop an Android application from scratch with the MIT APP Inventor. As the user interface of this assistive device, the Android application can utilize the celluar network connection to transfer data packets to the web application via GPRS, obtain precise location data via GPS, and communicate with XIAO ESP32S3 via BLE so as to get model detection results and transmit commands for data collection.
MIT App Inventor is an intuitive, visual programming environment that allows developers to build fully functional Android applications. Its blocks-based tool (drag-and-drop) facilitates the creation of complex, high-impact apps in significantly less time than the traditional programming environments.
After developing my application, named BLE Travel Emergency Assistant, I published it on Google Play. So, you can install this application on any compatible Android device via Google Play.
📲 Install BLE Emergency Assistant on Google Play
Also, you can download the application's APK file directly below.
Nevertheless, if you want to replicate or modify this Android application on the MIT App Inventor, follow the steps below.
#️⃣ First of all, create an account on the MIT App Inventor.
#️⃣ Download the BLE Travel Emergency Assistant app's project file in the AIA format (BLE_Emergency_Assistant.aia) and import the AIA file into the MIT App Inventor.
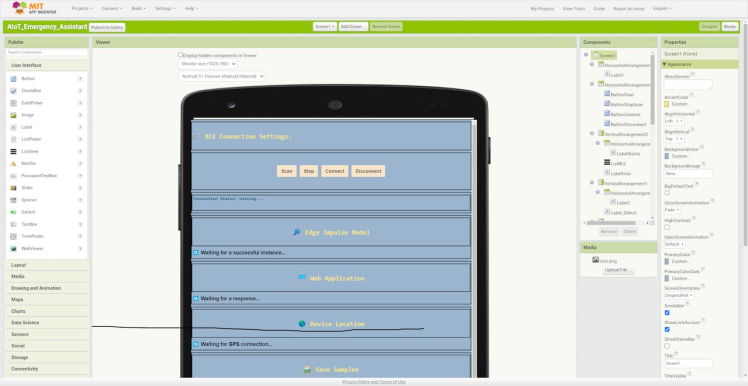
#️⃣ Since the MIT App Inventor does not support BLE connectivity by default, download the latest version of the BluetoothLE extension and import the BluetoothLE extension into the BLE Emergency Assistant project.
#️⃣ In this tutorial, you can get more information regarding enabling BLE connectivity on the MIT App Inventor.
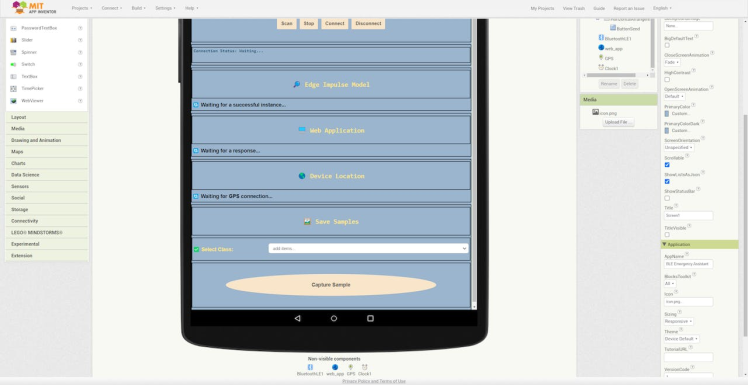
#️⃣ In the Blocks editor, you can inspect the functions I programmed with the drag-and-drop menu components.
#️⃣ In the following steps, you can get more information regarding all features of this Android application working in conjunction with XIAO ESP32S3 and the web application.
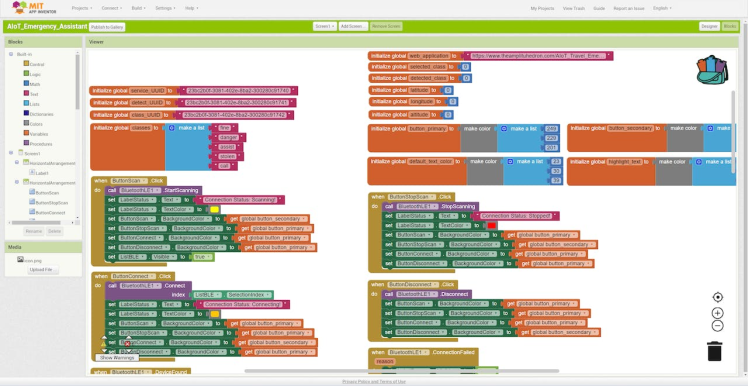
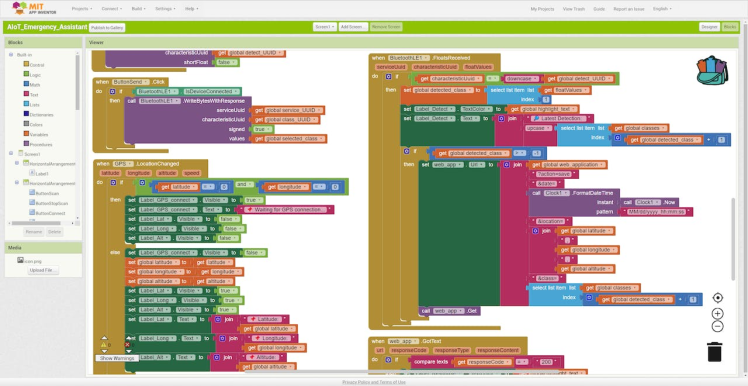
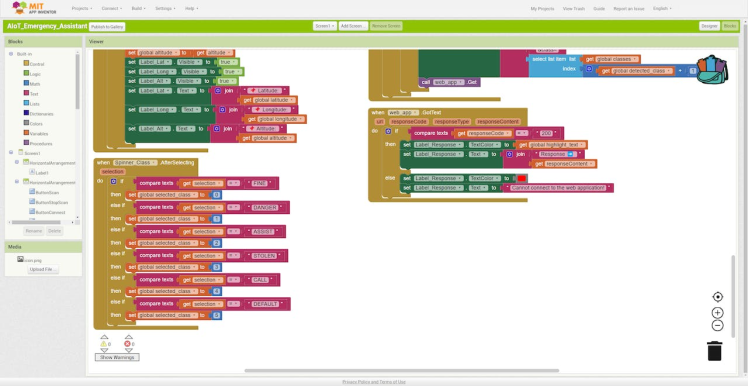
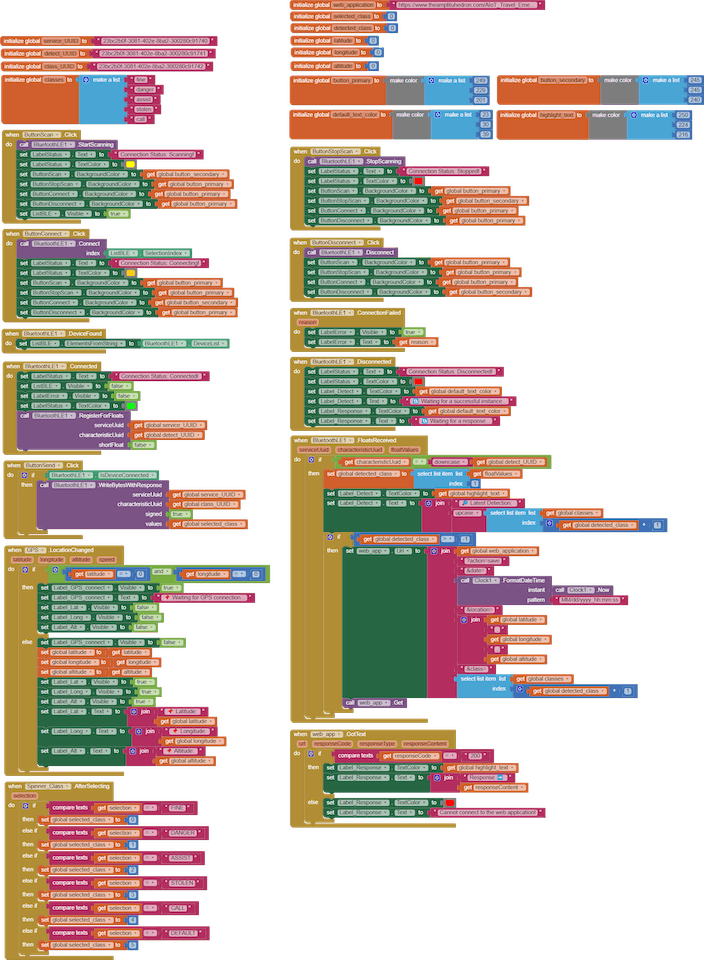
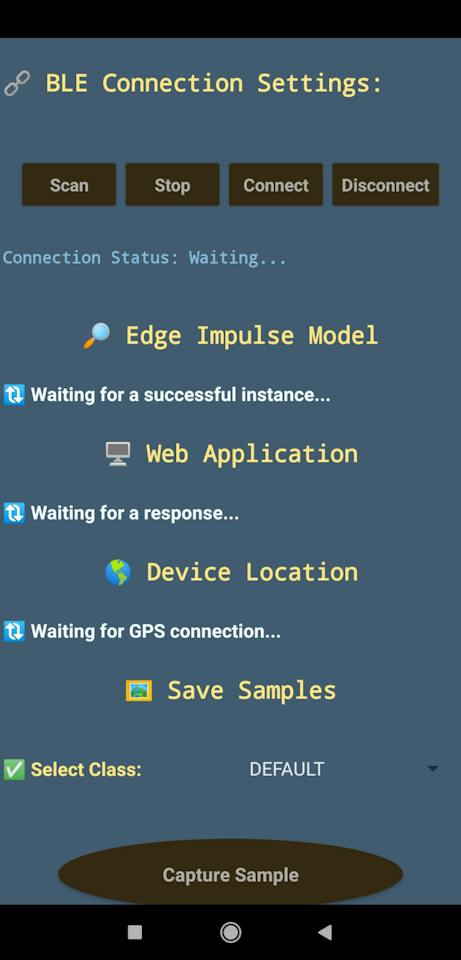
After installing this Android application on a compatible mobile phone, you can start communicating with XIAO ESP32S3 over BLE immediately.
Step 3: Creating an account to utilize Twilio's WhatsApp & SMS APIs
Since I decided to inform the user's emergency contacts of the latest detected keychain (token) by the object recognition model over WhatsApp and SMS, I needed to utilize Twilio's WhatsApp and SMS APIs simultaneously. In this regard, I was also able to obtain commands from emergency contacts over WhatsApp in order to send thorough location inspections generated by Google Maps as feedback via the web application.
Twilio gives the user a simple and reliable way to communicate with a Twilio-verified phone over WhatsApp via a webhook free of charge for trial accounts. Also, Twilio provides a trial text messaging service to transfer an SMS from a virtual phone number to a verified phone number internationally. Furthermore, Twilio supports official helper libraries for different programming languages, including PHP, enforcing its APIs.
#️⃣ First of all, sign up for Twilio and navigate to the default (first) trial account (project).
I noticed that creating a new free trial account (project) more than once may lead to the suspension of your Twilio user account. So, I recommend using the default trial account (project).
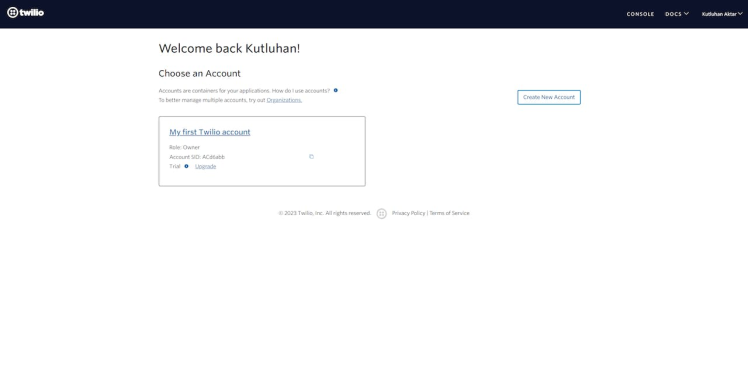
#️⃣ After verifying a phone number for the default account (project), set the account settings for WhatsApp in PHP initially.
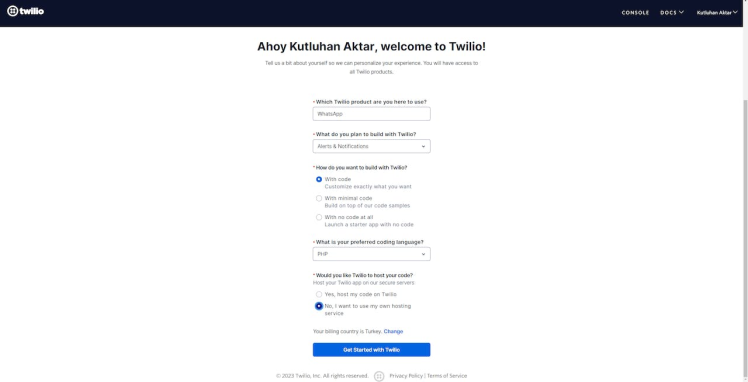
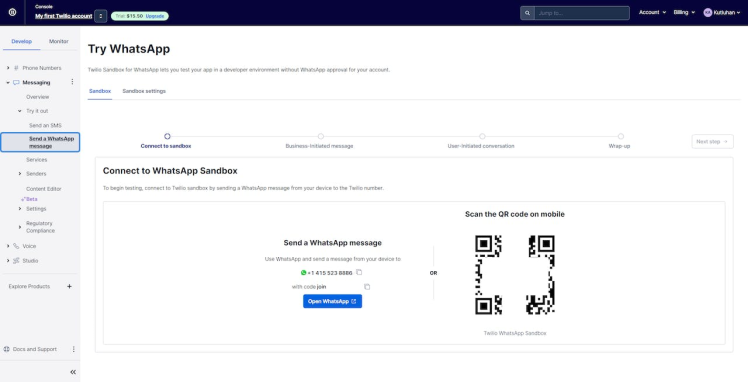
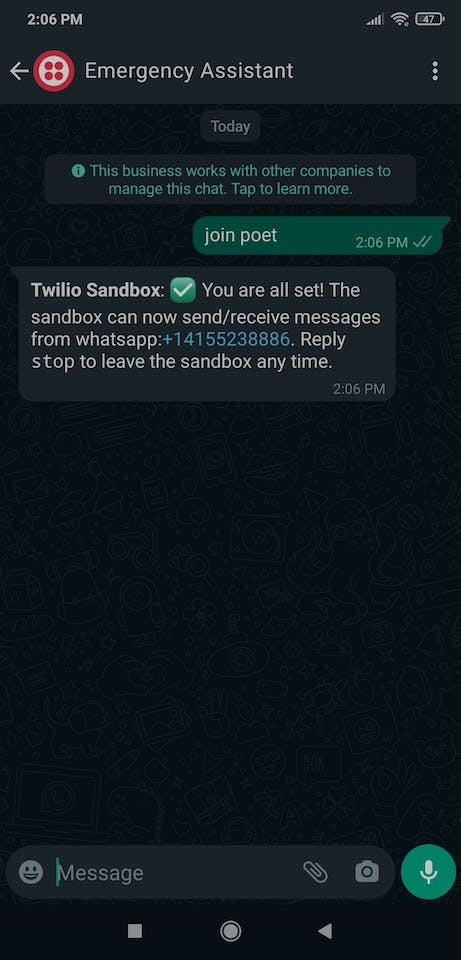
#️⃣ Go to Twilio Sandbox for WhatsApp and verify your device by sending the given code over WhatsApp, which activates a WhatsApp session.
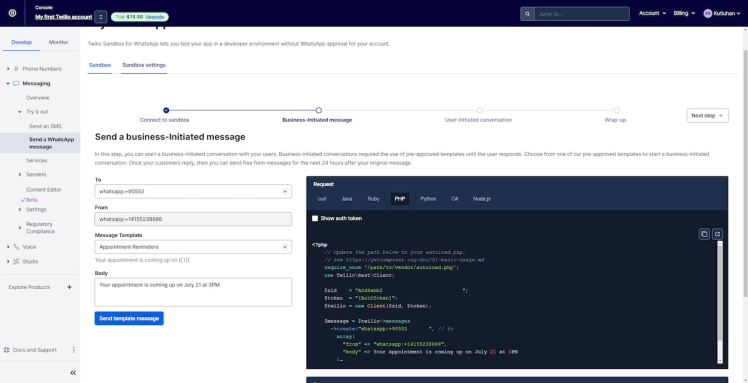
#️⃣ After verifying your phone number, download the Twilio PHP Helper Library to receive commands and send updates over WhatsApp via the web application.
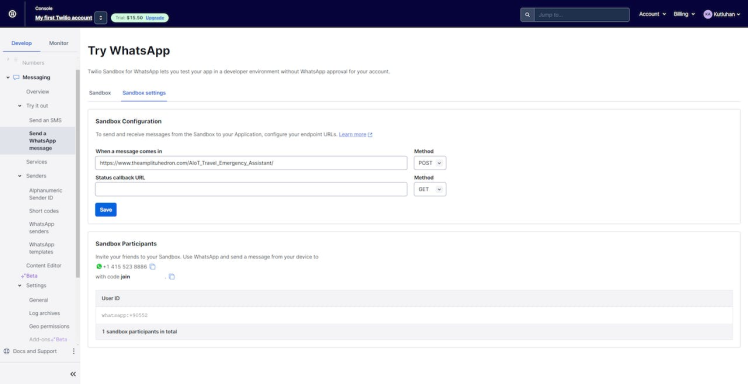
#️⃣ Finally, go to WhatsApp sandbox settings and change the receiving endpoint URL under WHEN A MESSAGE COMES IN with the requested webhook URL.
https://www.theamplituhedron.com/AIoT_Travel_Emergency_Assistant/
You can get more information regarding the web application in Step 4.
#️⃣ To configure the SMS settings, go to Messaging ➡ Send an SMS.
#️⃣ Since a virtual phone number is required to transfer an SMS via Twilio, click Get a Twilio number.
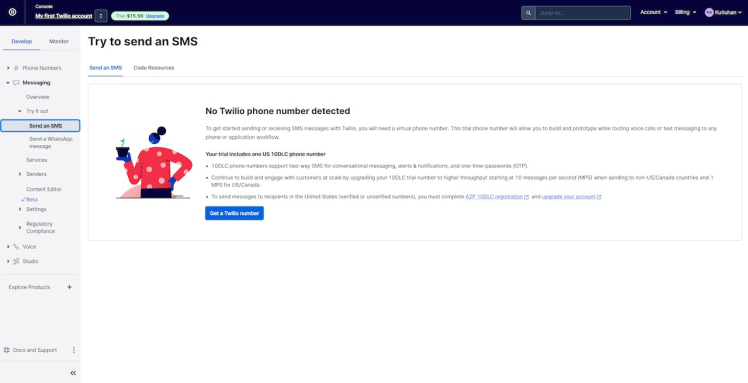
#️⃣ Since Twilio provides a trial (free) 10DLC phone number for each trial account, it lets the user utilize the text messaging service immediately after assigning a virtual phone number to the given account.
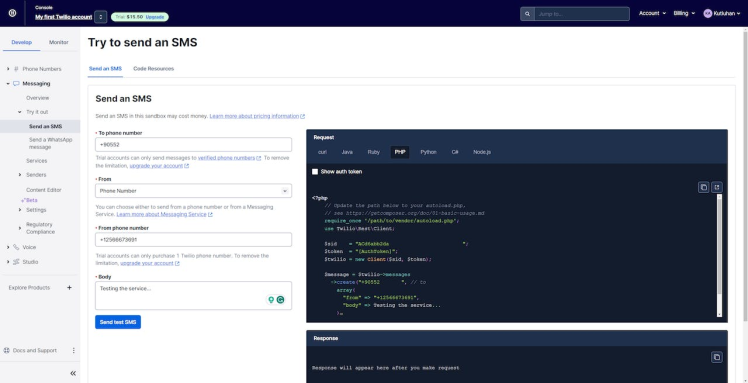
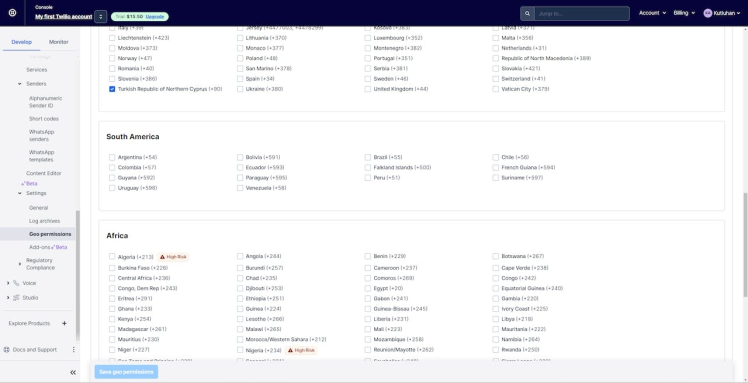
#️⃣ Finally, go to Geo permissions to adjust the allowed recipients depending on your region.
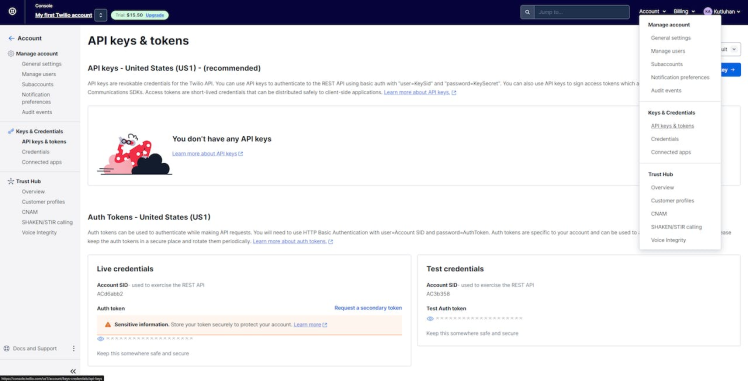
#️⃣ After configuring WhatsApp and SMS settings, go to Account ➡ API keys & tokens to get the account SID and the auth token under Live credentials so as to employ Twilio's WhatsApp and SMS APIs to communicate with the verified phone numbers.
Step 4: Developing a web application to communicate w/ the Android app and process requests from WhatsApp
Since I needed to obtain the model detection results from XIAO ESP32S3 through the Android application so as to inform emergency contacts, I decided to develop a basic web application (webhook) to utilize Twilio's WhatsApp and SMS APIs. In addition to working as a proxy server between the Android application and emergency contacts, the web application provides the user with various features.
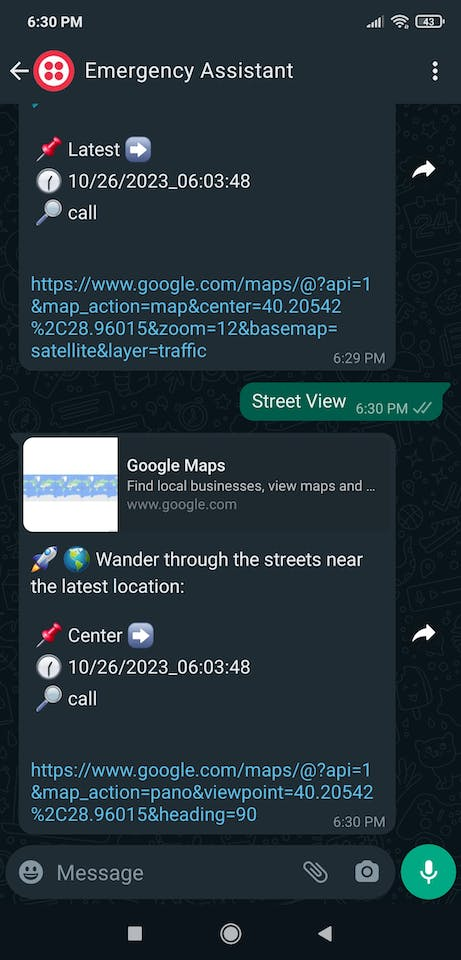
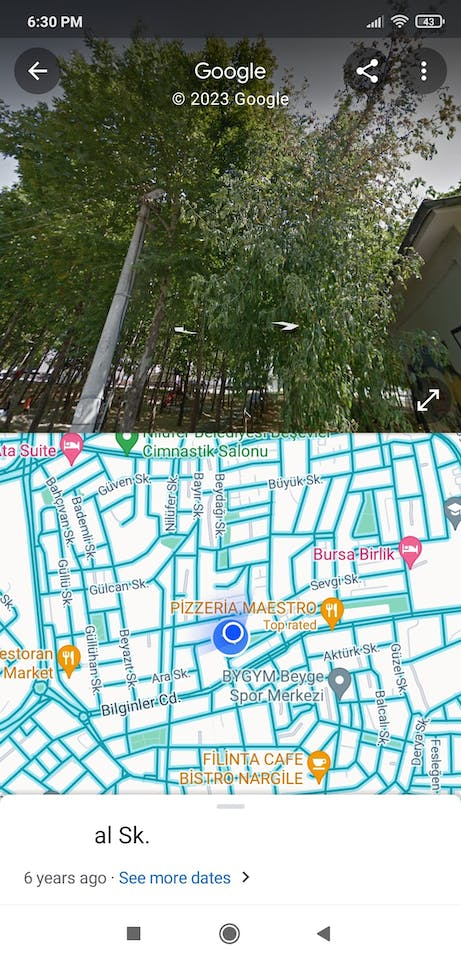
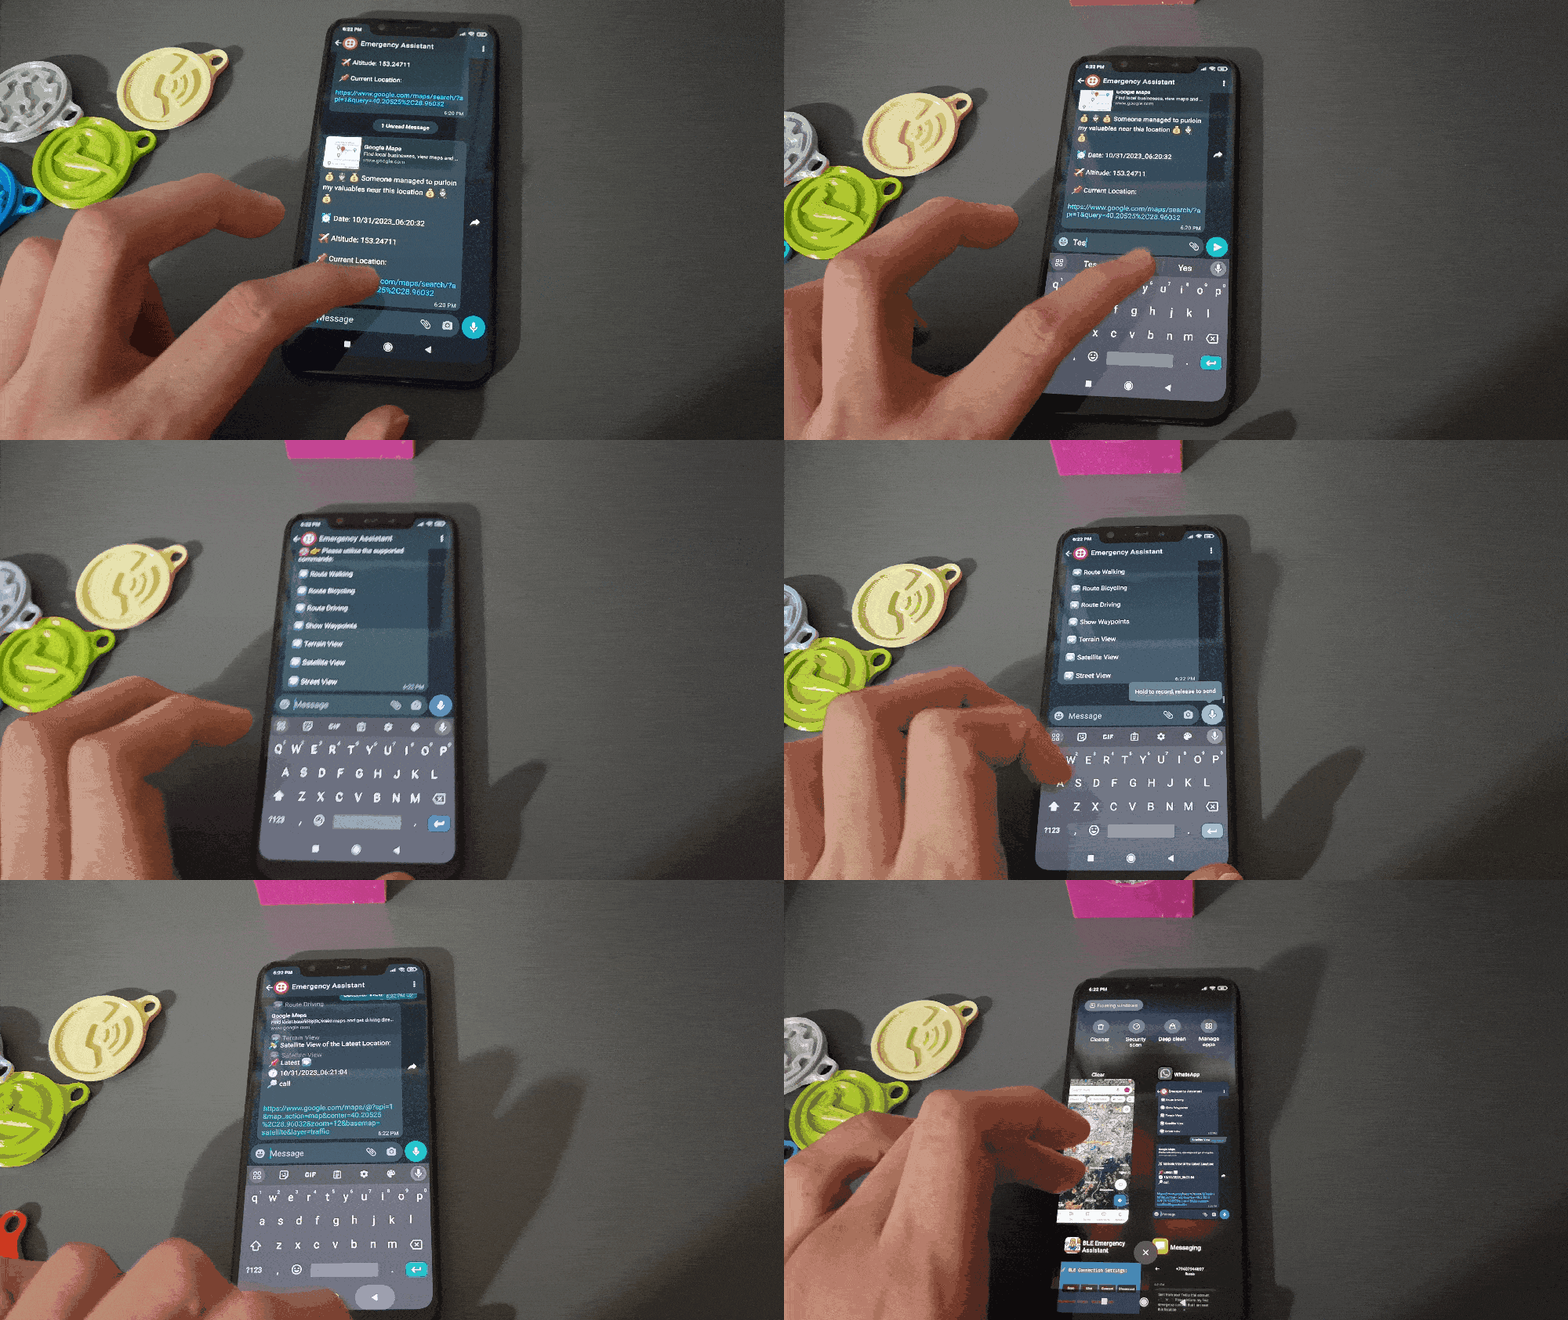
First of all, the web application allows the user to change the emergency contact information in the database with a single HTTP GET request. With the stored emergency contact information, the web application informs the given contacts via WhatsApp or SMS automatically, depending on the model detection results transferred by the Android application. Also, thanks to Twilio's APIs, the web application can receive commands through WhatsApp so as to send thorough location inspections generated by Google Maps as feedback to the primary emergency contact.
Since Twilio requires a publicly available URL to redirect the incoming WhatsApp messages to a given webhook, I utilized my SSL-enabled server to host this web application. However, you can employ an HTTP tunneling tool like ngrok to set up a public URL for the webhook.
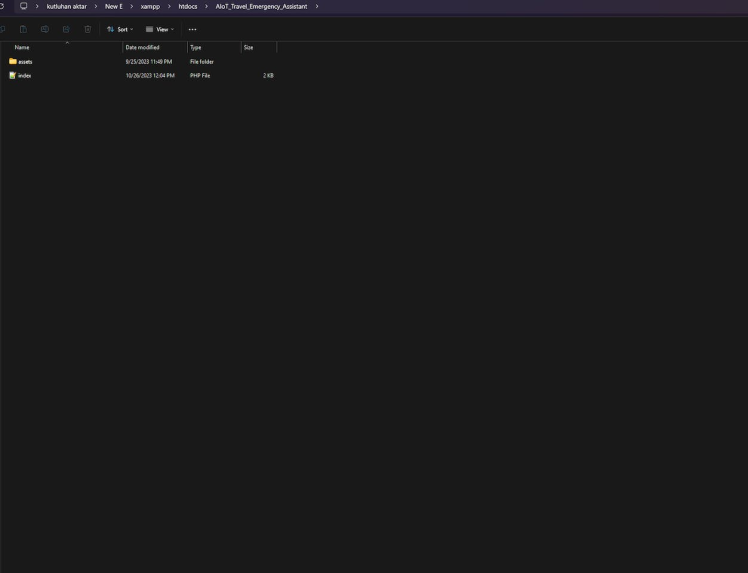
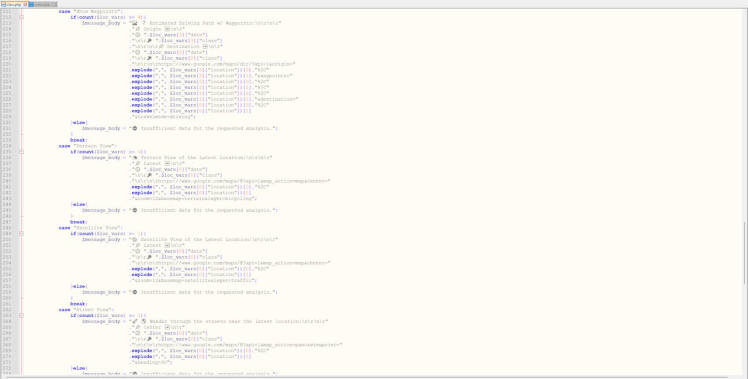
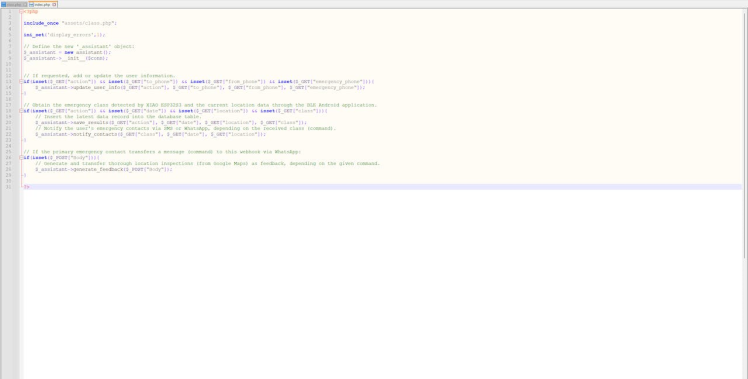
As shown below, the web application consists of two folders and two code files:
- /assets
- -- /twilio-php-main
- -- class.php
- index.php
📁 class.php
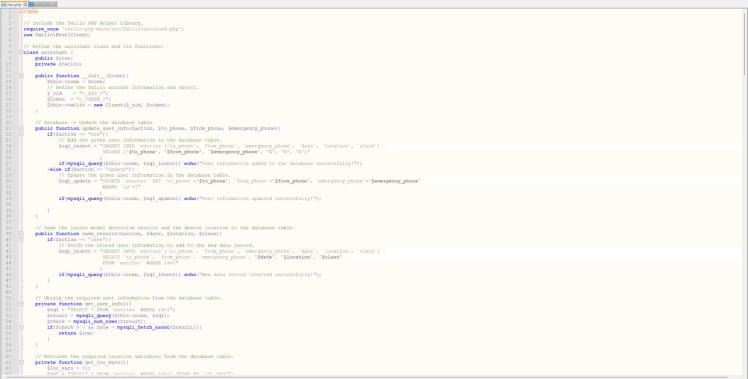
In the class.php file, I created a class named assistant to bundle the following functions under a specific structure.
⭐ Include the Twilio PHP Helper Library.
require_once 'twilio-php-main/src/Twilio/autoload.php';
use TwilioRestClient;
⭐ Define the assistant class and its functions.
⭐ In the __init__ function, define the Twilio account information and object.
class assistant {
	public $conn;
	private $twilio;

	public function __init__($conn){
		$this->conn = $conn;
		// Define the Twilio account information and object.
		$_sid    = "<_SID_>";
        $token  = "<_TOKEN_>";
        $this->twilio = new Client($_sid, $token);
	}
⭐ In the update_user_info function, depending on the given action parameter, add the given emergency contact information to the entries database table for the first time or update the stored contact information in the database table.
public function update_user_info($action, $to_phone, $from_phone, $emergency_phone){
		if($action == "new"){
			// Add the given user information to the database table.
			$sql_insert = "INSERT INTO `entries`(`to_phone`, `from_phone`, `emergency_phone`, `date`, `location`, `class`)
						   VALUES ('$to_phone', '$from_phone', '$emergency_phone', 'X', 'X', 'X')"
					      ;
			if(mysqli_query($this->conn, $sql_insert)) echo("User information added to the database successfully!");
		}else if($action == "update"){
			// Update the given user information in the database table.
			$sql_update = "UPDATE `entries` SET `to_phone`='$to_phone', `from_phone`='$from_phone', `emergency_phone`='$emergency_phone'
			               WHERE `id`=1"
						  ;
			if(mysqli_query($this->conn, $sql_update)) echo("User information updated successfully!");

		}
	}
⭐ In the save_results function:
⭐ First, fetch the stored emergency contact information.
⭐ Then, with the retrieved contact information, save the latest model detection results, the current date, and the current device location data transferred by the Android application to the entries database table as the new data record.
public function save_results($action, $date, $location, $class){
		if($action == "save"){
			// Fetch the stored user information to add to the new data record.
			$sql_insert = "INSERT INTO `entries`(`to_phone`, `from_phone`, `emergency_phone`, `date`, `location`, `class`)
						   SELECT `to_phone`, `from_phone`, `emergency_phone`, '$date', '$location', '$class'
						   FROM `entries` WHERE id=1"
			              ;
			if(mysqli_query($this->conn, $sql_insert)) echo("New data record inserted successfully!");
		}
	}
⭐ In the get_user_info function, retrieve the stored emergency contact information from the database table.
private function get_user_info(){
		$sql = "SELECT * FROM `entries` WHERE id=1";
		$result = mysqli_query($this->conn, $sql);
		$check = mysqli_num_rows($result);
		if($check > 0 && $row = mysqli_fetch_assoc($result)){
			return $row;
		}
	}
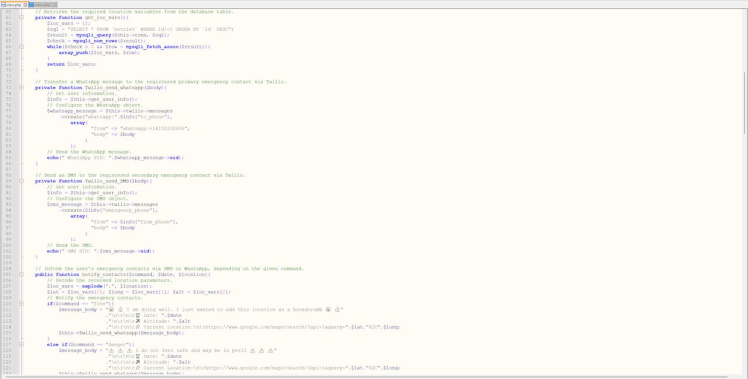
⭐ In the get_loc_vars function, obtain the stored location variables (latitude, longitude, and altitude) for each data record in the database table and return them in descending order as a list.
private function get_loc_vars(){
		$loc_vars = [];
		$sql = "SELECT * FROM `entries` WHERE id!=1 ORDER BY `id` DESC";
		$result = mysqli_query($this->conn, $sql);
		$check = mysqli_num_rows($result);
		while($check > 0 && $row = mysqli_fetch_assoc($result)){
			array_push($loc_vars, $row);
		}
		return $loc_vars;
	}
⭐ In the Twilio_send_whatsapp function:
⭐ Get the stored emergency contact information from the database table.
⭐ Configure the Twilio WhatsApp object with the given message.
⭐ Then, send a WhatsApp message to the registered primary emergency contact via Twilio.
private function Twilio_send_whatsapp($body){
		// Get user information.
		$info = $this->get_user_info();
		// Configure the WhatsApp object.
		$whatsapp_message = $this->twilio->messages
			->create("whatsapp:".$info["to_phone"],
				array(
					   "from" => "whatsapp:+14155238886",
					   "body" => $body
                     )
				);
		// Send the WhatsApp message.
        echo(" WhatsApp SID: ".$whatsapp_message->sid);
	}
⭐ In the Twilio_send_SMS function:
⭐ Get the stored emergency contact information from the database table.
⭐ Configure the Twilio SMS object with the given message.
⭐ Then, send an SMS to the registered secondary emergency contact via Twilio.
private function Twilio_send_SMS($body){
		// Get user information.
		$info = $this->get_user_info();
		// Configure the SMS object.
        $sms_message = $this->twilio->messages
			->create($info["emergency_phone"],
				array(
					   "from" => $info["from_phone"],
                       "body" => $body
                     )
                );
		// Send the SMS.
		echo(" SMS SID: ".$sms_message->sid);
	}
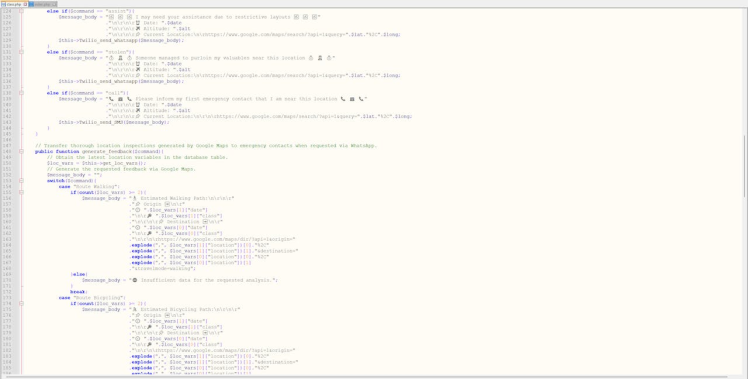
⭐ In the notify_contacts function:
⭐ Obtain the model detection results (command), the current date, and the current device location data transferred by the Android application.
⭐ Decode the received location parameters (latitude, longitude, altitude).
⭐ Notify the user's emergency contacts via SMS or WhatsApp, depending on the given command.
public function notify_contacts($command, $date, $location){
		// Decode the received location parameters.
		$loc_vars = explode(",", $location);
		$lat = $loc_vars[0]; $long = $loc_vars[1]; $alt = $loc_vars[2];
		// Notify the emergency contacts.
		if($command == "fine"){
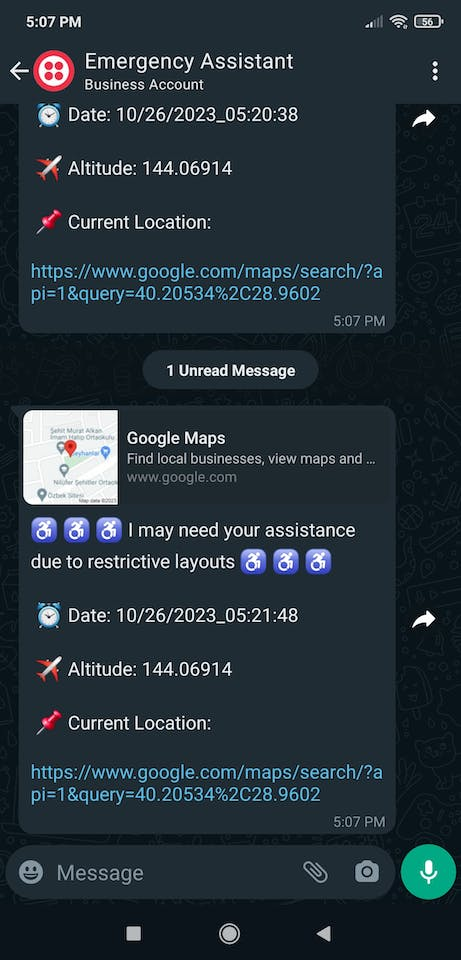
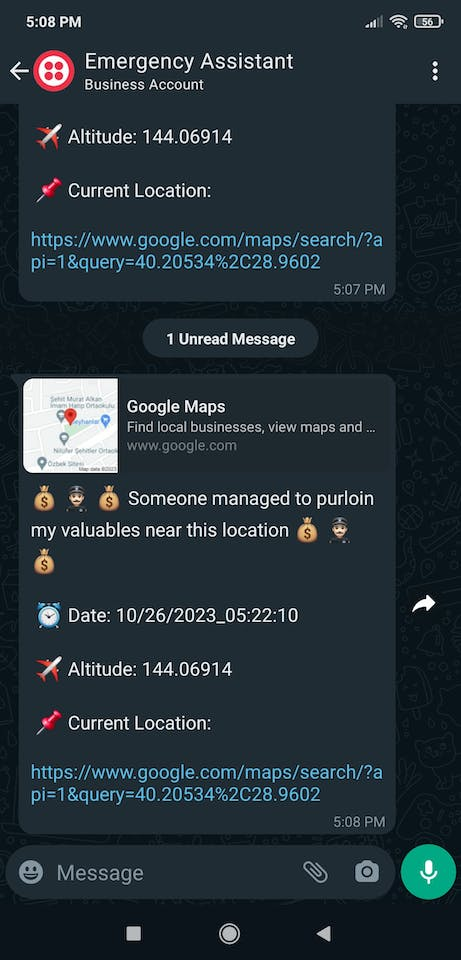
			$message_body = "😄 👍 I am doing well. I just wanted to add this location as a breadcrumb 😄 👍"
			                ."nrnr⏰ Date: ".$date
							."nrnr✈️ Altitude: ".$alt
							."nrnr📌 Current Location:nrhttps://www.google.com/maps/search/?api=1&query=".$lat."%2C".$long;
			$this->Twilio_send_whatsapp($message_body);
		}
		else if($command == "danger"){
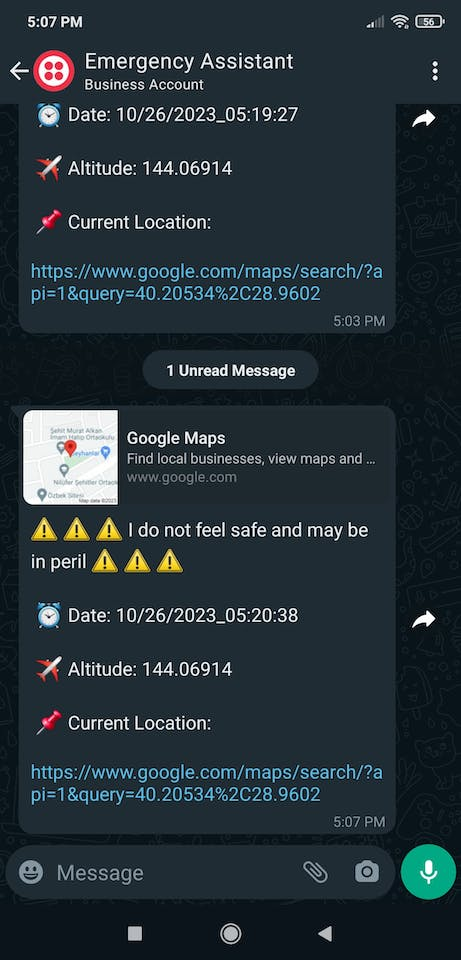
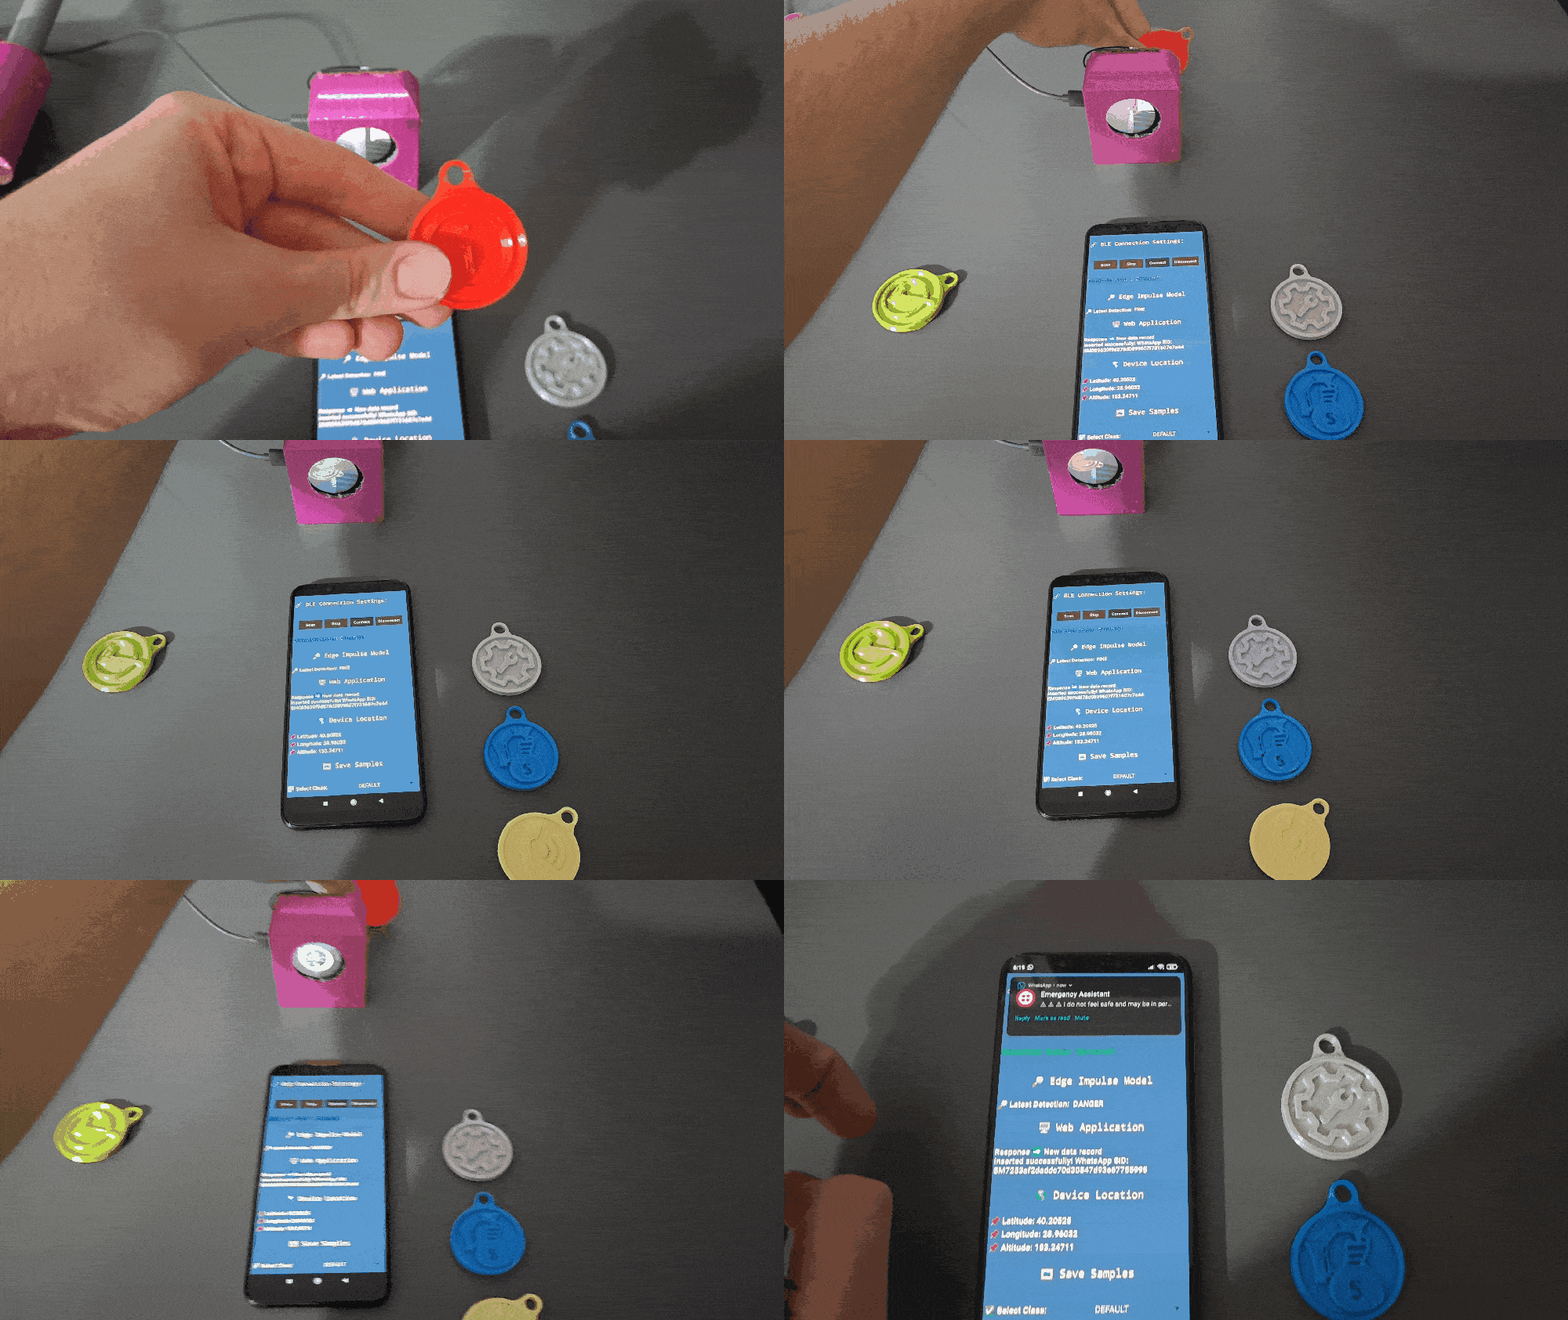
			$message_body = "⚠️ ⚠️ ⚠️ I do not feel safe and may be in peril ⚠️ ⚠️ ⚠️"
			                ."nrnr⏰ Date: ".$date
							."nrnr✈️ Altitude: ".$alt
							."nrnr📌 Current Location:nrhttps://www.google.com/maps/search/?api=1&query=".$lat."%2C".$long;
			$this->Twilio_send_whatsapp($message_body);
		}
		else if($command == "assist"){
			$message_body = "♿ ♿ ♿ I may need your assistance due to restrictive layouts ♿ ♿ ♿"
			                ."nrnr⏰ Date: ".$date
							."nrnr✈️ Altitude: ".$alt
							."nrnr📌 Current Location:nrhttps://www.google.com/maps/search/?api=1&query=".$lat."%2C".$long;
			$this->Twilio_send_whatsapp($message_body);
		}
		else if($command == "stolen"){
			$message_body = "💰 👮🏻 💰 Someone managed to purloin my valuables near this location 💰 👮🏻 💰"
			                ."nrnr⏰ Date: ".$date
							."nrnr✈️ Altitude: ".$alt
							."nrnr📌 Current Location:nrhttps://www.google.com/maps/search/?api=1&query=".$lat."%2C".$long;
			$this->Twilio_send_whatsapp($message_body);
		}
		else if($command == "call"){
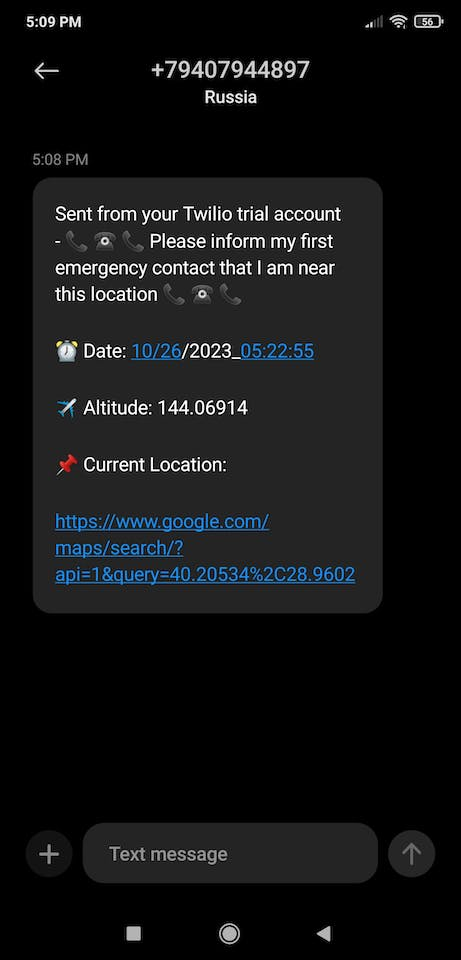
			$message_body = "📞 ☎️ 📞 Please inform my first emergency contact that I am near this location 📞 ☎️ 📞"
			                ."nrnr⏰ Date: ".$date
							."nrnr✈️ Altitude: ".$alt
							."nrnr📌 Current Location:nrnrhttps://www.google.com/maps/search/?api=1&query=".$lat."%2C".$long;
			$this->Twilio_send_SMS($message_body);
		}
	}
⭐ In the generate_feedback function:
⭐ Get the stored location variables (latitude, longitude, and altitude) for each data record in the database table in descending order.
⭐ When requested by the primary emergency contact via WhatsApp, generate a thorough location inspection with the retrieved location parameters by utilizing Google Maps URL API, according to the requested inquiry.
⭐ Then, transfer the generated feedback to the emergency contact as feedback.
You can get more detailed information regarding the inquirable feedback in the following steps.
public function generate_feedback($command){
		// Obtain the latest location variables in the database table.
		$loc_vars = $this->get_loc_vars();
		// Generate the requested feedback via Google Maps.
		$message_body = "";
		switch($command){
			case "Route Walking":
				if(count($loc_vars) >= 2){
					$message_body = "🚶 Estimated Walking Path:nrnr"
									."📌 Origin ➡️nr"
									."🕜 ".$loc_vars[1]["date"]
									."nr🔎 ".$loc_vars[1]["class"]
									."nrnr📌 Destination ➡️nr"
									."🕜 ".$loc_vars[0]["date"]
									."nr🔎 ".$loc_vars[0]["class"]
									."nrnrhttps://www.google.com/maps/dir/?api=1&origin="
									.explode(",", $loc_vars[1]["location"])[0]."%2C"
									.explode(",", $loc_vars[1]["location"])[1]."&destination="
									.explode(",", $loc_vars[0]["location"])[0]."%2C"
									.explode(",", $loc_vars[0]["location"])[1]
									."&travelmode=walking";
				}else{
					$message_body = "⛔ Insufficient data for the requested analysis.";
				}
				break;
			case "Route Bicycling":
				if(count($loc_vars) >= 2){
					$message_body = "🚴 Estimated Bicycling Path:nrnr"
									."📌 Origin ➡️nr"
									."🕜 ".$loc_vars[1]["date"]
									."nr🔎 ".$loc_vars[1]["class"]
									."nrnr📌 Destination ➡️nr"
									."🕜 ".$loc_vars[0]["date"]
									."nr🔎 ".$loc_vars[0]["class"]
									."nrnrhttps://www.google.com/maps/dir/?api=1&origin="
									.explode(",", $loc_vars[1]["location"])[0]."%2C"
									.explode(",", $loc_vars[1]["location"])[1]."&destination="
									.explode(",", $loc_vars[0]["location"])[0]."%2C"
									.explode(",", $loc_vars[0]["location"])[1]
									."&travelmode=bicycling";
				}else{
					$message_body = "⛔ Insufficient data for the requested analysis.";
				}
				break;
			case "Route Driving":
				if(count($loc_vars) >= 2){
					$message_body = "🚗 Estimated Driving Path:nrnr"
									."📌 Origin ➡️nr"
									."🕜 ".$loc_vars[1]["date"]
									."nr🔎 ".$loc_vars[1]["class"]
									."nrnr📌 Destination ➡️nr"
									."🕜 ".$loc_vars[0]["date"]
									."nr🔎 ".$loc_vars[0]["class"]
									."nrnrhttps://www.google.com/maps/dir/?api=1&origin="
									.explode(",", $loc_vars[1]["location"])[0]."%2C"
									.explode(",", $loc_vars[1]["location"])[1]."&destination="
									.explode(",", $loc_vars[0]["location"])[0]."%2C"
									.explode(",", $loc_vars[0]["location"])[1]
									."&travelmode=driving";
				}else{
					$message_body = "⛔ Insufficient data for the requested analysis.";
				}
				break;
			case "Show Waypoints":
				if(count($loc_vars) >= 4){
					$message_body = "🛣️ 📍 Estimated Driving Path w/ Waypoints:nrnr"
									."📌 Origin ➡️nr"
									."🕜 ".$loc_vars[3]["date"]
									."nr🔎 ".$loc_vars[3]["class"]
									."nrnr📌 Destination ➡️nr"
									."🕜 ".$loc_vars[0]["date"]
									."nr🔎 ".$loc_vars[0]["class"]
									."nrnrhttps://www.google.com/maps/dir/?api=1&origin="
									.explode(",", $loc_vars[3]["location"])[0]."%2C"
									.explode(",", $loc_vars[3]["location"])[1]."&waypoints="
									.explode(",", $loc_vars[2]["location"])[0]."%2C"
									.explode(",", $loc_vars[2]["location"])[1]."%7C"
									.explode(",", $loc_vars[1]["location"])[0]."%2C"
									.explode(",", $loc_vars[1]["location"])[1]."&destination="
									.explode(",", $loc_vars[0]["location"])[0]."%2C"
									.explode(",", $loc_vars[0]["location"])[1]
									."&travelmode=driving";
				}else{
					$message_body = "⛔ Insufficient data for the requested analysis.";
				}
				break;
			case "Terrain View":
				if(count($loc_vars) >= 1){
					$message_body = "⛰️ Terrain View of the Latest Location:nrnr"
									."📌 Latest ➡️nr"
									."🕜 ".$loc_vars[0]["date"]
									."nr🔎 ".$loc_vars[0]["class"]
									."nrnrhttps://www.google.com/maps/@?api=1&map_action=map¢er="
									.explode(",", $loc_vars[0]["location"])[0]."%2C"
									.explode(",", $loc_vars[0]["location"])[1]
									."&zoom=12&basemap=terrain&layer=bicycling";
				}else{
					$message_body = "⛔ Insufficient data for the requested analysis.";
				}
				break;
			case "Satellite View":
				if(count($loc_vars) >= 1){
					$message_body = "🛰️ Satellite View of the Latest Location:nrnr"
									."📌 Latest ➡️nr"
									."🕜 ".$loc_vars[0]["date"]
									."nr🔎 ".$loc_vars[0]["class"]
									."nrnrhttps://www.google.com/maps/@?api=1&map_action=map¢er="
									.explode(",", $loc_vars[0]["location"])[0]."%2C"
									.explode(",", $loc_vars[0]["location"])[1]
									."&zoom=12&basemap=satellite&layer=traffic";
				}else{
					$message_body = "⛔ Insufficient data for the requested analysis.";
				}
				break;
			case "Street View":
				if(count($loc_vars) >= 1){
					$message_body = "🚀 🌎 Wander through the streets near the latest location:nrnr"
									."📌 Center ➡️nr"
									."🕜 ".$loc_vars[0]["date"]
									."nr🔎 ".$loc_vars[0]["class"]
									."nrnrhttps://www.google.com/maps/@?api=1&map_action=pano&viewpoint="
									.explode(",", $loc_vars[0]["location"])[0]."%2C"
									.explode(",", $loc_vars[0]["location"])[1]
									."&heading=90";
				}else{
					$message_body = "⛔ Insufficient data for the requested analysis.";
				}
				break;
			default:
				$message_body = "🤖 👉 Please utilize the supported commands:nrnr➡️ Route Walkingnrnr➡️ Route Bicyclingnrnr➡️ Route Drivingnrnr➡️ Show Waypointsnrnr➡️ Terrain Viewnrnr➡️ Satellite Viewnrnr➡️ Street View";
				break;
		}
		// Transmit the generated feedback.
		$this->Twilio_send_whatsapp($message_body);
	}
⭐ Define the required MySQL database connection settings for the given server.
$server = array(
	"name" => "localhost",
	"username" => "root",
	"password" => "",
	"database" => "emergency_assistant"
);


$conn = mysqli_connect($server["name"], $server["username"], $server["password"], $server["database"]);
📁 Index.php
⭐ Include the class.php file.
⭐ Define the _assistant object of the assistant class.
include_once "assets/class.php";

ini_set('display_errors',1);

// Define the new '_assistant' object:
$_assistant = new assistant();
$_assistant->__init__($conn);
⭐ If requested by the user via an HTTP GET request, add or update the emergency contact information in the entries database table.
if(isset($_GET["action"]) && isset($_GET["to_phone"]) && isset($_GET["from_phone"]) && isset($_GET["emergency_phone"])){
	$_assistant->update_user_info($_GET["action"], $_GET["to_phone"], $_GET["from_phone"], $_GET["emergency_phone"]);
}
⭐ Get the emergency class detected by XIAO ESP32S3, the current date, and the current device location data through the Android application.
⭐ Insert a new data record with the received information into the database table.
⭐ Then, notify the user's emergency contacts via SMS or WhatsApp, depending on the received class (command).
if(isset($_GET["action"]) && isset($_GET["date"]) && isset($_GET["location"]) && isset($_GET["class"])){
	// Insert the latest data record into the database table.
	$_assistant->save_results($_GET["action"], $_GET["date"], $_GET["location"], $_GET["class"]);
	// Notify the user's emergency contacts via SMS or WhatsApp, depending on the received class (command).
	$_assistant->notify_contacts($_GET["class"], $_GET["date"], $_GET["location"]);
}
⭐ If the primary emergency contact transfers a message (inquiry) to the web application over WhatsApp via Twilio, generate and send thorough location inspections (via Google Maps) as feedback, depending on the inquired command.
if(isset($_POST["Body"])){
	// Generate and transfer thorough location inspections (from Google Maps) as feedback, depending on the given command.
	$_assistant->generate_feedback($_POST["Body"]);
}
Step 4.1: Setting and running the web application
As explained earlier, Twilio requires a publicly available URL to redirect the incoming WhatsApp messages to a given webhook. Therefore, I employed my SSL-enabled server to host the web application. Since I needed to set a specific database table for the web application, you can follow my process to configure your database regardless of the selected hosting option.
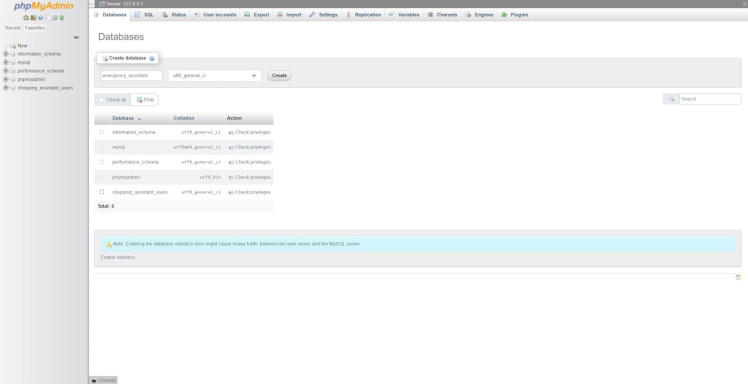
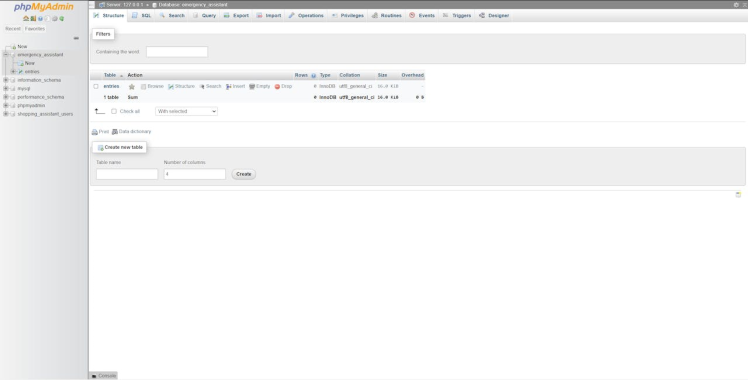
#️⃣ Open the phpMyAdmin tool to create a new database named emergency_assistant.
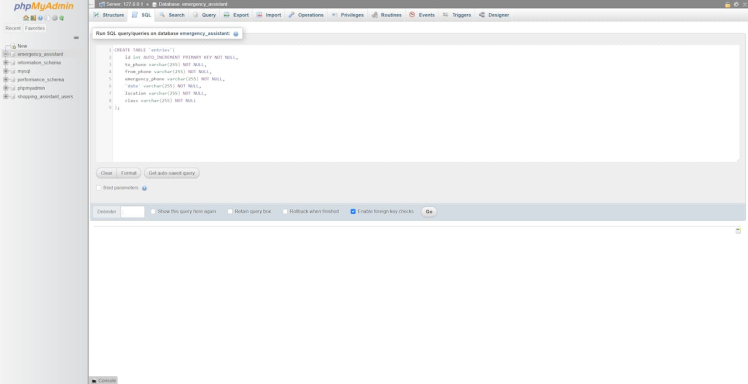
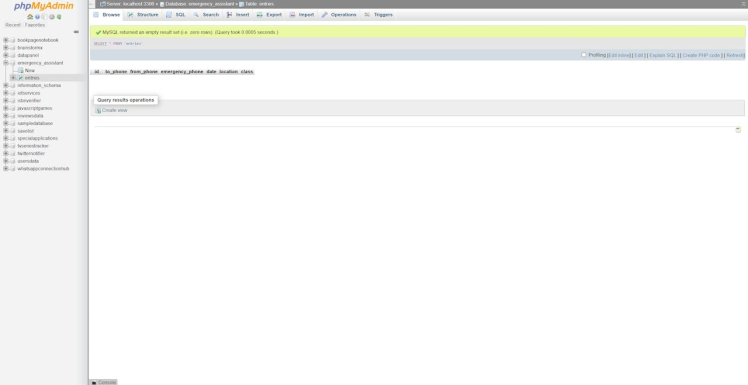
#️⃣ After adding the database successfully, go to the SQL section to create a MySQL database table named entries with the required data fields.
CREATE TABLE `entries`(
	id int AUTO_INCREMENT PRIMARY KEY NOT NULL,
	to_phone varchar(255) NOT NULL,
	from_phone varchar(255) NOT NULL,
    emergency_phone varchar(255) NOT NULL,
    `date` varchar(255) NOT NULL,
    location varchar(255) NOT NULL,
	class varchar(255) NOT NULL
);
After setting up and running the web application successfully:
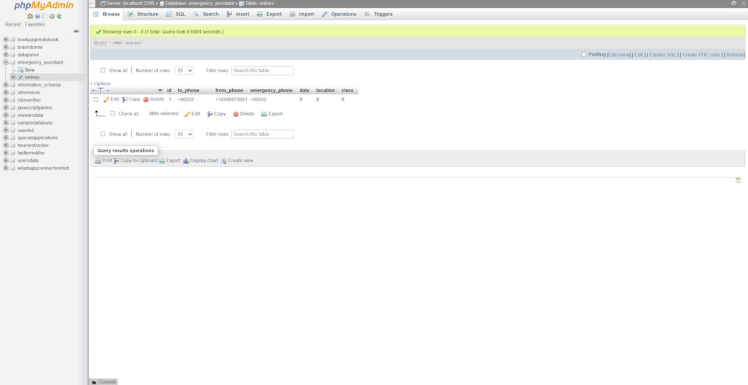
📲 ♿ 🌎 The web application lets the user add or update emergency contact information via HTTP GET requests.
?action=new&to_phone=+905521111111&from_phone=+12566673691&emergency_phone=+90552111111
?action=update&to_phone=+90552111111&from_phone=+12566673691&emergency_phone=+90552111111


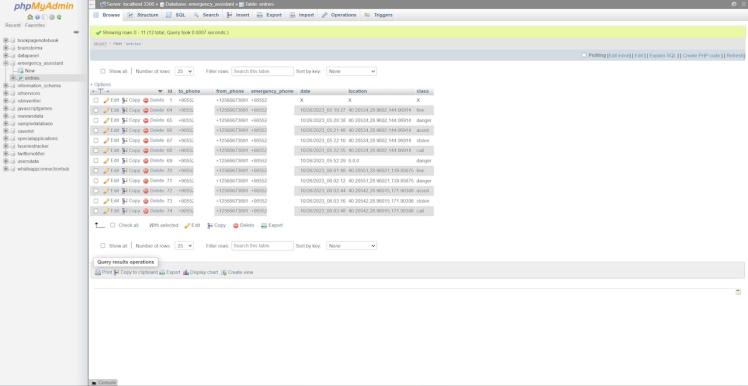
📲 ♿ 🌎 When the web application gets the model detection results and the current device location data with the date from the Android application via an HTTP GET request, it saves the received information to the database table and notifies the emergency contacts via WhatsApp or SMS (Twilio), depending on the received command.
?action=save&date=10/03/2023_06:19:27&location=40.20534, 28.9602, 144.06914&class=fine


Step 5: Setting up XIAO ESP32S3 Sense and Round Display on Arduino IDE
Since the expansion board of XIAO ESP32S3 Sense supports reading and writing information from/to files on a microSD card, I decided to capture images with the built-in OV2640 camera on the expansion board and save them directly to the SD card without applying any additional procedures. Also, I employed XIAO ESP32S3 to communicate with the Android application over BLE to obtain user commands and transfer the model detection results.
Since I utilized XIAO ESP32S3 in combination with the XIAO round display, I needed to set XIAO ESP32S3 on the Arduino IDE, install the required libraries, and configure some default settings before proceeding with the following steps.
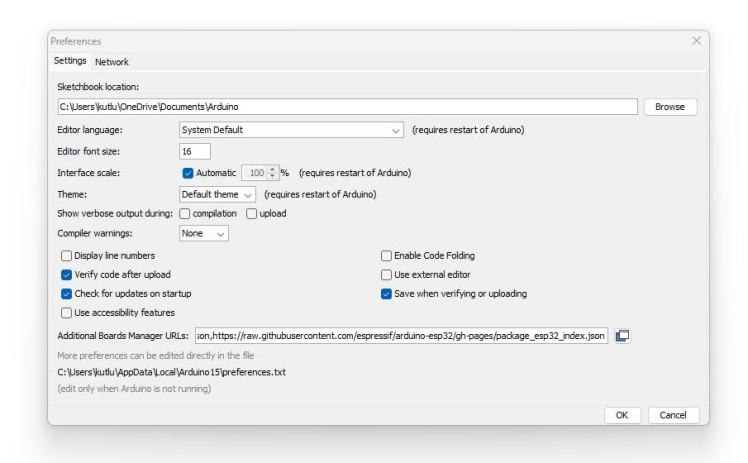
#️⃣ To add the XIAO ESP32S3 board package to the Arduino IDE, navigate to File ➡ Preferences and paste the URL below under Additional Boards Manager URLs.
https://raw.githubusercontent.com/espressif/arduino-esp32/gh-pages/package_esp32_index.json
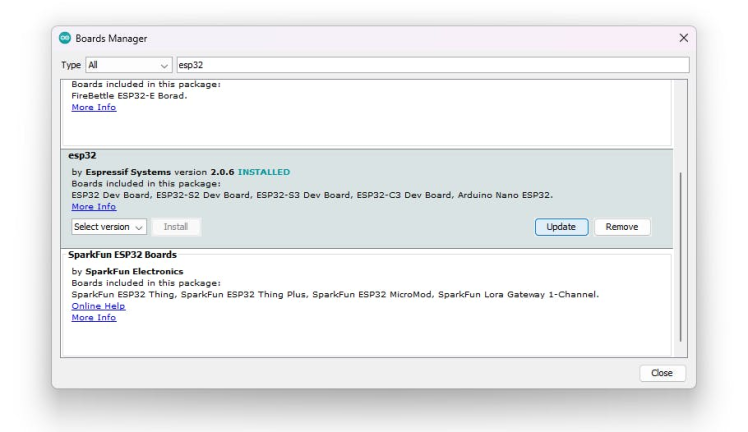
#️⃣ Then, to install the required core, navigate to Tools ➡ Board ➡ Boards Manager and search for esp32.
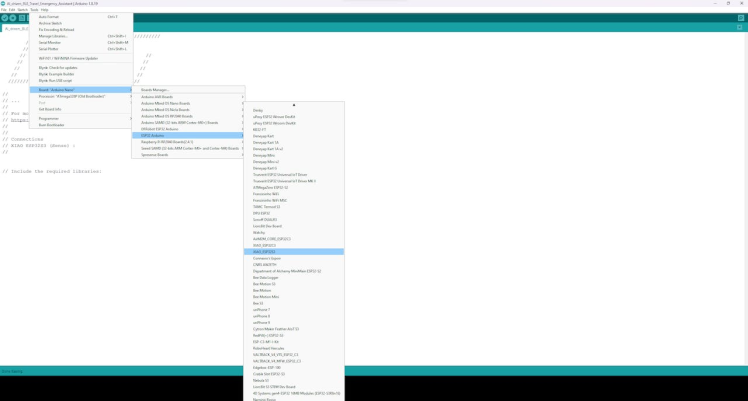
#️⃣ After installing the core, navigate to Tools ➡ Board ➡ ESP32 Arduino and select XIAO_ESP32S3.
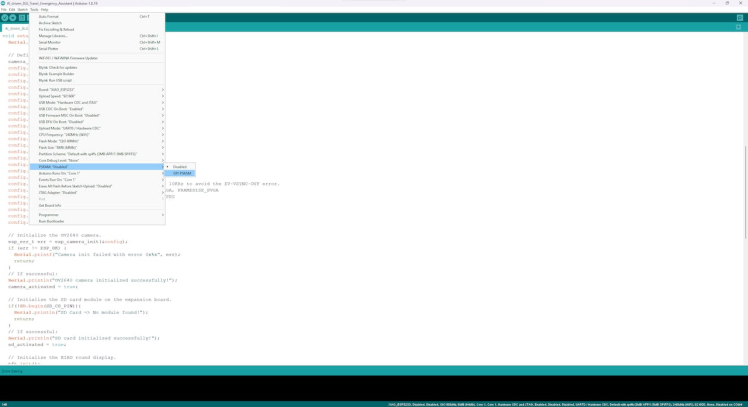
#️⃣ To ensure the built-in camera works properly without memory allocation errors, turn on the PSRAM function of the Arduino IDE — the external PSRAM on the ESP32 chip.
#️⃣ Download and inspect the required libraries for XIAO ESP32S3 Sense and the XIAO round display:
ArduinoBLE | Download
TFT_eSPI | Download
lvgl | Download
#️⃣ To configure the TFT_eSPI library for the XIAO round display, go to the TFT_eSPI folder in the root directory of the Arduino IDE (libraries).
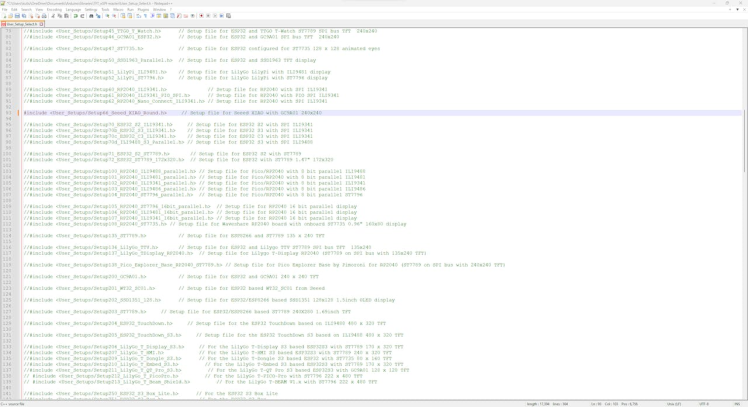
#️⃣ Then, open the User_Setup_Select.h file and change the default screen configuration to Seeed XIAO:
C:Users${UserName}DocumentsArduinolibrariesTFT_eSPIUser_Setup_Select.h
(comment) #include <User_Setup.h>
(uncomment) #include <User_Setups/Setup66_Seeed_XIAO_Round.h>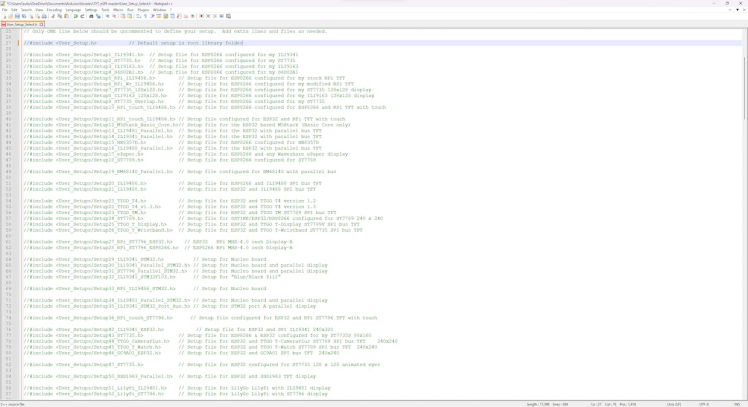
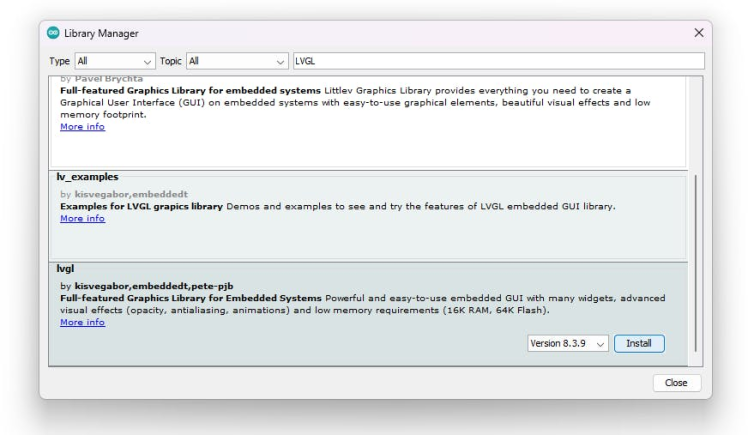
#️⃣ To configure the lvgl library for the XIAO round display, download the official lv_conf.h file from here.
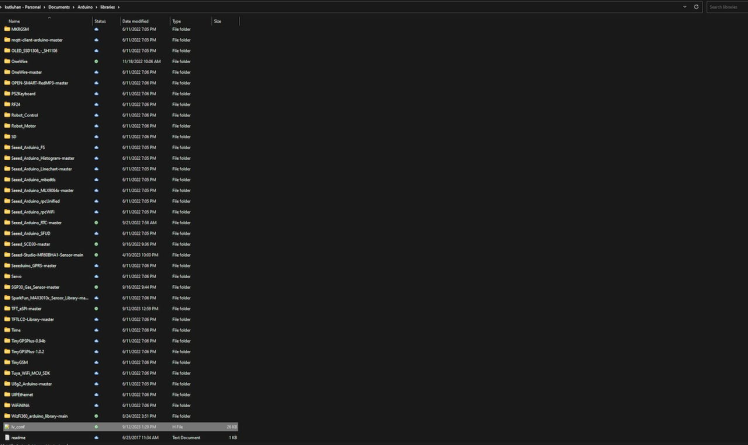
#️⃣ Then, copy the lv_conf.h file to the root directory of the Arduino IDE (libraries).
C:Users${UserName}DocumentsArduinolibraries
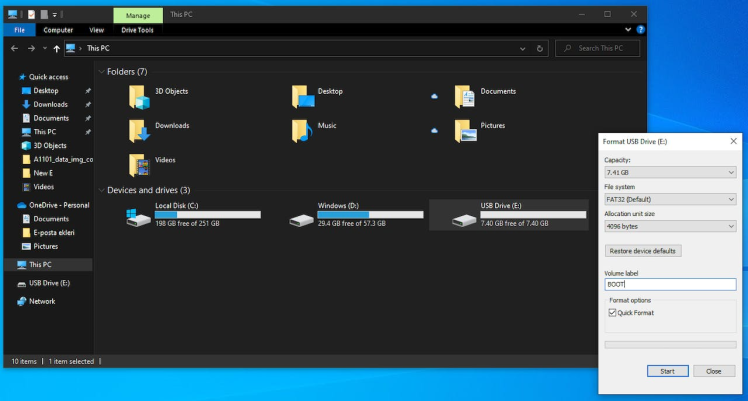
#️⃣ Since the built-in microSD card module on the expansion board supports FAT32 microSD cards up to 32GB, format the microSD card to FAT32 format if not compatible.
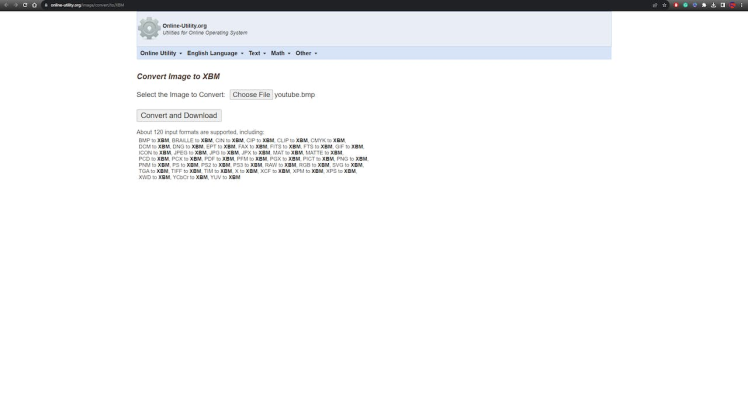
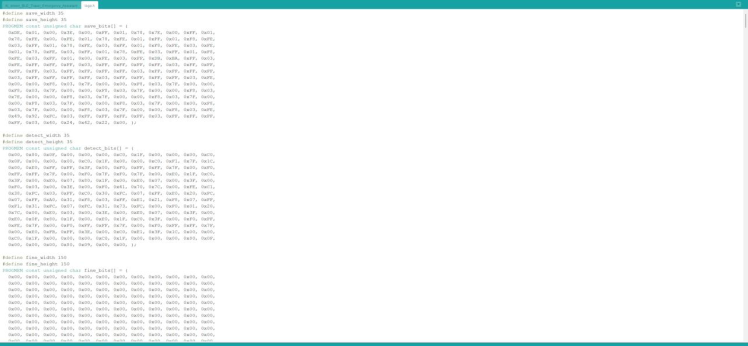
#️⃣ To be able to display images on the round display, convert image files to a C/C++ array format. I decided to utilize an online converter to save image files in the XBM format, a monochrome bitmap format in which data is stored as a C data array.
#️⃣ Then, save all the converted C arrays in the XBM format to the logo.h file.
Step 6: Capturing customized keychain (token) images w/ the built-in OV2640 camera
After setting XIAO ESP32S3 with the round display and installing the required libraries, I programmed XIAO ESP32S3 to capture raw image buffers, convert the captured buffers to JPG files, and save them as samples to the SD card on the expansion board.
Since I needed to add emergency classes as labels to the file names of each sample while collecting data to create a valid data set for the object detection model, I decided to utilize the Android application to transfer user commands to XIAO ESP32S3 over BLE to capture a sample and save it to the SD card with the selected class. In this regard, I was able to obviate the need for adding extra components to the assistive device, enlarging the main case dimensions. You can get more detailed information regarding the features of the Android application in the following steps.
Since different UUID sets, a 128-bit value used to specifically identify an object or entity, are required to assign services and characteristics for a stable BLE connection, it is crucial to generate individualized UUIDs with an online UUID generator. After generating your UUIDs, you can update the given UUIDs, as shown below.
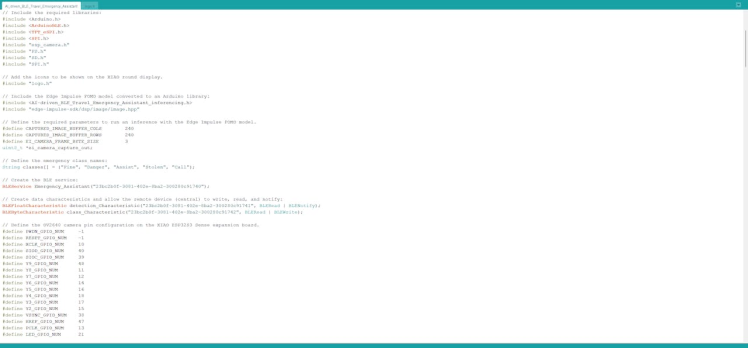
You can download the AI_driven_BLE_Travel_Emergency_Assistant.ino file to try and inspect the code for capturing images (samples) and saving them to the SD card with unique sample numbers.
⭐ Include the required libraries.
#include <Arduino.h>
#include <ArduinoBLE.h>
#include <TFT_eSPI.h>
#include <SPI.h>
#include "esp_camera.h"
#include "FS.h"
#include "SD.h"
#include "SPI.h"
⭐ Add the logo.h file, consisting of all the converted icons (C arrays) to be shown on the XIAO round display.
#include "logo.h"⭐ Create the BLE service and data characteristics. Then, allow the remote device (central) to read, write, and notify.
BLEService Emergency_Assistant("23bc2b0f-3081-402e-8ba2-300280c91740");

// Create data characteristics and allow the remote device (central) to write, read, and notify:
BLEFloatCharacteristic detection_Characteristic("23bc2b0f-3081-402e-8ba2-300280c91741", BLERead | BLENotify);
BLEByteCharacteristic class_Characteristic("23bc2b0f-3081-402e-8ba2-300280c91742", BLERead | BLEWrite);
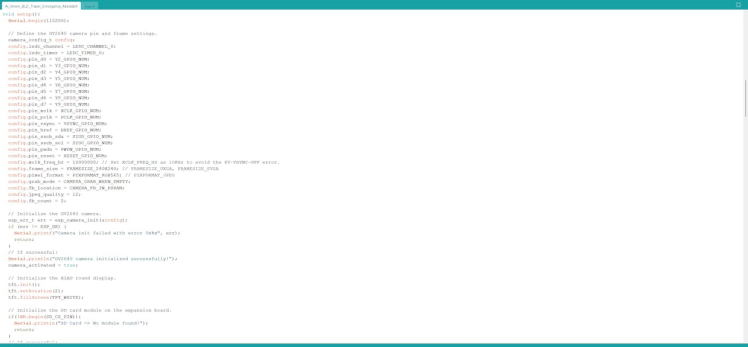
⭐ Define the pin configuration of the built-in OV2640 camera on the XIAO ESP32S3 Sense expansion board.
#define PWDN_GPIO_NUM     -1
#define RESET_GPIO_NUM    -1
#define XCLK_GPIO_NUM     10
#define SIOD_GPIO_NUM     40
#define SIOC_GPIO_NUM     39
#define Y9_GPIO_NUM       48
#define Y8_GPIO_NUM       11
#define Y7_GPIO_NUM       12
#define Y6_GPIO_NUM       14
#define Y5_GPIO_NUM       16
#define Y4_GPIO_NUM       18
#define Y3_GPIO_NUM       17
#define Y2_GPIO_NUM       15
#define VSYNC_GPIO_NUM    38
#define HREF_GPIO_NUM     47
#define PCLK_GPIO_NUM     13
#define LED_GPIO_NUM      21
⭐ Utilize the SD card reader on the expansion board without cutting the J3 solder bridge.
#define SD_CS_PIN 21 // #define SD_CS_PIN D2 // XIAO Round Display SD Card Reader⭐ Define the XIAO round display object and the screen dimensions.
TFT_eSPI tft = TFT_eSPI();
const int img_width = 240;
const int img_height = 240;
⭐ Assign the configured pins of the built-in OV2640 camera and define the frame (buffer) settings.
camera_config_t config;
  config.ledc_channel = LEDC_CHANNEL_0;
  config.ledc_timer = LEDC_TIMER_0;
  config.pin_d0 = Y2_GPIO_NUM;
  config.pin_d1 = Y3_GPIO_NUM;
  config.pin_d2 = Y4_GPIO_NUM;
  config.pin_d3 = Y5_GPIO_NUM;
  config.pin_d4 = Y6_GPIO_NUM;
  config.pin_d5 = Y7_GPIO_NUM;
  config.pin_d6 = Y8_GPIO_NUM;
  config.pin_d7 = Y9_GPIO_NUM;
  config.pin_xclk = XCLK_GPIO_NUM;
  config.pin_pclk = PCLK_GPIO_NUM;
  config.pin_vsync = VSYNC_GPIO_NUM;
  config.pin_href = HREF_GPIO_NUM;
  config.pin_sscb_sda = SIOD_GPIO_NUM;
  config.pin_sscb_scl = SIOC_GPIO_NUM;
  config.pin_pwdn = PWDN_GPIO_NUM;
  config.pin_reset = RESET_GPIO_NUM;
  config.xclk_freq_hz = 10000000; // Set XCLK_FREQ_HZ as 10KHz to avoid the EV-VSYNC-OVF error.
  config.frame_size = FRAMESIZE_240X240; // FRAMESIZE_UXGA, FRAMESIZE_SVGA
  config.pixel_format = PIXFORMAT_RGB565; // PIXFORMAT_JPEG
  config.grab_mode = CAMERA_GRAB_WHEN_EMPTY;
  config.fb_location = CAMERA_FB_IN_PSRAM;
  config.jpeg_quality = 12;
  config.fb_count = 2;
⭐ Initialize the OV2640 camera.
esp_err_t err = esp_camera_init(&config);
  if (err != ESP_OK) {
    Serial.printf("Camera init failed with error 0x%x", err);
    return;
  }
  // If successful:
  Serial.println("OV2640 camera initialized successfully!");
  camera_activated = true;
#️⃣ Note: Do not forget to initialize the round display (TFT screen) object before the SD card object to avoid compiling errors on the Arduino IDE.
⭐ Initialize the XIAO round display (TFT screen).
tft.init();
  tft.setRotation(2);
  tft.fillScreen(TFT_WHITE);
⭐ Initialize the built-in microSD card module on the expansion board.
if(!SD.begin(SD_CS_PIN)){
    Serial.println("SD Card => No module found!");
    return;
  }
  // If successful:
  Serial.println("SD card initialized successfully!");
  sd_activated = true;
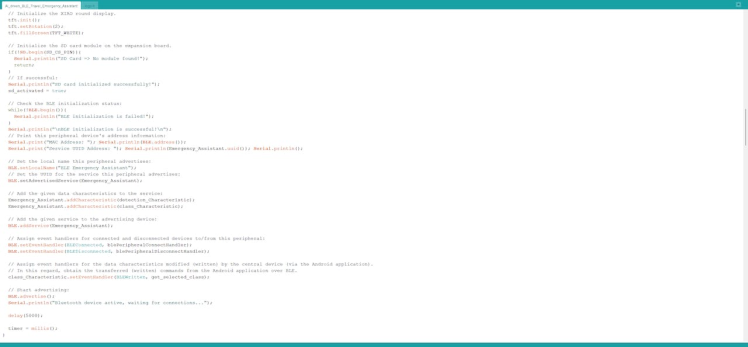
⭐ Check the BLE initialization status and print the XIAO ESP32S3 address information on the serial monitor.
while(!BLE.begin()){
    Serial.println("BLE initialization is failed!");
  }
  Serial.println("nBLE initialization is successful!n");
  // Print this peripheral device's address information:
  Serial.print("MAC Address: "); Serial.println(BLE.address());
  Serial.print("Service UUID Address: "); Serial.println(Emergency_Assistant.uuid()); Serial.println();
⭐ Set the local name (BLE Emergency Assistant) for XIAO ESP32S3 and the UUID for the advertised (transmitted) service.
⭐ Add the given data characteristics to the service. Then, add the given service to the advertising device.
⭐ Assign event handlers for connected and disconnected devices to/from XIAO ESP32S3.
⭐ Assign event handlers for the data characteristics modified (written) by the central device (via the Android application). In this regard, obtain the transferred (written) commands from the Android application over BLE.
⭐ Finally, start advertising (broadcasting) information.
BLE.setLocalName("BLE Emergency Assistant");
  // Set the UUID for the service this peripheral advertises:
  BLE.setAdvertisedService(Emergency_Assistant);

  // Add the given data characteristics to the service:
  Emergency_Assistant.addCharacteristic(detection_Characteristic);
  Emergency_Assistant.addCharacteristic(class_Characteristic);

  // Add the given service to the advertising device:
  BLE.addService(Emergency_Assistant);

  // Assign event handlers for connected and disconnected devices to/from this peripheral:
  BLE.setEventHandler(BLEConnected, blePeripheralConnectHandler);
  BLE.setEventHandler(BLEDisconnected, blePeripheralDisconnectHandler);

  // Assign event handlers for the data characteristics modified (written) by the central device (via the Android application).
  // In this regard, obtain the transferred (written) commands from the Android application over BLE.
  class_Characteristic.setEventHandler(BLEWritten, get_selected_class);

  // Start advertising:
  BLE.advertise();
  Serial.println("Bluetooth device active, waiting for connections...");
⭐ If the built-in OV2640 camera and the microSD card module on the expansion board are initialized successfully:
⭐ Capture a frame (RGB565 buffer) with the OV2640 camera.
⭐ Display the captured frame on the XIAO round display.
if(camera_activated && sd_activated){
    // Capture a frame (RGB565 buffer) with the OV2640 camera.
    camera_fb_t *fb = esp_camera_fb_get();
    if(!fb){ Serial.println("Camera => Cannot capture the frame!"); return; }

    // Display the captured frame on the XIAO round display.
    tft.startWrite();
    tft.setAddrWindow(0, 0, img_width, img_height);
    tft.pushColors(fb->buf, fb->len);
    tft.endWrite();

	...
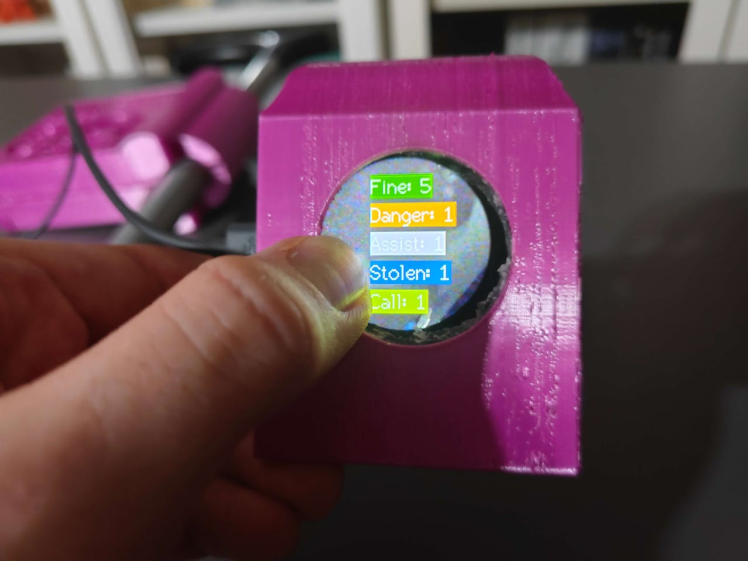
⭐ If the user touches the XIAO round display, show the current sample numbers for each emergency class on the SD card.
...

    if(display_is_pressed()){
      String f_n = "Fine: " + String(sample_number[0]);
      String d_n = "Danger: " + String(sample_number[1]);
      String a_n = "Assist: " + String(sample_number[2]);
      String s_n = "Stolen: " + String(sample_number[3]);
      String c_n = "Call: " + String(sample_number[4]);
      int x = 75, y = 25, d = 40;
      tft.setTextSize(2);
      tft.setTextColor(TFT_WHITE, TFT_GREEN, false);
      tft.drawString(f_n.c_str(), x, y, 2);
      tft.setTextColor(TFT_WHITE, TFT_ORANGE, false);
      tft.drawString(d_n.c_str(), x, y+d, 2);
      tft.setTextColor(TFT_WHITE, TFT_SILVER, false);
      tft.drawString(a_n.c_str(), x, y+(2*d), 2);
      tft.setTextColor(TFT_WHITE, TFT_NAVY, false);
      tft.drawString(s_n.c_str(), x, y+(3*d), 2);
      tft.setTextColor(TFT_WHITE, TFT_GREENYELLOW, false);
      tft.drawString(c_n.c_str(), x, y+(4*d), 2);
      delay(1000);
    }

	...
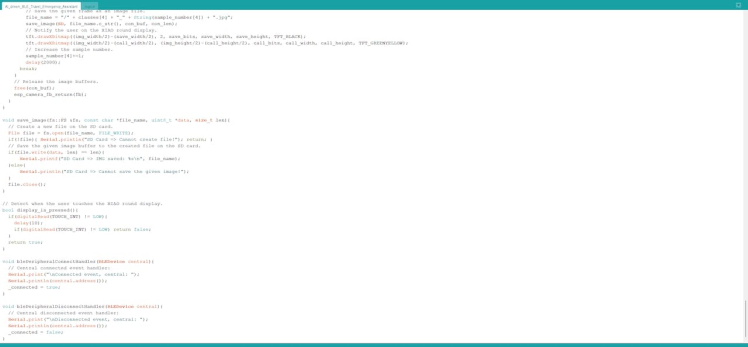
⭐ In the save_image function:
⭐ Create a new file with the given file name on the SD card.
⭐ Save the passed image buffer to the created file.
void save_image(fs::FS &fs, const char *file_name, uint8_t *data, size_t len){
  // Create a new file on the SD card.
  File file = fs.open(file_name, FILE_WRITE);
  if(!file){ Serial.println("SD Card => Cannot create file!"); return; }
  // Save the given image buffer to the created file on the SD card.
  if(file.write(data, len) == len){
      Serial.printf("SD Card => IMG saved: %sn", file_name);
  }else{
      Serial.println("SD Card => Cannot save the given image!");
  }
  file.close();
}
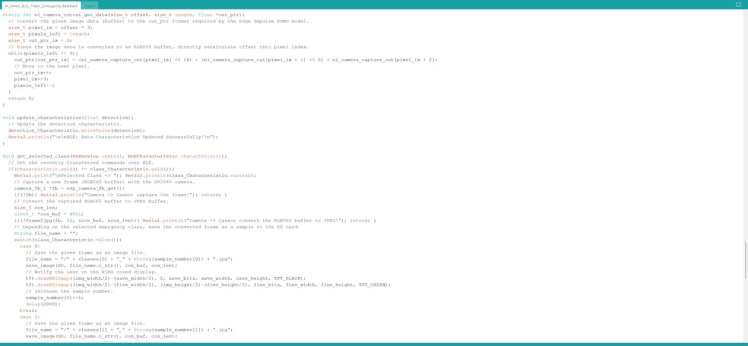
⭐ In the get_selected_class function:
⭐ Get the recently transferred commands over BLE.
⭐ Capture a new frame (RGB565 buffer) with the OV2640 camera.
⭐ Convert the captured RGB565 buffer to a JPEG buffer by executing the built-in frame2jpg function.
⭐ Depending on the selected emergency class:
⭐ Generate the file name with the current sample number of the given class.
⭐ Save the converted frame as a sample to the SD card.
⭐ Notify the user on the XIAO round display.
⭐ Then, increase the sample number of the given class.
⭐ Finally, release the image buffers.
void get_selected_class(BLEDevice central, BLECharacteristic characteristic){
  // Get the recently transferred commands over BLE.
  if(characteristic.uuid() == class_Characteristic.uuid()){
    Serial.print("nSelected Class => "); Serial.println(class_Characteristic.value());
    // Capture a new frame (RGB565 buffer) with the OV2640 camera.
    camera_fb_t *fb = esp_camera_fb_get();
    if(!fb){ Serial.println("Camera => Cannot capture the frame!"); return; }
    // Convert the captured RGB565 buffer to JPEG buffer.
    size_t con_len;
    uint8_t *con_buf = NULL;
    if(!frame2jpg(fb, 10, &con_buf, &con_len)){ Serial.println("Camera => Cannot convert the RGB565 buffer to JPEG!"); return; }
    // Depending on the selected emergency class, save the converted frame as a sample to the SD card.
    String file_name = "";
    switch(class_Characteristic.value()){
      case 0:
        // Save the given frame as an image file.
        file_name = "/" + classes[0] + "_" + String(sample_number[0]) + ".jpg";
        save_image(SD, file_name.c_str(), con_buf, con_len);
        // Notify the user on the XIAO round display.
        tft.drawXBitmap((img_width/2)-(save_width/2), 2, save_bits, save_width, save_height, TFT_BLACK);
        tft.drawXBitmap((img_width/2)-(fine_width/2), (img_height/2)-(fine_height/2), fine_bits, fine_width, fine_height, TFT_GREEN);
        // Increase the sample number.
        sample_number[0]+=1;
        delay(2000);
      break;
      case 1:
        // Save the given frame as an image file.
        file_name = "/" + classes[1] + "_" + String(sample_number[1]) + ".jpg";
        save_image(SD, file_name.c_str(), con_buf, con_len);
        // Notify the user on the XIAO round display.
        tft.drawXBitmap((img_width/2)-(save_width/2), 2, save_bits, save_width, save_height, TFT_BLACK);
        tft.drawXBitmap((img_width/2)-(danger_width/2), (img_height/2)-(danger_height/2), danger_bits, danger_width, danger_height, TFT_ORANGE);
        // Increase the sample number.
        sample_number[1]+=1;
        delay(2000);
      break;
      case 2:
        // Save the given frame as an image file.
        file_name = "/" + classes[2] + "_" + String(sample_number[2]) + ".jpg";
        save_image(SD, file_name.c_str(), con_buf, con_len);
        // Notify the user on the XIAO round display.
        tft.drawXBitmap((img_width/2)-(save_width/2), 2, save_bits, save_width, save_height, TFT_BLACK);
        tft.drawXBitmap((img_width/2)-(assist_width/2), (img_height/2)-(assist_height/2), assist_bits, assist_width, assist_height, TFT_SILVER);
        // Increase the sample number.
        sample_number[2]+=1;
        delay(2000);
      break;
      case 3:
        // Save the given frame as an image file.
        file_name = "/" + classes[3] + "_" + String(sample_number[3]) + ".jpg";
        save_image(SD, file_name.c_str(), con_buf, con_len);
        // Notify the user on the XIAO round display.
        tft.drawXBitmap((img_width/2)-(save_width/2), 2, save_bits, save_width, save_height, TFT_BLACK);
        tft.drawXBitmap((img_width/2)-(stolen_width/2), (img_height/2)-(stolen_height/2), stolen_bits, stolen_width, stolen_height, TFT_NAVY);
        // Increase the sample number.
        sample_number[3]+=1;
        delay(2000);
      break;
      case 4:
        // Save the given frame as an image file.
        file_name = "/" + classes[4] + "_" + String(sample_number[4]) + ".jpg";
        save_image(SD, file_name.c_str(), con_buf, con_len);
        // Notify the user on the XIAO round display.
        tft.drawXBitmap((img_width/2)-(save_width/2), 2, save_bits, save_width, save_height, TFT_BLACK);
        tft.drawXBitmap((img_width/2)-(call_width/2), (img_height/2)-(call_height/2), call_bits, call_width, call_height, TFT_GREENYELLOW);
        // Increase the sample number.
        sample_number[4]+=1;
        delay(2000);
      break;
    }
    // Release the image buffers.
    free(con_buf);
    esp_camera_fb_return(fb);
  }
}
Step 6.1: Saving the captured images as samples via the Android application
In any Bluetooth® Low Energy (also referred to as Bluetooth® LE or BLE) connection, devices can have one of these two roles: the central and the peripheral. A peripheral device (also called a client) advertises or broadcasts information about itself to devices in its range, while a central device (also called a server) performs scans to listen for devices broadcasting information. You can get more information regarding BLE connections and procedures, such as services and characteristics, from here.
As explained earlier, to avoid latency or packet loss while advertising (transmitting) model detection results and receiving user commands from the Android application over BLE, I utilized an individual float data characteristic for the advertised information and a byte data characteristic for the incoming information.
After executing the AI_driven_BLE_Travel_Emergency_Assistant.ino file on XIAO ESP32S3:
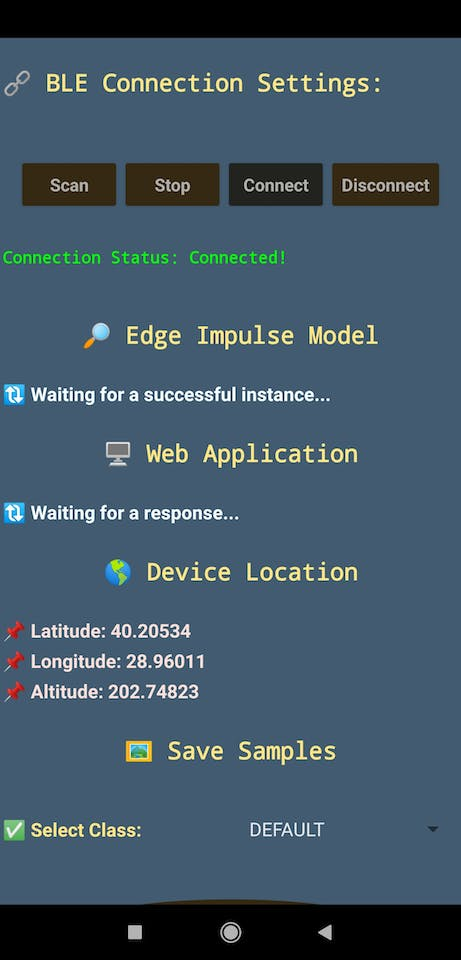
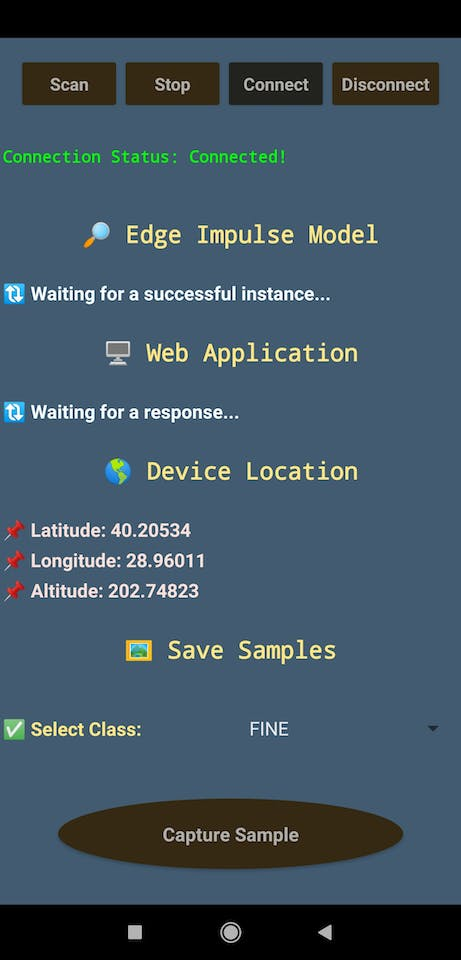
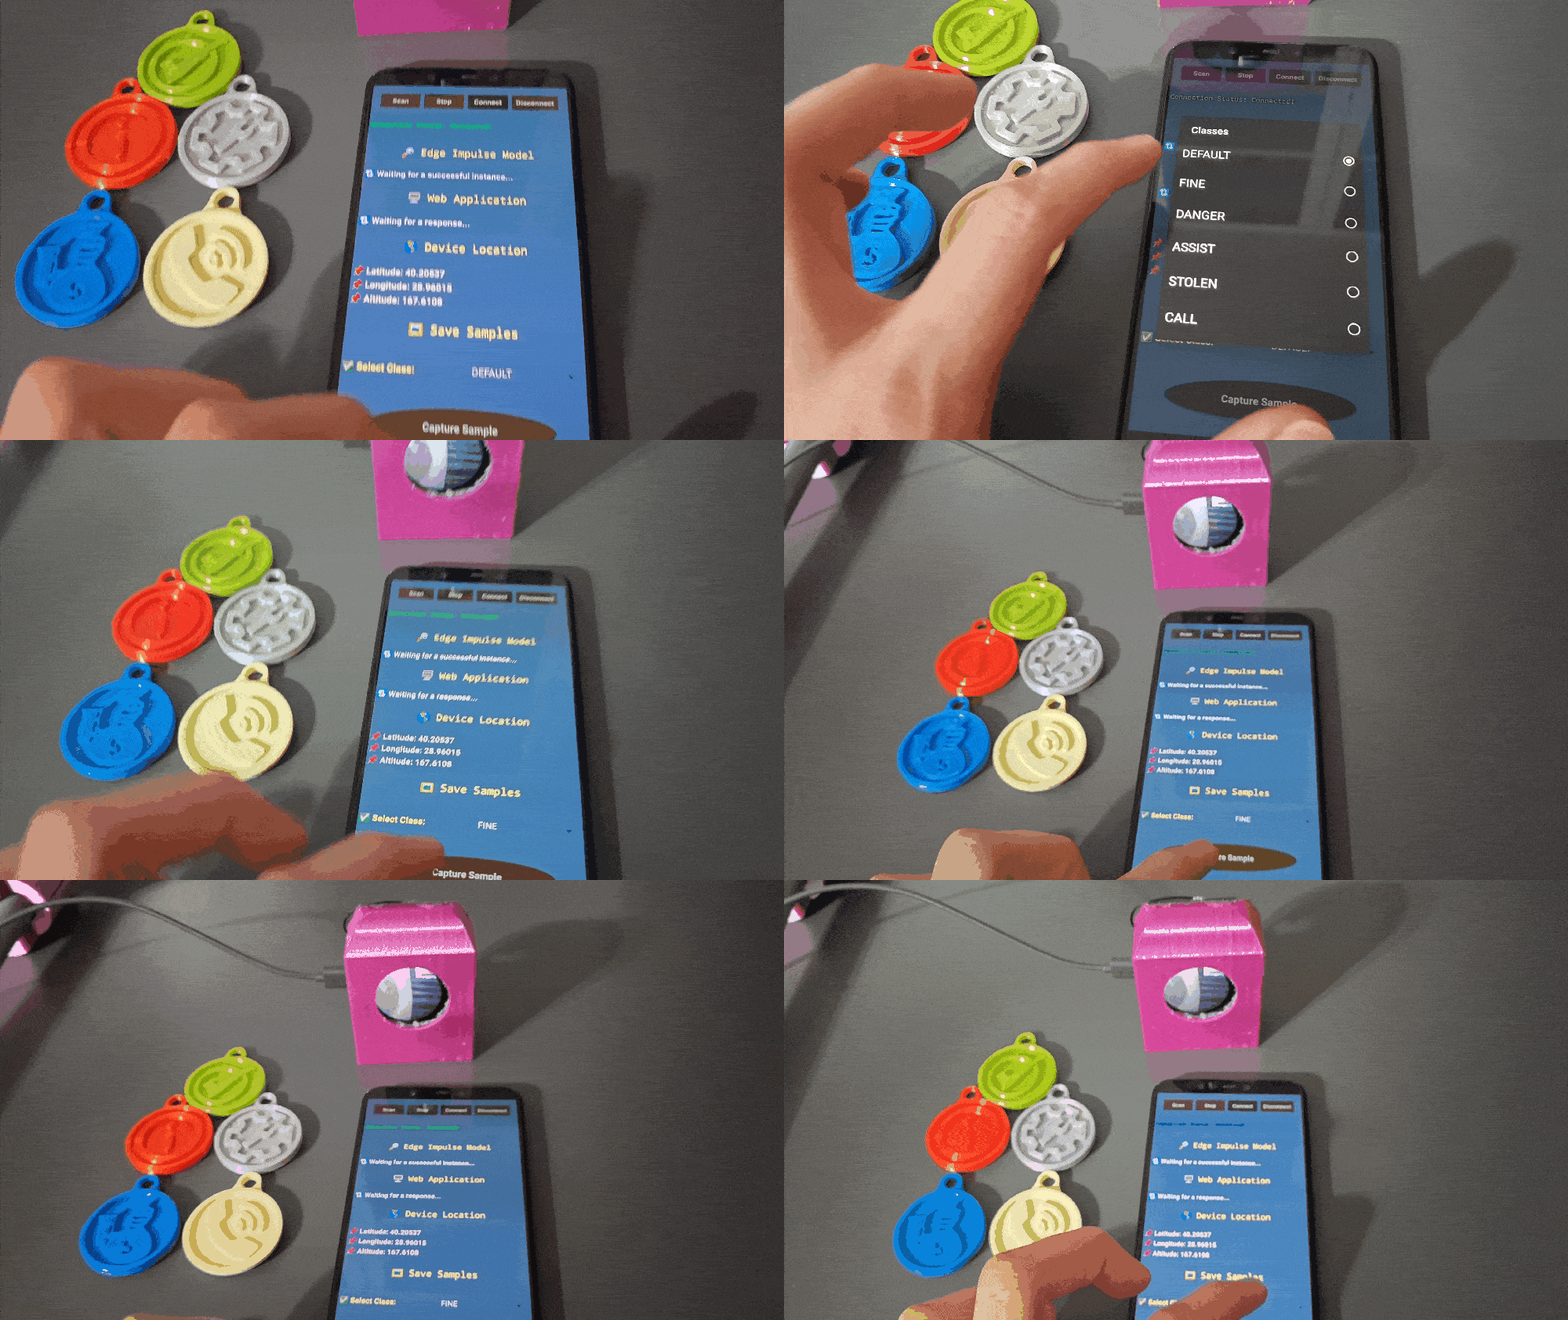
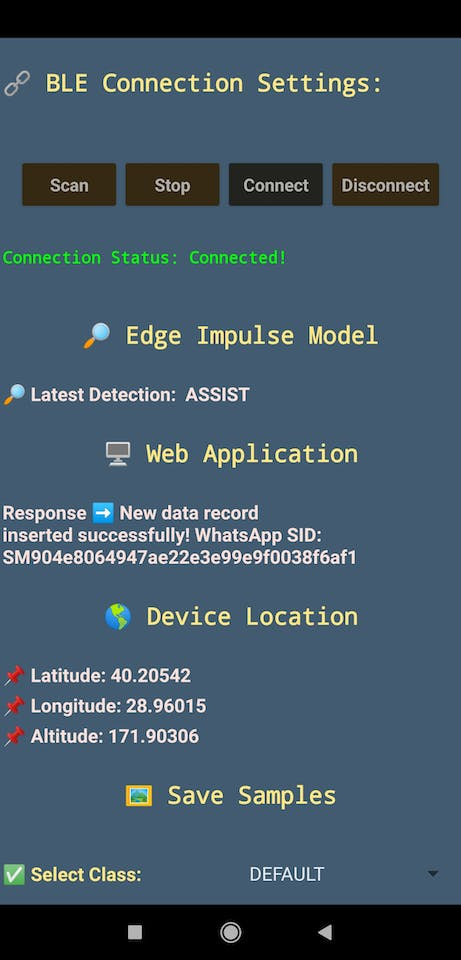
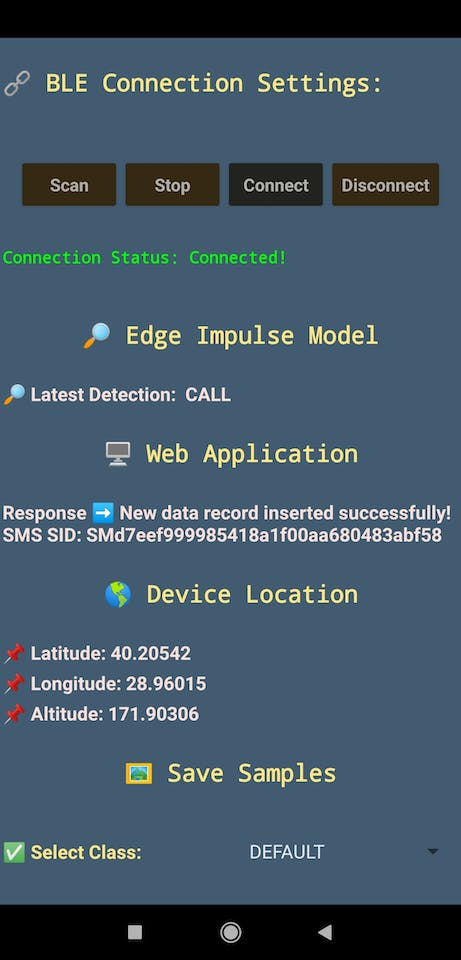
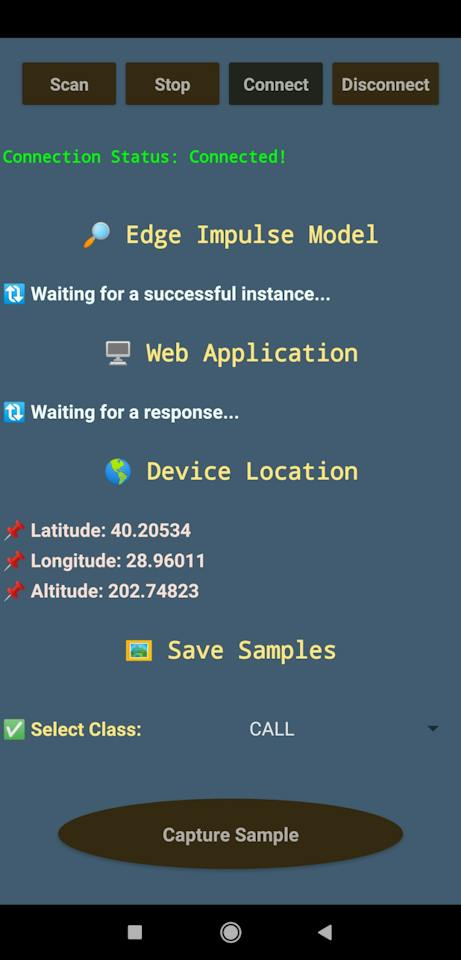
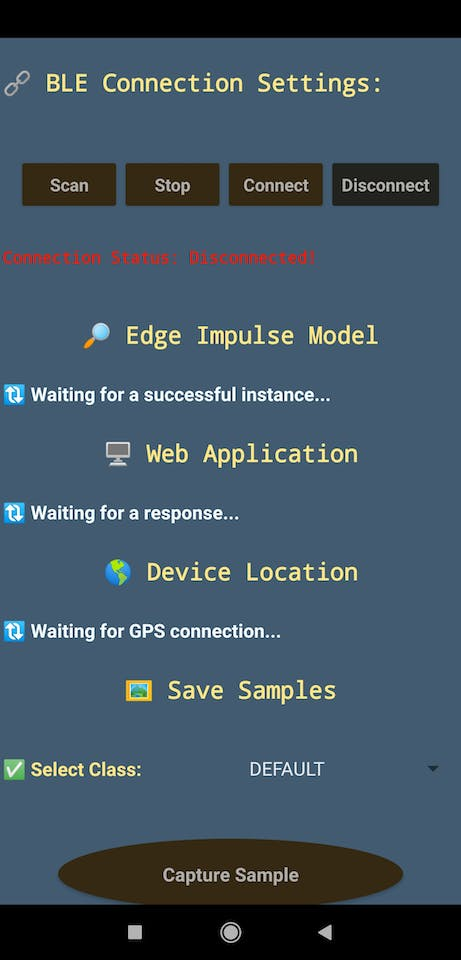
📲 ♿ 🌎 The Android application (BLE Travel Emergency Assistant) allows the user to scan BLE devices and communicate with XIAO ESP32S3, named BLE Emergency Assistant, over BLE.
📲 ♿ 🌎 If the Scan button is pressed, the Android application searches for compatible BLE devices and shows them as a list.
📲 ♿ 🌎 If the Stop button is pressed, the Android application halts the scanning process.
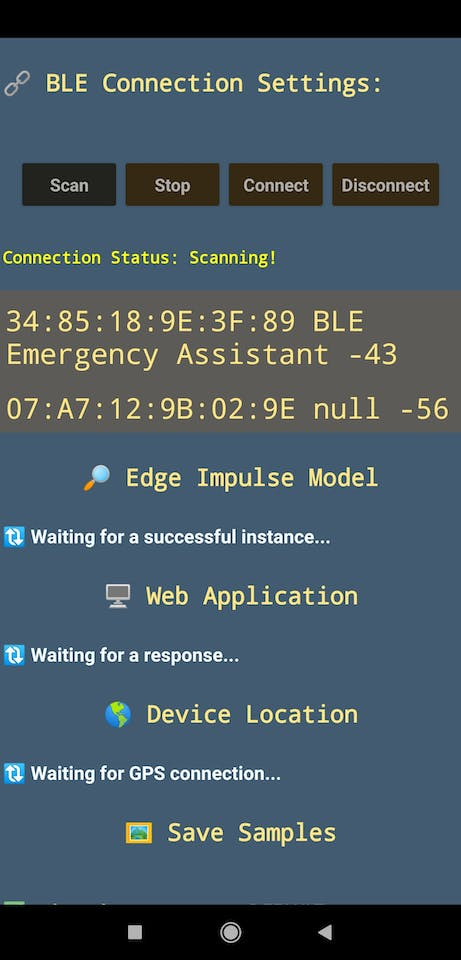
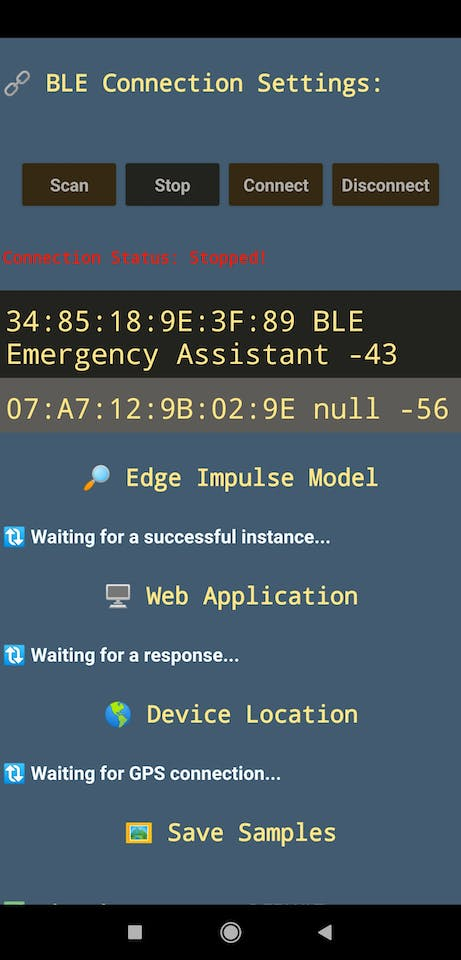
📲 ♿ 🌎 If the Connect button is pressed, the Android application attempts to connect to the selected BLE device.
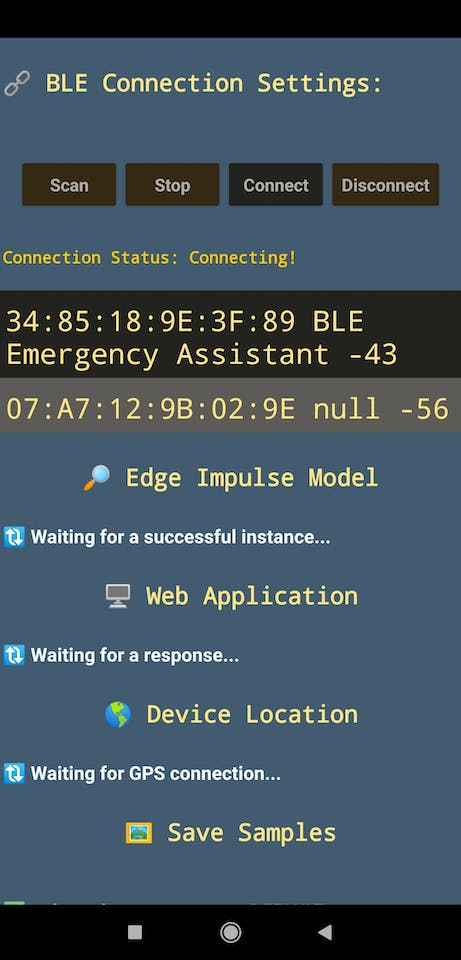
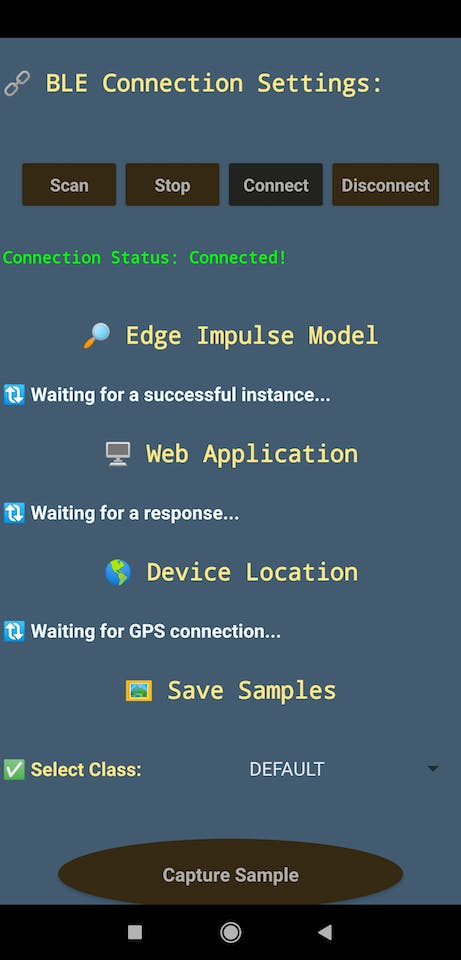
📲 ♿ 🌎 When the GPS information is available, the Android application updates and displays location variables (latitude, longitude, altitude) automatically.
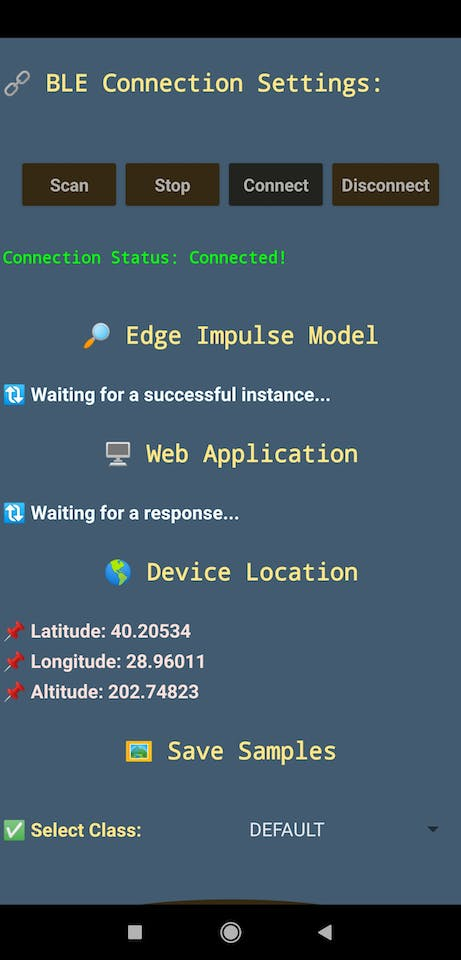
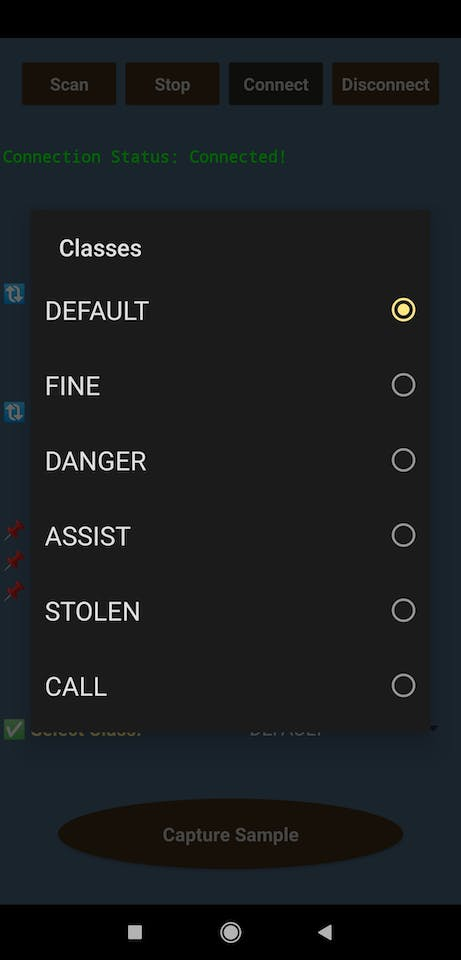
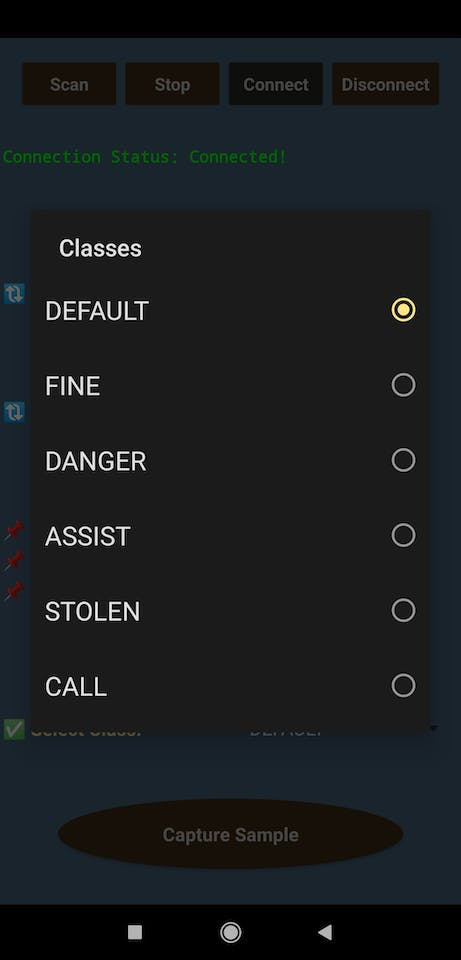
📲 ♿ 🌎 After connecting to XIAO ESP32S3 over BLE successfully, the Android application lets the user select an emergency class via the spinner:
- FINE
- DANGER
- ASSIST
- STOLEN
- CALL
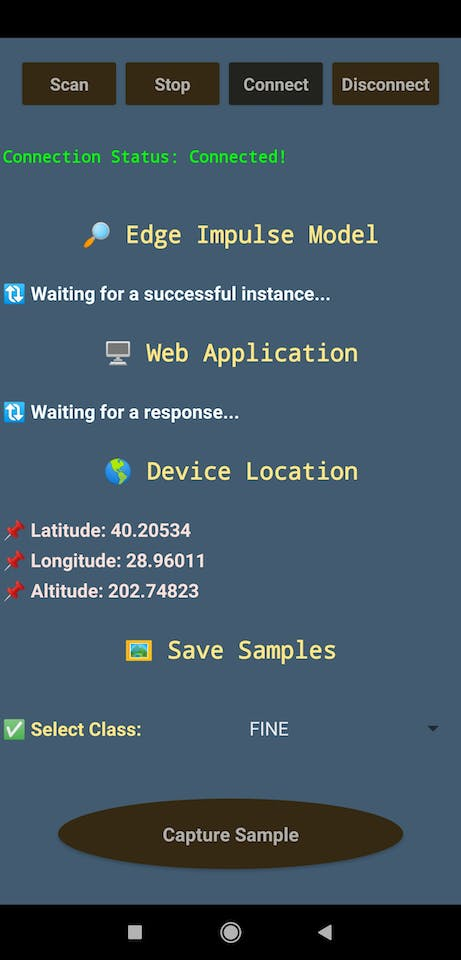
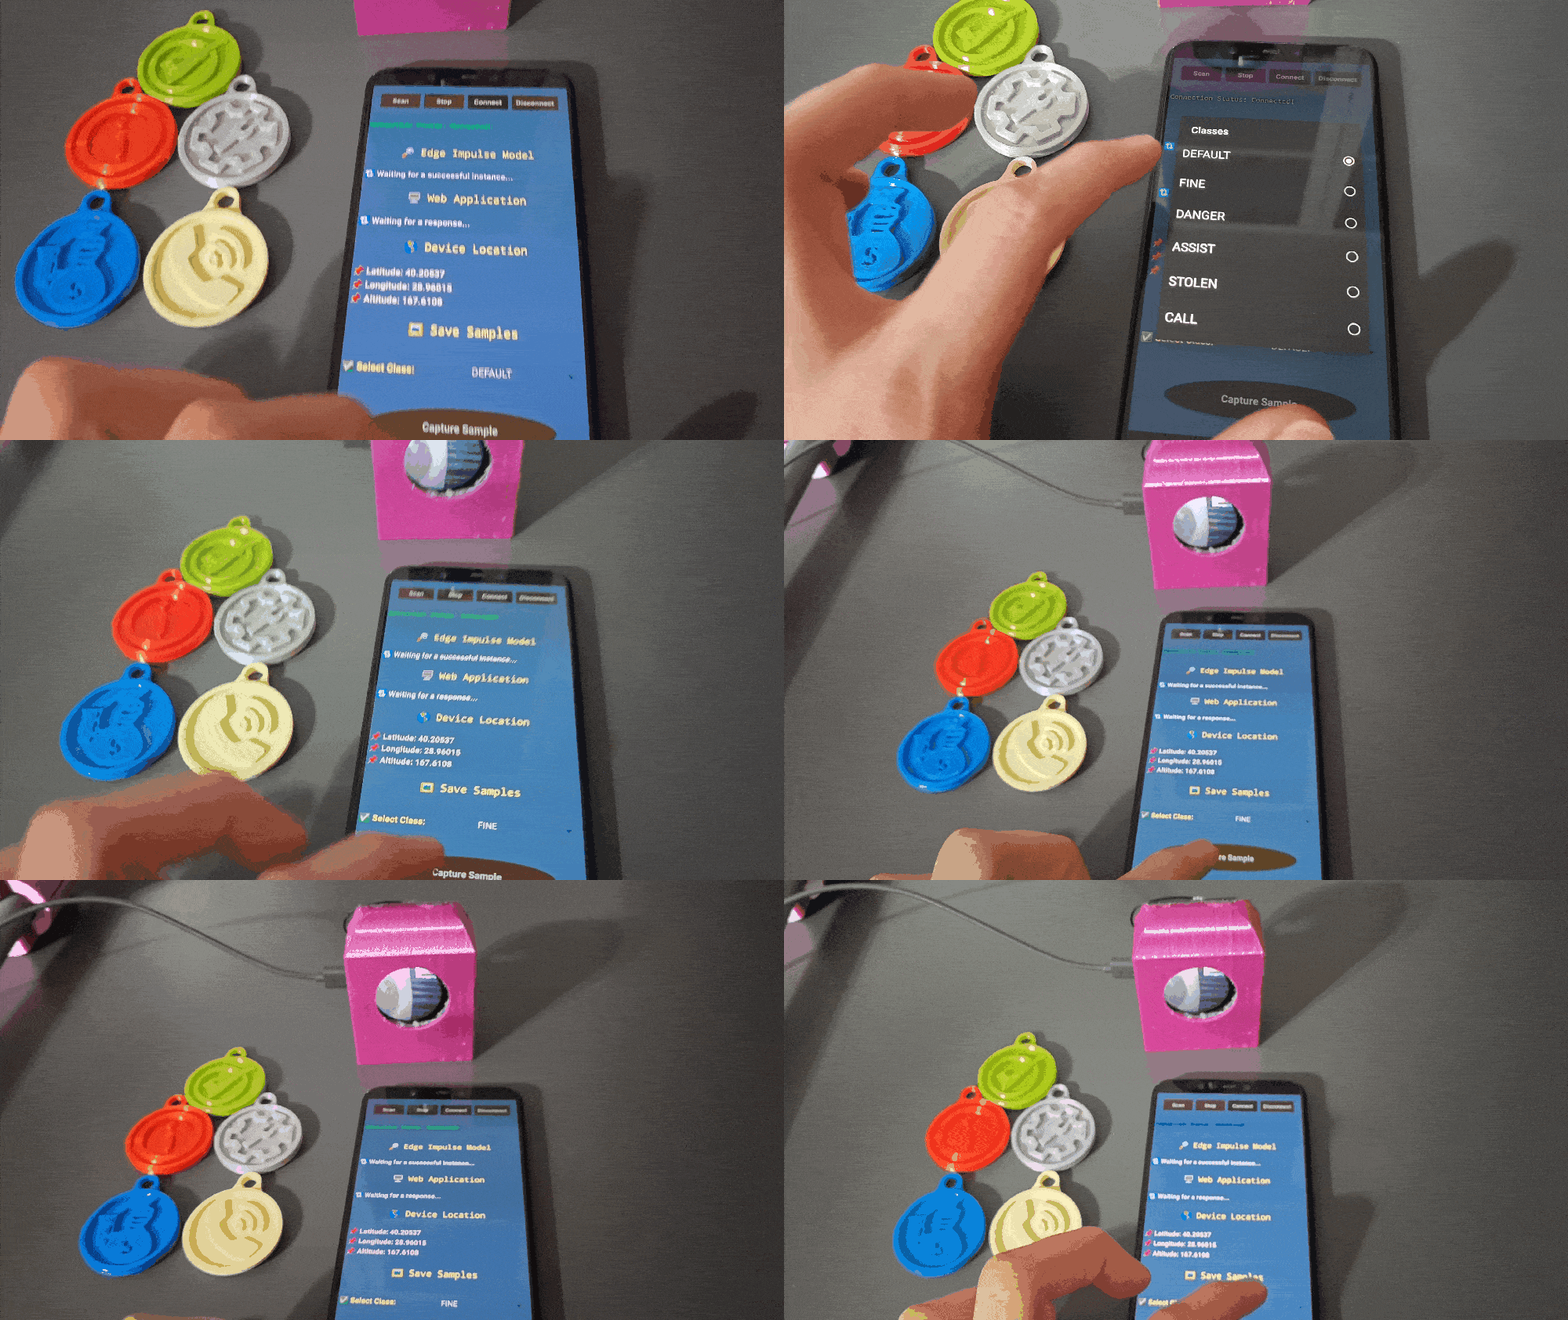
📲 ♿ 🌎 When the user selects the Fine emergency class via the spinner and clicks the Capture Sample button, the Android application transmits the selected class (byte characteristic) to XIAO ESP32S3.
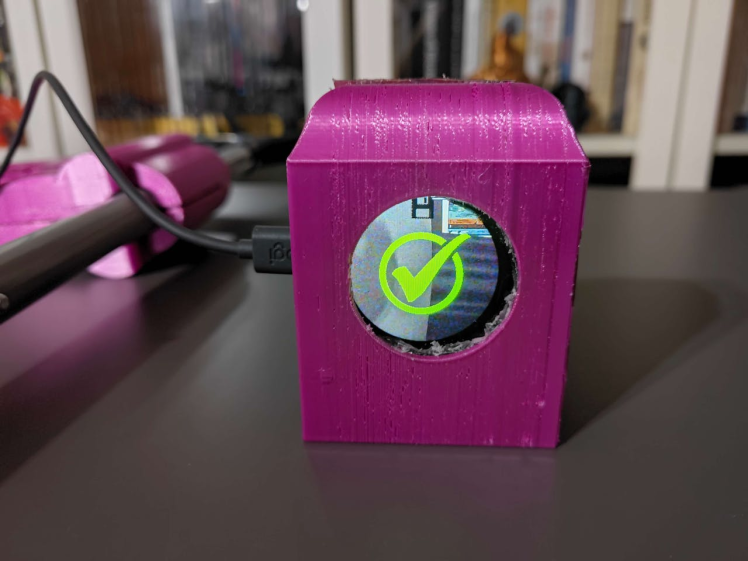
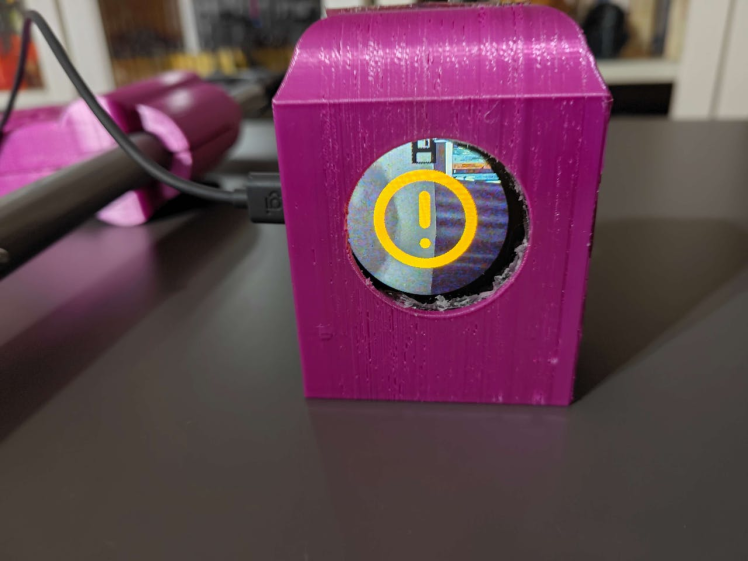
📲 ♿ 🌎 When XIAO ESP32S3 receives the selected class (Fine), it shows the assigned class icon and the Save logo on the XIAO round display to notify the user.
📲 ♿ 🌎 Then, XIAO ESP32S3 captures an image via the built-in OV2640 camera on the expansion board and saves the captured image, by adding the current sample number to the file name, to the SD card.
📲 ♿ 🌎 Finally, XIAO ESP32S3 updates the sample number of the selected class.

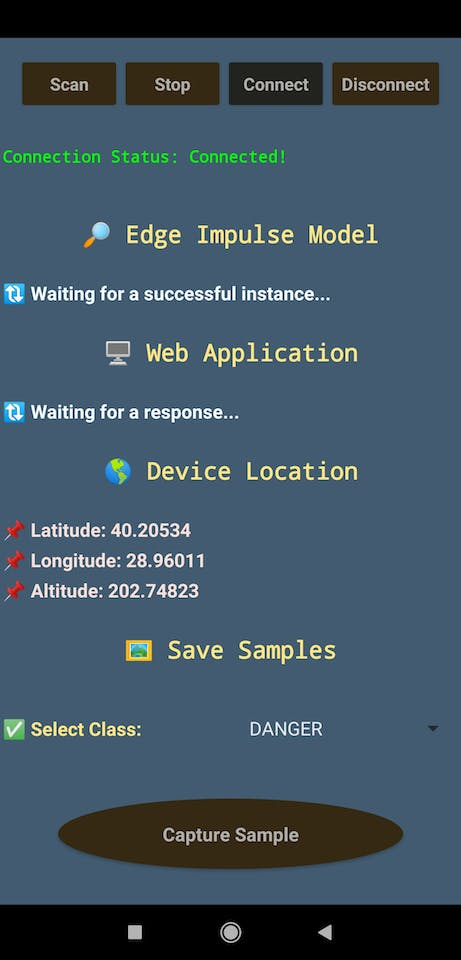
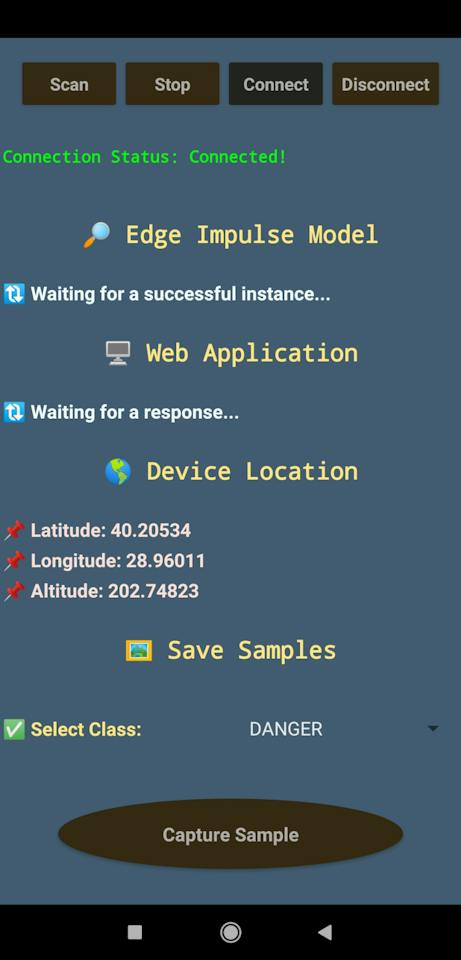
📲 ♿ 🌎 When the user selects the Danger emergency class via the spinner and clicks the Capture Sample button, the Android application transmits the selected class (byte characteristic) to XIAO ESP32S3.
📲 ♿ 🌎 When XIAO ESP32S3 receives the selected class (Danger), it shows the assigned class icon and the Save logo on the XIAO round display to notify the user.
📲 ♿ 🌎 Then, XIAO ESP32S3 captures an image via the built-in OV2640 camera on the expansion board and saves the captured image, by adding the current sample number to the file name, to the SD card.
📲 ♿ 🌎 Finally, XIAO ESP32S3 updates the sample number of the selected class.
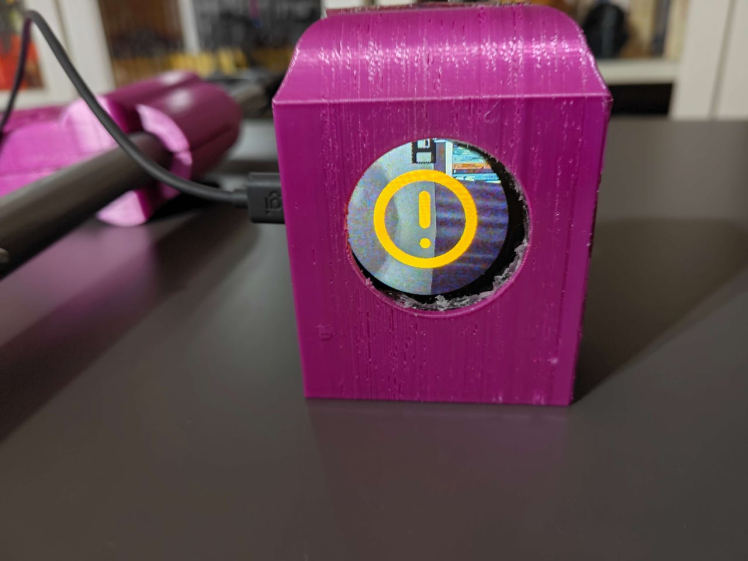
📲 ♿ 🌎 When the user selects the Assist emergency class via the spinner and clicks the Capture Sample button, the Android application transmits the selected class (byte characteristic) to XIAO ESP32S3.
📲 ♿ 🌎 When XIAO ESP32S3 receives the selected class (Assist), it shows the assigned class icon and the Save logo on the XIAO round display to notify the user.
📲 ♿ 🌎 Then, XIAO ESP32S3 captures an image via the built-in OV2640 camera on the expansion board and saves the captured image, by adding the current sample number to the file name, to the SD card.
📲 ♿ 🌎 Finally, XIAO ESP32S3 updates the sample number of the selected class.
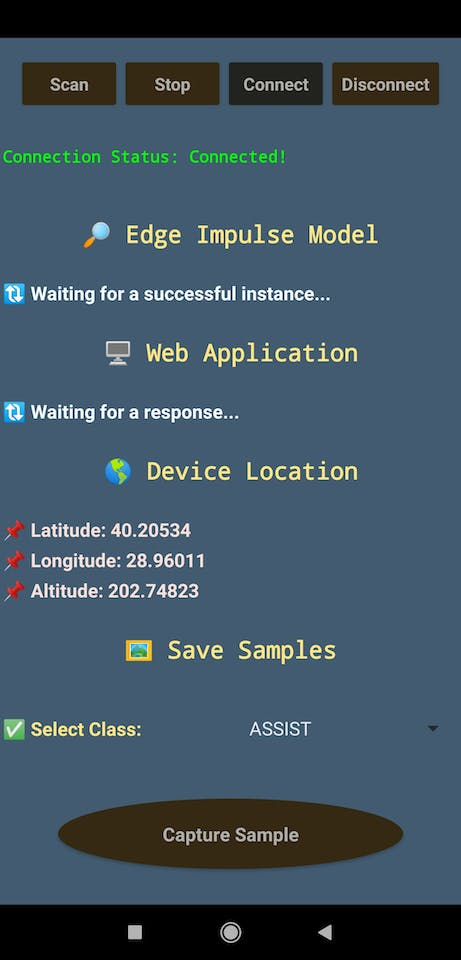
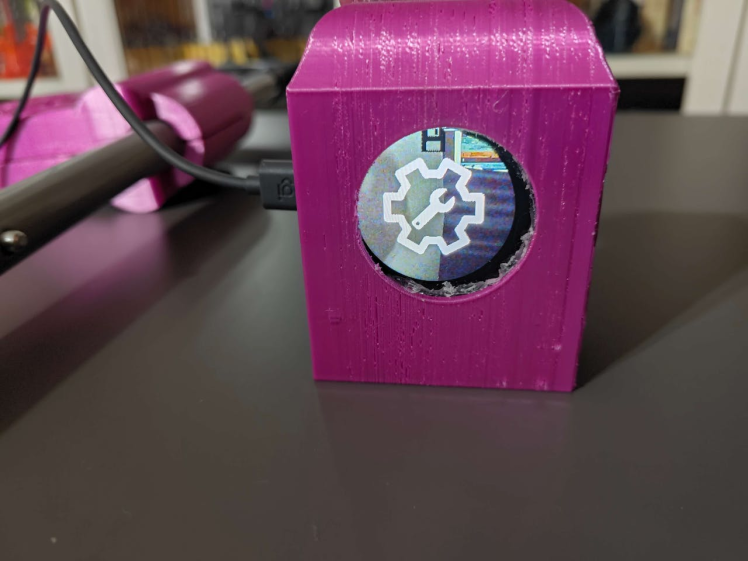
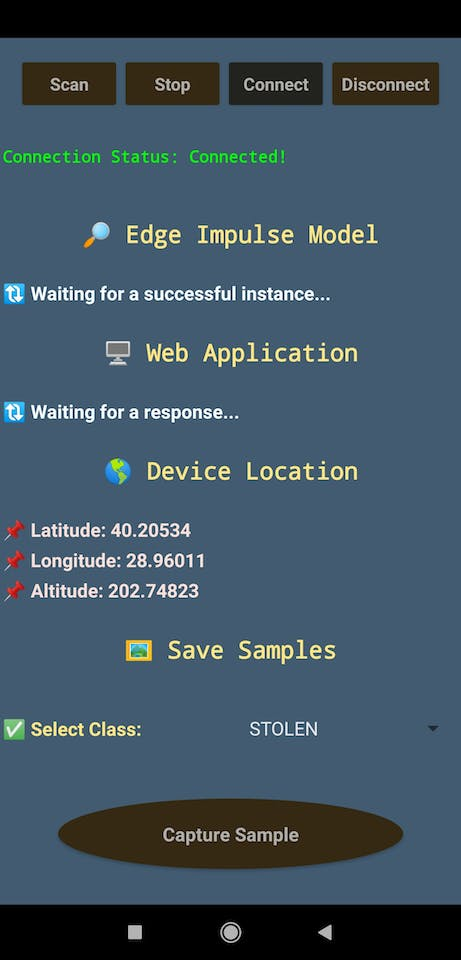
📲 ♿ 🌎 When the user selects the Stolen emergency class via the spinner and clicks the Capture Sample button, the Android application transmits the selected class (byte characteristic) to XIAO ESP32S3.
📲 ♿ 🌎 When XIAO ESP32S3 receives the selected class (Stolen), it shows the assigned class icon and the Save logo on the XIAO round display to notify the user.
📲 ♿ 🌎 Then, XIAO ESP32S3 captures an image via the built-in OV2640 camera on the expansion board and saves the captured image, by adding the current sample number to the file name, to the SD card.
📲 ♿ 🌎 Finally, XIAO ESP32S3 updates the sample number of the selected class.
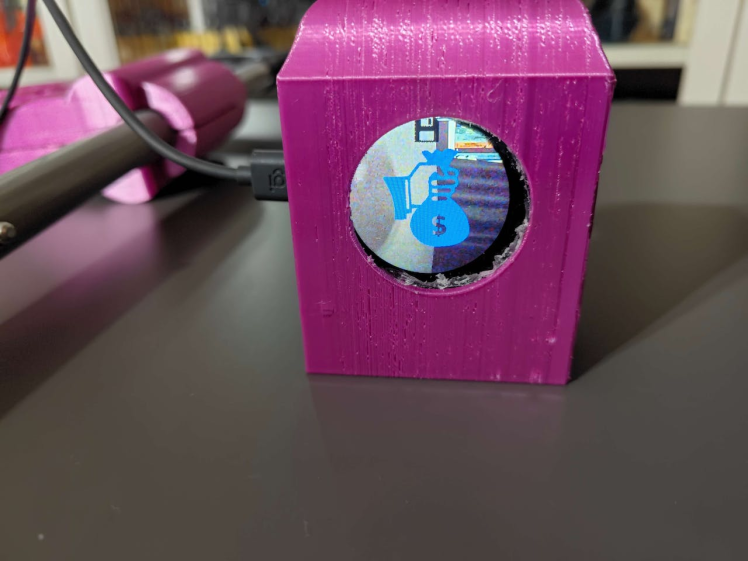
📲 ♿ 🌎 When the user selects the Call emergency class via the spinner and clicks the Capture Sample button, the Android application transmits the selected class (byte characteristic) to XIAO ESP32S3.
📲 ♿ 🌎 When XIAO ESP32S3 receives the selected class (Call), it shows the assigned class icon and the Save logo on the XIAO round display to notify the user.
📲 ♿ 🌎 Then, XIAO ESP32S3 captures an image via the built-in OV2640 camera on the expansion board and saves the captured image, by adding the current sample number to the file name, to the SD card.
📲 ♿ 🌎 Finally, XIAO ESP32S3 updates the sample number of the selected class.
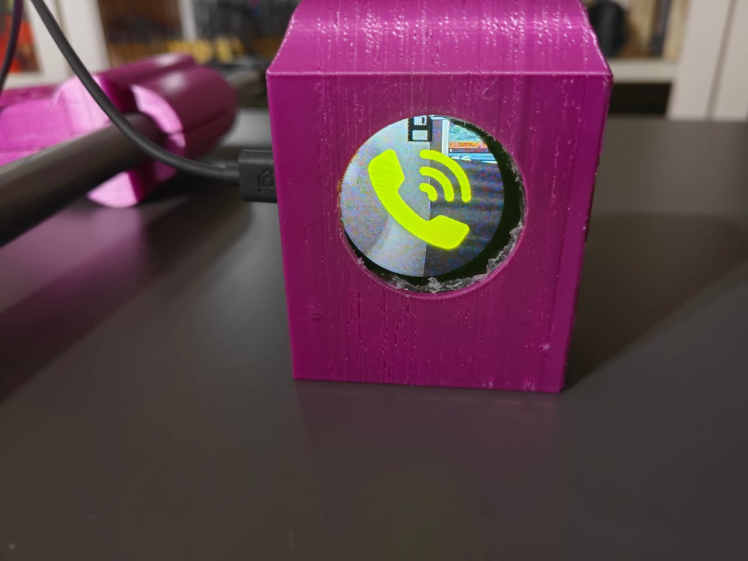
📲 ♿ 🌎 The color schemes of the assigned icons of the emergency classes are compatible with the actual color codes of the printed keychains (tokens).
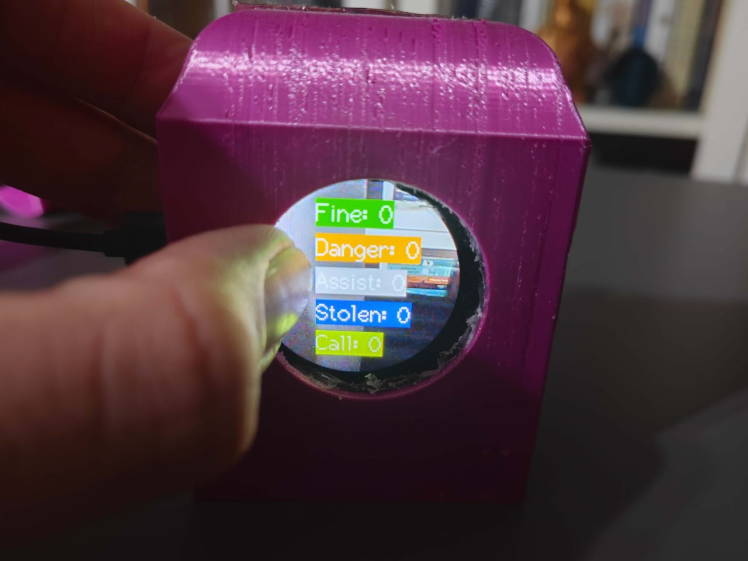
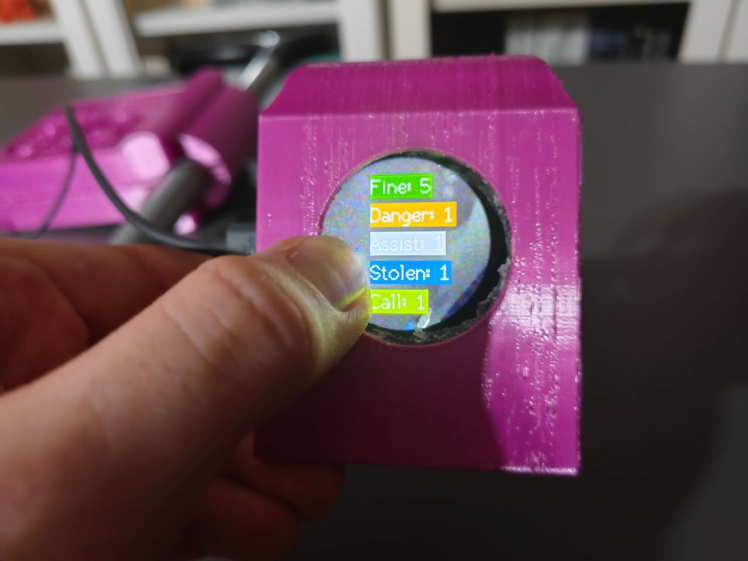
📲 ♿ 🌎 If the user touches the XIAO round display, XIAO ESP32S3 shows the current sample numbers for each emergency class on the SD card individually.
📲 ♿ 🌎 Also, XIAO ESP32S3 prints notifications and reports on the serial monitor for debugging.
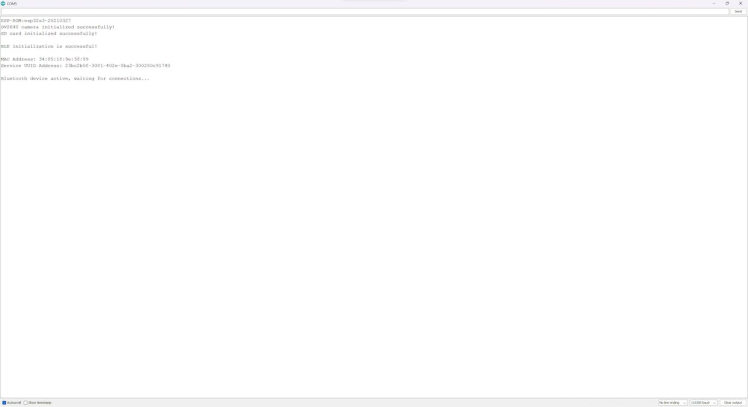
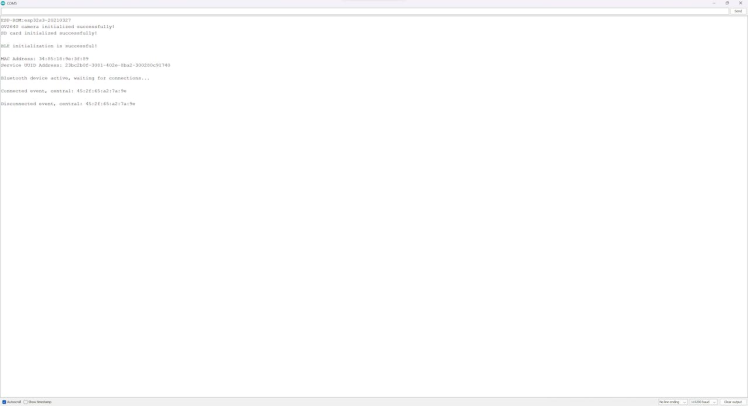
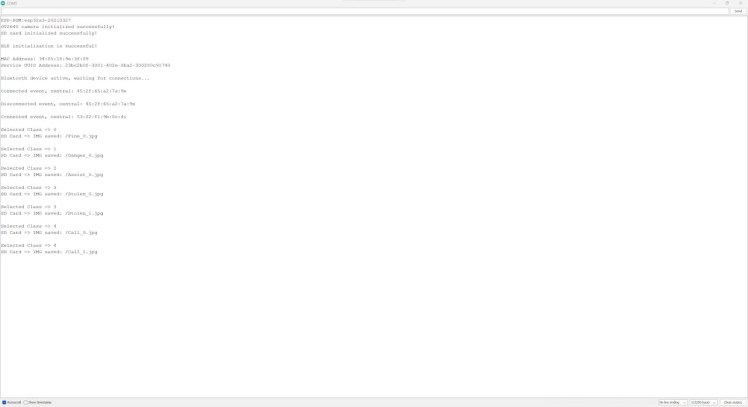
📲 ♿ 🌎 If the Disconnect button is pressed, the Android application disconnects from the connected BLE device and stops the data transfer.
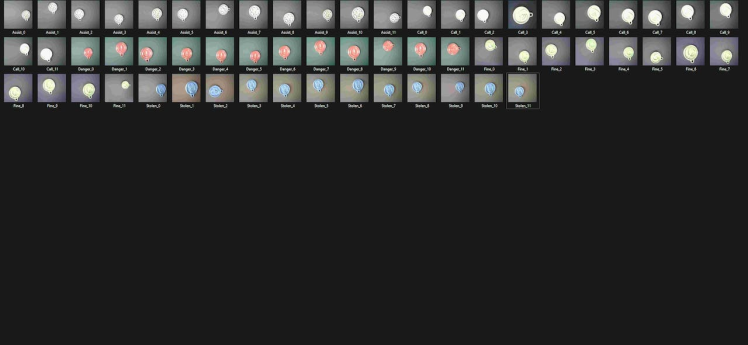
After employing the Android application to capture images of specific keychains (tokens) and save them to the SD card, I constructed my data set for the object detection model.
Step 7: Building an object detection (FOMO) model with Edge Impulse
When I completed capturing images of customized keychains (tokens) and storing the captured samples on the SD card, I started to work on my object detection (FOMO) model to detect keychains individually so as to inform emergency contacts via WhatsApp or SMS immediately.
Since Edge Impulse supports almost every microcontroller and development board due to its model deployment options, I decided to utilize Edge Impulse to build my object detection model. Also, Edge Impulse provides an elaborate machine learning algorithm (FOMO) for running more accessible and faster object detection models on edge devices such as XIAO ESP32S3.
Edge Impulse FOMO (Faster Objects, More Objects) is a novel machine learning algorithm that brings object detection to highly constrained devices. FOMO models can count objects, find the location of the detected objects in an image, and track multiple objects in real time, requiring up to 30x less processing power and memory than MobileNet SSD or YOLOv5.
Even though Edge Impulse supports JPG or PNG files to upload as samples directly, each target object in a training or testing sample needs to be labeled manually. Therefore, I needed to follow the steps below to format my data set so as to train my object detection model accurately:
- Data Scaling (Resizing)
- Data Labeling
Since I added emergency classes and assigned sample numbers to the file names while capturing images of customized keychains, I preprocessed my data set effortlessly to label each target object on an image sample on Edge Impulse by utilizing the given emergency classes:
- Fine
- Danger
- Assist
- Stolen
- Call
Plausibly, Edge Impulse allows building predictive models optimized in size and accuracy automatically and deploying the trained model as a supported firmware (Arduino library) for XIAO ESP32S3. Therefore, after scaling (resizing) and preprocessing my data set to label target objects, I was able to build an accurate object detection model to recognize customized keychains (tokens), which runs on XIAO ESP32S3 without any additional requirements.
You can inspect my object detection (FOMO) model on Edge Impulse as a public project.
Step 7.1: Uploading images (samples) to Edge Impulse and labeling objects
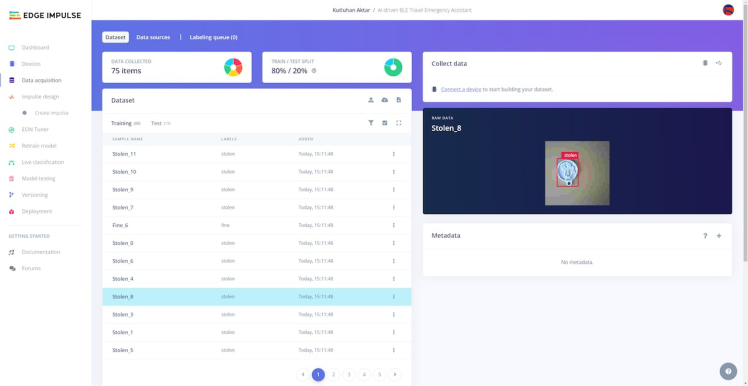
After collecting training and testing image samples, I uploaded them to my project on Edge Impulse. Then, I labeled each target object on the image samples.
#️⃣ First of all, sign up for Edge Impulse and create a new project.
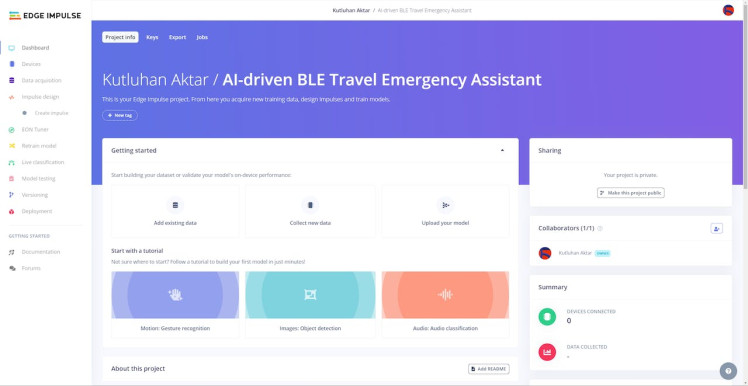
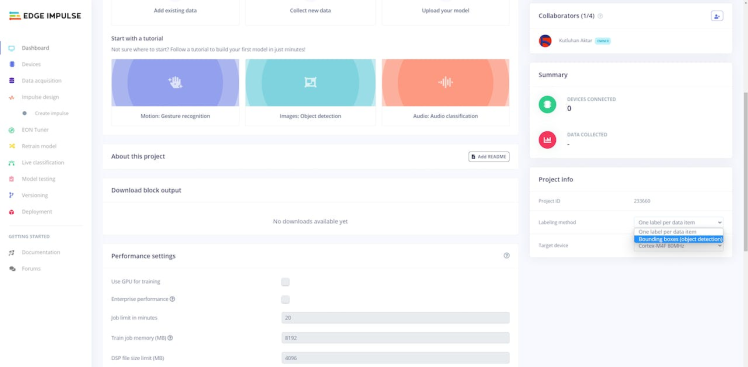
#️⃣ To be able to label image samples manually on Edge Impulse for object detection models, go to Dashboard ➡ Project info ➡ Labeling method and select Bounding boxes (object detection).
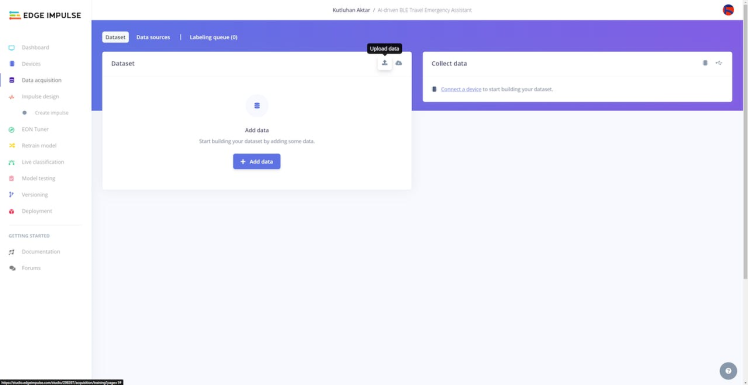
#️⃣ Navigate to the Data acquisition page and click the Upload data icon.
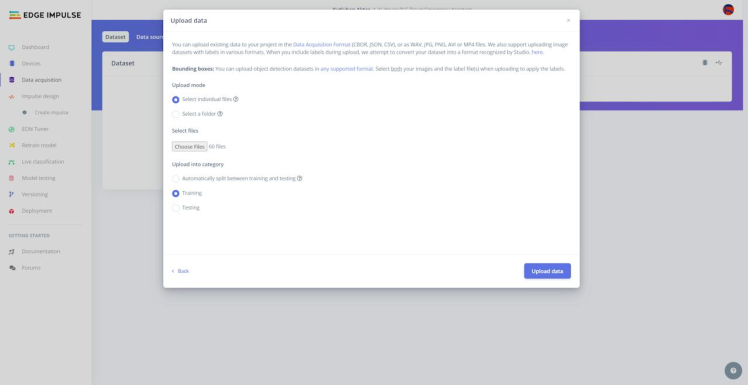
#️⃣ Then, choose the data category (training or testing), select image files, and click the Upload data button.
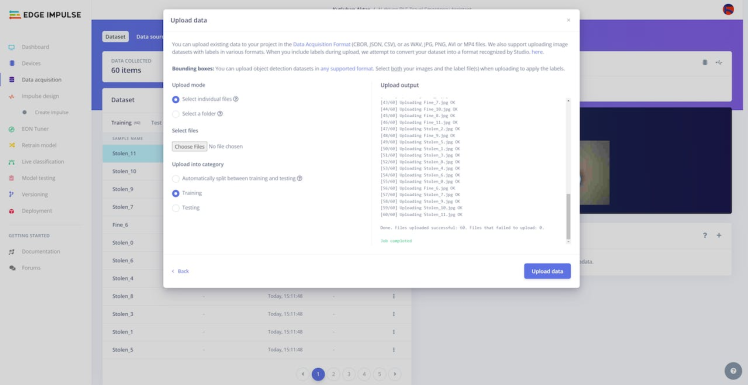
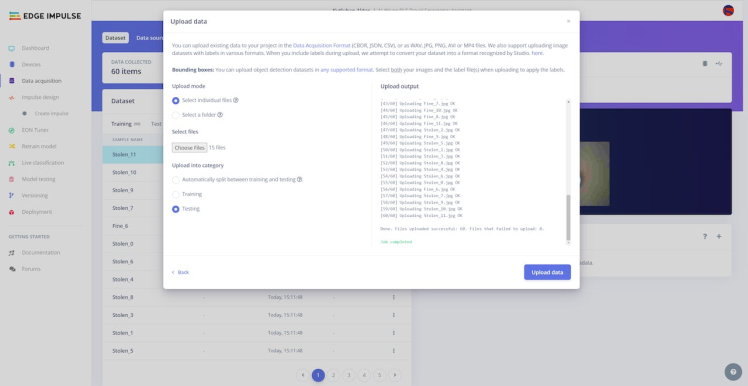
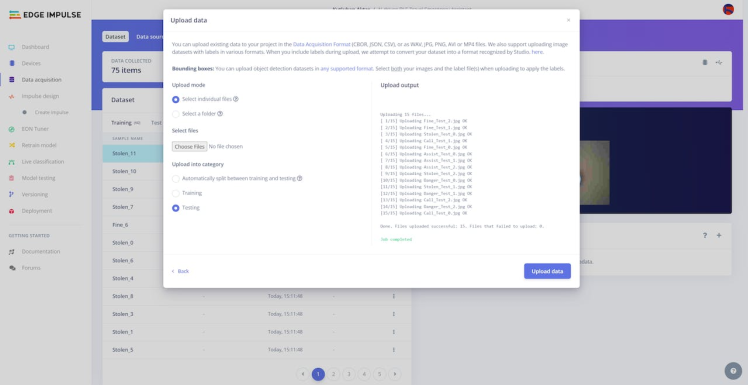
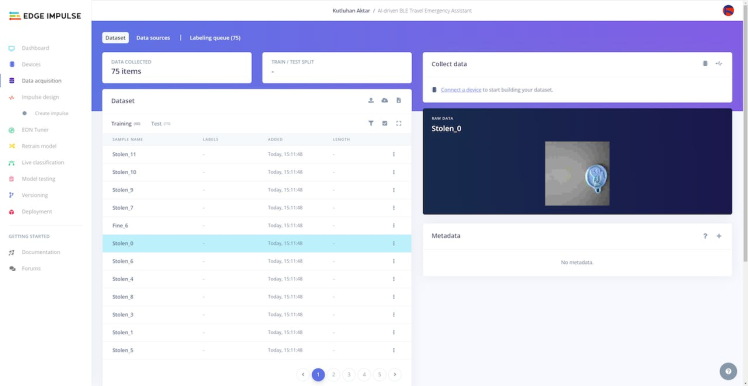
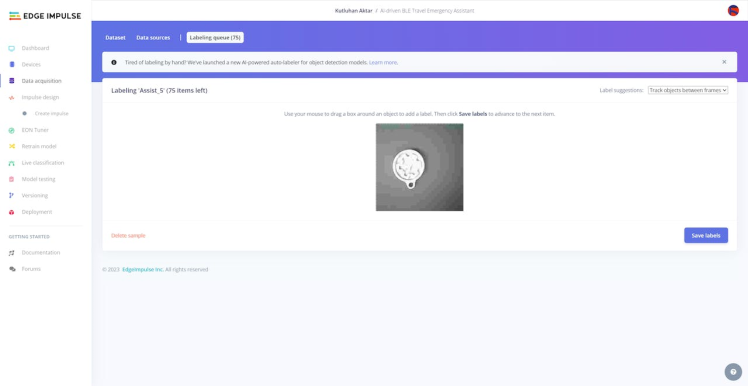
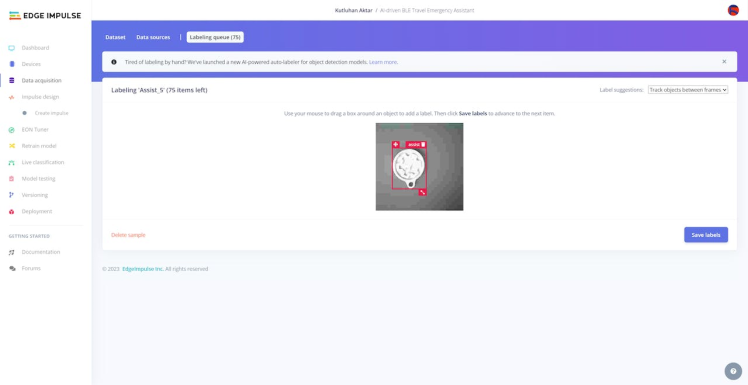
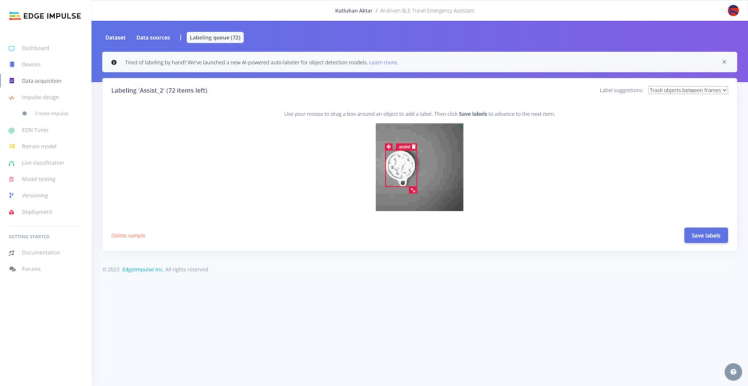
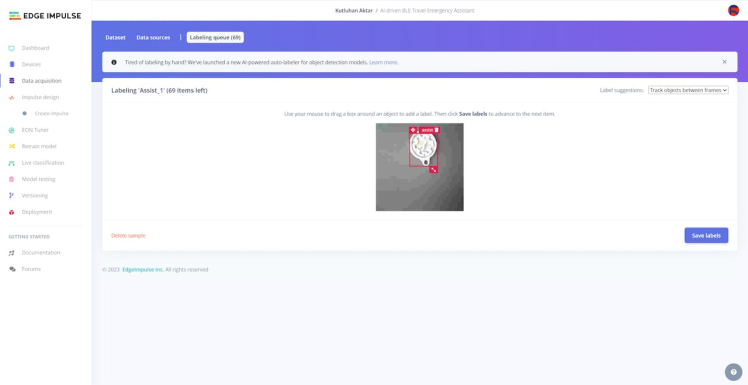
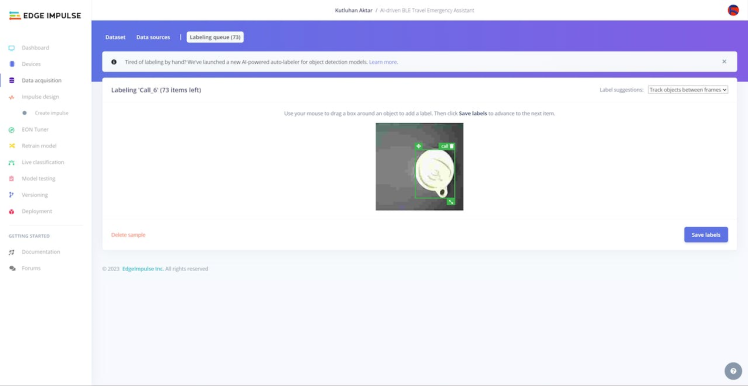
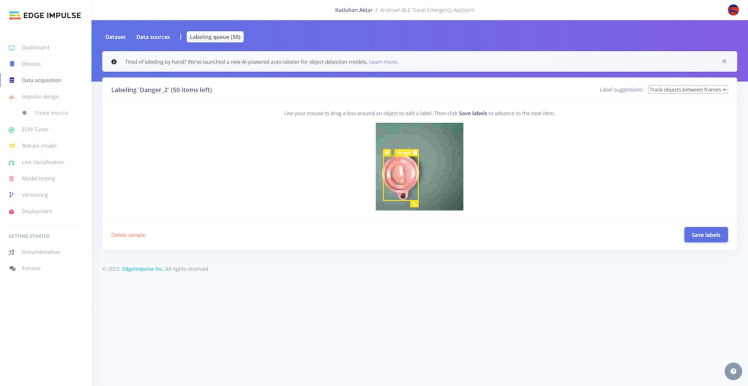
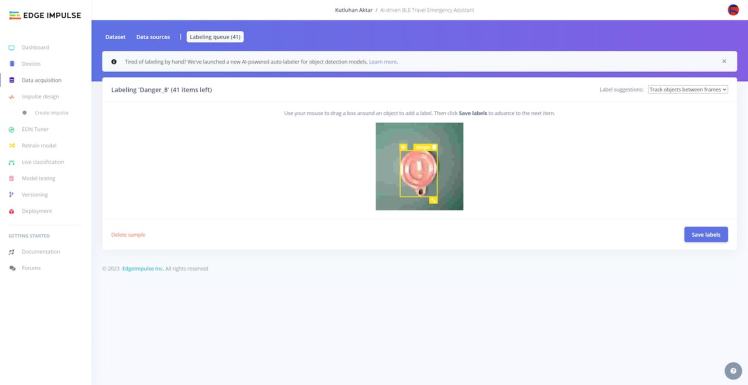
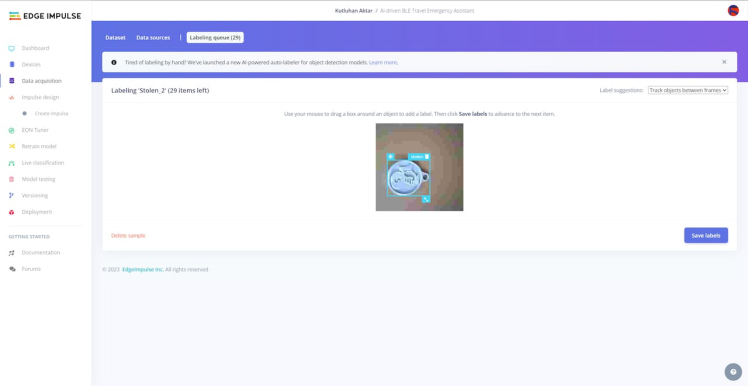
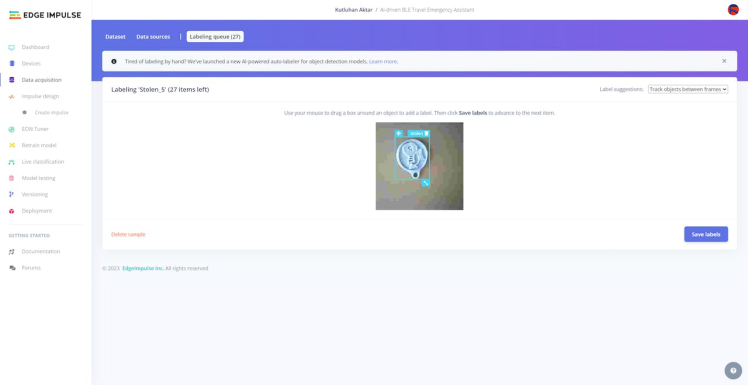
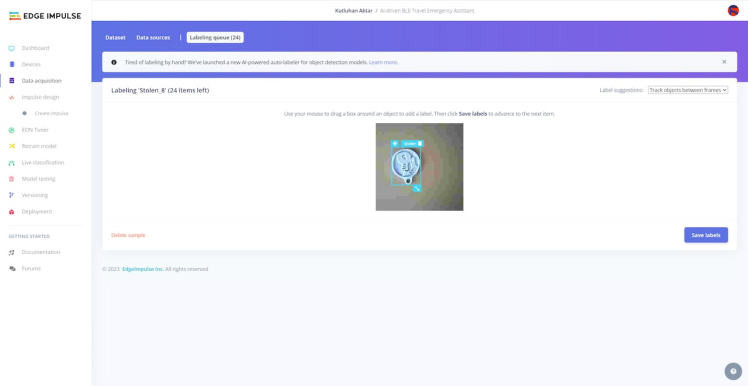
After uploading my data set successfully, I labeled each target object on the image samples by utilizing the emergency classes. In Edge Impulse, labeling an object is as easy as dragging a box around it and entering a class. Also, Edge Impulse runs a tracking algorithm in the background while labeling objects, so it moves the bounding boxes automatically for the same target objects in different images.
#️⃣ Go to Data acquisition ➡ Labeling queue (Object detection labeling). It shows all unlabeled items (training and testing) remaining in the given data set.
#️⃣ Finally, select an unlabeled item, drag bounding boxes around target objects, click the Save labels button, and repeat this process until all samples have at least one labeled target object.

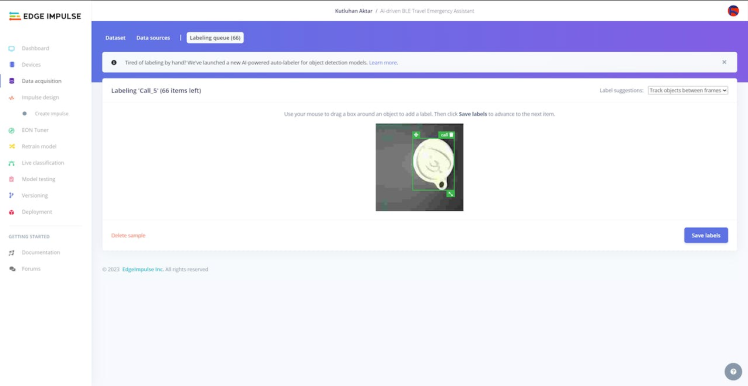
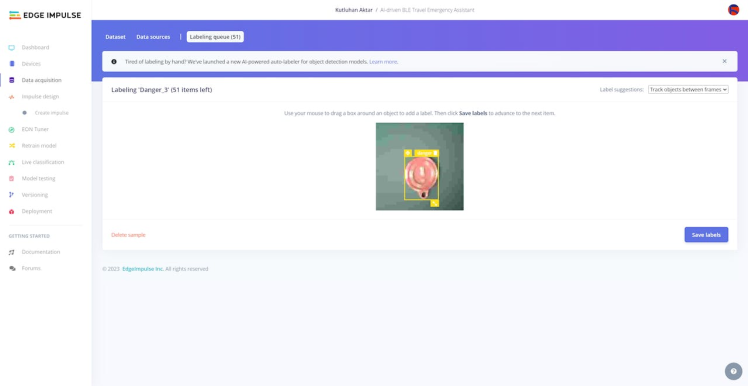
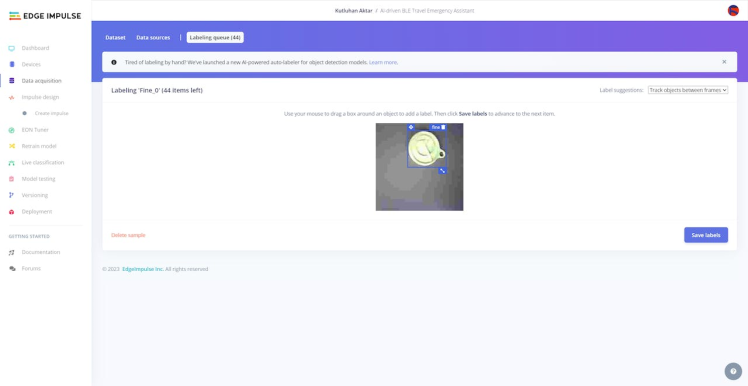
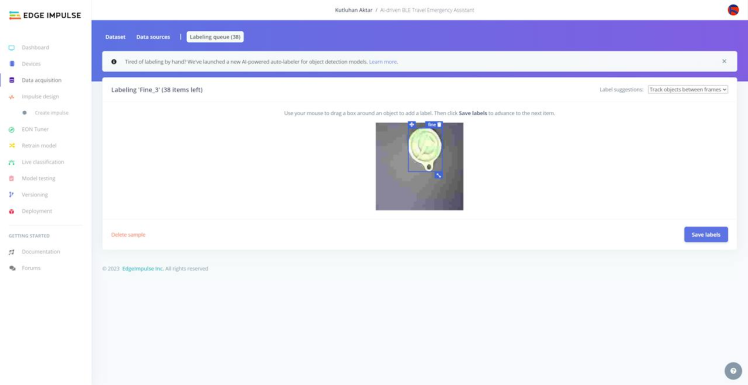
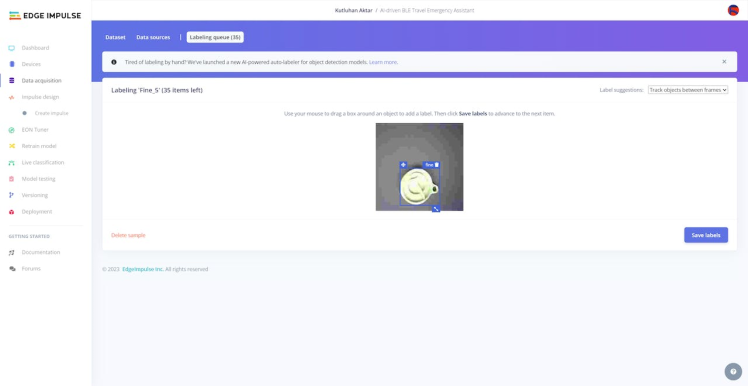
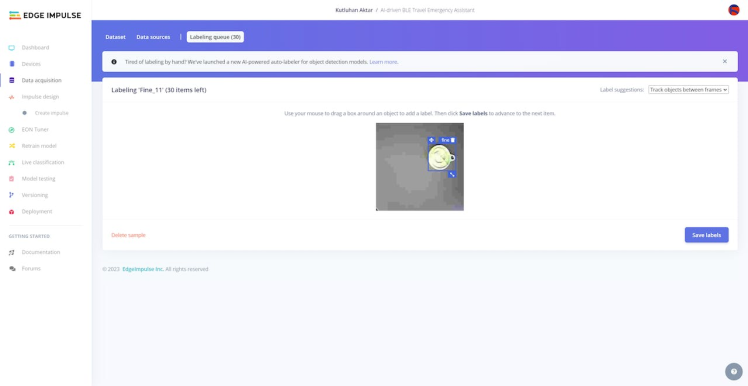
Step 7.2: Training the FOMO model on the customized keychain images
After labeling target objects on my training and testing samples successfully, I designed an impulse and trained it on detecting different keychains (tokens).
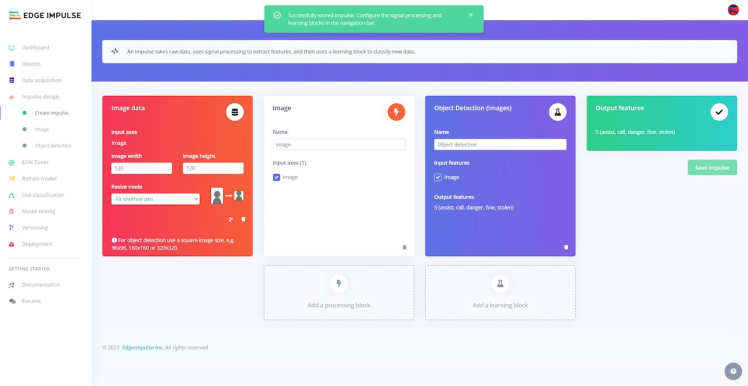
An impulse is a custom neural network model in Edge Impulse. I created my impulse by employing the Image preprocessing block and the Object Detection (Images) learning block.
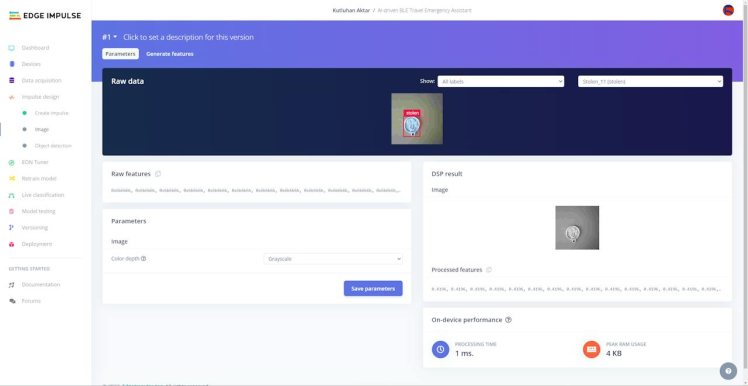
The Image preprocessing block optionally turns the input image format to grayscale and generates a features array from the raw image.
The Object Detection (Images) learning block represents a machine learning algorithm that detects objects on the given image, distinguished between model labels.
#️⃣ Go to the Create impulse page and set image width and height parameters to 120. Then, select the resize mode parameter as Fit shortest axis so as to scale (resize) given training and testing image samples.
#️⃣ Select the Image preprocessing block and the Object Detection (Images) learning block. Finally, click Save Impulse.
#️⃣ Before generating features for the object detection model, go to the Image page and set the Color depth parameter as Grayscale. Then, click Save parameters.
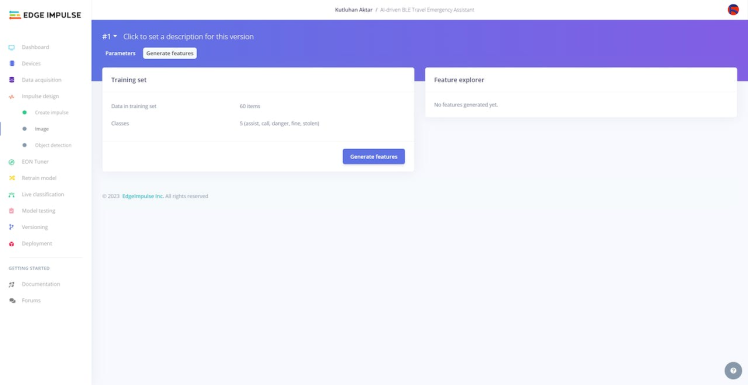
#️⃣ After saving parameters, click Generate features to apply the Image preprocessing block to training image samples.
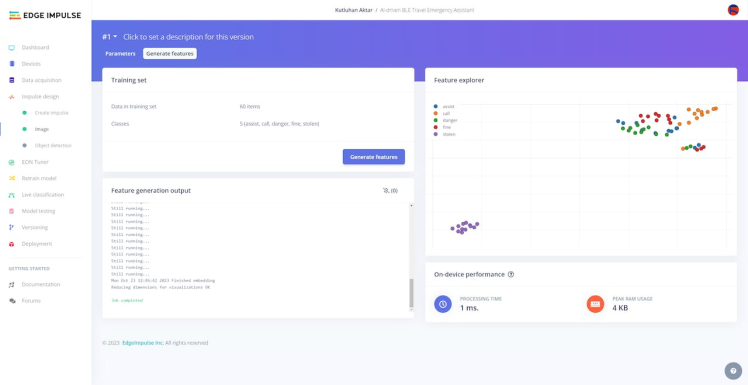
#️⃣ After generating features successfully, navigate to the Object detection page and click Start training.
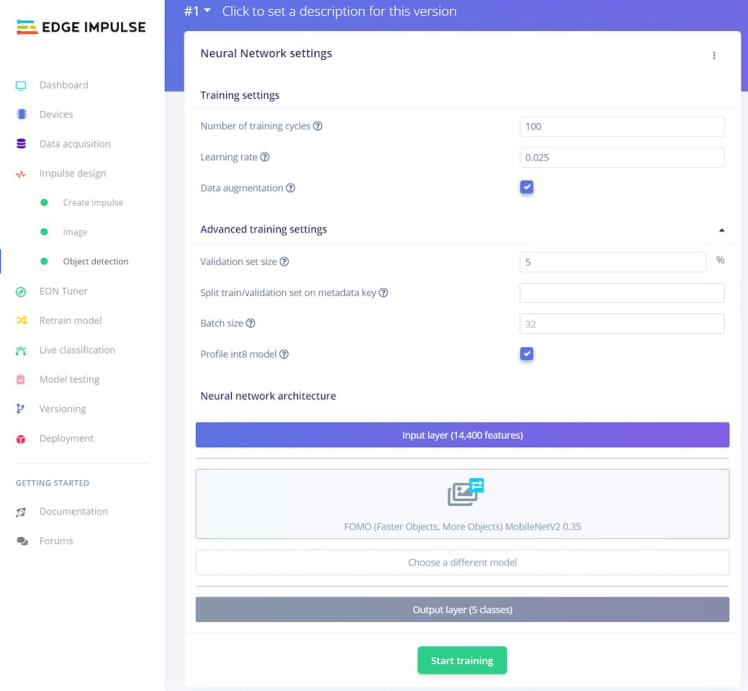
According to my experiments with my object detection model, I modified the neural network settings and architecture to build an object detection model with high accuracy and validity:
📌 Neural network settings:
- Number of training cycles ➡ 100
- Learning rate ➡ 0.025
- Validation set size ➡ 5
📌 Neural network architecture:
- FOMO (Faster Objects, More Objects) MobileNetV2 0.35
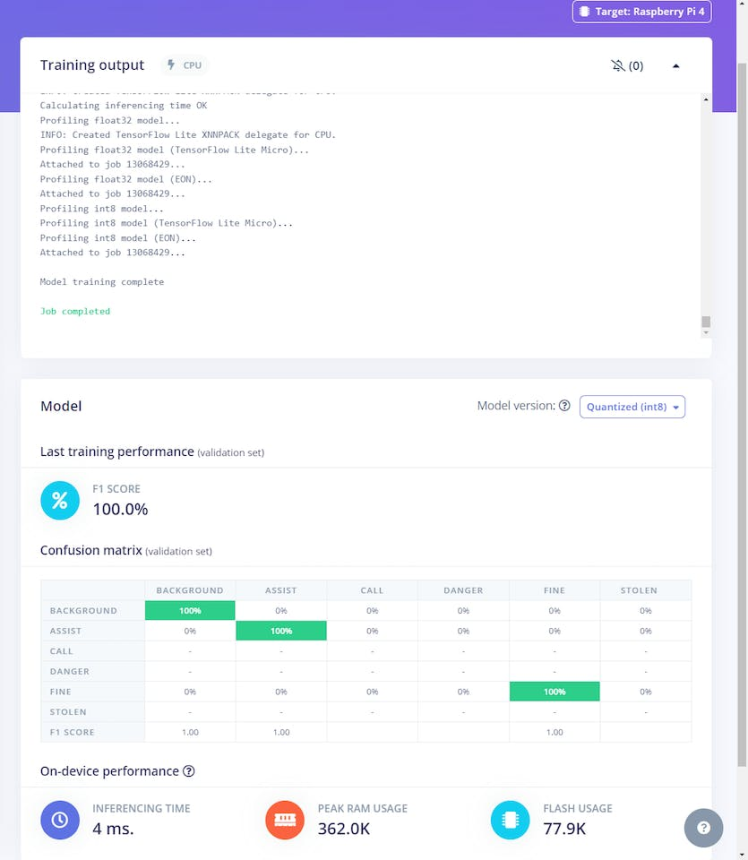
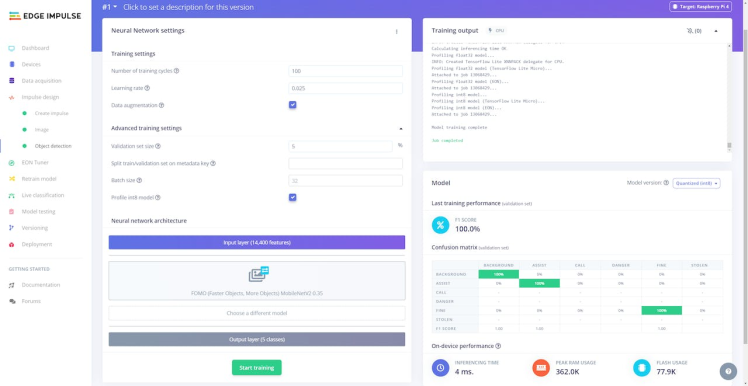
After generating features and training my FOMO model with training samples, Edge Impulse evaluated the F1 score (accuracy) as 100%.
The F1 score (accuracy) is approximately 100% due to the modest volume of training samples of unique keychains (tokens) with distinct color schemes, depending on the selected filament colors. Since the model can recognize these individual colors precisely, it performs excellently with a small validation set. Therefore, I am still collecting samples to improve my data set.
Step 7.3: Evaluating the model accuracy and deploying the model
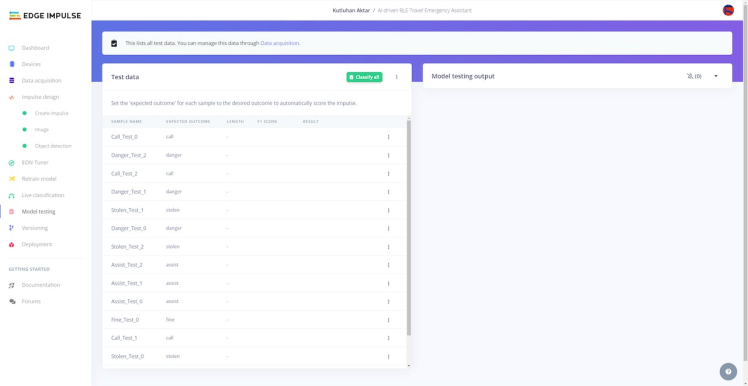
After building and training my object detection model, I tested its accuracy and validity by utilizing testing image samples.
The evaluated accuracy of the model is 73.33%.
#️⃣ To validate the trained model, go to the Model testing page and click Classify all.
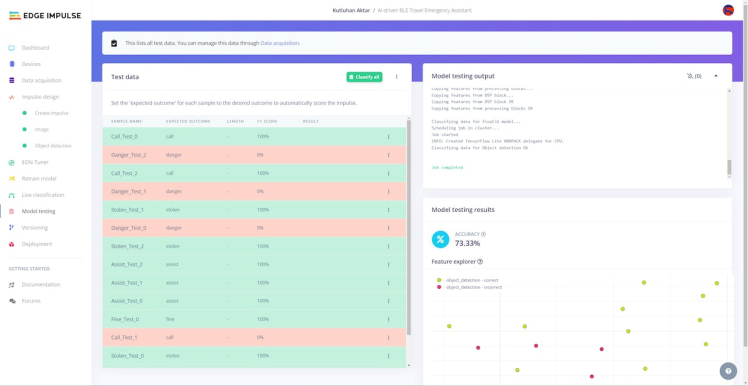
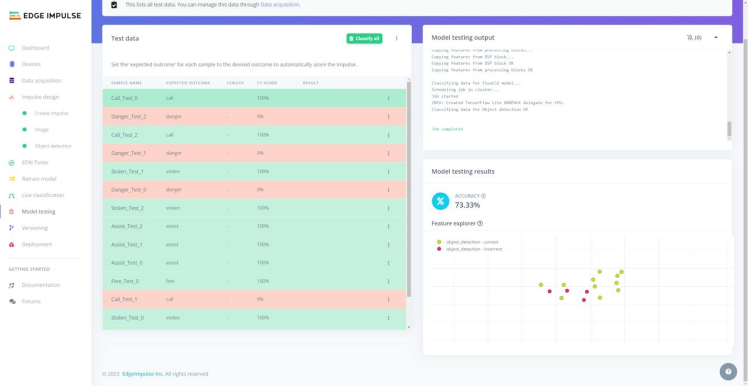
After validating my object detection model, I deployed it as a fully optimized and customizable Arduino library.
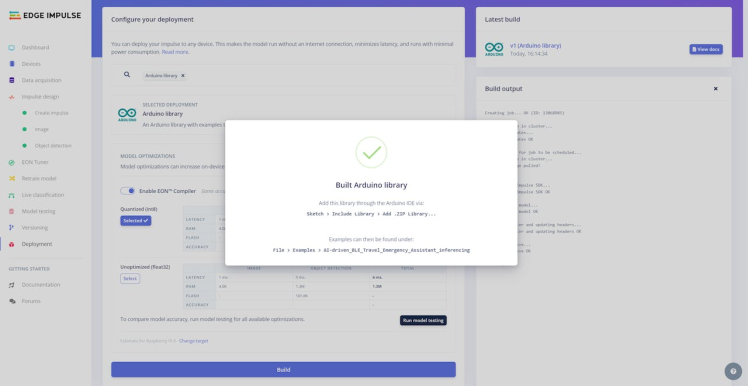
#️⃣ To deploy the validated model as an Arduino library, navigate to the Deployment page and search for Arduino library.
#️⃣ Then, choose the Quantized (int8) optimization option to get the best performance possible while running the deployed model.
#️⃣ Finally, click Build to download the model as an Arduino library.
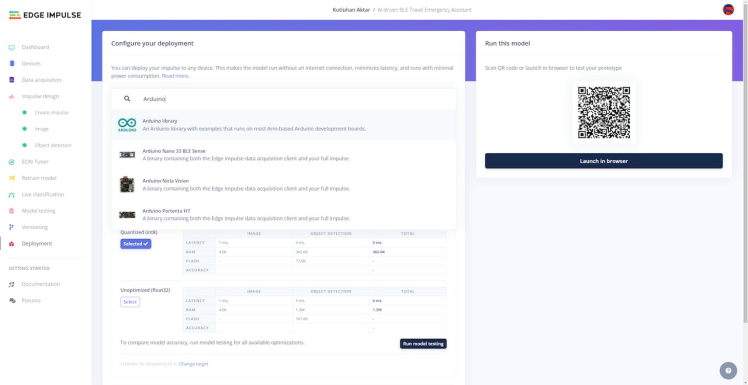
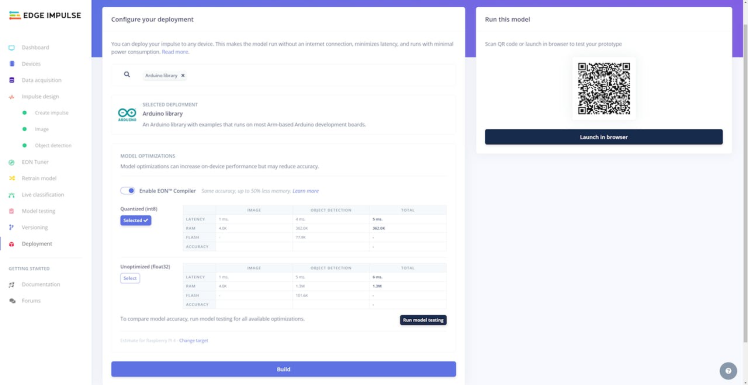
Step 8: Setting up the Edge Impulse FOMO model on XIAO ESP32S3 Sense
After building, training, and deploying my object detection model as an Arduino library on Edge Impulse, I needed to upload the generated Arduino library to XIAO ESP32S3 to run the model directly so as to create an accessible assistive device operating with minimal latency, memory usage, and power consumption.
Since Edge Impulse optimizes and formats signal processing, configuration, and learning blocks into a single package while deploying models as Arduino libraries, I was able to import my model effortlessly to run inferences.
#️⃣ After downloading the model as an Arduino library in the ZIP file format, go to Sketch ➡ Include Library ➡ Add.ZIP Library...
#️⃣ Then, include the AI-driven_BLE_Travel_Emergency_Assistant_inferencing.h file to import the Edge Impulse object detection model.
#include <AI-driven_BLE_Travel_Emergency_Assistant_inferencing.h>After importing my model successfully to the Arduino IDE, I programmed XIAO ESP32S3 to run inferences to detect customized keychains (tokens) every 30 seconds automatically.
Then, I employed XIAO ESP32S3 to transfer the model detection result (emergency class) to the Android application via BLE after running an inference successfully.
Also, as explained earlier, XIAO ESP32S3 can receive commands from the Android application via BLE to collect and save image samples simultaneously.
Since I utilized the same code file to execute all device features consecutively, you can inspect the overlapping functions and instructions in Step 6.
You can download the AI_driven_BLE_Travel_Emergency_Assistant.ino file to try and inspect the code for running an Edge Impulse object detection model and sending the model detection results via BLE.
⭐ Include the built-in Edge Impulse image functions.
⭐ Define the required parameters to run an inference with the Edge Impulse FOMO model.
#include "edge-impulse-sdk/dsp/image/image.hpp"

// Define the required parameters to run an inference with the Edge Impulse FOMO model.
#define CAPTURED_IMAGE_BUFFER_COLS        240
#define CAPTURED_IMAGE_BUFFER_ROWS        240
#define EI_CAMERA_FRAME_BYTE_SIZE         3
uint8_t *ei_camera_capture_out;
⭐ Define the emergency class names.
String classes[] = {"Fine", "Danger", "Assist", "Stolen", "Call"};⭐ In the run_inference_to_make_predictions function:
⭐ Summarize the Edge Impulse FOMO model inference settings and print them on the serial monitor.
⭐ Convert the passed RGB565 raw image buffer to an RGB888 image buffer by utilizing the built-in fmt2rgb888 function.
⭐ Depending on the given model, resize the converted RGB888 buffer by utilizing built-in Edge Impulse image functions.
⭐ Create a signal object from the converted and resized image buffer.
⭐ Run an inference.
⭐ Print the inference timings on the serial monitor.
⭐ Obtain labels (classes) and bounding box measurements for each detected target object on the given image buffer.
⭐ Print the model detection results on the serial monitor.
⭐ Get the imperative predicted label (class).
⭐ Print inference anomalies on the serial monitor, if any.
⭐ Release the image buffers.
void run_inference_to_make_predictions(camera_fb_t *fb){
  // Summarize the Edge Impulse FOMO model inference settings (from model_metadata.h):
  ei_printf("nInference settings:n");
  ei_printf("tImage resolution: %dx%dn", EI_CLASSIFIER_INPUT_WIDTH, EI_CLASSIFIER_INPUT_HEIGHT);
  ei_printf("tFrame size: %dn", EI_CLASSIFIER_DSP_INPUT_FRAME_SIZE);
  ei_printf("tNo. of classes: %dn", sizeof(ei_classifier_inferencing_categories) / sizeof(ei_classifier_inferencing_categories[0]));

  if(fb){
    // Convert the captured RGB565 buffer to RGB888 buffer.
    ei_camera_capture_out = (uint8_t*)malloc(CAPTURED_IMAGE_BUFFER_COLS * CAPTURED_IMAGE_BUFFER_ROWS * EI_CAMERA_FRAME_BYTE_SIZE);
    if(!fmt2rgb888(fb->buf, fb->len, PIXFORMAT_RGB565, ei_camera_capture_out)){ Serial.println("Camera => Cannot convert the RGB565 buffer to RGB888!"); return; }

    // Depending on the given model, resize the converted RGB888 buffer by utilizing built-in Edge Impulse functions.
    ei::image::processing::crop_and_interpolate_rgb888(
      ei_camera_capture_out, // Output image buffer, can be same as input buffer
      CAPTURED_IMAGE_BUFFER_COLS,
      CAPTURED_IMAGE_BUFFER_ROWS,
      ei_camera_capture_out,
      EI_CLASSIFIER_INPUT_WIDTH,
      EI_CLASSIFIER_INPUT_HEIGHT);

    // Run inference:
    ei::signal_t signal;
    // Create a signal object from the converted and resized image buffer.
    signal.total_length = EI_CLASSIFIER_INPUT_WIDTH * EI_CLASSIFIER_INPUT_HEIGHT;
    signal.get_data = &ei_camera_cutout_get_data;
    // Run the classifier:
    ei_impulse_result_t result = { 0 };
    EI_IMPULSE_ERROR _err = run_classifier(&signal, &result, false);
    if(_err != EI_IMPULSE_OK){
      ei_printf("ERR: Failed to run classifier (%d)n", _err);
      return;
    }

    // Print the inference timings on the serial monitor.
    ei_printf("nPredictions (DSP: %d ms., Classification: %d ms., Anomaly: %d ms.): n",
        result.timing.dsp, result.timing.classification, result.timing.anomaly);

    // Obtain the object detection results and bounding boxes for the detected labels (classes).
    bool bb_found = result.bounding_boxes[0].value > 0;
    for(size_t ix = 0; ix < EI_CLASSIFIER_OBJECT_DETECTION_COUNT; ix++){
      auto bb = result.bounding_boxes[ix];
      if(bb.value == 0) continue;
      // Print the calculated bounding box measurements on the serial monitor.
      ei_printf("    %s (", bb.label);
      ei_printf_float(bb.value);
      ei_printf(") [ x: %u, y: %u, width: %u, height: %u ]n", bb.x, bb.y, bb.width, bb.height);
      // Get the predicted label (class).
      if(bb.label == "fine") predicted_class = 0;
      if(bb.label == "danger") predicted_class = 1;
      if(bb.label == "assist") predicted_class = 2;
      if(bb.label == "stolen") predicted_class = 3;
      if(bb.label == "call") predicted_class = 4;
      Serial.print("nPredicted Class: "); Serial.println(bb.label);
    }
    if(!bb_found) ei_printf("    No objects found!n");

    // Detect anomalies, if any:
    #if EI_CLASSIFIER_HAS_ANOMALY == 1
      ei_printf("Anomaly: ");
      ei_printf_float(result.anomaly);
      ei_printf("n");
    #endif

    // Release the image buffers.
    free(ei_camera_capture_out);
  }
}
⭐ In the ei_camera_cutout_get_data function:
⭐ Convert the passed image data (buffer) to the out_ptr format required by the Edge Impulse FOMO model.
⭐ Since the given image data is already converted to an RGB888 buffer and resized, directly recalculate the given offset into pixel index.
static int ei_camera_cutout_get_data(size_t offset, size_t length, float *out_ptr){
  // Convert the given image data (buffer) to the out_ptr format required by the Edge Impulse FOMO model.
  size_t pixel_ix = offset * 3;
  size_t pixels_left = length;
  size_t out_ptr_ix = 0;
  // Since the image data is converted to an RGB888 buffer, directly recalculate offset into pixel index.
  while(pixels_left != 0){
    out_ptr[out_ptr_ix] = (ei_camera_capture_out[pixel_ix] << 16) + (ei_camera_capture_out[pixel_ix + 1] << 8) + ei_camera_capture_out[pixel_ix + 2];
    // Move to the next pixel.
    out_ptr_ix++;
    pixel_ix+=3;
    pixels_left--;
  }
  return 0;
}
⭐ In the update_characteristics function, update the float data characteristic to transmit (advertise) the detected emergency class over BLE.
void update_characteristics(float detection){
  // Update the detection characteristic.
  detection_Characteristic.writeValue(detection);
  Serial.println("nnBLE: Data Characteristics Updated Successfully!n");
}
⭐ If the built-in OV2640 camera and the microSD card module on the expansion board are initialized successfully:
⭐ Capture a frame (RGB565 buffer) with the OV2640 camera.
⭐ Every 30 seconds, run an inference with the Edge Impulse FOMO model to make predictions on the emergency classes.
⭐ If the Edge Impulse FOMO model detects a class successfully, transfer the model detection results to the Android application via BLE.
⭐ Then, notify the user by showing the assigned class icon and the AI logo on the XIAO round display.
⭐ Clear the predicted class (label).
⭐ Finally, update the timer and release the image buffers.
if(camera_activated && sd_activated){
    // Capture a frame (RGB565 buffer) with the OV2640 camera.
    camera_fb_t *fb = esp_camera_fb_get();
    if(!fb){ Serial.println("Camera => Cannot capture the frame!"); return; }

	...

    // Every 30 seconds, run the Edge Impulse FOMO model to make predictions on the emergency classes.
    if(millis() - timer > 30*1000){
      // Run inference.
      run_inference_to_make_predictions(fb);
      // If the Edge Impulse FOMO model detects an emergency class (keychain) successfully:
      if(predicted_class > -1){
        // Update the detection characteristic via BLE.
        update_characteristics(predicted_class);
        // Notify the user on the XIAO round display depending on the detected class.
        tft.drawXBitmap((img_width/2)-(detect_width/2), 2, detect_bits, detect_width, detect_height, TFT_BLACK);
        if(predicted_class == 0) tft.drawXBitmap((img_width/2)-(fine_width/2), (img_height/2)-(fine_height/2), fine_bits, fine_width, fine_height, TFT_GREEN);
        if(predicted_class == 1) tft.drawXBitmap((img_width/2)-(danger_width/2), (img_height/2)-(danger_height/2), danger_bits, danger_width, danger_height, TFT_ORANGE);
        if(predicted_class == 2) tft.drawXBitmap((img_width/2)-(assist_width/2), (img_height/2)-(assist_height/2), assist_bits, assist_width, assist_height, TFT_SILVER);
        if(predicted_class == 3) tft.drawXBitmap((img_width/2)-(stolen_width/2), (img_height/2)-(stolen_height/2), stolen_bits, stolen_width, stolen_height, TFT_NAVY);
        if(predicted_class == 4) tft.drawXBitmap((img_width/2)-(call_width/2), (img_height/2)-(call_height/2), call_bits, call_width, call_height, TFT_GREENYELLOW);
        delay(2000);
        // Clear the predicted class (label).
        predicted_class = -1;
      }
      // Update the timer:
      timer = millis();
    }

	...

    // Release the image buffers.
    esp_camera_fb_return(fb);
    delay(10);
  }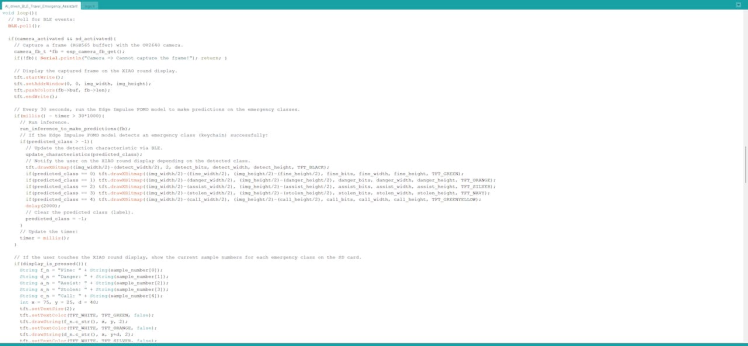
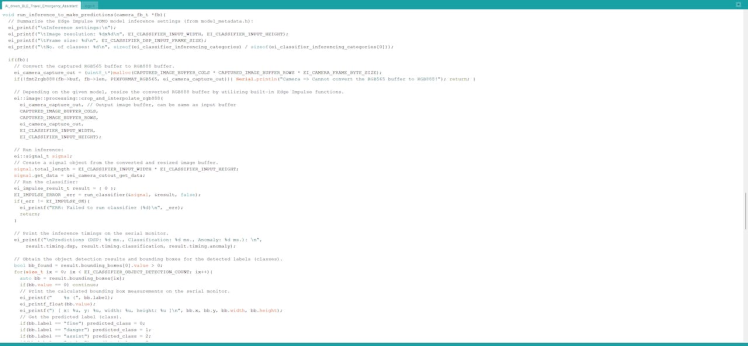
Step 9: Running the model and informing emergency contacts via WhatsApp & SMS
My Edge Impulse object detection (FOMO) model scans a captured image buffer and predicts possibilities of trained labels to recognize a target object on the given picture. The prediction result (score) represents the model's "confidence" that the detected object corresponds to each of the five different labels (classes) [0 - 4], as shown in Step 7:
- 0 — Assist
- 1 — Call
- 2 — Danger
- 3 — Fine
- 4 — Stolen
You can inspect overlapping Android application features, such as BLE device scanning, in Step 6.1.
After setting up and running the Edge Impulse object detection (FOMO) model on XIAO ESP32S3:
📲 ♿ 🌎 After connecting to XIAO ESP32S3 over BLE via the Android application successfully, the user can utilize the assistive device to detect customized keychains (tokens) representing an emergency class (label).
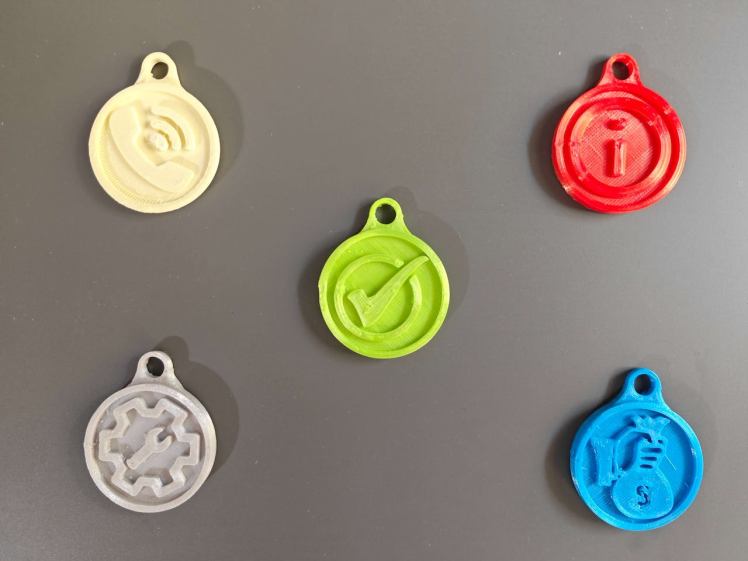
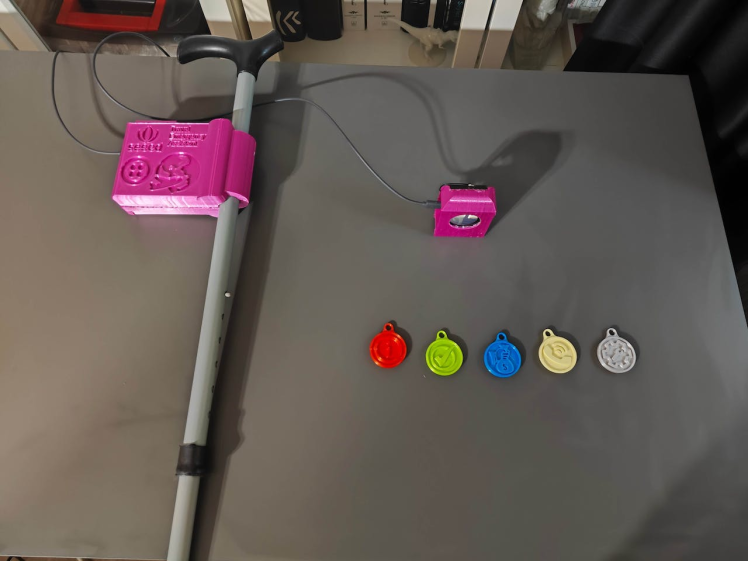
📲 ♿ 🌎 Every 30 seconds, XIAO ESP32S3 runs an inference with the object detection model. If XIAO ESP32S3 detects an emergency class successfully, it notifies the user by showing the assigned class icon and the AI logo on the XIAO round display.
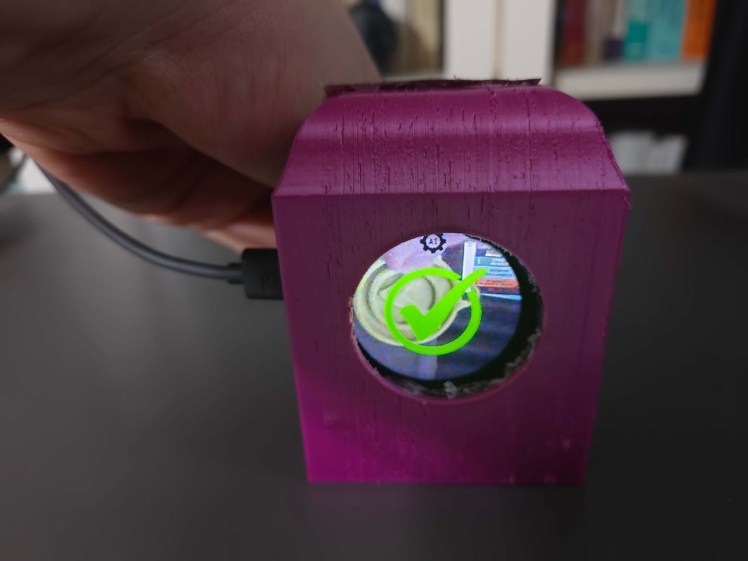
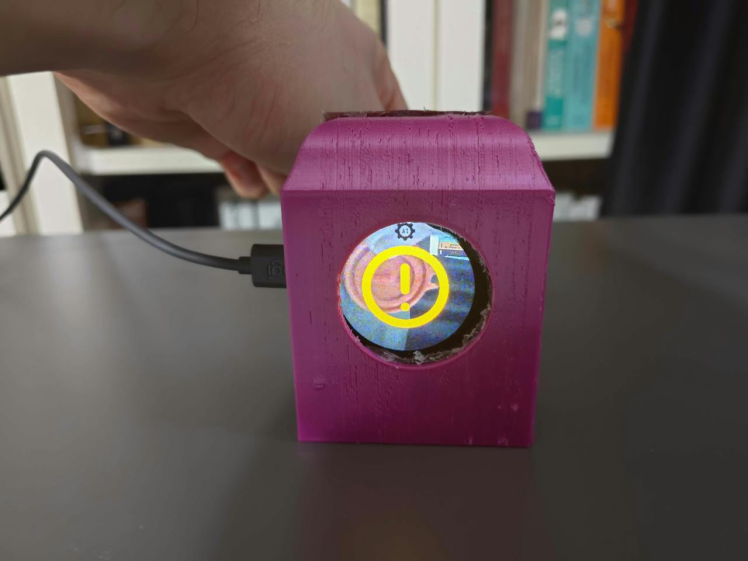
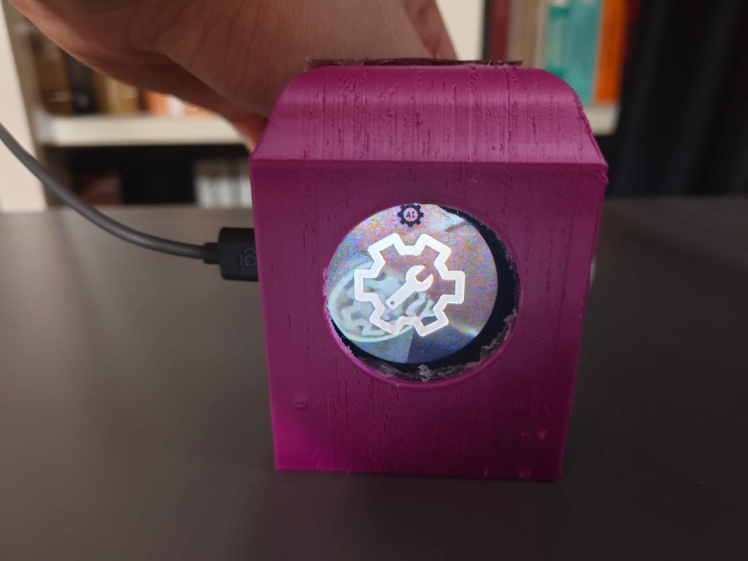
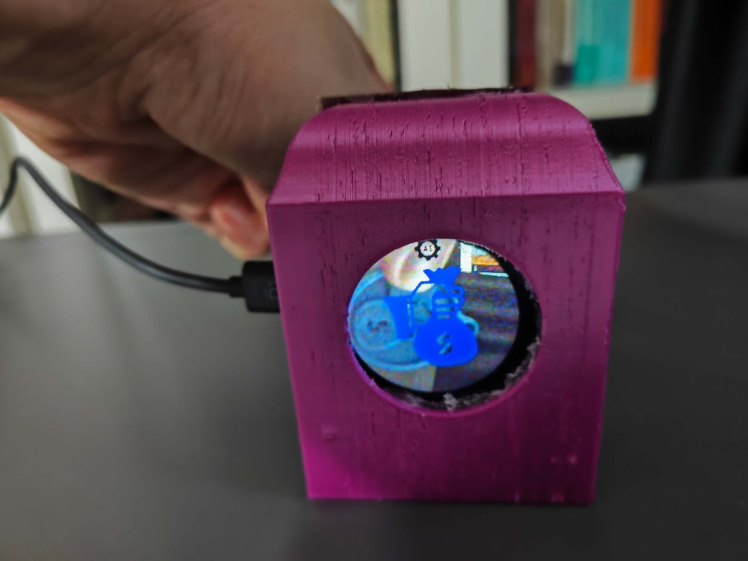
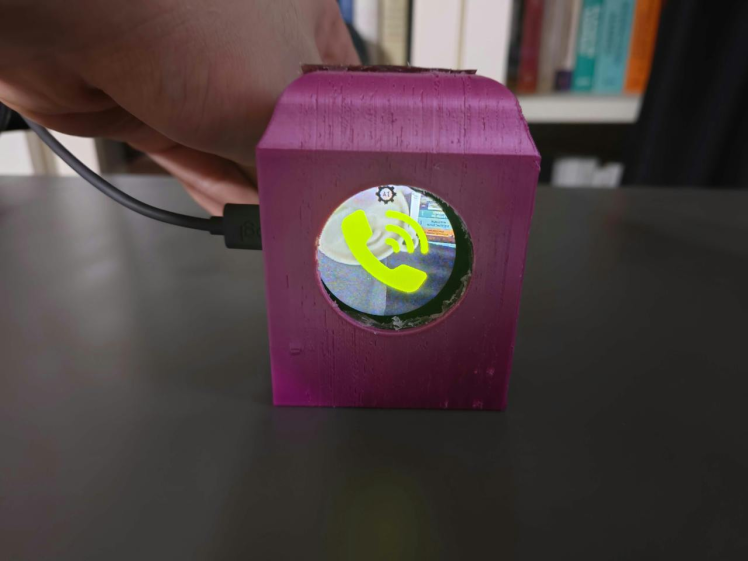
📲 ♿ 🌎 After detecting an emergency class, XIAO ESP32S3 transfers the model detection results to the Android application via BLE.
📲 ♿ 🌎 When the Android application obtains a data packet from XIAO ESP32S3, it displays the model detection results on its interface. Then, the Android application transfers the model detection results, the current location parameters (latitude, longitude, and altitude — GPS), and the current date to the web application via an HTTP GET request (cellular network connectivity — GPRS).
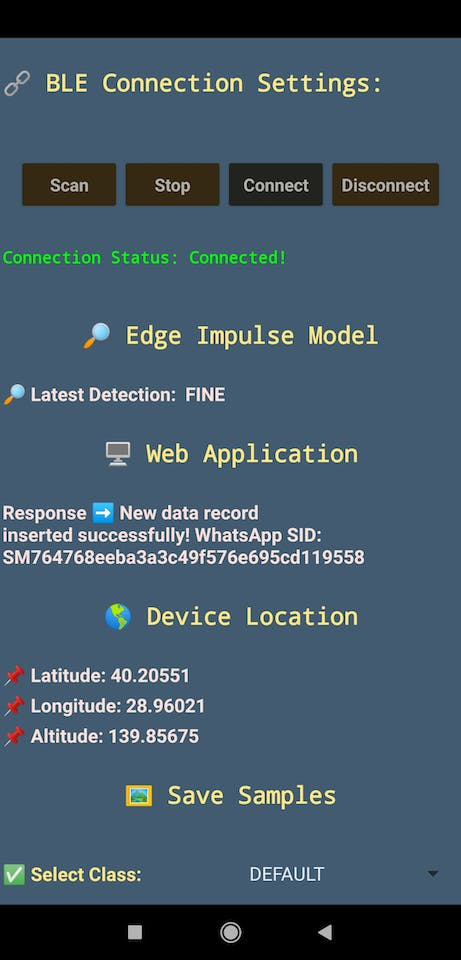
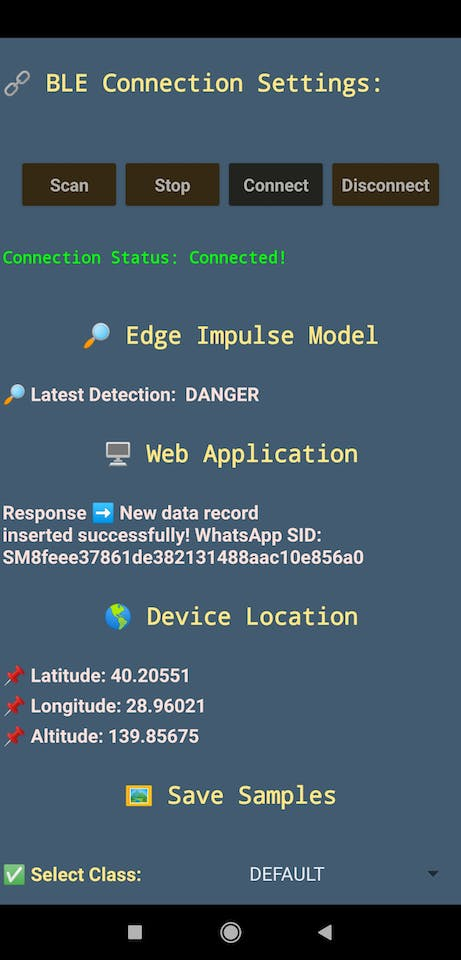
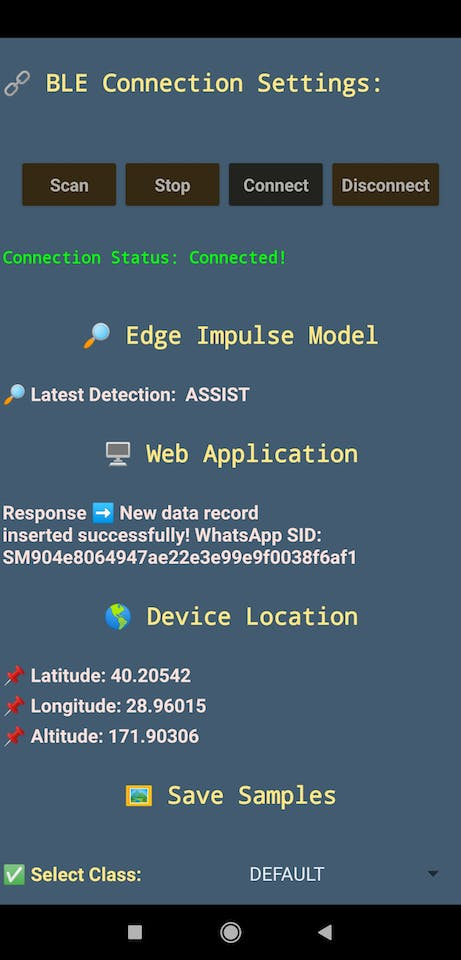
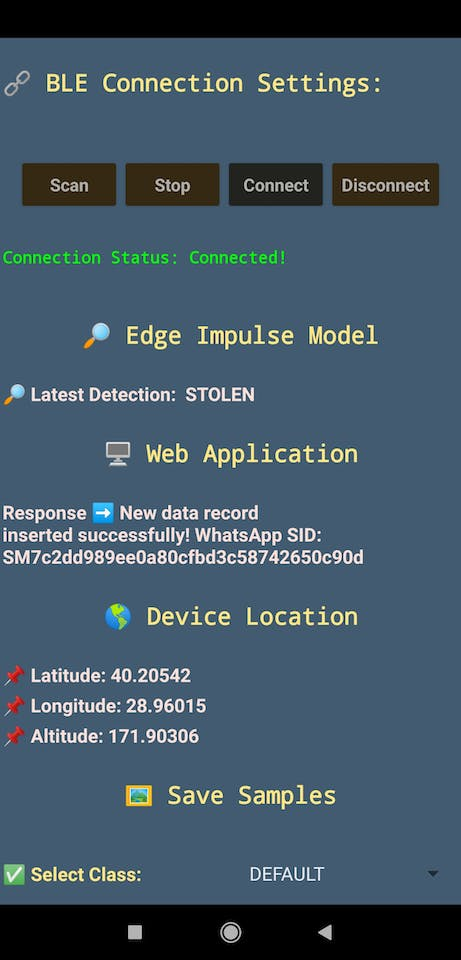
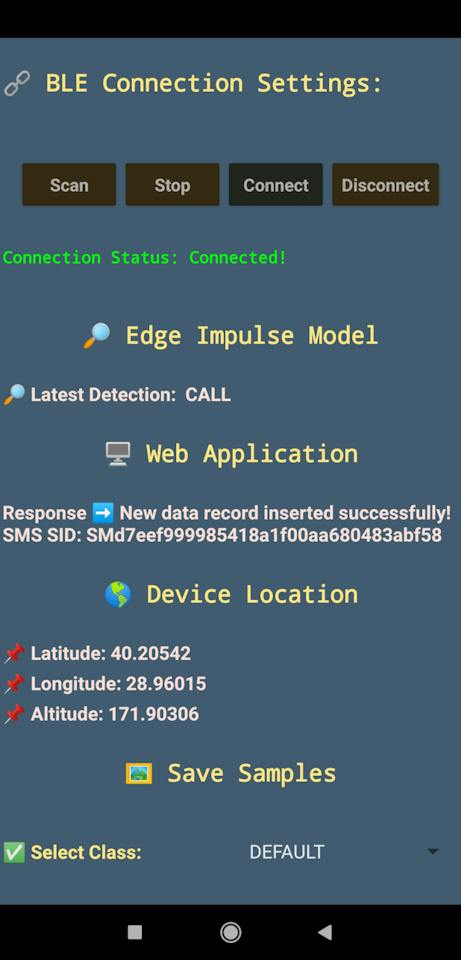
📲 ♿ 🌎 After receiving a data packet from the Android application, the web application decodes the received location information to generate a Google Maps URL with the location parameters.
📲 ♿ 🌎 Then, depending on the detected emergency class, the web application notifies emergency contacts via WhatsApp or SMS by utilizing Twilio's APIs.
📲 ♿ 🌎 The web application sends a notification message to the primary emergency contact via WhatsApp for these emergency classes:
- Fine
😄 👍 I am doing well. I just wanted to add this location as a breadcrumb 😄 👍
- Danger
⚠️ ⚠️ ⚠️ I do not feel safe and may be in peril ⚠️ ⚠️ ⚠️
- Assist
♿ ♿ ♿ I may need your assistance due to restrictive layouts ♿ ♿ ♿
- Stolen
💰 👮🏻 💰 Someone managed to purloin my valuables near this location 💰 👮🏻 💰
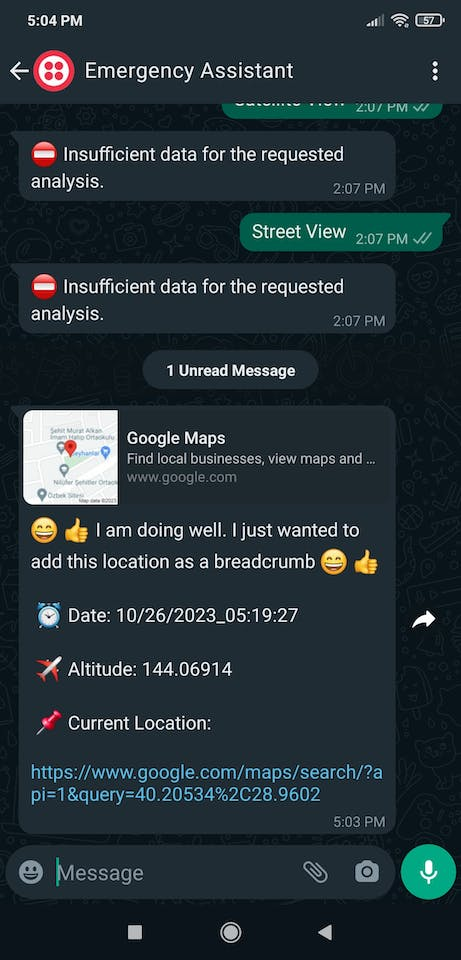
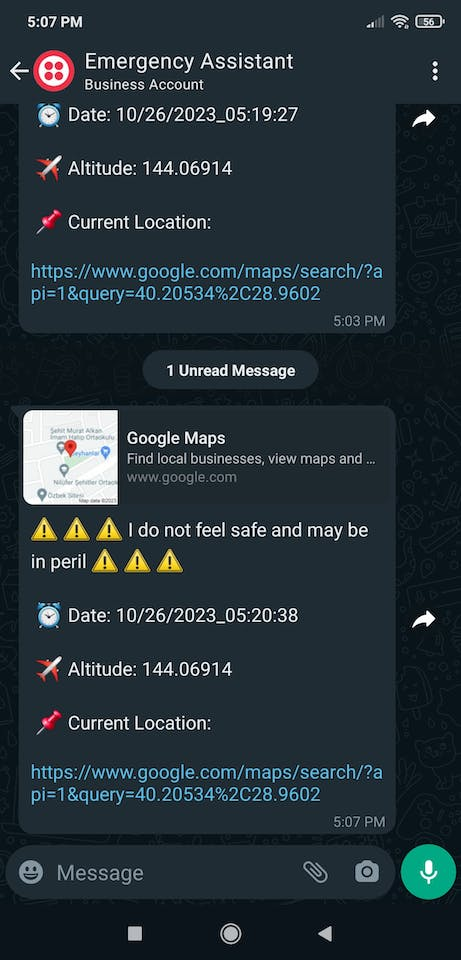
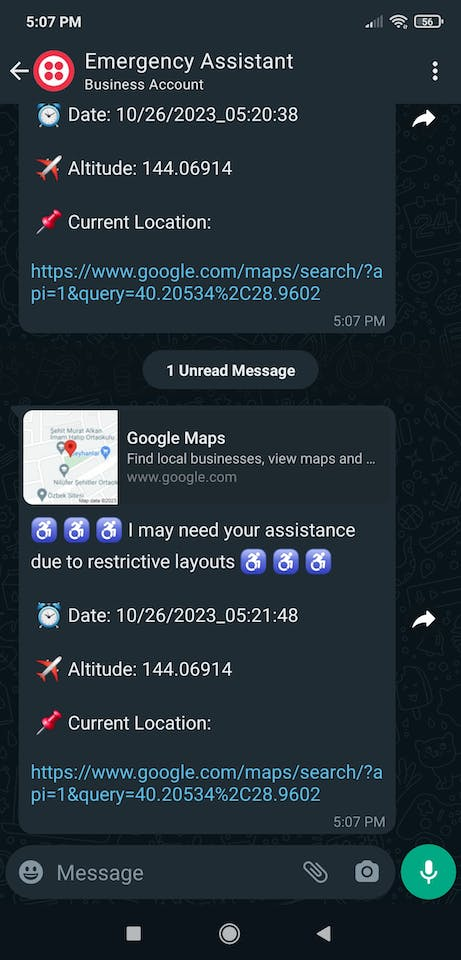
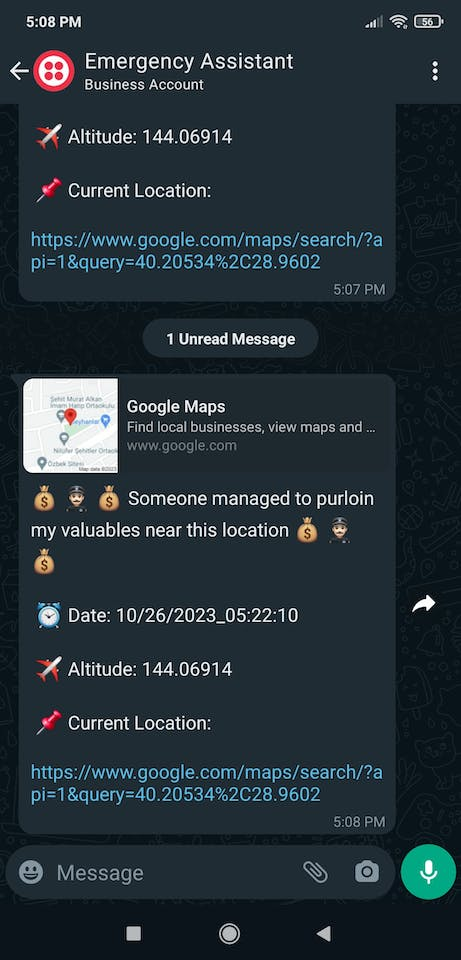
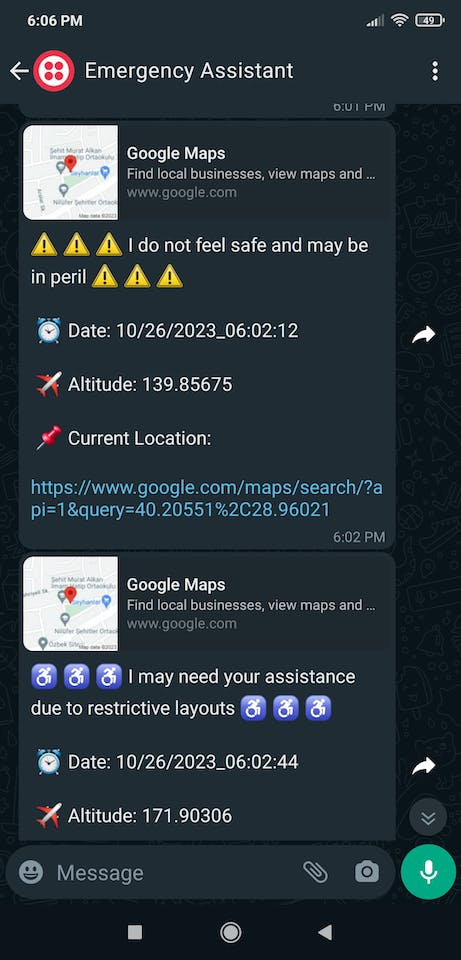
📲 ♿ 🌎 The web application sends a notification message to the secondary emergency contact via SMS for this emergency class:
- Call
📞 ☎️ 📞 Please inform my first emergency contact that I am near this location 📞 ☎️ 📞
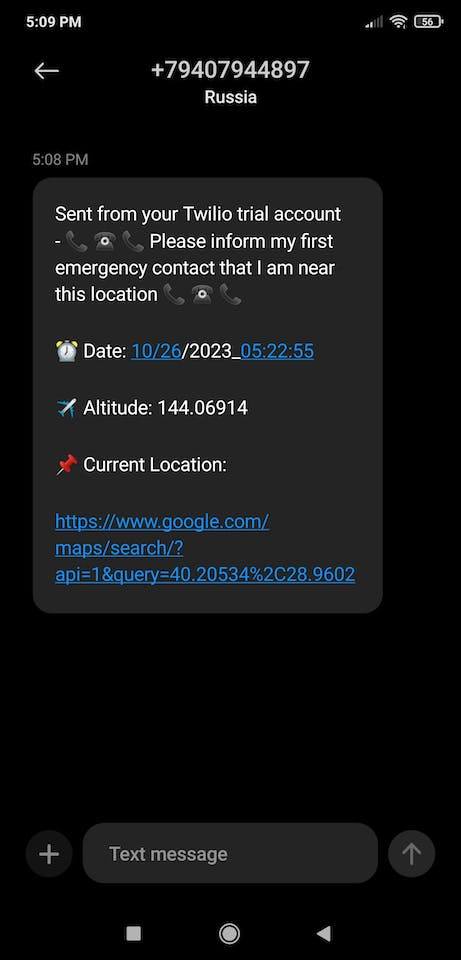
📲 ♿ 🌎 When the web application informs the emergency contact of the detected emergency class successfully, the Android application shows the server response, including SMS or WhatsApp message SID assigned by Twilio.
📲 ♿ 🌎 Also, XIAO ESP32S3 prints notifications and detection results on the serial monitor for debugging.
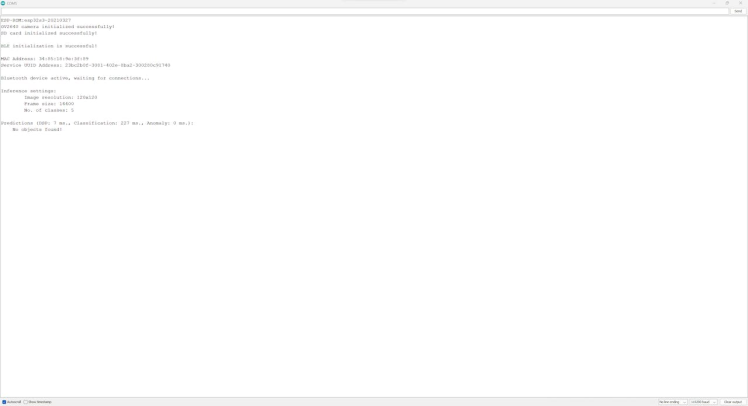
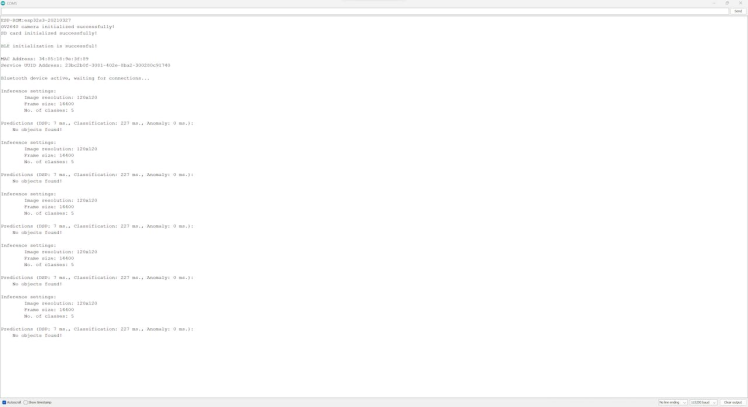
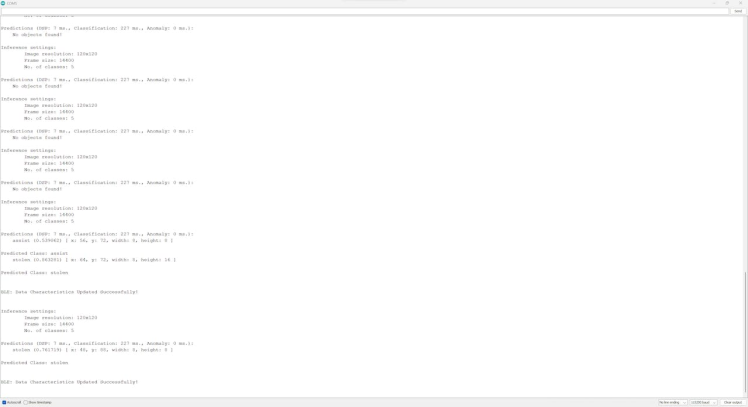
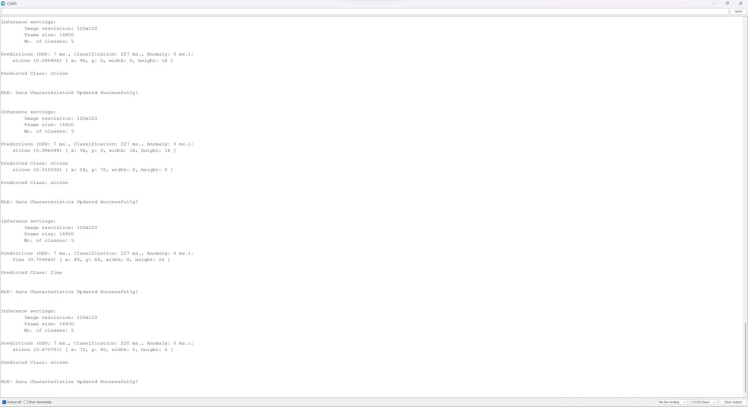
As far as my experiments go, the assistive device detects emergency classes accurately, transmits the model detection results to the Android application via BLE, and informs emergency contacts of the latest detection results over WhatsApp or SMS via the web application flawlessly :)
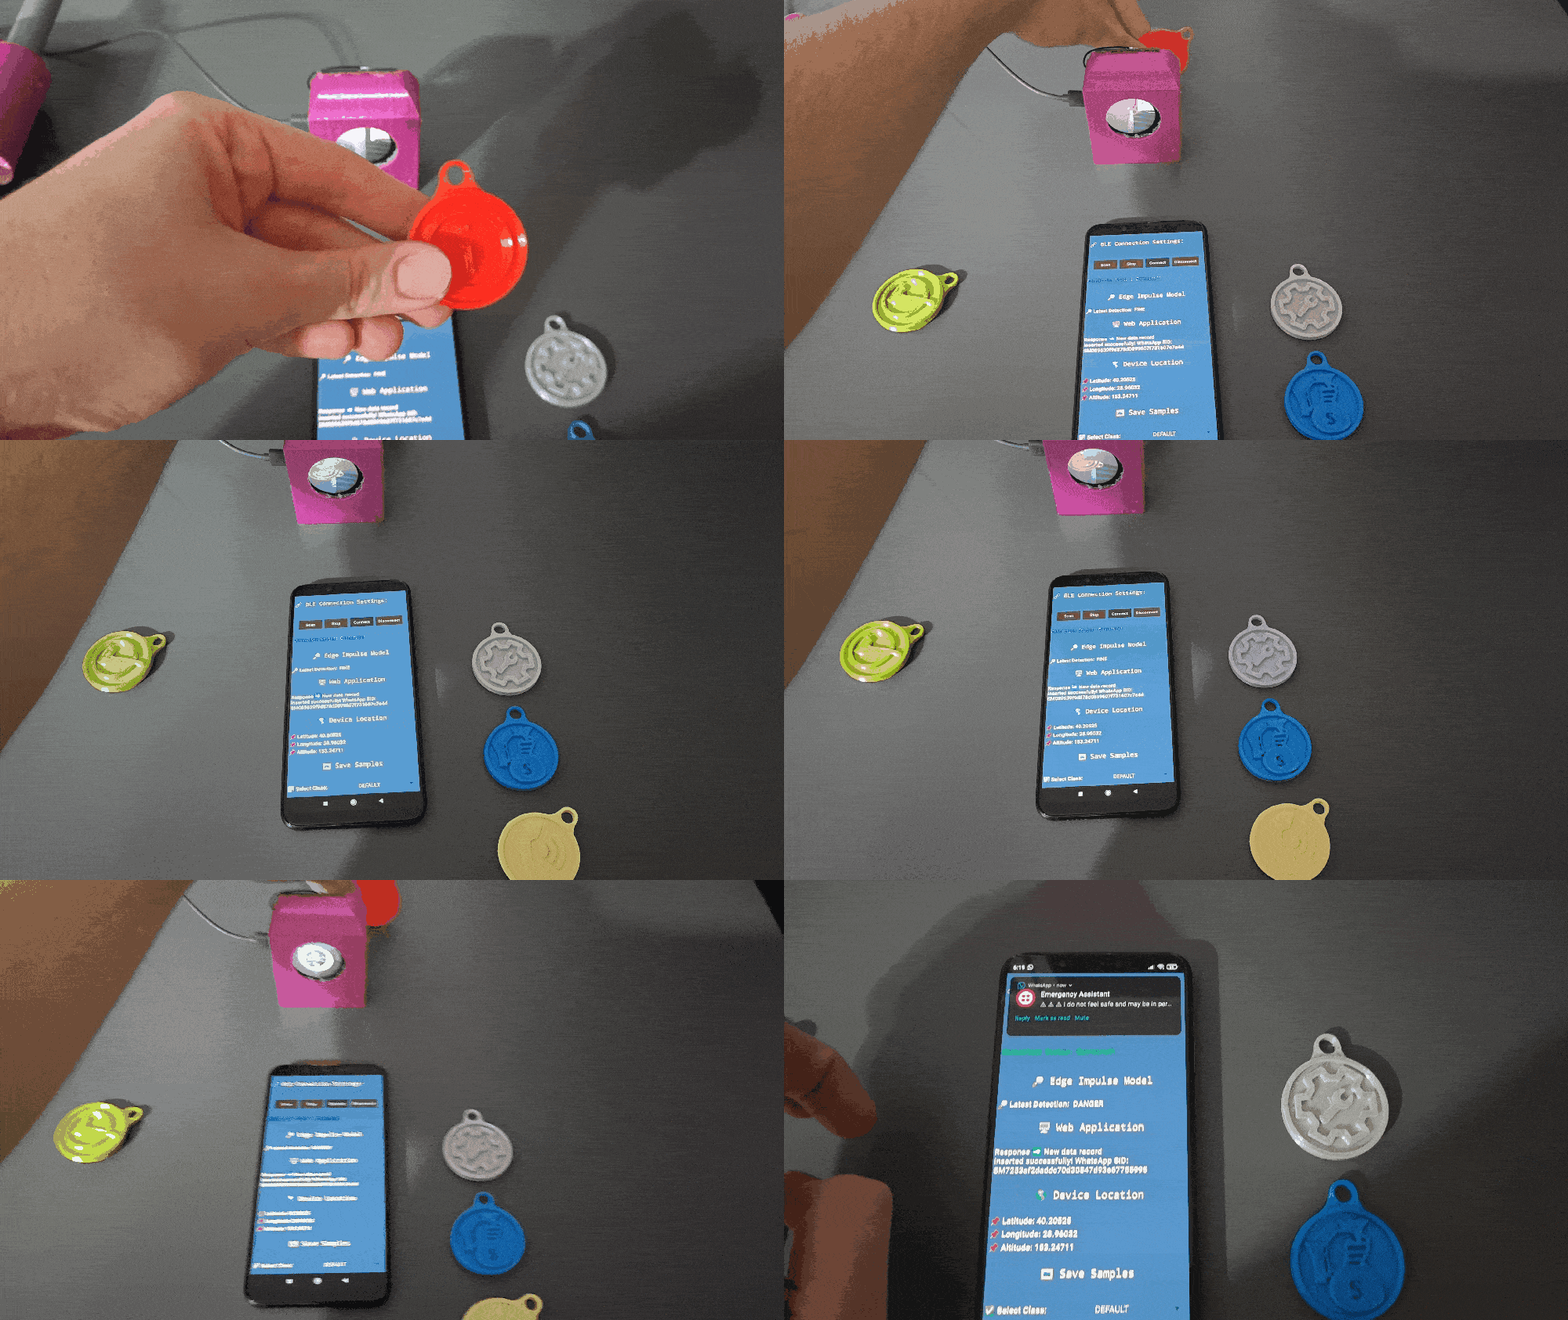
Step 9.1: Providing emergency contacts w/ thorough location inspections generated by Google Maps via WhatsApp
As explained in Step 4.1, the web application saves the data packets transferred by the Android application to a MySQL database table. In this regard, I decided to utilize the stored location data in the database table to provide emergency contacts with thorough location inspections generated by Google Maps so as to comprehend the user's travel route until the latest notification message (database entry).
📲 ♿ 🌎 The web application allows the primary emergency contact to send inquiries (requests) over WhatsApp via Twilio's WhatsApp API.
- ➡️ Route Walking
- ➡️ Route Bicycling
- ➡️ Route Driving
- ➡️ Show Waypoints
- ➡️ Terrain View
- ➡️ Satellite View
- ➡️ Street View

📲 ♿ 🌎 If the stored data records in the database table are insufficient to generate the requested analysis, the web application notifies the primary emergency contact over WhatsApp.
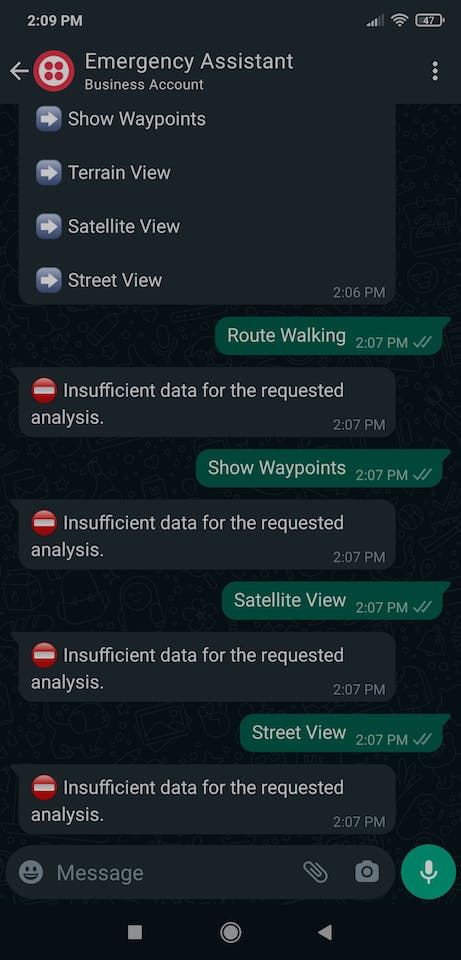
📲 ♿ 🌎 According to the received supported command (request), the web application generates thorough location inspections with the stored location parameters by utilizing Google Maps URL API.
📲 ♿ 🌎 Then, the web application sends the generated location inspection as feedback to the primary emergency contact over WhatsApp.
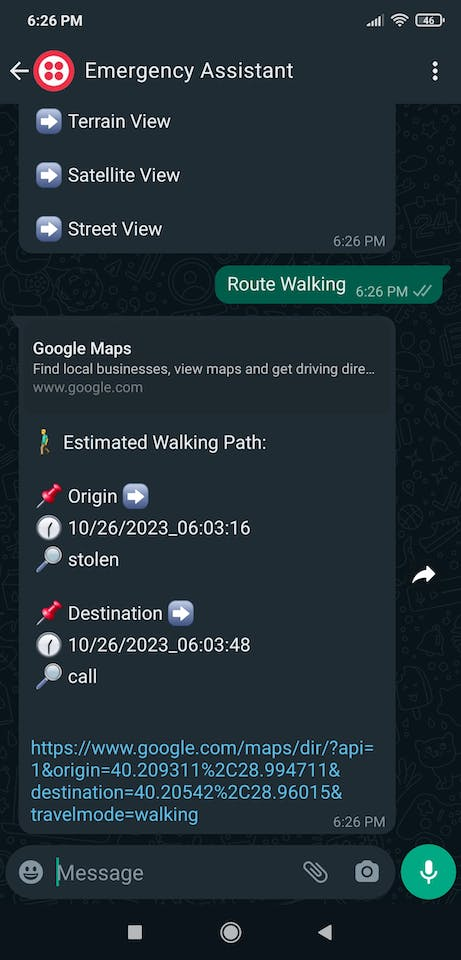
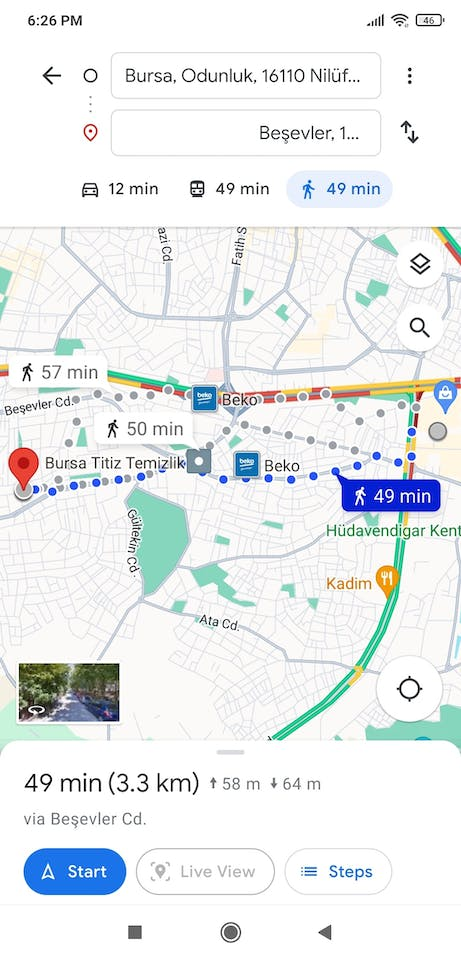
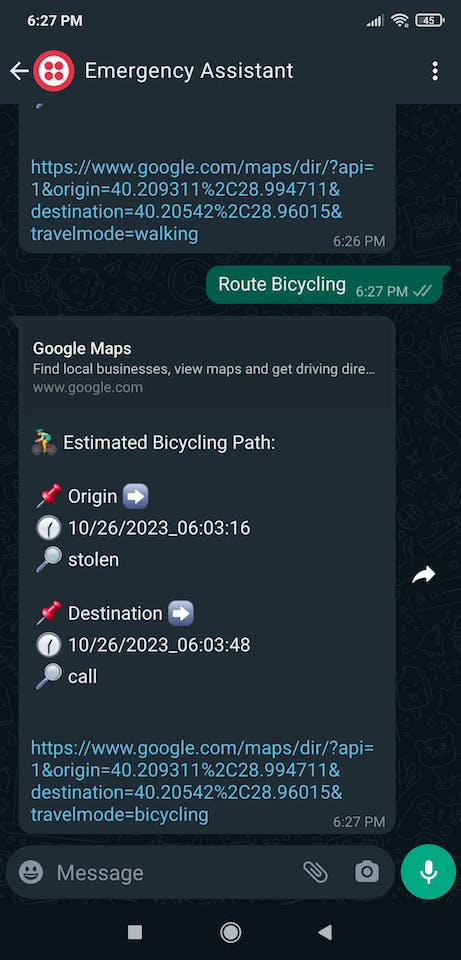
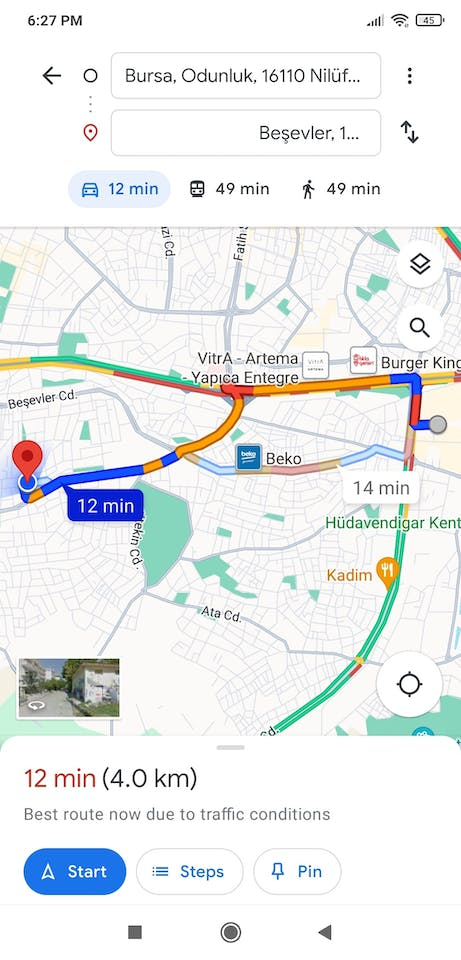
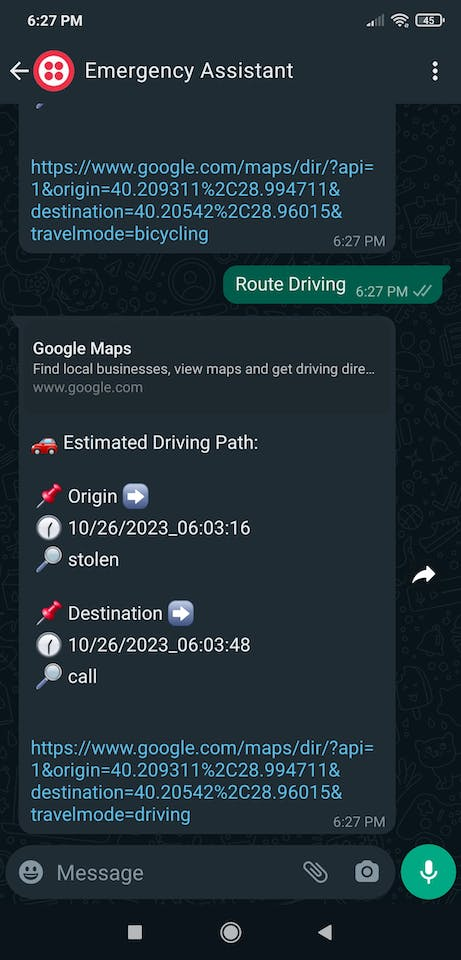
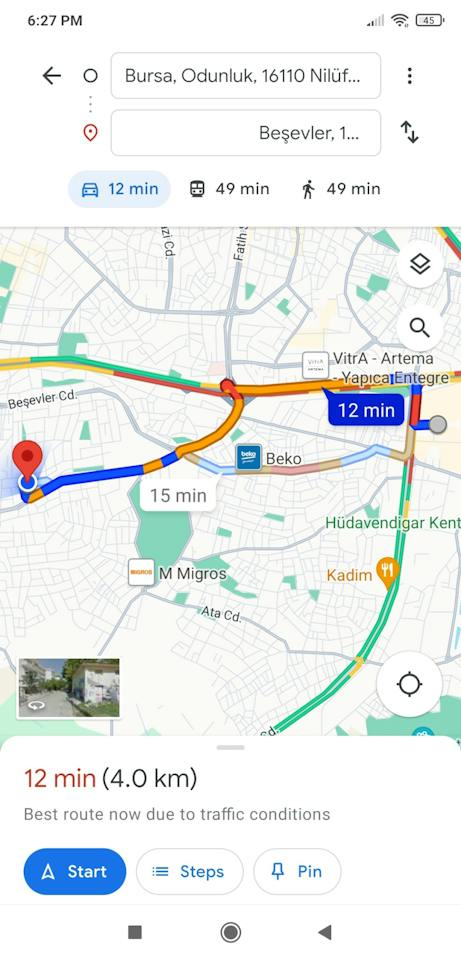
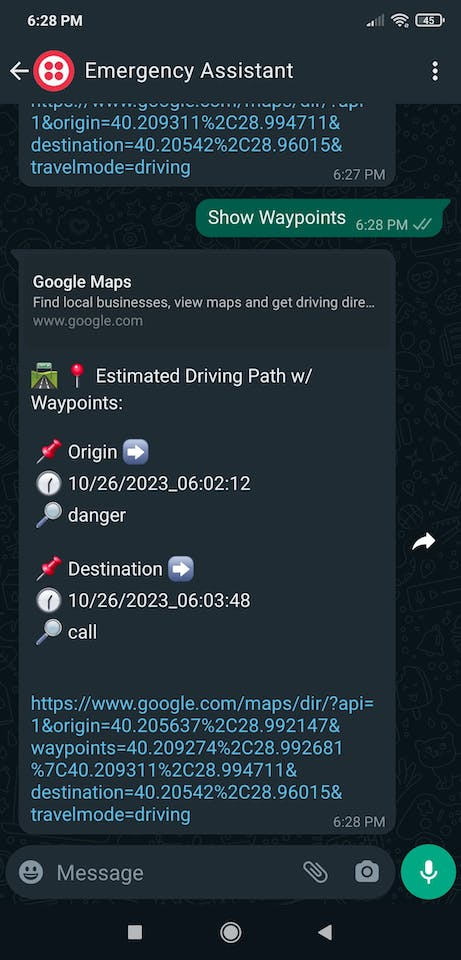
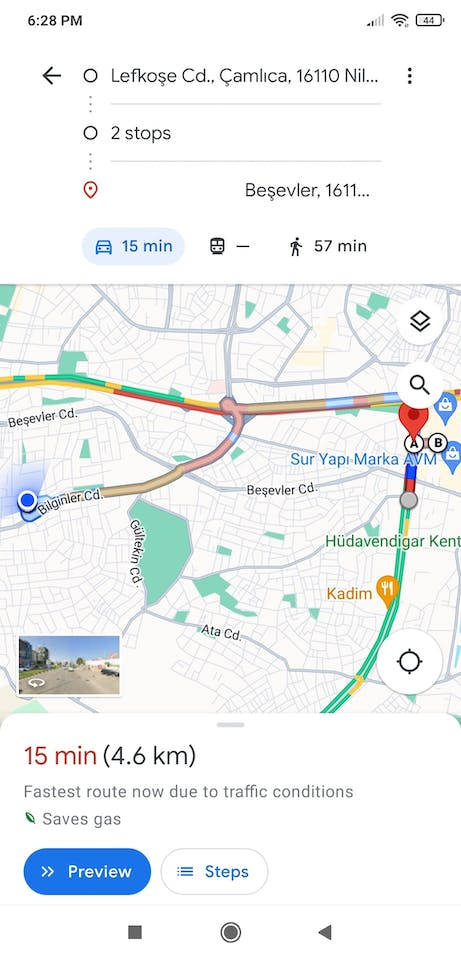
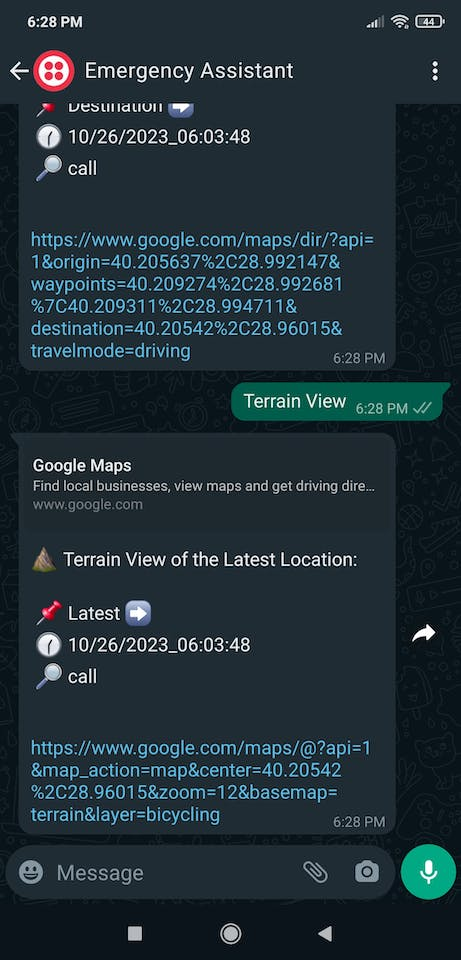
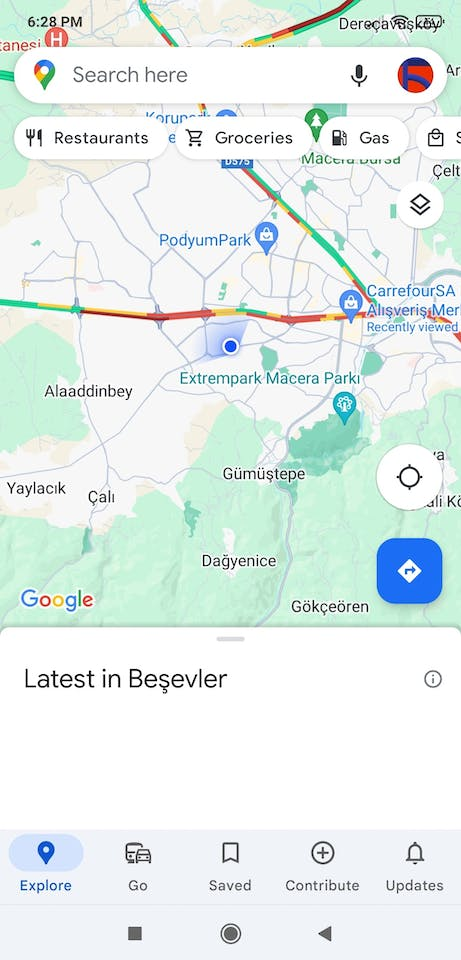
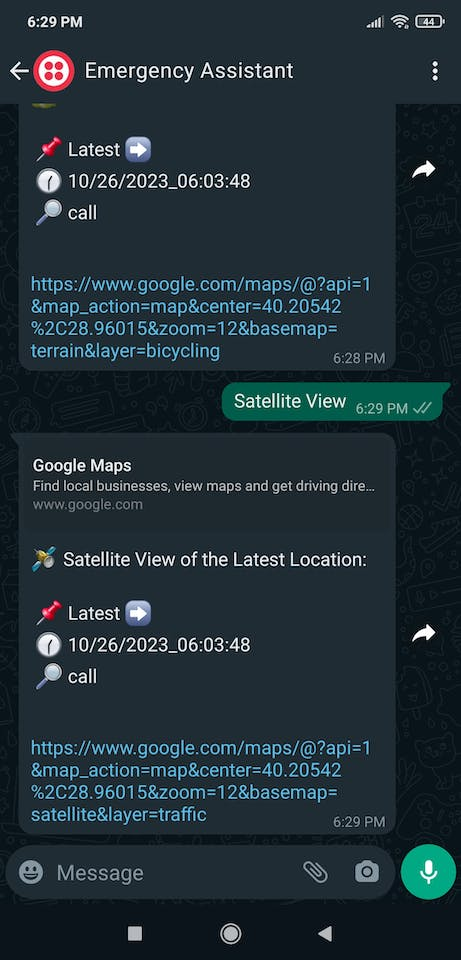
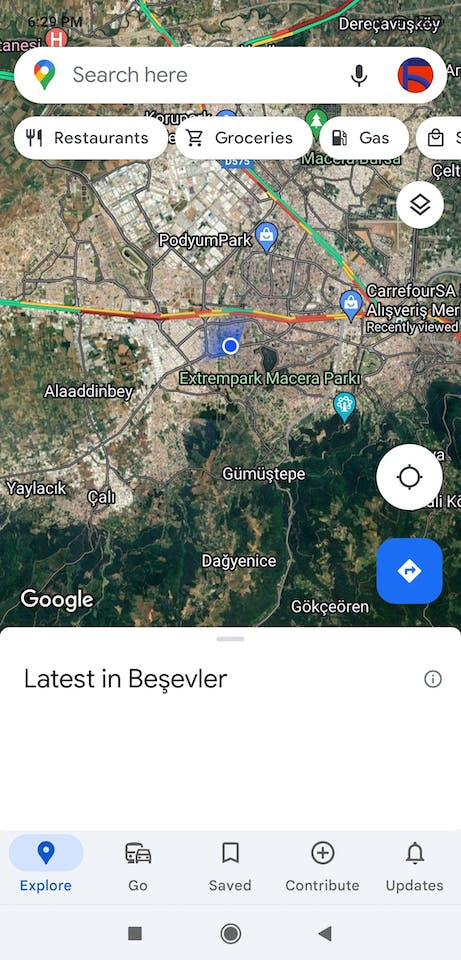
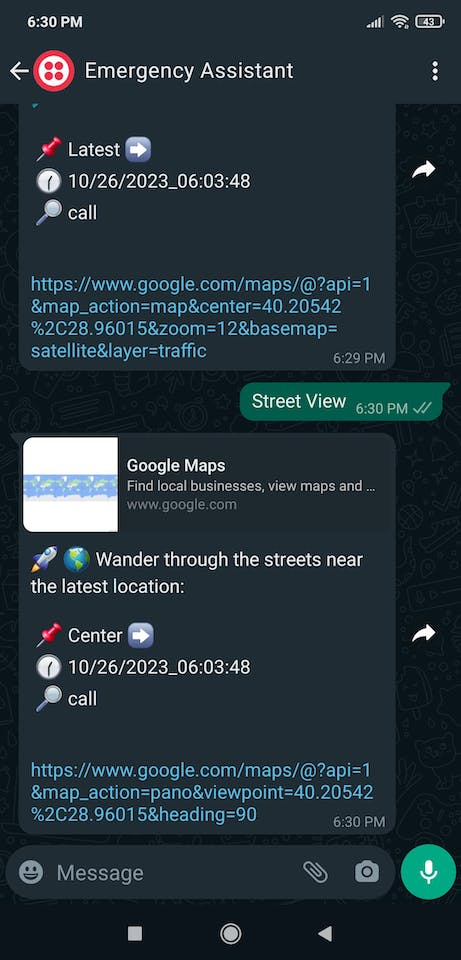
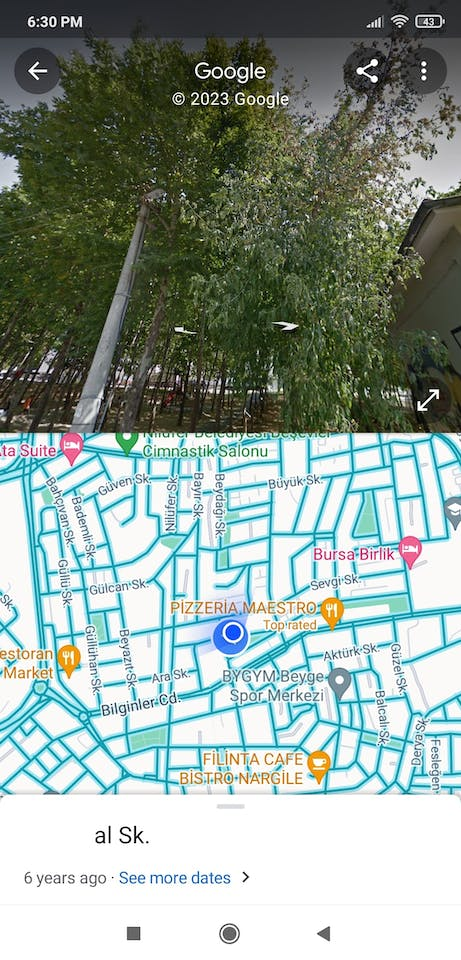
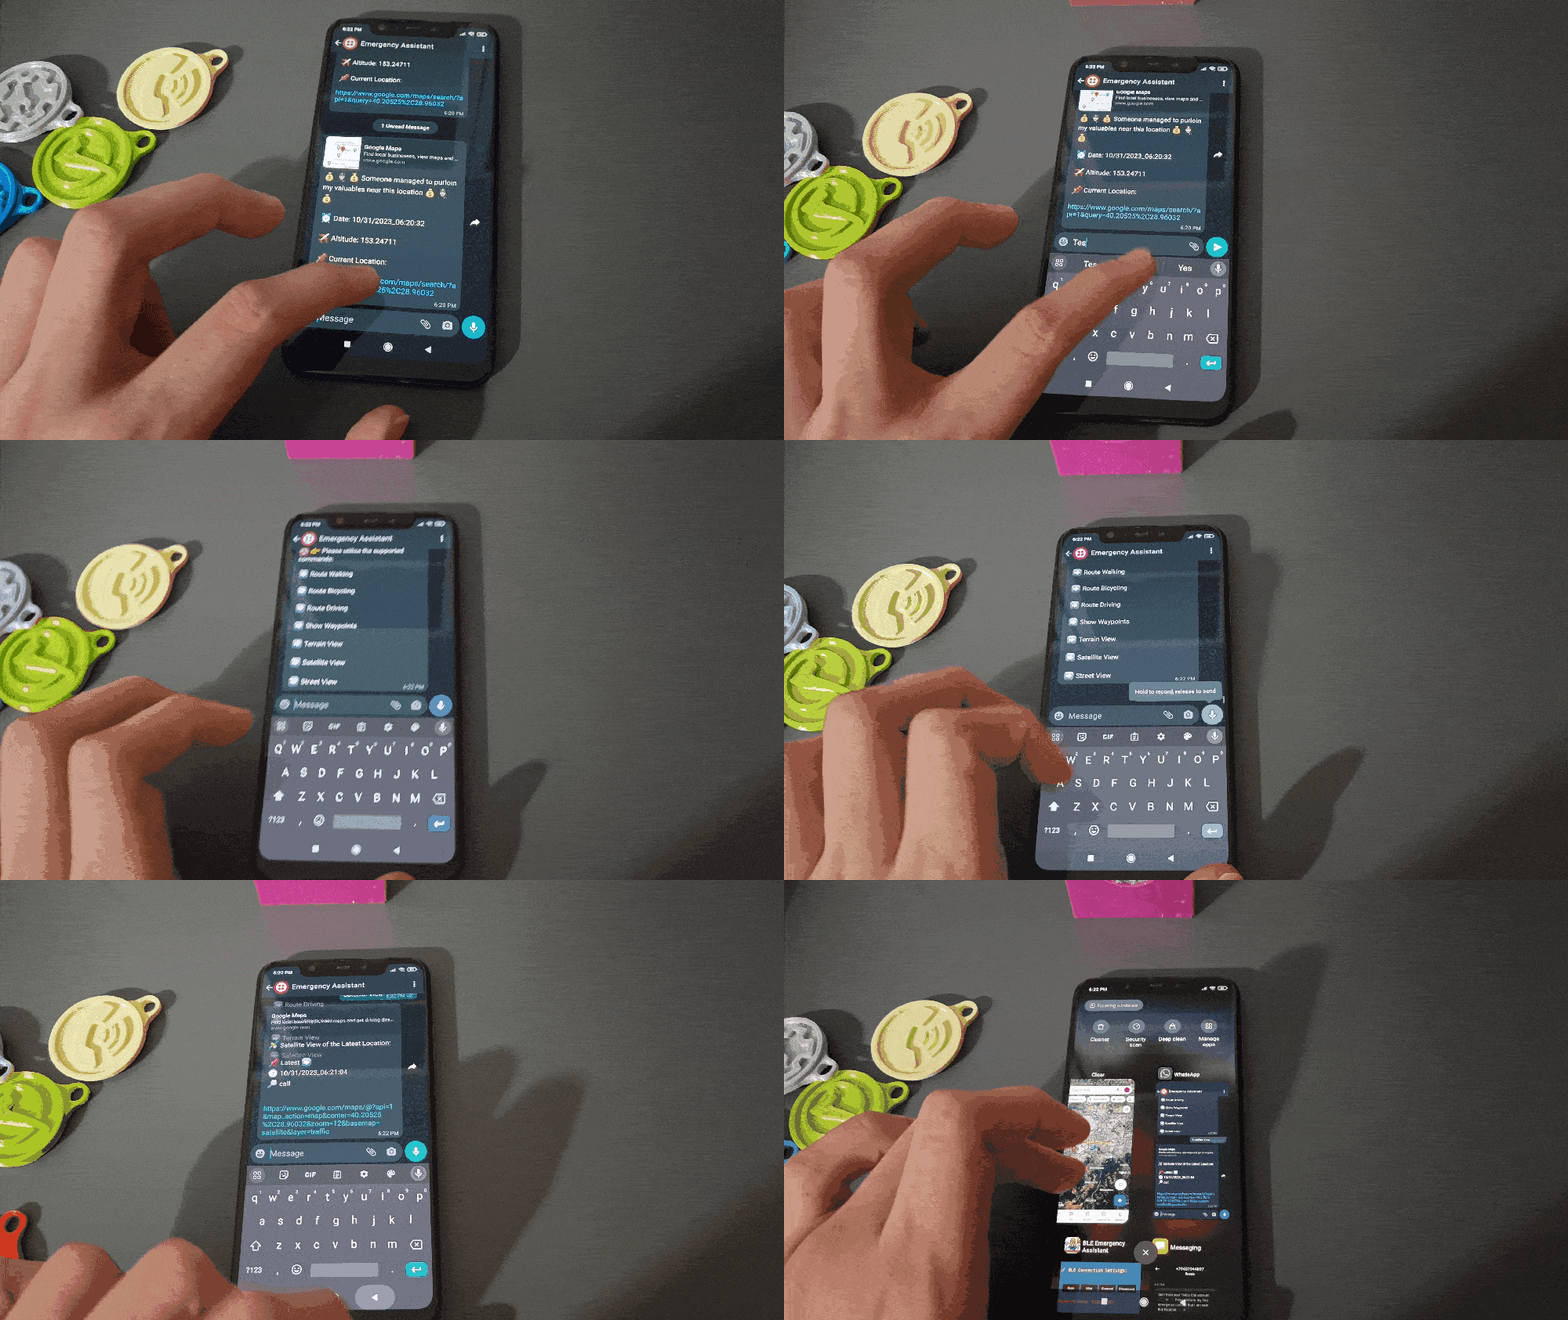
Videos and Conclusion
Further Discussions
By applying object detection models trained on customized keychains (tokens) in detecting emergencies covertly to assistive devices, we can achieve to:
📲 ♿ 🌎 preclude offenders from committing crimes against people with disabilities,
📲 ♿ 🌎 help people with mobility impairments to capitalize on smartphone features during emergencies,
📲 ♿ 🌎 provide versatile notification options specialized for mobility aids,
📲 ♿ 🌎 inform emergency contacts of potential emergencies with location data immediately,
📲 ♿ 🌎 generate a travel itinerary related to previously visited destinations if requested by emergency contacts.
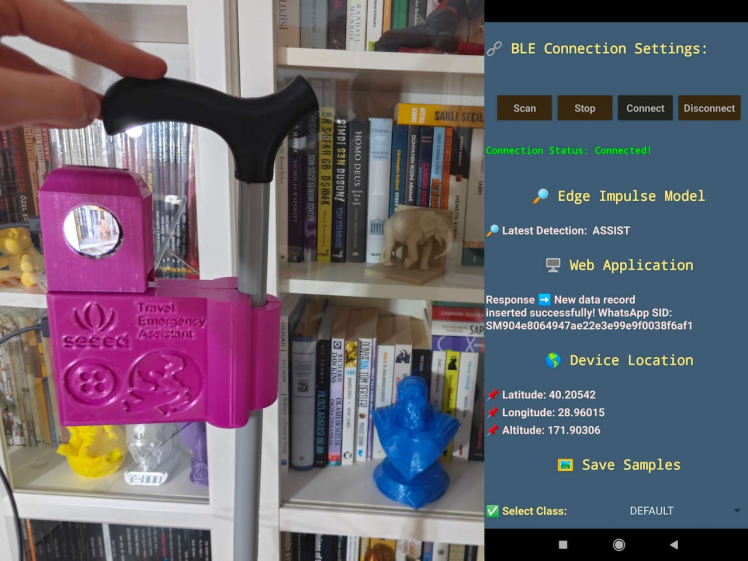
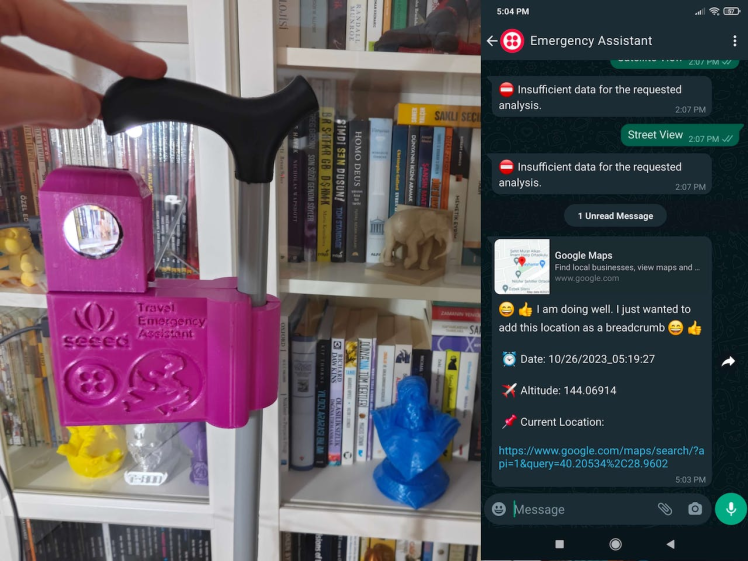
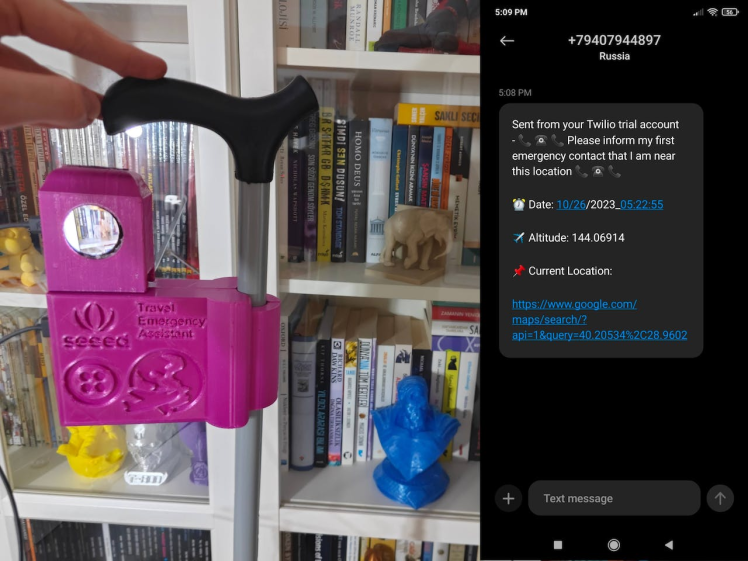
References
[1] Disability Rights California, Abuse, Neglect, and Crimes Against People with Disabilities, https://www.disabilityrightsca.org/what-we-do/programs/abuse-neglect-and-crimes-against-people-with-disabilities
[2] Załuska U, Kwiatkowska-Ciotucha D, Grześkowiak A., Travelling from Perspective of Persons with Disability: Results of an International Survey, International journal of environmental research and public health, vol. 19, 17 10575, 25 Aug. 2022, https://doi.org/10.3390/ijerph191710575
Schematics, diagrams and documents
CAD, enclosures and custom parts
Code
Credits

kutluhan_aktar
AI & Full-Stack Developer | @EdgeImpulse | @Particle | Maker | Independent Researcher


