Add Voice Control To Lego Planetarium Using Arduino Nano 33
About the project
Our aim is to build a voice-activated planetarium using an Arduino Nano 33 IoT, a Nema 17 motor, and a Lego planetarium kit. This combination is sure to make for a fun and innovative experience. Let’s dive in and get started! Imagine if you tell the planetarium to "move forward ten days," and it does as you say.
Project info
Difficulty: Moderate
Platforms: Arduino
Estimated time: 2 days
License: GNU General Public License, version 3 or later (GPL3+)
Items used in this project
Hardware components
Story
The goal behind this project was to give the well-known Lego planetarium a voice-activated, high-tech makeover. The brains of this project are the Arduino Nano 33 IoT, which uses a Nema 17 motor to power the planetarium. This makes it possible for voice instructions to automatically control its movements. A 16x2 LCD panel that displays the planetarium's current status and functionality will also be included. This project attempts to offer a new level of interaction to a standard teaching tool while also improving its functionality. By combining Lego with modern technology, we can create an engaging, educational, and amusing experience for people of all ages.
Explanation of the components and their roles:
Arduino Nano 33 IoT: This microcontroller will serve as the brain of our project, handling voice commands and controlling the motor.
Nema 17 motor: This stepper motor will drive the planetarium, allowing precise control of its movements.
A4988 Motor Driver: This driver will interface between the Arduino and the Nema 17 motor, ensuring smooth and accurate operation.
16x2 LCD: This display will show the current status and actions of the planetarium, making it easy to see what's happening at a glance.
Lego planetarium kit: The foundation of our project, this kit will be enhanced with our electronics to create a fully interactive experience.
With these components, we'll be able to create a fun and educational voice-controlled planetarium. Let's get started!
Hardware Assembly:
Preparing the Lego planetarium:
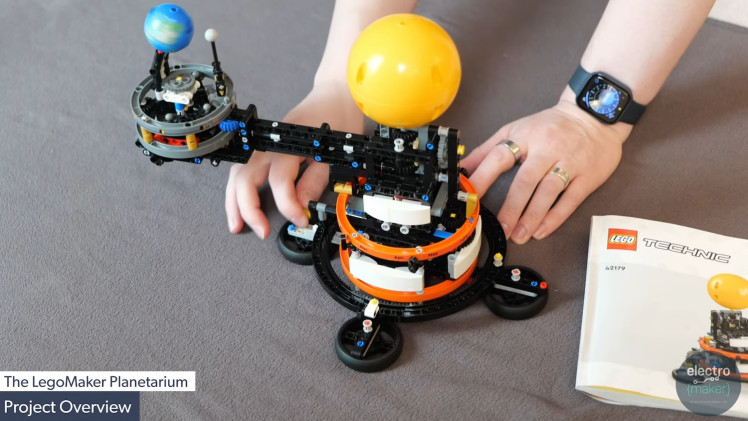
Start by assembling the Lego planetarium kit according to the instructions provided. Ensure that all the components fit together correctly and that the crank mechanism operates smoothly. This will serve as the foundation for our project, so it's essential to get this part right.
Connecting the Nema 17 motor to the planetarium:
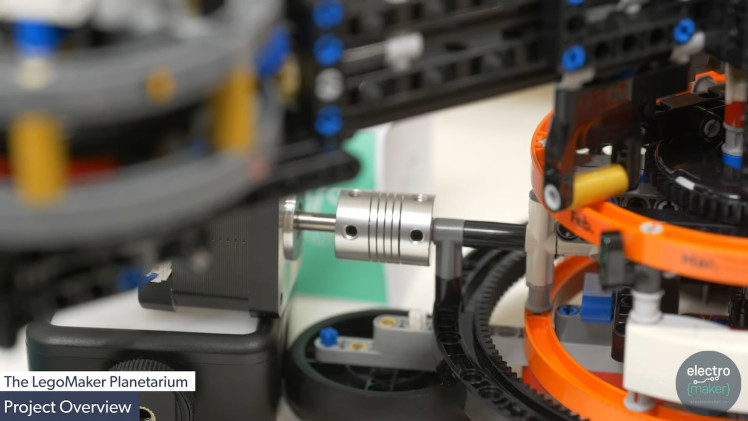
To automate the planetarium's movements, we need to replace the manual crank with the Nema 17 motor. Carefully remove the crankshaft and find a way to securely attach the motor to the planetarium's input shaft. This may require some creative engineering, such as using a coupler or 3D-printed parts to ensure a snug fit. Make sure the motor is aligned correctly to avoid any binding or excessive wear.
Setting up the Arduino Nano 33 IoT and the A4988 Motor Driver:
Next, we'll set up the brain of our project. Start by mounting the Arduino Nano 33 IoT onto a breadboard. Connect the A4988 motor driver to the Arduino, ensuring that all necessary pins are properly wired. The motor driver will interface between the Arduino and the Nema 17 motor, allowing for precise control of the motor's movements.
Wiring the components on the breadboard:
With the Arduino and motor driver in place, it's time to wire up the rest of the components. Connect the Nema 17 motor to the A4988 motor driver, making sure to follow the correct wiring diagram. Attach the 16x2 LCD to the Arduino, ensuring that the I2C connections (SDA and SCL) are correctly routed. Finally, power everything up by connecting the Arduino to a suitable power source, such as a USB cable or a dedicated power supply.
Carefully check all connections to make sure they are secure and correctly aligned. This step is crucial to ensure the smooth operation of your voice-controlled planetarium.
With the hardware assembled, we're ready to move on to the software setup!
Enclosure and Display:
Designing and 3D printing the enclosure:
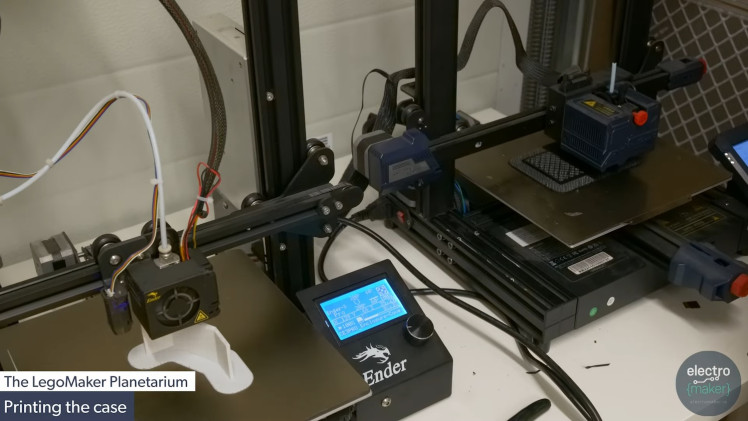
To protect and neatly house our components, we'll design a custom enclosure. Using a 3D modeling software, create an enclosure that fits the Arduino Nano 33 IoT, the A4988 motor driver, and the breadboard. Ensure there are openings for the USB cable, motor cables, and the 16x2 LCD. If you don't have access to 3D modeling software, there are many online resources and pre-made designs that might suit your needs. Once the design is complete, print the enclosure using a 3D printer.
Assembling the components inside the enclosure:
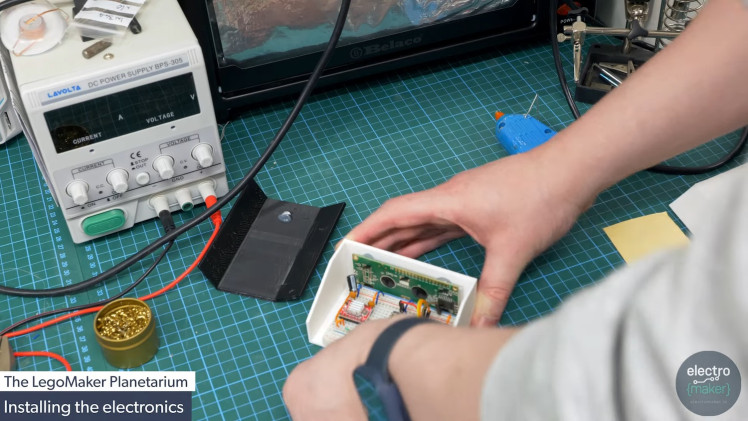
With the 3D-printed enclosure ready, it's time to assemble the components inside. Start by placing the breadboard with the Arduino Nano 33 IoT and the A4988 motor driver into the enclosure. Secure them in place using screws or adhesive, ensuring that all connections remain intact. Make sure there's enough space around the components for airflow and easy access to the wiring.
Attaching the 16x2 LCD to the enclosure:
Next, we'll attach the 16x2 LCD to the front of the enclosure. Carefully insert the LCD into the designated opening, making sure it fits snugly. Use hot glue or screws to secure the LCD in place. Ensure that the LCD's I2C connections are still accessible from the inside so you can connect them to the Arduino. Once the LCD is securely attached, connect it to the Arduino using jumper wires, following the correct wiring diagram for I2C connections (SDA and SCL).
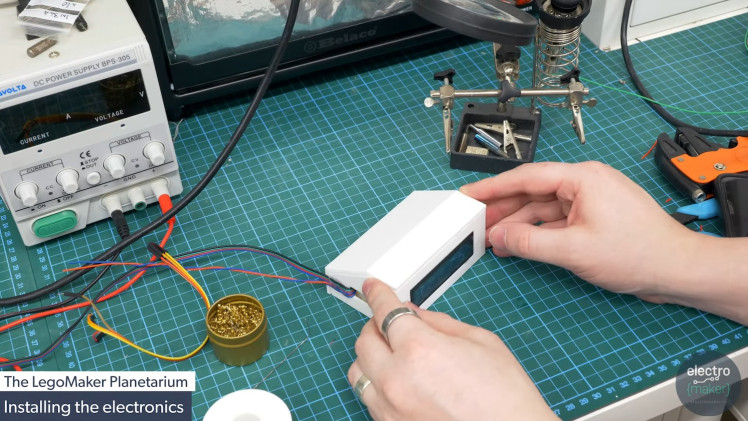
With the enclosure assembled and the LCD attached, your project will not only look professional but also be protected from dust and damage. This step is crucial for ensuring the longevity and reliability of your voice-controlled planetarium.
Now that our hardware is neatly enclosed, we can move on to setting up the software to bring this project to life!
Software Setup:
Installing the Arduino IDE:
First, we need to install the Arduino Integrated Development Environment (IDE) on your computer. The Arduino IDE is a user-friendly platform that allows you to write, compile, and upload code to your Arduino board. Head over to the Arduino website and download the IDE suitable for your operating system. Follow the installation instructions provided to complete the setup.
Writing and uploading the Arduino code:
With the Arduino IDE installed, it's time to write the code that will control our planetarium. Start a new project in the IDE and begin by including the necessary libraries for controlling the motor and the LCD. The core of the code will involve setting up the motor control pins, initializing the LCD, and writing the functions to handle the motor movements based on voice commands.
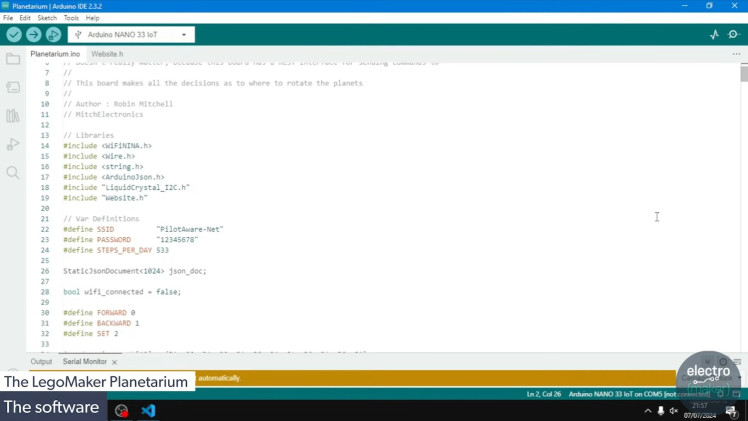
The code files can be found at the bottom of this project page. Upload the code to your Arduino Nano 33 IoT by connecting it to your computer via USB and clicking the upload button in the Arduino IDE.
Setting up the web server on the Arduino Nano 33 IoT:
Next, we'll set up a web server on the Arduino Nano 33 IoT to handle voice commands. Add the necessary code to create a web server that listens for incoming connections and processes commands. This web server will serve a simple webpage with a button to start voice recognition and send commands to the Arduino.
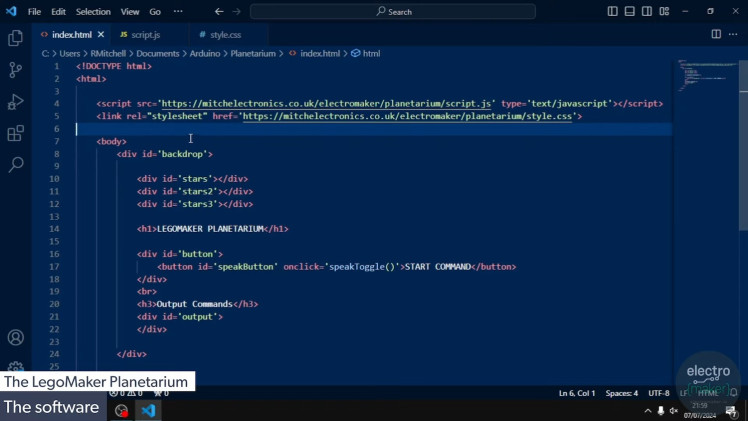
Integrating the voice recognition feature using JavaScript:
To add voice recognition, we'll use JavaScript's Web Speech API. This code will be part of the webpage served by the Arduino. When the user clicks the button, the browser will start listening for voice commands and send them to the Arduino.
Upload the updated Arduino code to include the web server and voice recognition setup.
With the software in place, your voice-controlled planetarium is now ready for testing. Let's move on to the final stage: testing and fine-tuning!
Testing and Adjustments:
Initial tests of the motor and voice commands:
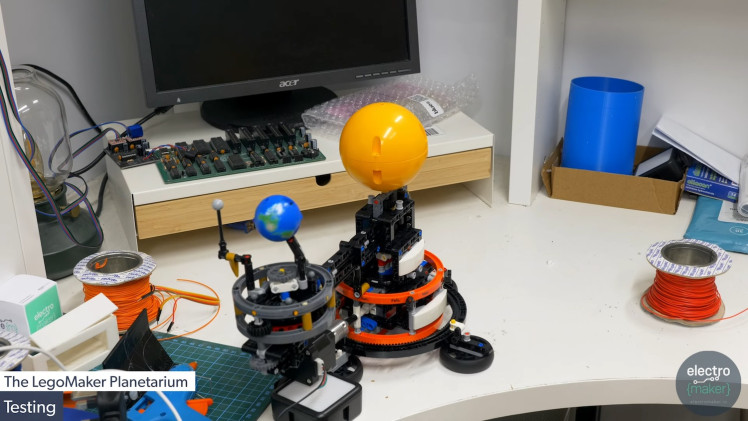
Now that the hardware and software are set up, it's time to test the system. Power up your Arduino Nano 33 IoT and open a web browser on a device connected to the same network. Navigate to the IP address assigned to the Arduino to access the web server. Click the "Speak" button and try giving a command like "move forward ten days."Â Observe the motor's response to ensure it moves the planetarium as expected. If the motor doesn't respond, double-check your wiring and code.
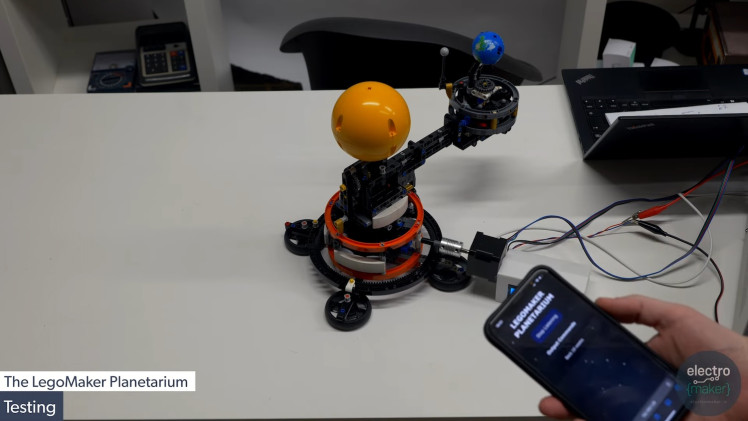
Adjusting the motor current and lubricating the gears:
If the motor struggles or stalls, you may need to adjust the current supplied to the Nema 17 motor. Use a small screwdriver to turn the potentiometer on the A4988 motor driver until the motor operates smoothly. Be cautious not to supply too much current, as this can overheat the motor and driver. Additionally, lubricate the gears of the Lego planetarium with a light machine oil to reduce friction and ensure smooth operation. This will help the motor move the planetarium more effectively.
Fine-tuning the software for optimal performance:
With the hardware adjustments complete, it's time to fine-tune the software. Monitor the system's response to various voice commands and make adjustments as necessary. For instance, you might need to tweak the motor control functions to ensure precise movements or adjust the delay between steps for smoother operation. Update the voice recognition script to handle additional commands or improve accuracy. Continuously test the system to ensure all components work harmoniously.
Consider adding features like:
Speed control: Adjust the motor speed based on the command (e.g., fast forward, slow forward).
Error handling: Implement feedback mechanisms to inform the user if a command wasn't understood or executed correctly.
Logging: Keep a log of commands and actions to help troubleshoot any issues that arise.
After making these adjustments, run a series of tests to confirm that the planetarium responds accurately and reliably to voice commands. Make any final tweaks needed to perfect the system.
With everything tested and adjusted, your voice-controlled Lego planetarium is ready to showcase!
Final Demonstration:
Showcasing the fully functional voice-controlled planetarium:
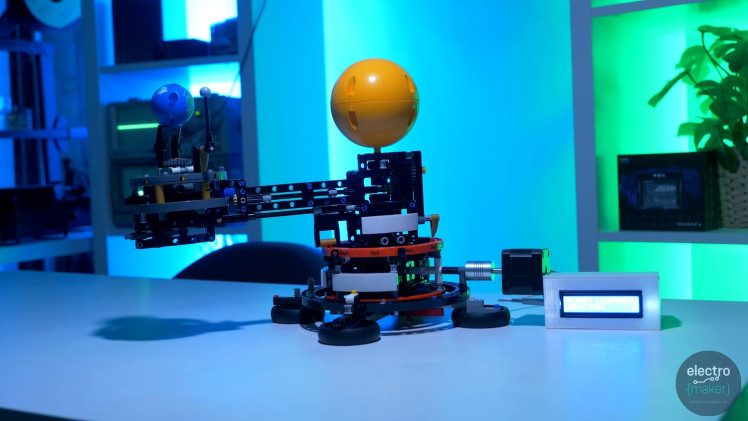
Now that your project is complete and fine-tuned, it's time for the exciting part: the final demonstration. Set up your voice-controlled Lego planetarium in a spot where it can be easily viewed and interacted with. Make sure all the components are securely in place and that the system is powered on. Open the web interface on a connected device and prepare to show off your creation.
Demonstrating various voice commands and their effects:
Begin by explaining how the system works to your audience. Highlight the main components: the Arduino Nano 33 IoT, the Nema 17 motor, the A4988 motor driver, the 16x2 LCD, and the Lego planetarium. Then, walk them through the process of giving a voice command.
For example, start with a simple command like "move forward ten days." Click the "Speak" button on the web interface and clearly say the command. Watch as the planetarium responds, moving the appropriate amount to reflect ten days of planetary movement. Use the LCD display to show the current status and actions of the planetarium.
Next, demonstrate a few more commands to showcase the versatility of your system:
"Move backward three weeks" Observe the planetarium as it reverses its movement to reflect the specified period.
"Move forward six months" Show how the system calculates the quickest way to achieve the command, possibly moving backward to reach the correct position.
"Reset to today" Demonstrate how the planetarium can reset to its initial state.
Congratulations on completing your voice-controlled Lego planetarium project! Enjoy sharing your creation and inspiring others to explore the fascinating world of electronics and programming.
Conclusion:
With this project, you've successfully transformed a traditional Lego planetarium into a high-tech marvel that can be controlled by voice commands. This setup not only adds a layer of interactivity to the planetarium but also provides an engaging way to dive into the worlds of electronics and programming. By combining the timeless appeal of Lego with modern technology, you've created a unique and educational experience.
Enjoy showcasing your voice-controlled planetarium to friends, family, and fellow makers. Inspire others to embark on their own tech-enhanced projects and continue exploring the exciting intersection of technology and creativity.









Leave your feedback...