$50 Diy Ai Smart Coop
About the project
The Smart Chicken Coop automates feeding, door control, and predator alerts, all managed through a user-friendly app.
Items used in this project
Hardware components
View all
Hand tools and fabrication machines
Story
AI is making waves everywhere, but what excites us most is how effortlessly it can now be incorporated into everyday devices. In fact, why should your backyard farm miss out on this revolution? If you're passionate about raising chickens but want to streamline your daily chores with cutting-edge technology, a DIY Smart Coop powered by AI and IoT is the perfect project for that.
The Vision Behind the DIY Smart CoopBackyard farming is all about sustainability and the joy of raising chickens for fresh eggs and natural pest control. However, managing a chicken coop can be a lot of work, from early morning door openings to late-night predator checks. The Smart Coop changes all that, using AI-driven automation to make chicken care easier. With features like SMS alerts for predators and an automated door that opens and closes on a schedule, you can rest easy knowing your chickens are well cared for.
AI and IoT take it further, allowing for full control over key aspects of the coop. The door opens and closes automatically in the morning and evening, and you can customize feeding schedules or trigger instant feeding when needed. It's not just about convenienceâ€â€it’s about blending the best of technology with tradition to give you peace of mind.
Why Build the DIY Smart Coop?This project goes beyond simple automation. AI and IoT empower you to create a high-tech, self-sustaining coop that’s tailored to your unique needs. Here’s why it’s worth building:
- Reduce Your Workload: Automate key tasks like opening and closing the door, feeding your chickens, and monitoring for predators.
- Enhance Safety with AI: Receive SMS alerts when predators are detected, ensuring your flock is protected even when you're away.
- Stay in Control: Schedule the door to open and close, and take instant action from anywhere via your phone.
- Customize Feeding: Set feeding times according to your schedule, or use instant feeding options to give your chickens a treat at the push of a button.
- Adapt to Your Needs: Whether you're managing a large flock or a small coop, you can adjust the system to fit your specific requirements.
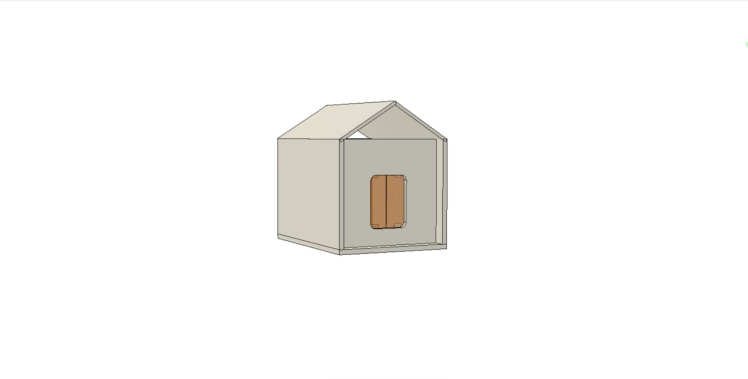
Our journey started with designing the coop in Fusion 360. This essential step involved carefully crafting a 3D model using accurate measurements, enabling us to visualize each component before construction. Using CAD software significantly reduces errors during the design process, allowing for precise measurements and modifications. This capability ensures that components fit together accurately and helps identify potential issues before construction, ultimately saving time and resources.
Micro Controller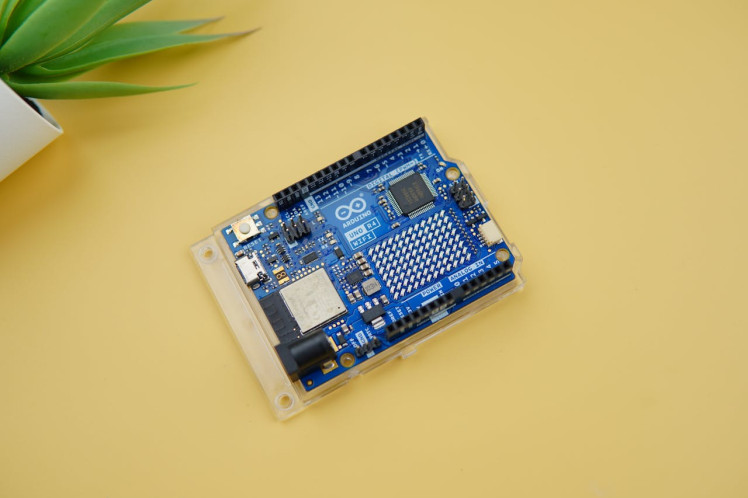
The controller used in the project is the Arduino UNO R4 WiFi. It is a powerful microcontroller board designed around the 32-bit RA4M1 microcontroller from Renesas, offering improved performance and processing power compared to its 8-bit predecessor. It features an ESP32 module that provides both Wi-Fi and Bluetooth connectivity, making it ideal for IoT applications. With increased memory, including 32 KB of SRAM and 512 KB of flash memory, it can handle larger programs and more data. The board also boasts more general-purpose input/output (GPIO) pins, enhancing its capability to connect with multiple sensors and actuators simultaneously.
Its built-in USB-C port allows for convenient power and programming, and the higher clock speed of up to 48 MHz ensures faster data processing and communication for real-time applications. Additionally, the R4 WiFi incorporates advanced power management features, hardware support for PWM, ADC, and DAC, and enhanced security for wireless communication. It can be powered via USB-C or an external battery, providing flexibility for deployment in various projects. Maintaining compatibility with existing Arduino libraries and shields, the R4 WiFi benefits from extensive community support, making it an excellent choice for both beginners and experienced developers looking to create advanced IoT solutions.
Front Door Mechanism Setup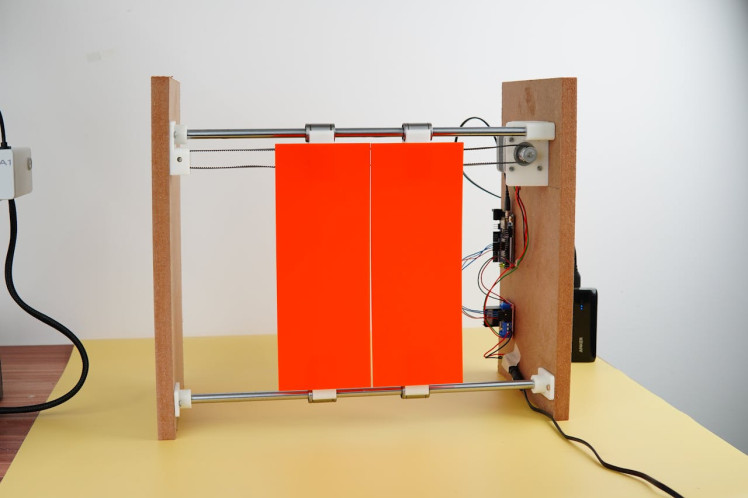
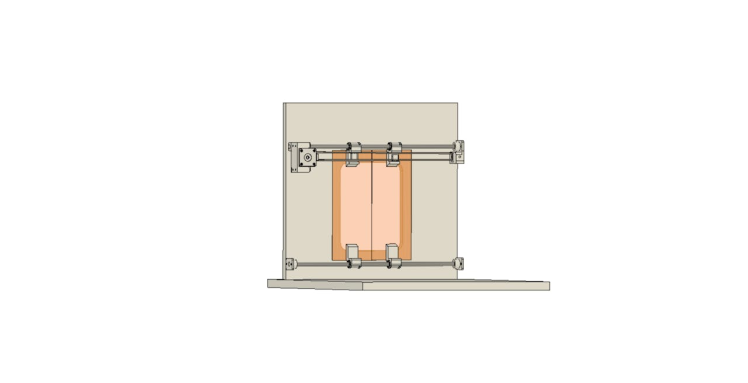
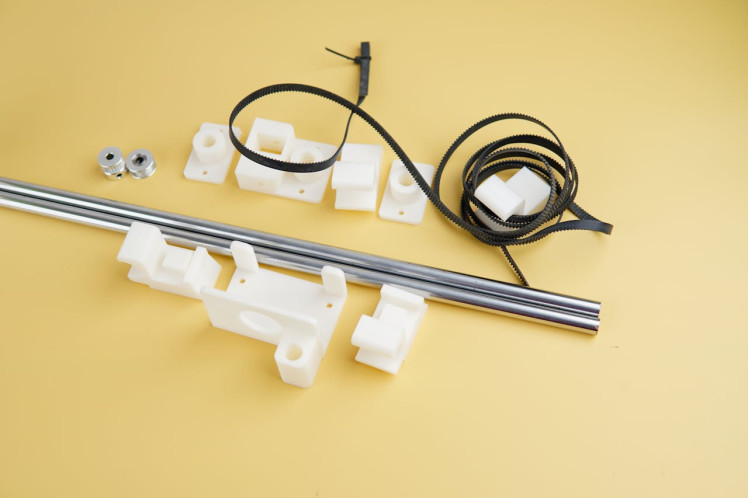
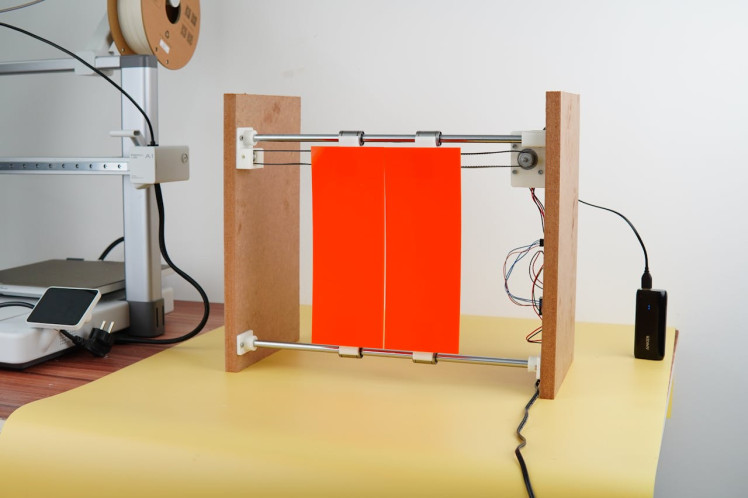
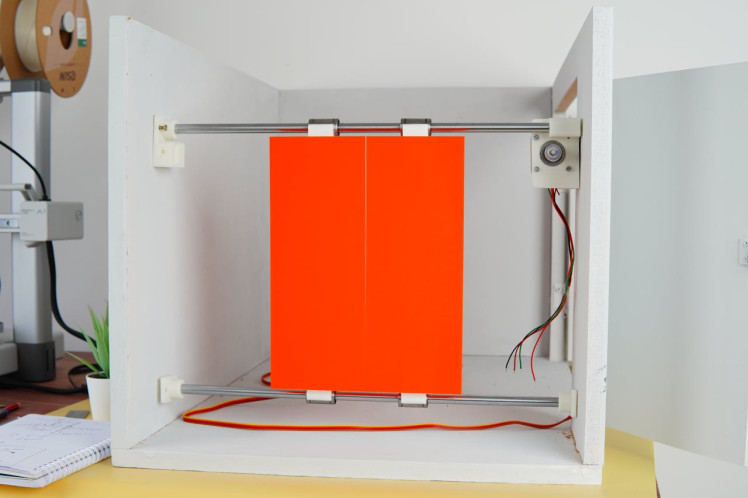
This split door system utilizes 10mm metal rods, a Nema 17 stepper motor, and a GT2 timing belt, pulley and all supported by linear ball bearings. The mechanism works by pushing one door while simultaneously pulling the other when the motor is engaged, allowing for smooth and synchronized movement. This design optimizes space while ensuring secure access, perfectly catering to the automated needs of the coop. We designed this mechanical system in Fusion 360 and 3D printed the required parts for building the system.
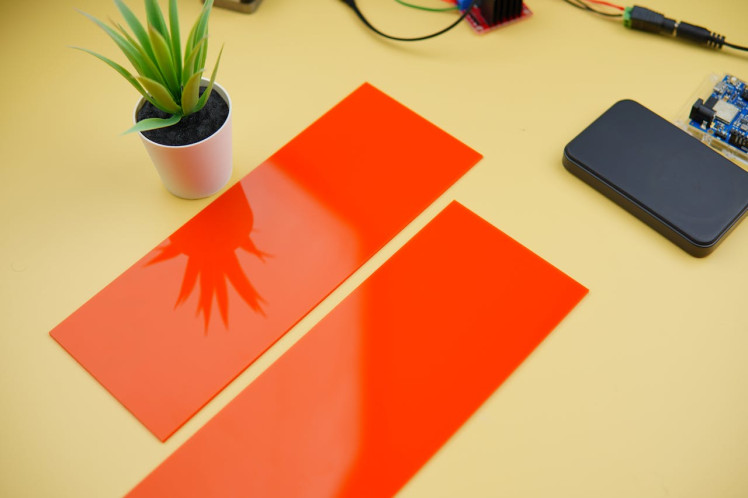
As the front door, we used the 2mm orange acrylic sheet which is laser cut in the nearby laser cutting shop.
A single Nema 17 motor, driven by an L298 motor driver and controlled via the stepper.h library powers the entire mechanism. This setup is energized by a 12V 3A power supply, while the Arduino is powered using a power bank, making it an effective test configuration.
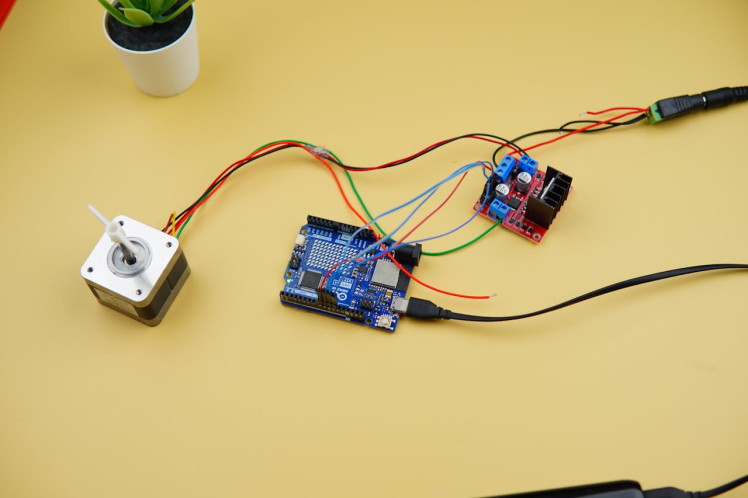
Before connecting the motor to the module, you need to identify the phases of the motor you plan to use. The best way to do this is to check the motor's datasheet.
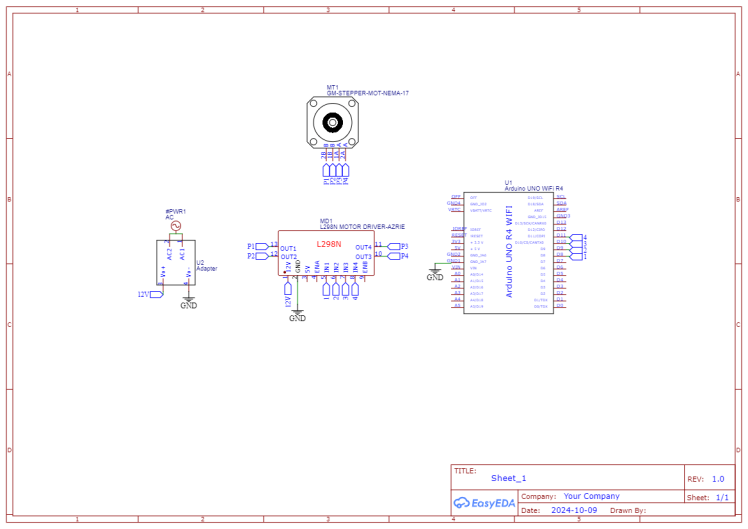
Then we connected everything to a waste wood to test the mechanism and ran these test codes.
// Include the Arduino Stepper Library
#include <Stepper.h>
// Number of steps per output rotation
const int stepsPerRevolution = 200;
// Create Instance of Stepper library
Stepper myStepper(stepsPerRevolution, 8, 9, 10, 11);
void setup()
{
// set the speed at 60 rpm:
myStepper.setSpeed(40);
// initialize the serial port:
Serial.begin(9600);
}
void loop()
{
// step one revolution in one direction:
Serial.println("clockwise");
myStepper.step(stepsPerRevolution);
delay(4000);
// step one revolution in the other direction:
Serial.println("counterclockwise");
myStepper.step(-stepsPerRevolution);
delay(4000);
}
The images below show the arrangement of the parts of the split door mechanism.
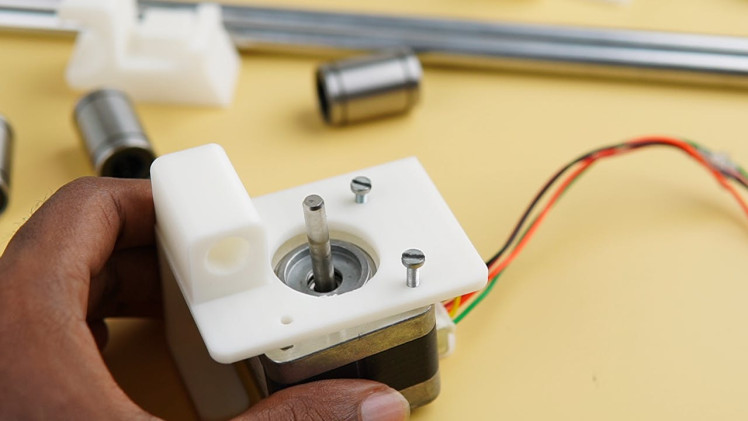

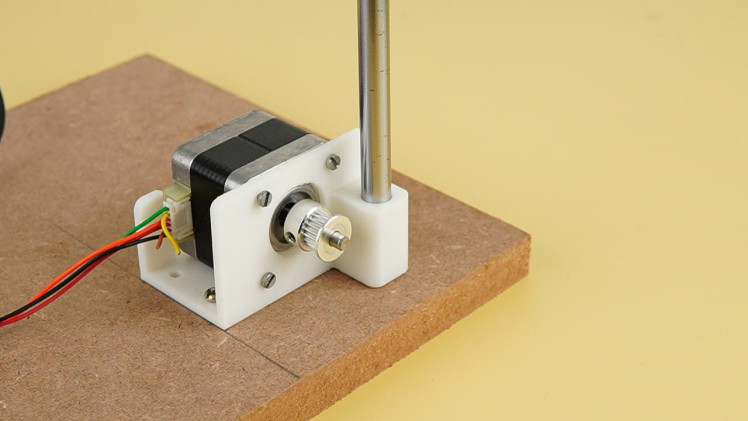
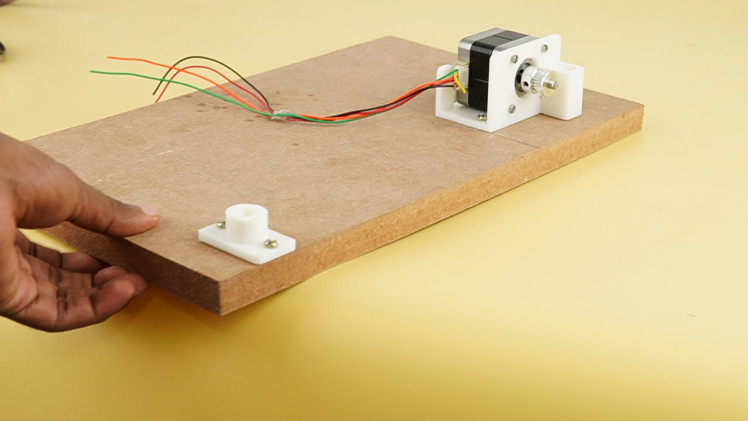
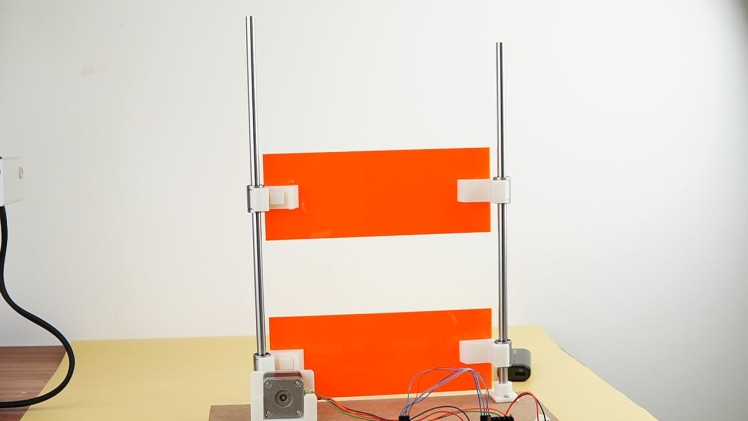
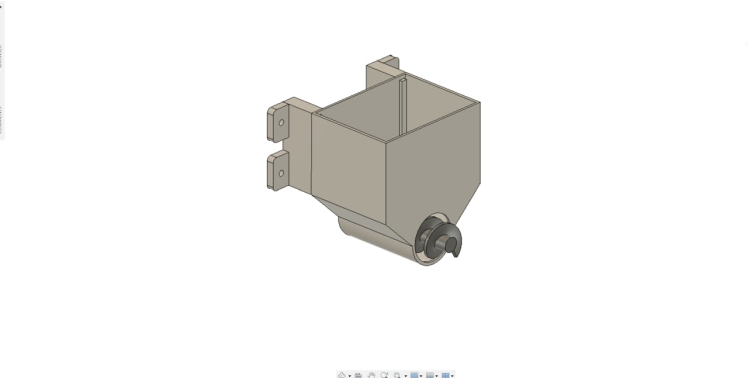
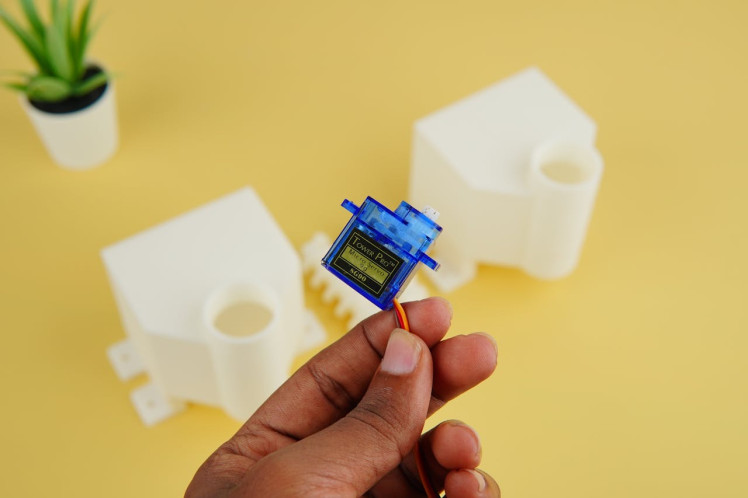
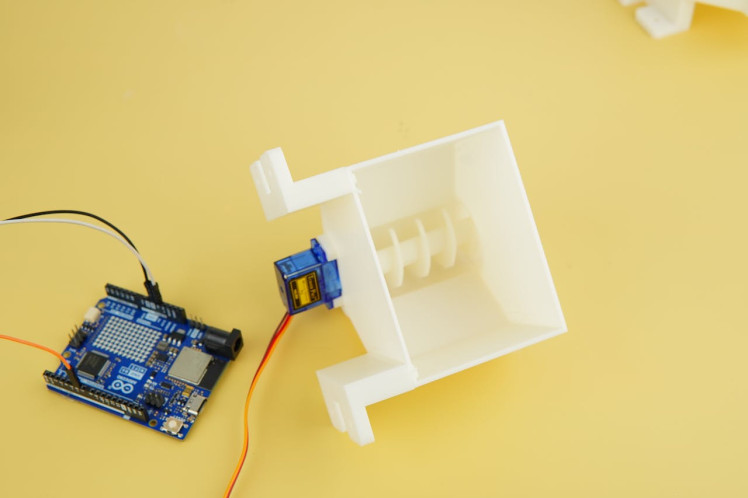
Creating an efficient and reliable feeder mechanism is crucial for maintaining a consistent feeding schedule for the chickens. We designed a dual-feeder setup using an Archimedes screw mechanism powered by a continuous servo motor, ensuring that food is dispensed smoothly and effectively.

Predator Detection With Husky Lens
Protecting your chickens from predators is a top priority when managing a coop, especially in a farm-to-table setup where the quality and safety of your livestock directly impact your food supply. The husky lens is used here to solve that issue.
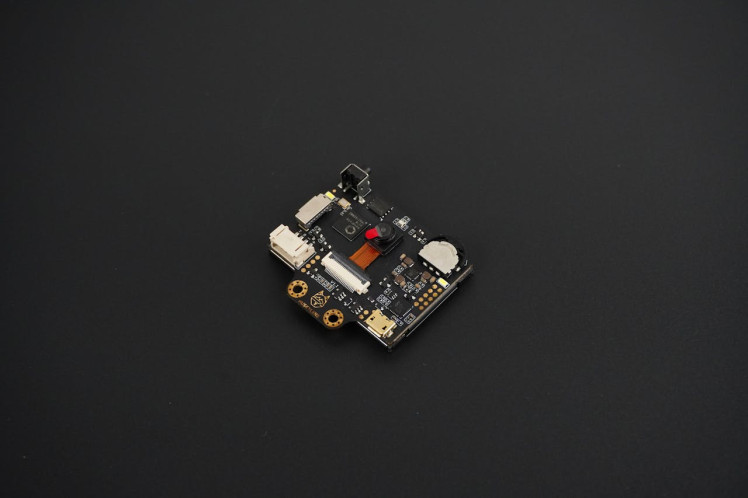
HuskyLens is an AI-powered vision sensor that can recognize objects, faces, colors, lines, and tags. It's designed to be easy to use, with a user-friendly interface and a built-in screen that allows you to see what the sensor is detecting in real-time. HuskyLens is based on machine learning and can be trained to recognize specific objects or creatures, making it an ideal tool for predator detection in a chicken coop. Follow these steps to set up HuskyLens for predator detection
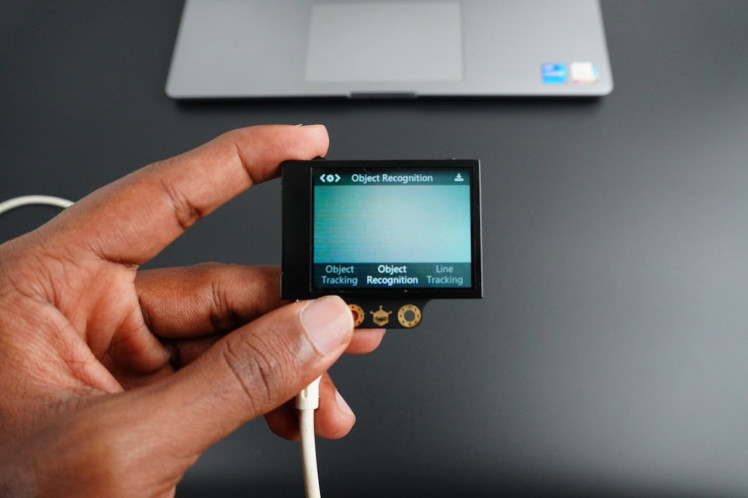
To train the HuskyLens for predator detection, begin by powering it on. Then Navigate through the menu to select object recognition mode. Next, introduce the HuskyLens to various predators, such as raccoons, foxes, and stray dogs, either in a controlled environment or by using images and videos. Point the HuskyLens at the predator and press the "learn" button to teach it the animal’s specific features. For better accuracy, repeat this process from different angles and under varying lighting conditions. Once trained, test the HuskyLens by showing it images or videos of both predators and non-threatening animals like cats or squirrels, ensuring it can correctly differentiate between threats and non-threats. If the HuskyLens struggles to distinguish animals, fine-tune the training by adjusting the learning settings.
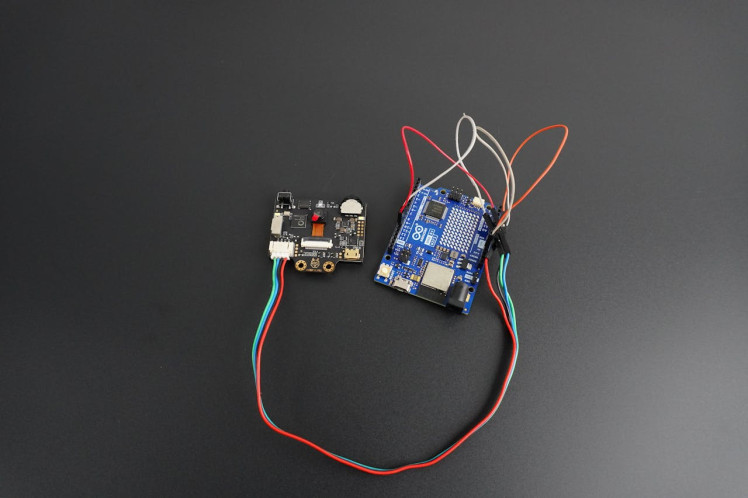
Once trained, the HuskyLens connects to the Arduino UNO R4 WiFi using the I2C protocol, ensuring smooth communication between the sensor and the controller. This setup allows the system to process and act on predator alerts in real time, keeping your chickens safe.
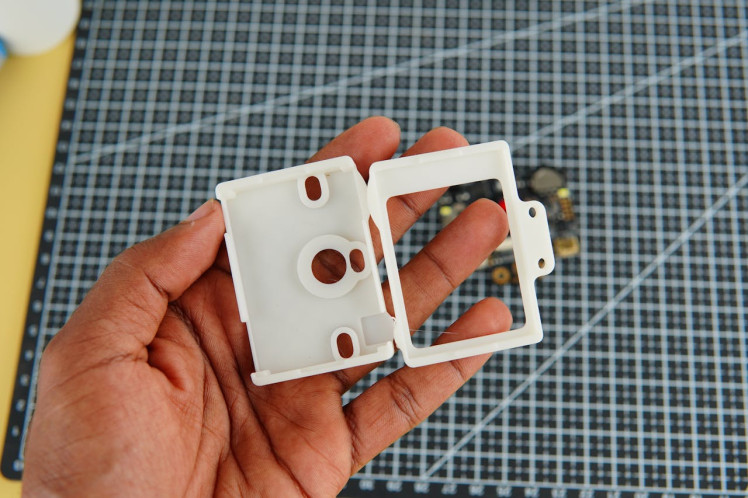
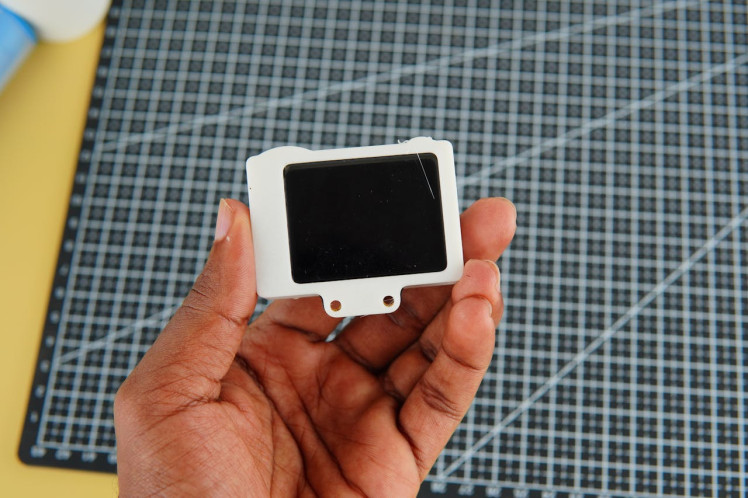
To place the Husky lens in the coop we have 3d printed this case for convenience.
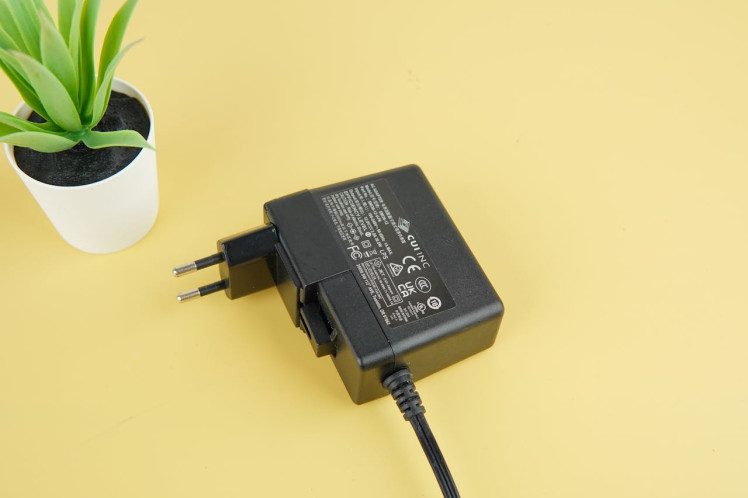
12V 3A power supply is used here as the main power source. However, the Husky lens and the Sg90 servo motor work at 5V, so we used the Mini 360 Buck converter to solve the issue.
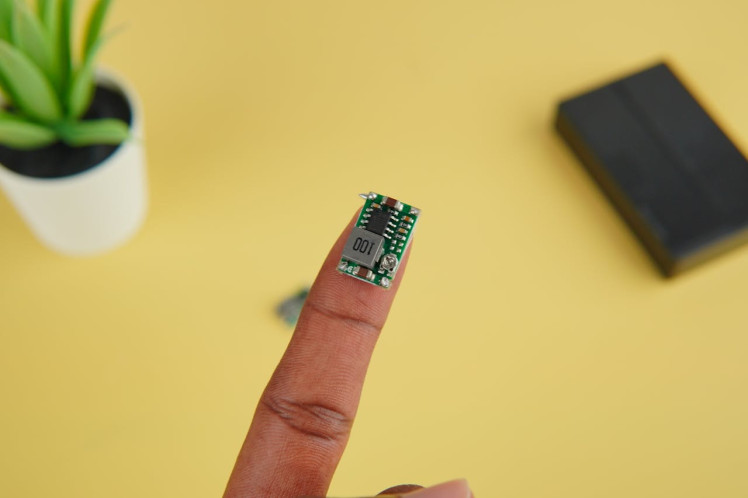
The Arduino UNO R4 WiFi is powered directly from the 12V through the Vin pin.
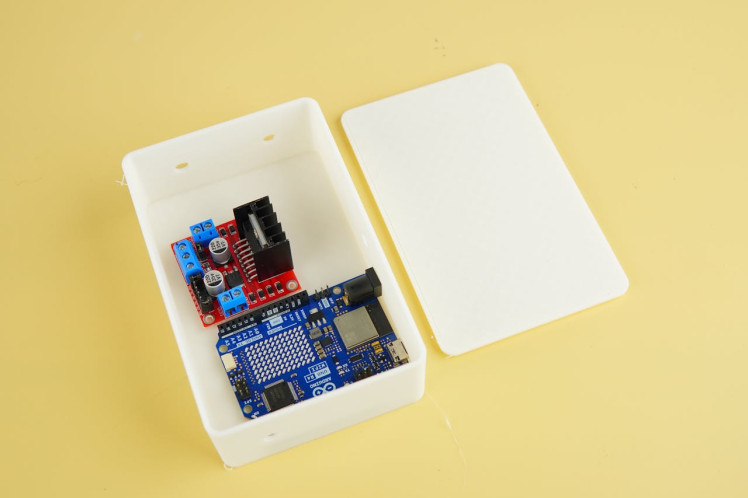
Additionally, we developed a protective case for the electronic components housed within the coop, ensuring they are secure and shielded from the elements.
Housing & Painting
We constructed the housing using 3/4 inch MDF wood for the main structure, ensuring a strong and stable build. To achieve a precise fit, we used 1/2 inch MDF for the top section, which we tapered to give the project a retro aesthetic look.

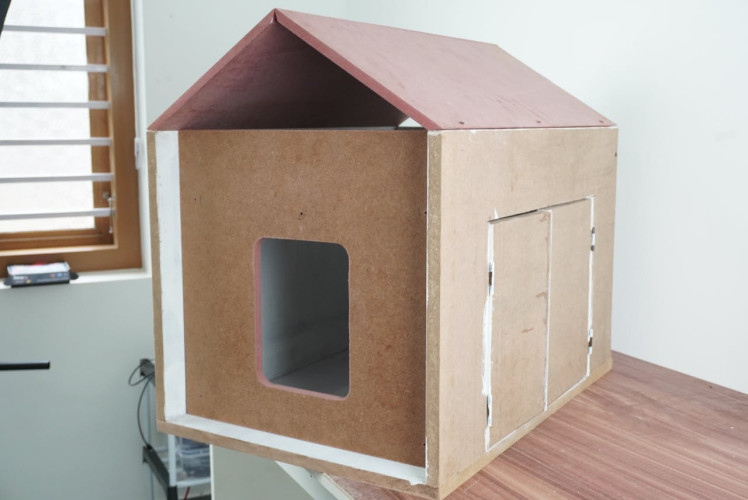
The side panels were securely attached to the base with one-inch screws, while the door was fitted using 1/4-inch screws for the hinges. Before attaching the top portion, we primed the inner surface to streamline the finishing process, focusing on the outer surfaces for the final touch.
Then later we painted all the surfaces before getting into the final assembly.

Final Assembly
Then we started fitting the electronic and mechanical parts to the main coop. Primarily we attached the door portion by perfectly measuring the distance from the front face other the door mechanism would not operate as expected.
After that, we prepared the two feeder boxes by attaching the servo motors to them. Parallely we placed the electronic components in the box one by one by pulling out the wires for the components which is residing outside.
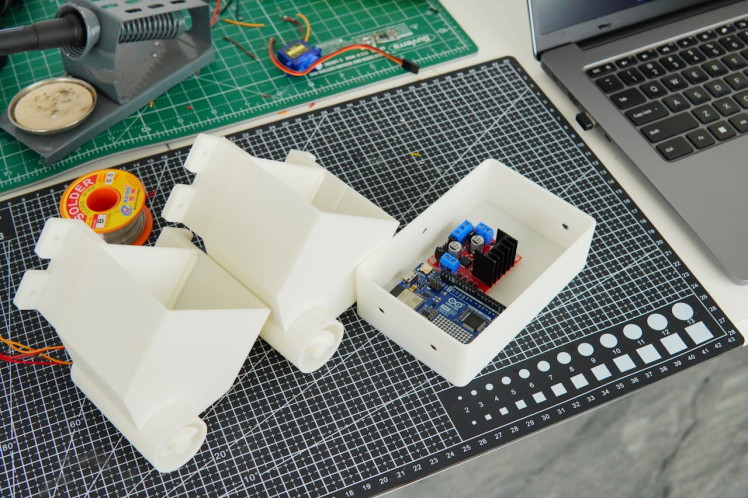
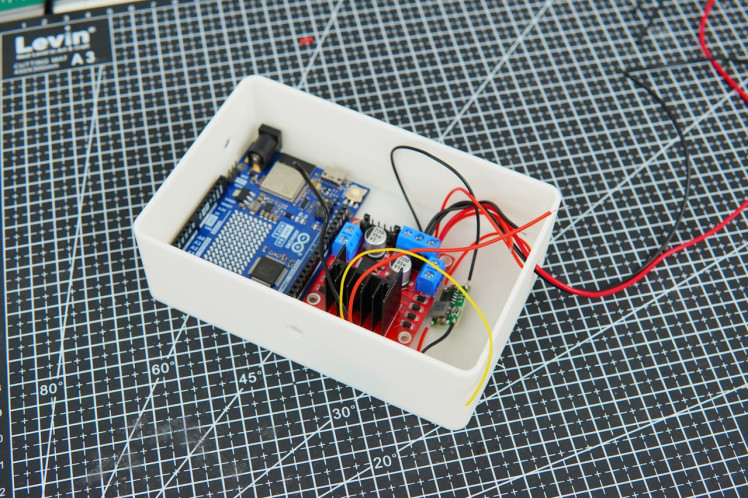
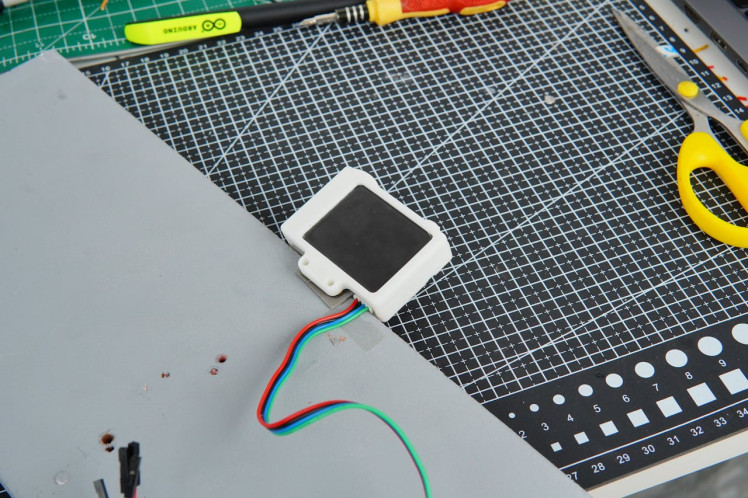
The husky lens was secured to the front portion with a piece of double-sided tape.
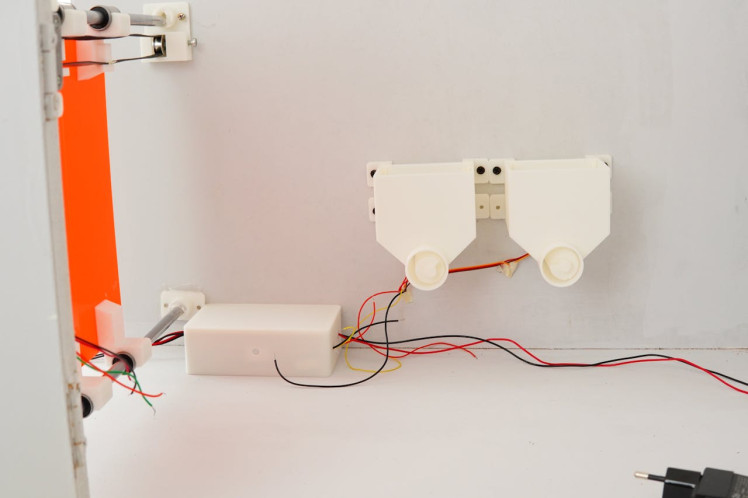
The two feeder portions were attached to a side adjacent with the help of drywall screws.
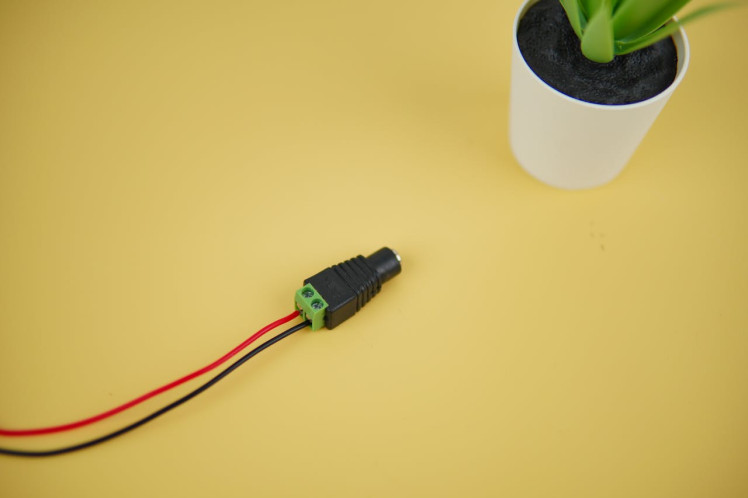
Two long wires are connected to the female DC power jack for powering up the coop.
You can find the entire assets for the replication in the GitHub repo.
Companion App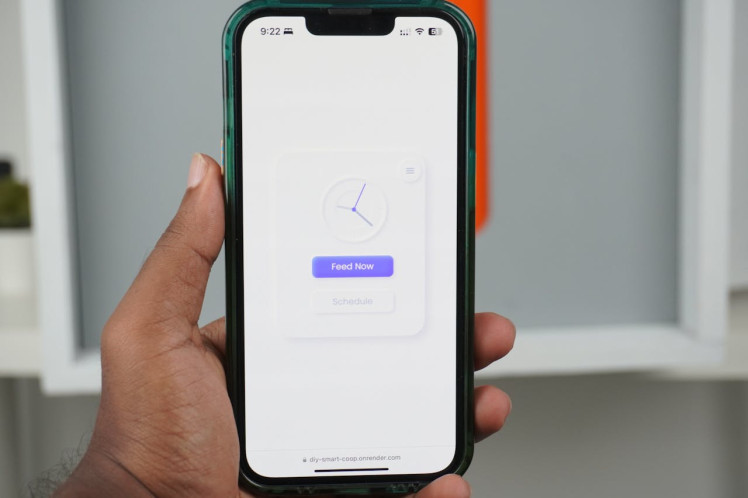
The app's interface is built with HTML, CSS, and JavaScript, offering a responsive and user-friendly experience. It integrates Firebase JS for communication, enabling real-time updates and synchronization with the smart coop's operations.
Twilio for SMS Alert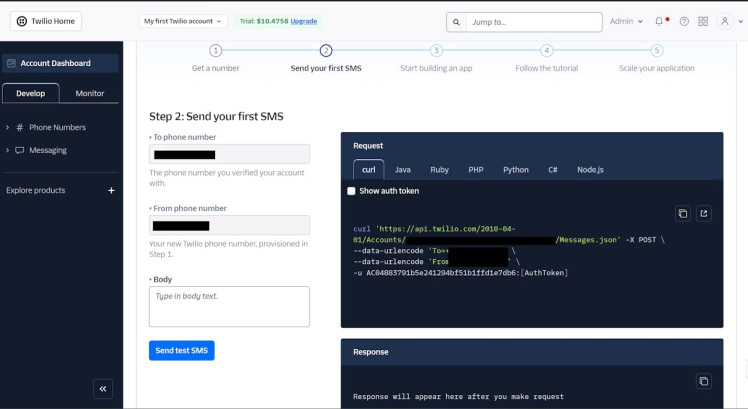
Twilio is a cloud communications platform that provides a set of APIs (Application Programming Interfaces) for building and integrating communication services into applications. It allows developers to add messaging, voice, and video capabilities to their applications without having to build or maintain complex infrastructure.
Here we are using Twilio to send SMS alerts if there are any predators detected.
Follow these steps carefully for integrating Twilio
1. Signup for Twilio, if you don't have an account
2. Get a Twilio Phone number, this phone number will be used for sending the SMS alert to the concerned person.
3. Then note the account info such as the Account SID, Auth Token, and the generated Twilio number, this should need to be added in the code.
Smart Coop Is Ready for Action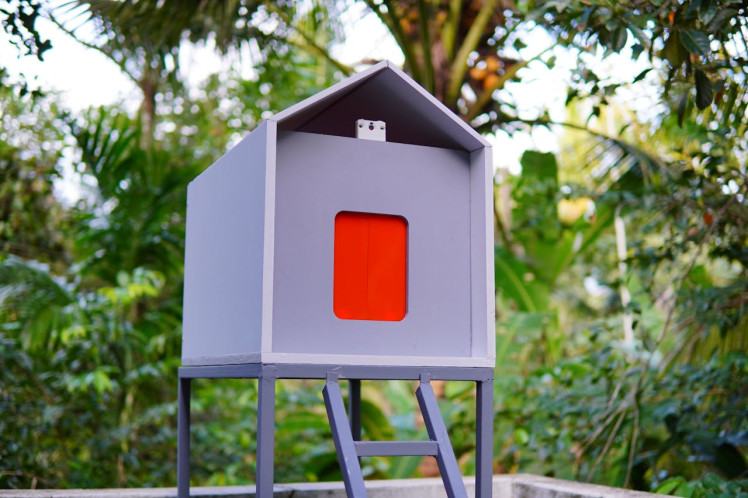
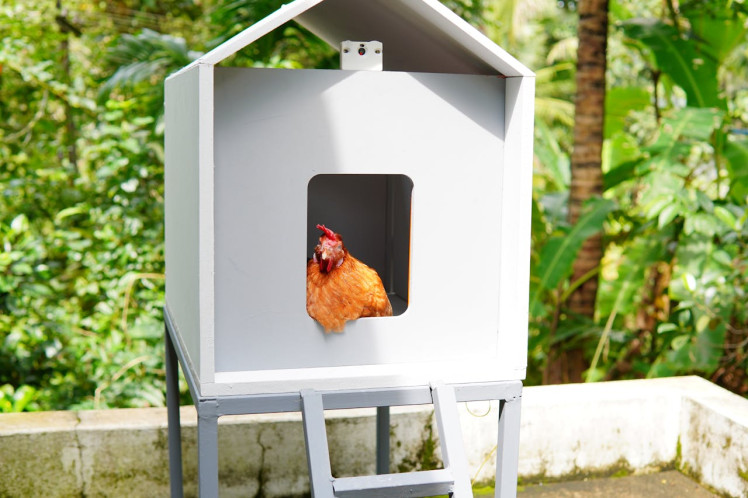
Simply plug in your smart coop, and it's ready to handle all your chicken care needs. From automated feeding and secure door control to real-time predator detection, this fully finished smart coop has everything set up for you. Just sit back and let your coop do the work!




Leave your feedback...