Roshambo Retro Gaming Case review
Retro consoles aren't necessarily new. From TV Plug & Play game consoles to the Atari Flashback, these devices offered a means of revisiting childhood favorites and retro classics. However, with the introduction of its NES Classic Mini, Nintendo kickstarted a retro console craze. While you can buy an NES Mini, SNES Classic, Atari Flashback, and Sega Genesis Mini, you may also build your own DIY NES Mini or Nintendo 64 (N64) with various single-board computers (SBCs). With the Roshambo retro gaming case, you can create your own SNES Mini with a RockPro64 and other maker boards.
What is the Roshambo Retro Gaming Case?
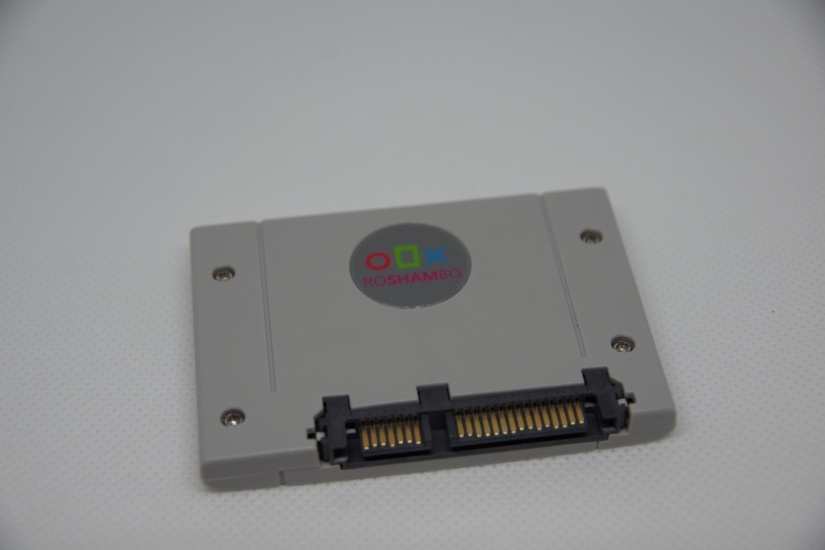
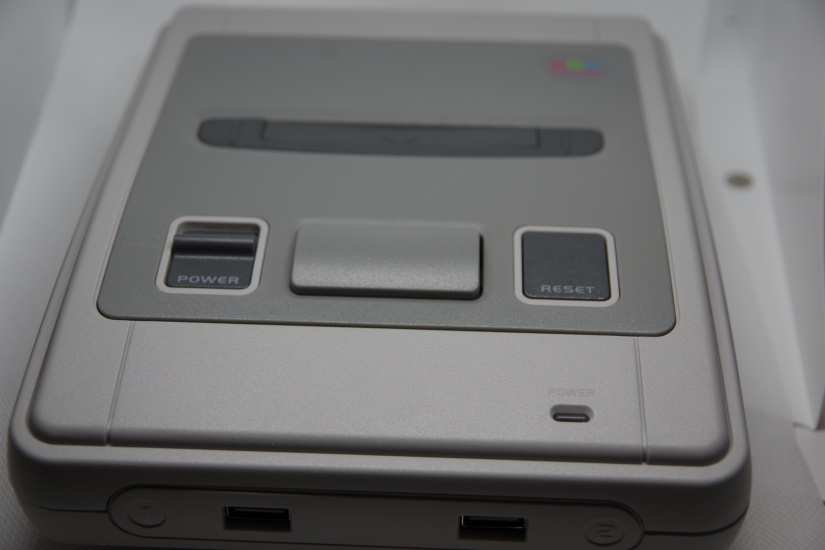
The Roshambo retro gaming kit is a SNES, or more accurately Super Famicom, style case with its dark grey on light grey colorway with splashes of bright colors on the controller buttons and console itself. You'll find a few different variants of the Roshambo retro case: One for the RockPro64 and another for devices such as the Raspberry Pi 3 B+, Rock64, ASUS Tinker Board, and a slew of other development boards.On top, the Roshambo gaming shell features working power and reset buttons, as well as a SATA port in its cartridge slot. An eject button ejects select SATA harddrives, and you can even purchase SATA-based game cartridges for storing ROMs. GPIO connectivity provides safe reset and shutdown functionality, and there are tons of ports. At the front, the Roshambo retro gaming case boasts two USB ports, with a third at the back. There's access to power, Ethernet, and HDMI ports as well as microSD card slots. My Roshambo retro gaming kit came with the RockPro64 case, all required cables, a 120GB cartridge SSD, and a pair of matching controllers.
What is the RockPro64?
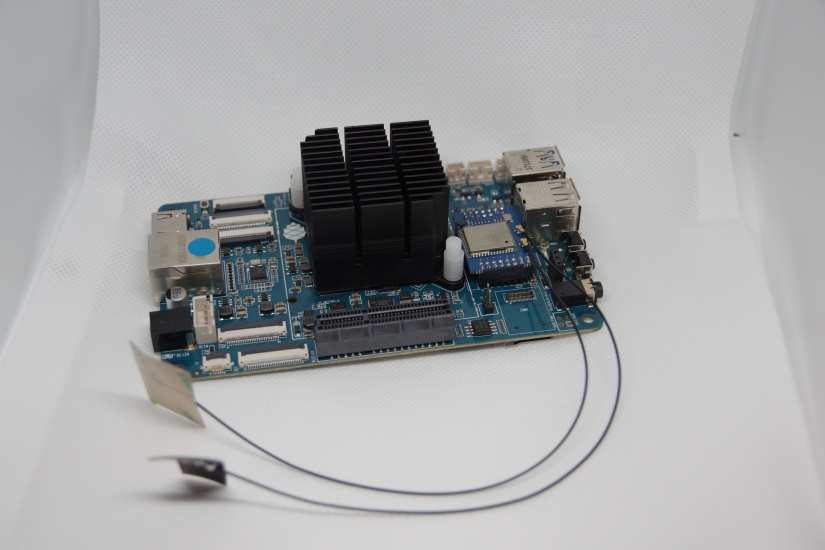 The RockPro64 is a single-board computer which packs a true punch. Powered by a beefy Rockchip RK3399 system on a chip (SoC) with a Mali T860 MP4 GPU, there's a ton of horsepower onboard. It's available with up to 4GB of LPDDR4 RAM, and includes a microSD card slot and eMMC module for ample storage options.
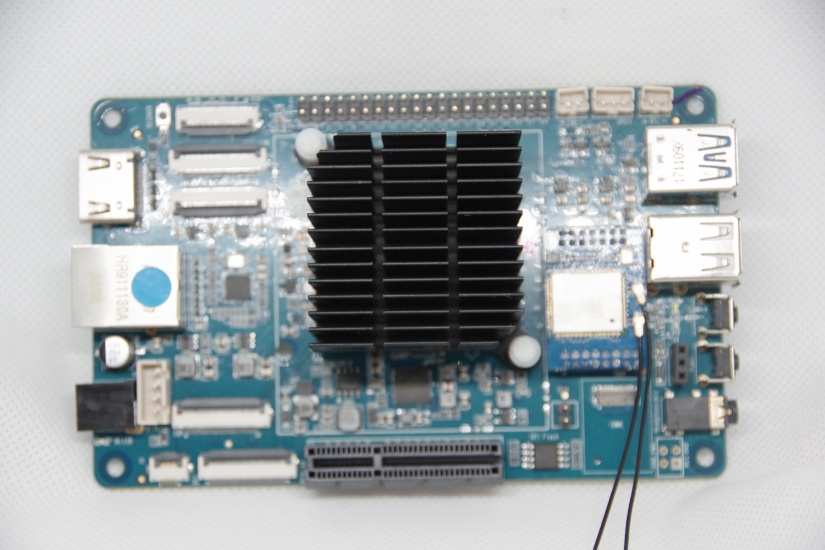
Pine64 RockPro64 specs:
- Rockchip RK3399 Hexa-Core (dual ARM Cortex A72 and quad ARM Cortex A53) processor
- MALI T-860 Quad-Core GPU
- eMMC slot
- microSD card slot
- 1 x USB 3.0 Type C
- 1x USB 3.0 type A
- 2x USB 2.0 Host
- Gigabit Ethernet
- PI-2 GPIO Bus
- eDP interface
- MiPi DSI interface
- Touch panel interface
- Stereo MiPi CSI interface
RockPro64 Gaming: RockPro64 OS Options
Because this particular RockPro64 case is designed for retro gaming, you'll likely want to install a RockPro64 gaming operating system. Available options include Recalbox, Lakka, Batocera, or RetroArena. Recalbox and Batocera are pretty similar, both Debian-based Linux distros which use the RetroArch and the EmulationStation frontend. I'd suggest these for anyone from beginners to experts. Moreover, both Recalbox and Batocera tout Kodi media centre integration for a retro gaming home theatre PC (HTPC) combo. Lakka is a bit more comprehensive with an overwhelming amount of settings which you can tweak. It's better suited to power users, or anyone who prefers its XrossMediaBar (XMB) style user interface (UI). TheRA has a port of RetroPie for boards including the Odroid XU4 and RockPro64, however it's in an open beta.- Recalbox: Best for beginners and HTPC/retro gaming use
- Batocera: Best for beginners and HTPC/retro gaming use
- Lakka: Best for advanced users
- RetroPie: Best for fans of RetroPie and beta testing
How to Build a SNES Classic Mini with the RockPro64 and Roshambo Retro Case
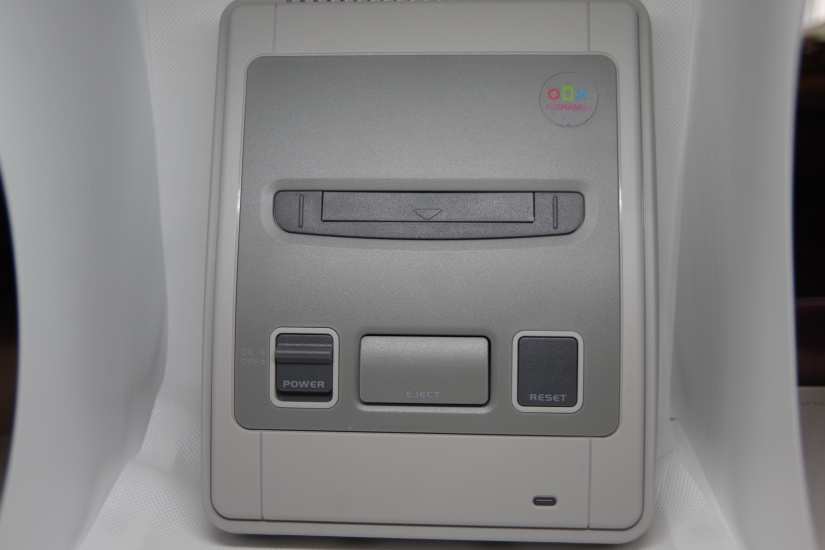 For a DIY SNES Mini with the Roshambo gaming case, you'll need a few items. First, the Roshambo retro case and a compatible maker board. While I used the RockPro64, there's a case option for the Rock64, Raspberry Pi, and ASUS Tinker Board. You'll need the case itself, and a microSD card or eMMC module. Although the RockPro64 boasts eMMC support, I opted for a microSD card installation since the eMMC isn't user accessible when the RockPro64 is safely snuggled inside the Roshambo retro case. Kits do come with all necessary cables and a fan.
- RoshamboPro or Roshambo Retro Gaming Case
- RockPro64Pro or other compatible SBC
- eMMC or microSD boot medium
- Compatible retro gaming OS
- Peripherals (controller, keyboard, mouse)
- Image mounting software (i.e. Etcher)
- Extraction software (i.e. 7Zip)
Total cost: $100+. The RockPro64 2GB variant clocks in at $70, while its 4GB iteration retails for $80. Then, you'll need the case which goes for $33. Opting for the non-RockPro64 Roshambo case may lower the price if you instead use a Raspberry Pi board, though performance won't top the RockPro64. However, an ASUS Tinker Board maintains the same form factor of the Pi, and serves as a median between the RockPro64 and the Pi.
Assembling the RoshamboPro case is moderately simple. Unfortunately, no instructions came packaged in my case. But it's a simple enough installation process. Begin by placing your RockPro64 or preferred single-board computer in the bottom of the case. Line it up with the port cutouts on the Roshambo retro gaming case. Everything only fits in one way. Once you've got it lined up properly, go ahead and use three longer screws to mount the board in the case.
Next, affix the fan if you're using one. There's a heatsink and fan. Place the heatsink on either the fan itself or directly on the board. Then place the fan on the board with the wires facing towards the front of the case. A pair of spring clips hold the board in place. The black and red fan wires mount to the fan connector on the board, and it only goes in one way.
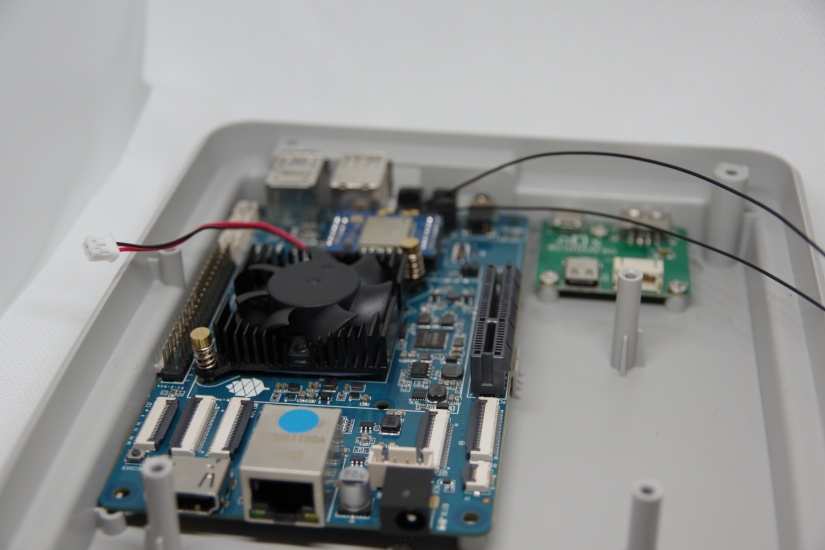 Now, plug in the USB-C extension cable. The right-angle USB-C port slips into the USB-C port on the front of the baord with the other end connecting to the USB-C extension on the back of the case.
 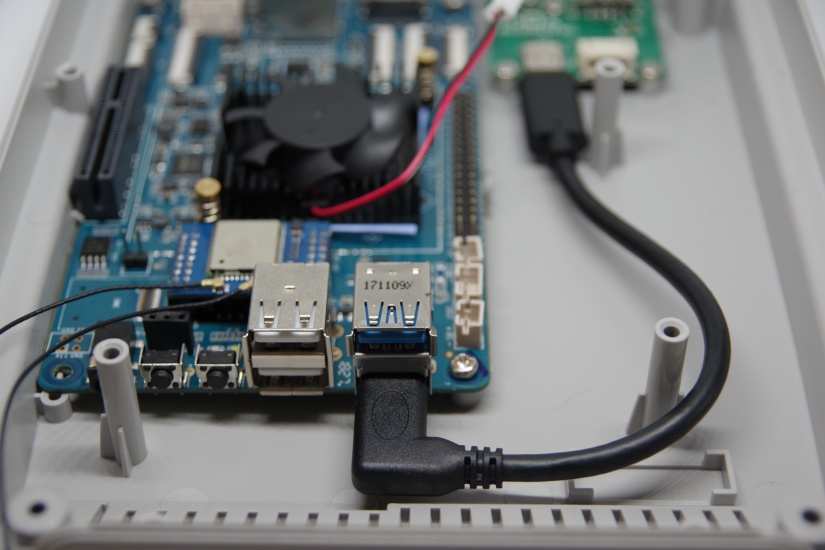 After that, hook up the USB 3.0 port to the top USB port above the USB-C. The USB 2.0 hooks to the top USB 2.0 port on the front of the case.
 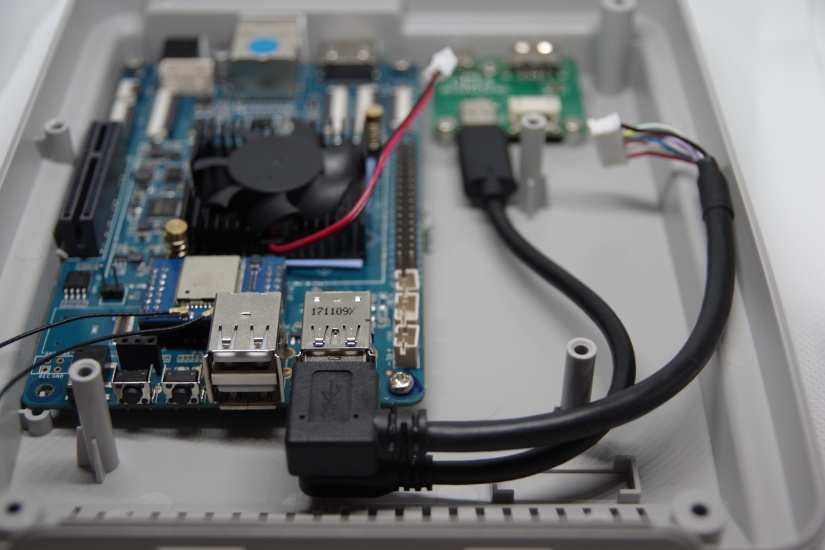 It's time to hook up the GPIO pins. It's a black and white strand of cables. The white cables need to face the outside of the case.
 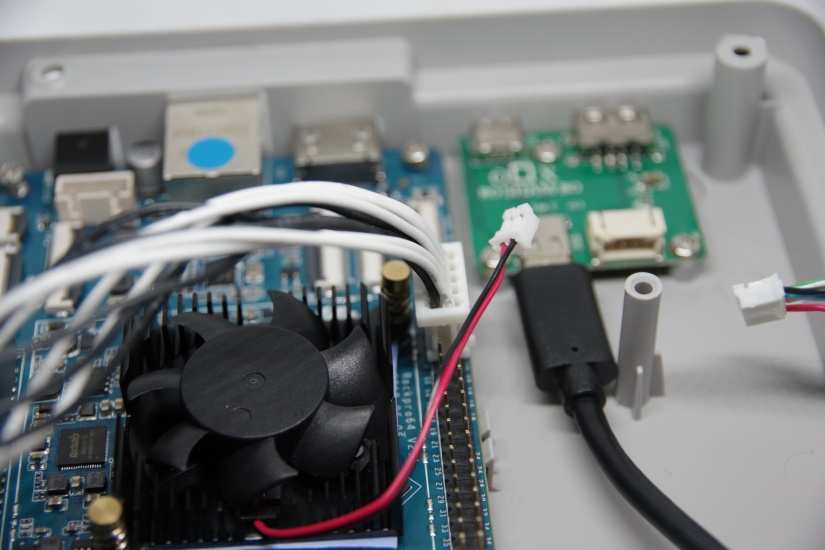 There's a cable with a white and red end. Plug the white end into white plastic slot on the back extension board on the case.
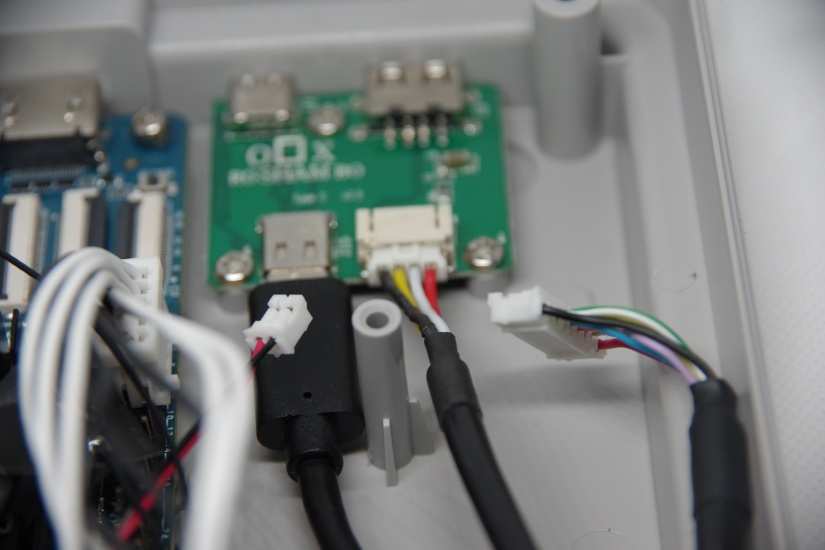 When that's complete, put the top I/O board on top of the RockPro64. I'd suggest waiting until you've hooked everything up to screw it down. Begin by connecting the GPIO cable to a connector on the top board.
 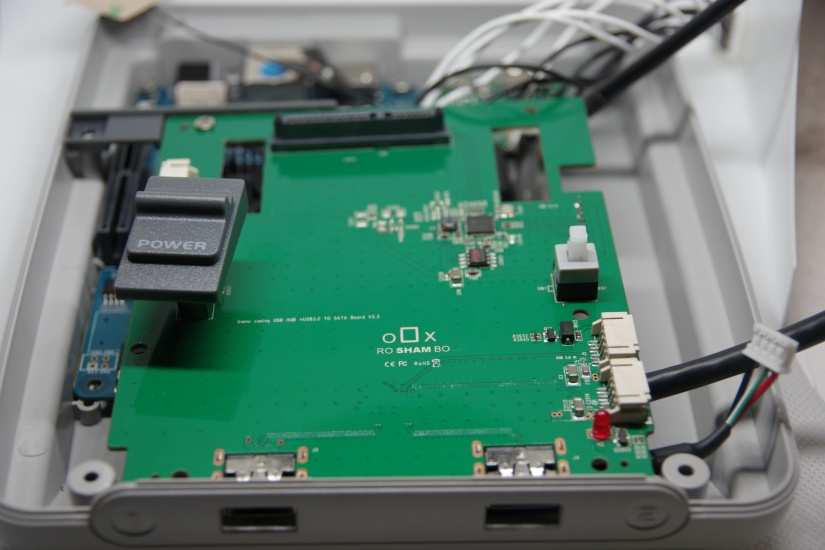 Hook up the wide cable connection to a slot on the bottom of that board.
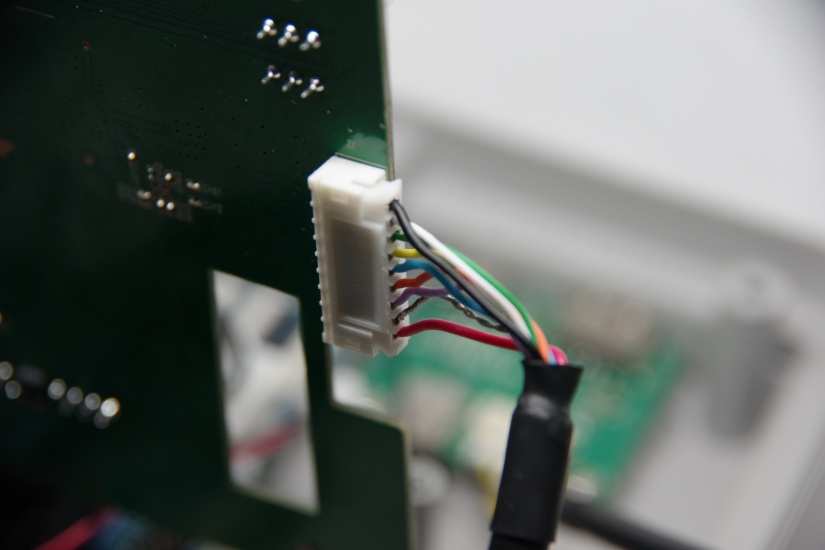 The white cable connector hooks to the second slot on the front of the board, with the red one on front. Make sure everything's connected correctly, then screw it down. If you're using the fan, you'll need to swap the plastic bracket for the metal bracket.
 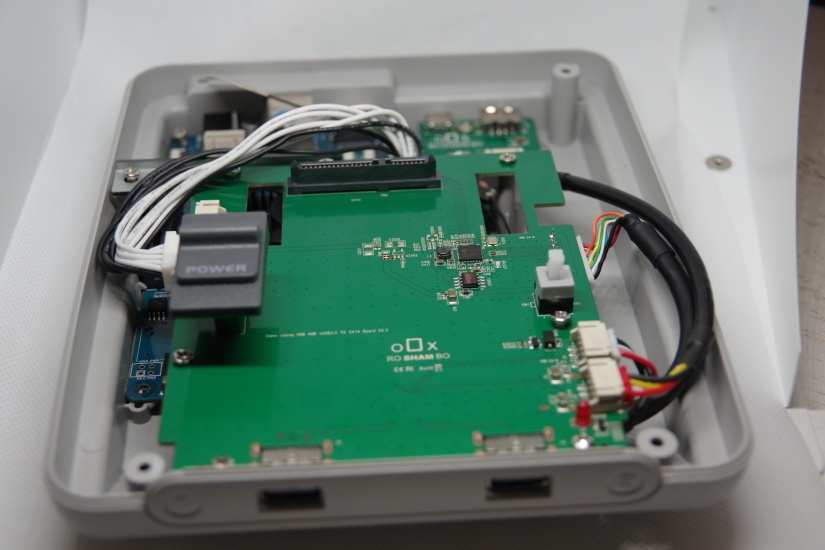 Once everything is screwed down and all cables connected, go ahead and place the top of the case on, flip the whole case over, and screw it together using four screws. To begin using the Roshambo retro case, merely load up an operating system on a microSD card, pop it in, and you're ready to go.
Roshambo Retro Gaming Case Review: A High-quality Super Famicom Clone with a Few Minor Flaws
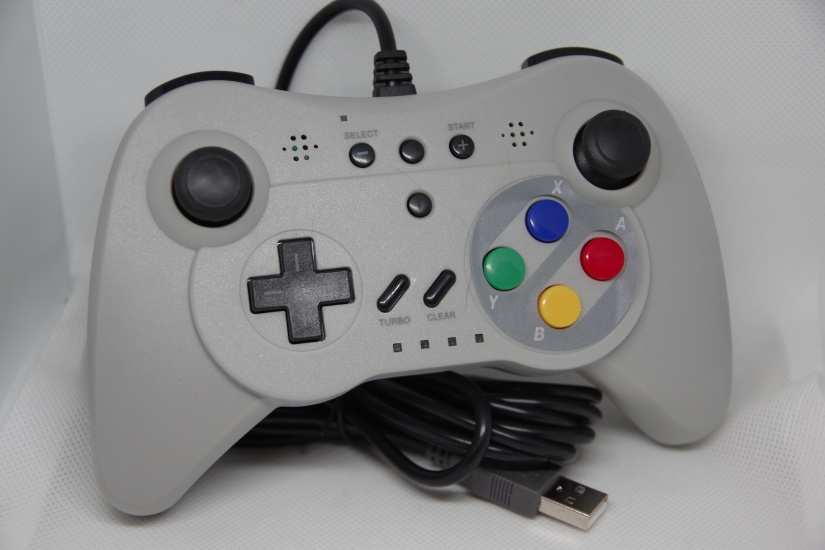
RockPro64 Roshambo Retro Gaming Kit Review: Should You Buy the Roshambo Gaming Case?
If you're planning on using your RockPro64 for retro gaming, this is hands-down the best RockPro64 case option on the market. With working power and reset buttons, a SATA port in the cartridge slot with a functioning eject button, and access to virtually every port necessary, this is a fantastic means to cobble together a DIY SNES Classic Mini. Matching controllers and SSD cartridges which emulate the look of Super Nintendo carts complete the retro Super Famicom/SNES aesthetic. Build quality is generally excellent, though a few screw holds are sort of fiddly. Instructions, if you receive them, are somewhat lacking. Despite a few shortcomings, this is easily my favorite RockPro64 case you can buy, providing a new home for my RockPro64 board.
Electroscore: 4/5 ![Electroscore: 4]()
Pros:
- SNES/Super Famicom retro aesthetic
- Best case for the RockPro64, options for other boards as well
- Loads of accessories (matching controllers, SSD cartridges)
Cons:
- Instructions lacking
- Fiddly screw holes











Leave your feedback...