Labists ET4 3D Printer Review
The Labists ET4 is a budget-friendly 3D printer best suited for experienced makers looking to get started with 3D Printing. The performance of the machine is astounding for its price point and while its setup and configuration may be a challenge for new users, it's got a good feature set and is remarkably user-friendly. But should you buy it? Learn all about the Labists ET4 3D printer, from its specs, price, and print quality to whether or not it's the right printer for you.
Labists ET4 3D Printer Review Verdict
The Labists ET4 is exactly what you might expect from this kind of printer, a perfectly capable machine based on many of the popular budget 3D printers at this price. In fact, you might notice that the Labists ET4 looks similar to Anet ET4. As a budget-conscious 3D printer, the Labists ET4 performs extremely well for its price. With very similar specifications to the popular Ender 3, you may be looking at this printer as a viable alternative, and you’ll certainly not be disappointed.
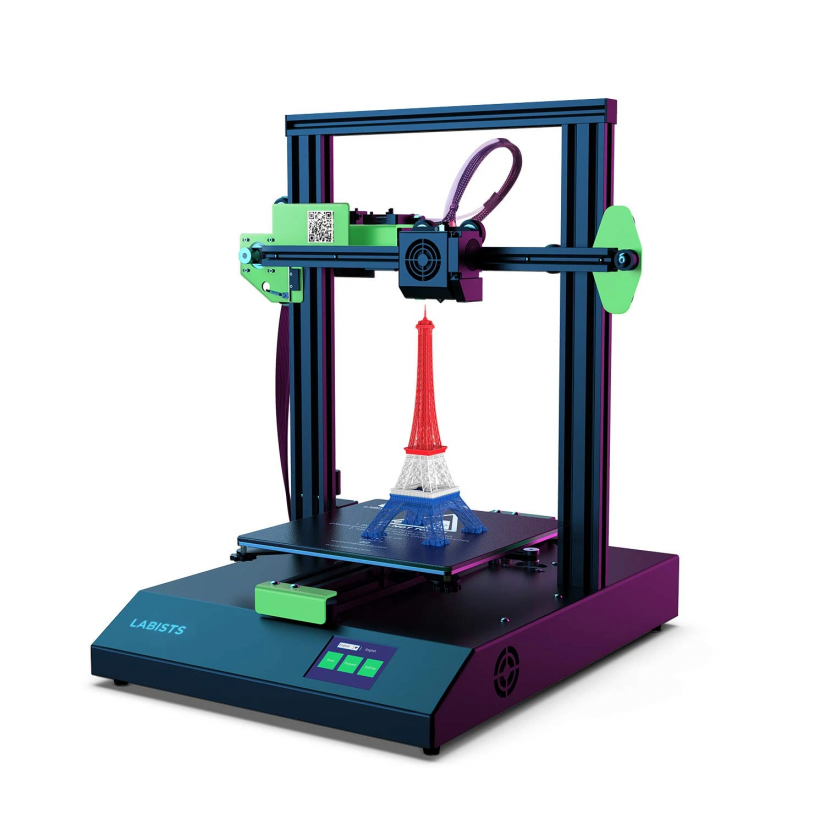 The machine’s build quality and material make it sturdy and robust, as well as giving it a professional-grade look that would let it fit in well in any workshop or maker space. This is the only place you’re going to want to put it however, as the volume of the machine while in operation is quite distracting, it isn’t the loudest printer but it’s certainly not viable in a bedroom or office. The noise is certainly at its worst when moving the print head up and down, and this makes setting up and calibrating the printer extra noisy.
Pros:
- Affordable
- Good build quality
- High print detail
- Levelling assist
Cons:
- Assembly can be a hurdle
- Can be quite loud
- Slicing software not supplied and tutorials are outdated
Get 25% off of all products on the Labists official website with code LABEM25
Labists ET4 DIY 3D Printer Kit Assembly and Configuration
The setup and calibration of this printer is quite easy but may require some tweaks not detailed in the instructions. While the Labists ET4 instruction manual is fine, Labists provides a video tutorial on how to get set up from assembly to calibration, which can be found above. Assembling the printer is as simple as affixing the vertical axis to the base via four screws and plugging in some wires. However, when attaching the print head to the x-axis it was extremely loose. None of the instructions stated this, but one of the wheels on the print head module required tightening with a wrench to fit on the rail. Admittedly, this may have just been a poorly adjusted unit, but be aware that DIY 3D printer kits may have unexpected issues like this.
Labists ET4 Features
Despite its budget pricing, the ET4 comes with a variety of useful features that let it punch well above its weight class. Labists offers one of the most user-friendly printers on the market.
Auto Bed-Levelling
The print bed can be levelled automatically which on this printer means the head will travel across the entire print bed and give readings of how far it is from each point, allowing you to make adjustments. This can be tedious however, as you must repeat the whole set of measurements to see how much further you must adjust it. Other printers often leave the head in one area while you adjust and give an alert when it’s correctly set, so while this bed levelling is useful, there are better options.
Filament Runout Detection
Thanks to a filament runout detection sensor along the filament line, the printer can detect when the filament is running out and pause the print which is helpful if you’re trying to make the most of your filament, or want to switch after it runs out. This works great and means you’ll suffer fewer failed prints.
Resume Print
If you suffer a power outage or need to turn your printer off partway through the print, on many printers this will mean a failed print. The Labists ET4 will allow you to resume the stopped print the next time it powers on.
Heated Print Bed
Although this is more common than not on more modern printers, a heated print bed allows for compatibility with many more types of filament, something printers at this budget may not include. ABS, PETG, and other varieties of plastic offer different qualities such as strength, and even for the classic PLA the heated bed will reduce warping and improve adhesion.
Test Prints
While specs and features are great, the real test of a 3D printer is print quality. I printed the included test models, benchy, the Autodesk Kickstarter test, and several fun prints.
Provided Models
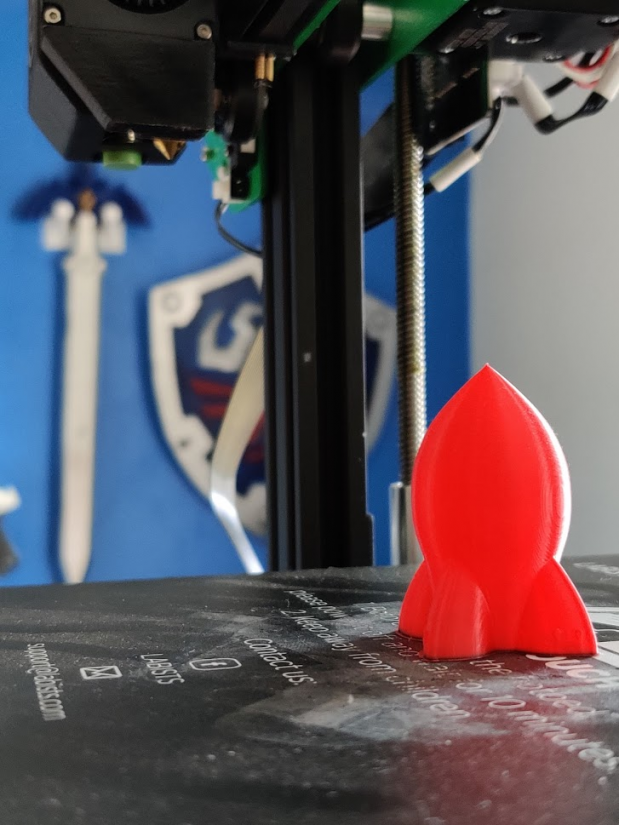
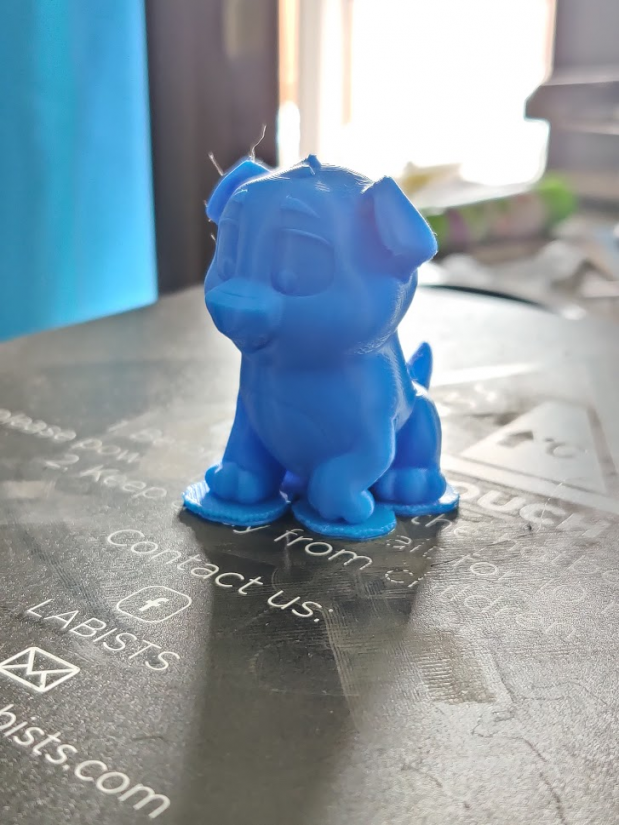
The printer’s microSD card comes with a few basic models to get started with. Although simple, they give a good idea of the ET4's capabilities. In particular, the cat and dog models are incredibly detailed with barely any layer lines visible. Here are some of the pictures in question.
Benchy
The classic 3D printer torture test, Benchy the Benchmarking Boat, is a popular first print for new printers and tests the abilities a machine.
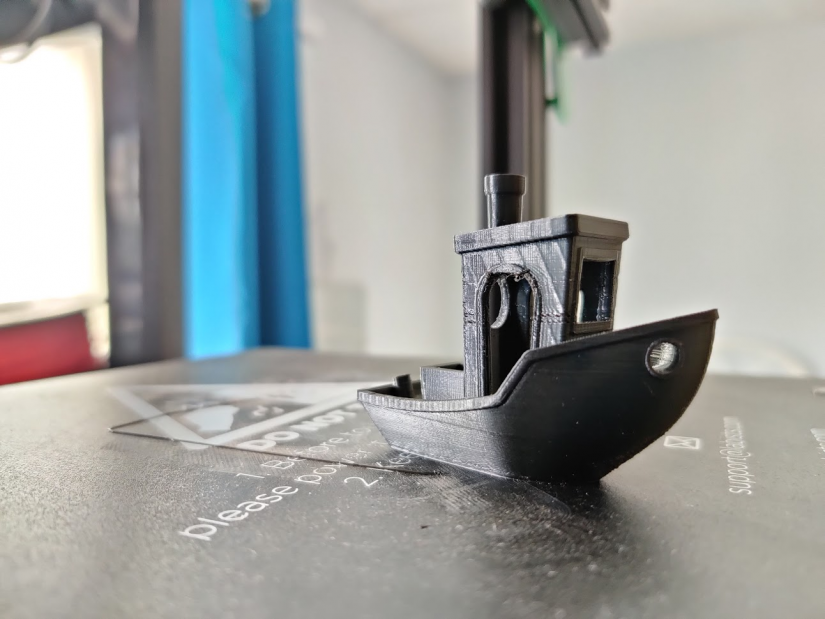 As you can see, the ET4 performed admirably when dealing with Benchy, printed without any support structures, rafts, or calibration. The overhangs slightly suffer a bit of warping where the filament drops down, although this is only minimal and the structure is not affected much.
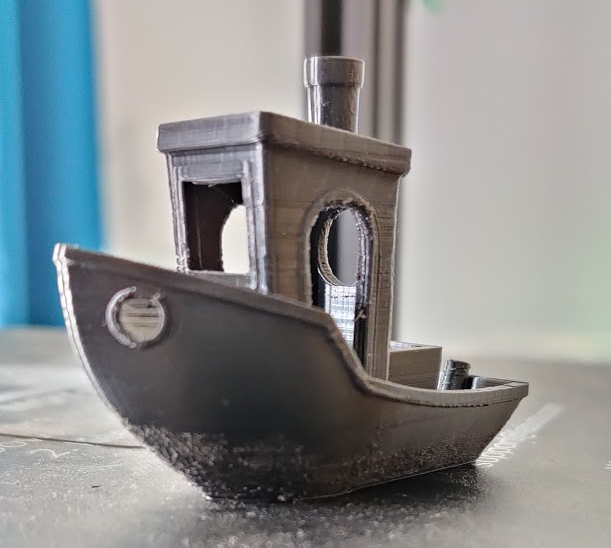
The layer lines are slightly visible throughout the surface, but the print suffers some roughness on one side near the start of the print. Still, this may have been due to the filament as this hasn’t occurred on any other print.
The text on the bottom of the hull isn’t very clean, but still legible, and the nameplate on the back of the ship is incredibly clear considering its small size.
Autodesk Kickstarter test
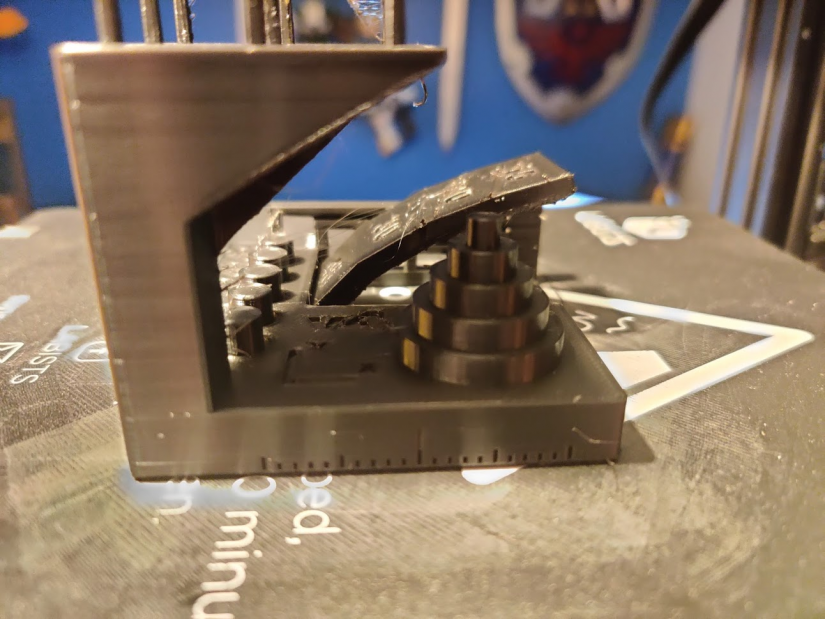
This Autodesk Kickstarter test benchmarking model comes with a sheet of measurement specifications that allow you to score the printer based on how well it handled some difficult features of the model. As you will see, the Labists ET4 did a very good job with this test:
- Dimensional Accuracy: 5 of 5 points
- Fine Flow Control: 2.5 of 5 points (the spikes were printed to their full height, but I encountered some stringing at the top)
- Fine Negative Features: 5 of 5 points (all pins were removable by hand)
- Overhangs: 3 of 5 points (20° and 15° overhangs showed some minor irregularities)
- Bridging: 5 of 5 points (no bridges contacted the surface beneath them)
- XY Resonance: 2.5 of 2.5 points (no ringing detectable)
- Z-Axis Alignment: 2.5 of 2.5 points (no layer registration effect visible)
Overall, the printer scored a total of 25.5 out of 30 points.
Wizard Dice Tower
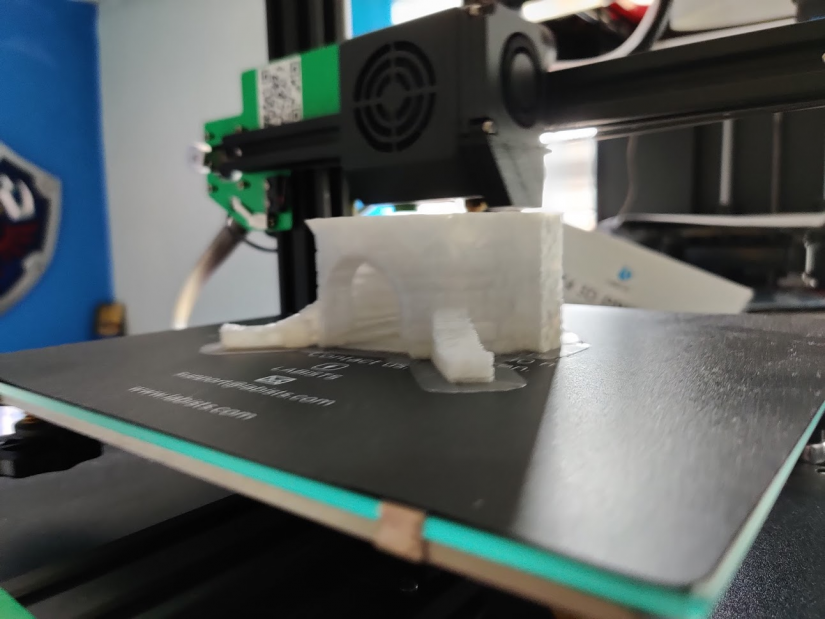
To attempt something a little more practical and fun I found a dice tower on Thingiverse, one of the best websites for downloadable 3D printer models. I used a color-changing filament that switches color when warmed.
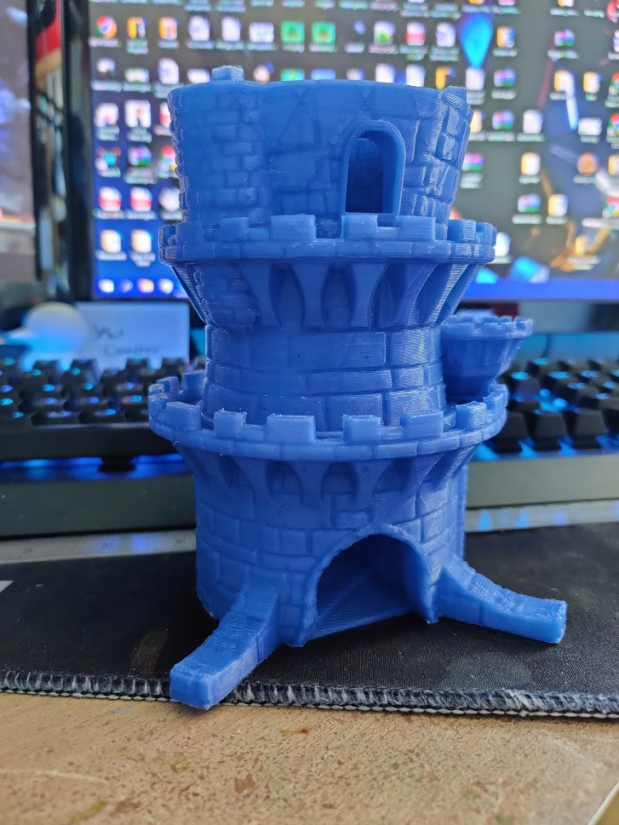
To begin with, printing the main tower section went well. The detail in the brickwork came out very nicely and the stairs inside were smooth. This print was done on a lower detail setting to allow it to print faster, however there may have been issues with this that I will get to later.
Unfortunately, this first print failed when making use of the resume print function. It is unclear why this occurred, as the resume print worked perfectly on other prints and I couldn’t reproduce this error, so it may have been an unfortunate fluke.
In certain lights, the support structures on the inside can be seen through the outside, leaving an ugly pattern on the brickwork. This can probably be avoided by using certain filaments and print settings.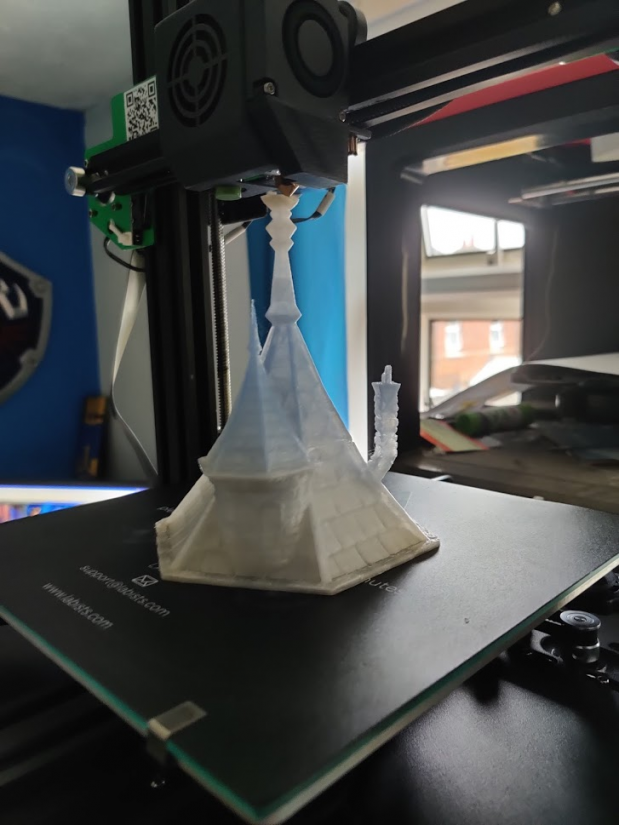
The blocks at the top are unfortunately not as well printed as I'd have liked. It seems that the printer could not extrude filament quickly enough to fill these small detailed areas and the integrity of the structures did not hold.
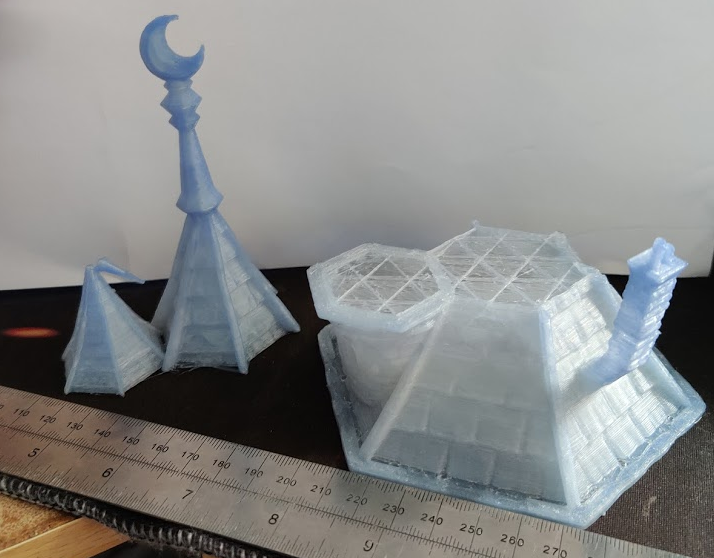
The next section was the roof, which had the biggest issues. The large layer height means that in some sections the filament could not be extruded quickly enough which caused some weak structure on the detailed areas. And in the middle area of the print it actually gave way with a slight pull. If attempted on a more precise printer setting I’m sure this would have been fine, but for prints that don’t require precision detail like larger objects this greatly increases the required print time when using the printer. This issue meant that the roof needed to be reprinted, and while the second attempt was somewhat better, there were still structural issues.
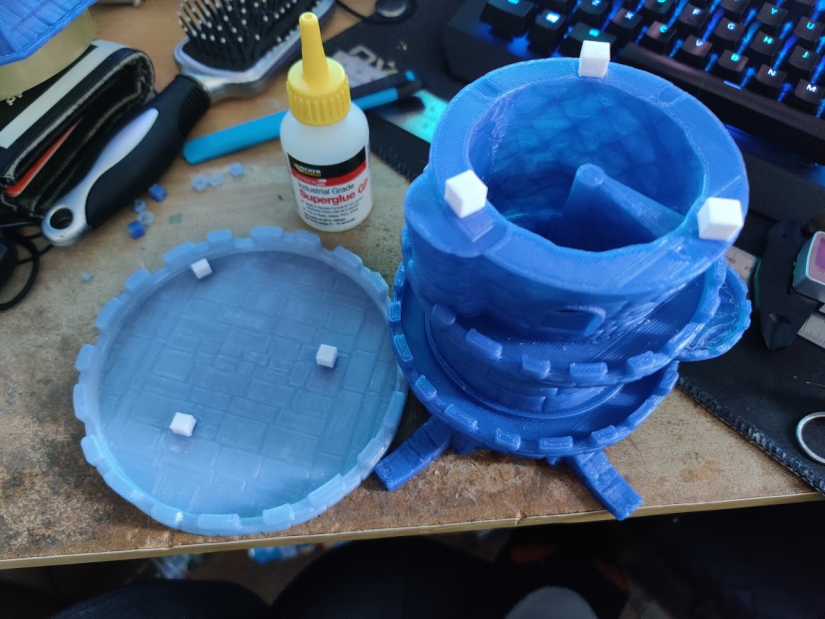
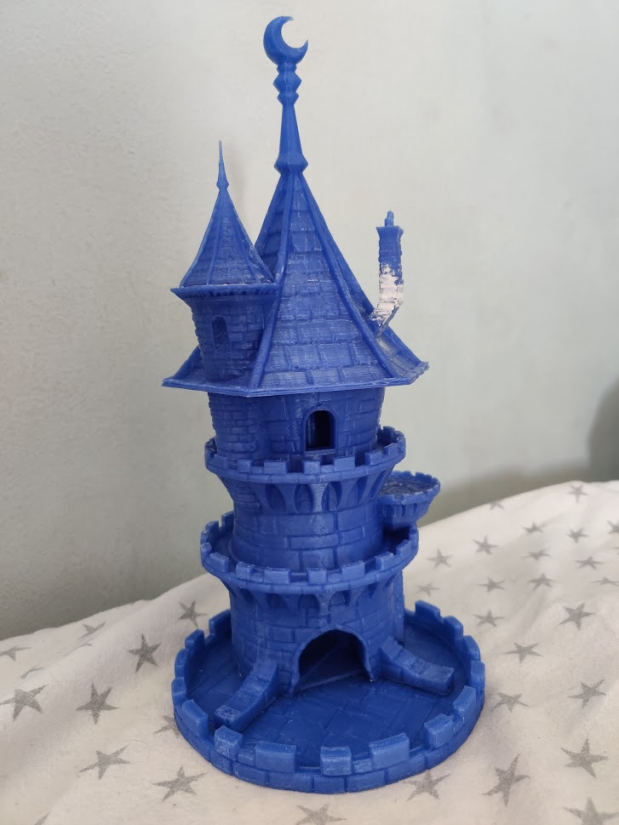
The base/tray of the tower printed perfectly well, save for the recurring issue with the connection blocks. With all the sections printed, I quickly modelled some replacement blocks to superglue on, used some filler on the weaker parts of the roof and super glued along the weak section of the roof to ensure it didn’t break the same way as the last one.
Printer Accessories
Thingiverse features an ET4 z-axis stabilizer and filament guide. that you can print out and use as an accessory for your Labists ET4 3D printer.
Software
The supplied version of Cura that comes with the machine is somewhat out of date. Furthermore, the instructions for setting this version up also appear to use a completely different version with different configuration information.
The best way to set up slicing software for this printer is to download the latest version of Cura, and select the inbuilt Anet ET4 configuration, which works perfectly with the Labists machine. This isn't really a major issue since there's a workaround, but if you're a 3D printer newcomer it could be confusing.
Technical Specs
The specifications for this printer are highly competitive, while the max printing speed is questionable, the specifications are very similar to that of the Ender 3. Because of the shared model number and unit, this printer shares specs with the Anet ET4, so this can be used in comparisons when researching the printer.
Labists ET4 Specs:
- Max Printing Speed: 150mm/s (Recommended speed: 30~60mm/s)
- Nozzle diameter: 0.4mm
- Max Nozzle Temperature: 250℃
- Max Hot bed Temperatur: 100℃
- Printable Filaments: ABS, PLA (Recommended Filament: 1.75MM PLA)
- Printing Size: 220x220x250mm
- Layer Thickness: 0.1~ 0.3mm
- Precision: ± 0.1mm
- Compatible Systems: Windows, Mac
- Recommended Slicing Software: CURA, MODELIGHT
- File Format: STL, G-code
- Power Input: 100~240V AC
- Working Humidity: 30%~90%"
Get 25% off of all products on the Labists official website with code LABEM25
Final Thoughts - Should You Buy the Labists ET4?
If you’re new to 3D printing, this probably isn’t the best place to start. There’s plenty of printers pre-built and already set up that can print out of the box, letting you learn the difficult bits later. If you’re looking to replace your printer to a new budget machine you can upgrade, print more materials with, or just something with a bit bigger print area, then this is definitely an ideal choice.
Ultimately, the Labists ET4 provides good value for the money. It's cheap as chips and boasts an incredible slate of features such as a heated bed, filament runout detection, and auto levelling. Despite shipping with an outdated version of CURA and old instructions, the ET4 remains one of the best cheap 3D printers on the market.
Your turn: which 3D printers do you recommend?


