How to Hack a Walmart LED Panel with ESP32 C3 for Custom Light Displays
If you've ever been frustrated with the limitations of off-the-shelf tech, you're not alone. In this project, TURFPTAx dive's into hacking a $20 Walmart LED panel, turning it into something far more functional and customizable. The original panel, while visually appealing with its sharp square pixels, came with hardware and software that left much to be desired. The accompanying app, intended to control the LED panel, was particularly problematic—riddled with issues, it barely functioned as expected. But where there's a problem, there's also an opportunity, and that's where the fun of hardware hacking begins.

Watch Ian talk about TURFPTAx hacking a $20 Walmart LED panel with an ESP32 C3 in this episode of The Electromaker Show
The Hack: Replacing the Proprietary Chip with ESP32 C3
The original setup of the Walmart LED panel came with a generic Bluetooth chip and an accompanying app intended to control the display. However, this setup was fraught with issues. The Bluetooth chip was a proprietary component with minimal documentation, making it difficult to understand or modify. Users quickly found that the app was unreliable, with frequent crashes and questionable prompts that hinted at potential security vulnerabilities.
Given these challenges, the decision to replace the original chip became a necessity. The existing hardware was not only underperforming but also posed security risks, leading to the need for a more reliable and customizable solution.
The Solution
Enter the ESP32 C3 Xiao board—a well-documented, powerful microcontroller that offers a perfect alternative to the problematic original chip. The ESP32 C3 was chosen for its compatibility with the addressable LEDs used in the panel, as well as its robust support from the maker community.
To begin the transformation, the original LED panel was carefully disassembled to access the internals. The teardown revealed that the panel’s LEDs were controlled by the generic Bluetooth chip, which was promptly removed. In its place, the ESP32 C3 Xiao board was integrated, connecting directly to the LED data lines and power supply. This swap allowed for full control of the LEDs using the vast array of libraries available for the ESP32 C3, greatly enhancing the functionality of the panel.
The result was a much more versatile and secure LED panel, now powered by the ESP32 C3, capable of running a variety of custom animations and patterns far beyond what the original setup could achieve.
Detailed Look at Addressable LEDs
Unlike standard LEDs, which simply turn on or off, addressable LEDs allow for individual control of each LED in a strip or matrix. This is made possible by a data line that sends specific instructions to each LED, telling it what colour to display and how bright it should be.
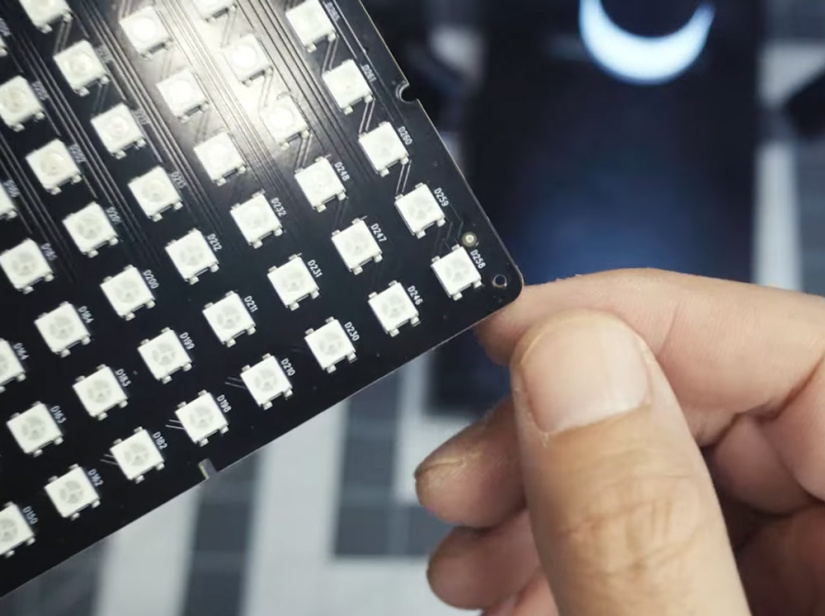
The way this works is that each LED in the chain has a small chip that interprets the data it receives. The first LED in the line reads the data meant for it and then passes the remaining data down the line to the next LED. This process continues until all LEDs have received their instructions. The intricacies of these LEDs, as demonstrated in the video, reveal just how precise and responsive they can be, making them ideal for dynamic lighting effects.
Practical Tips for Implementation
When connecting the ESP32 C3 to the LED panel, there are a few important considerations to keep in mind to ensure a smooth setup. First, it's crucial to follow the PCB traces carefully. These traces will guide you to the correct points for connecting the data line from the ESP32 C3 to the LEDs.
Additionally, depending on your setup, you may need to add a resistor or capacitor to stabilize the power supply and data signal. A resistor, typically placed on the data line, can help prevent signal noise, while a capacitor across the power lines can smooth out any fluctuations in the voltage. These small adjustments can make a significant difference in the performance and reliability of your LED display.
Did you enjoy this article?
Make sure you subscribe to The Electromaker Show for similar content and subscribe to our monthly newsletter!

Ian Buckley is a writer, musician, and perpetual tinkerer. Commonly found surrounded by hobby electrical components, he's also a keen programmer and likes to build crazy-sounding instruments with microcontrollers. In addition to Electromaker, Ian writes over at MakeUseOf and has bylines at the likes of Online Tech Tips as well as Help Desk Geek.