A Solar Powered Squirrelhouse
Whether you live in the countryside or a suburban part of town near a park or fields, there is a good chance that there’s some wildlife nearby. While birds, foxes, squirrels and other creatures are bolder than ever when it comes to living in proximity to the grinding gears of progress, it can still be difficult to see them up close.
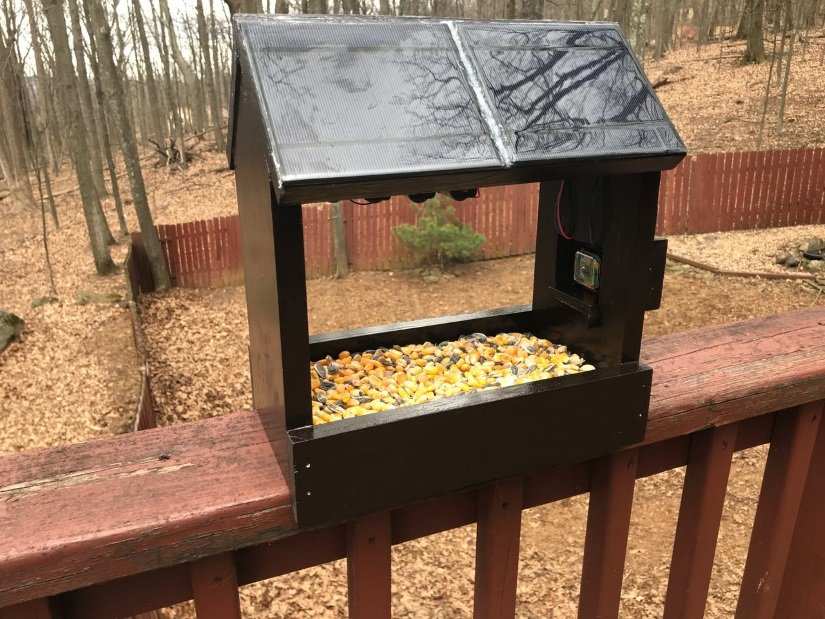
The answer, of course, is a camera, and the smaller, the better. This seems to have been part of the thinking behind DIYer “reichley”’s impressive “squirrel haus” build, a DIY construction combining solar panels with a Raspberry Pi Zero W and Raspberry Pi Camera Module. Aiming to snap some great shots of feeding squirrels in the house using Calin Crisan’s motioneyeos motion capture distro, the finished product is an extraordinary collision of woodwork and smart technology.
But why solar power? Well, this was an early decision, made at the planning stage. “The first step was sketching out how big I wanted the squirrel haus to be, where I wanted to place the camera, and whether the haus would be tied to an outlet (and, therefore, tethered to the house's grid) or autonomous via some solar panels, lithium battery charging modules, and 18650 batteries … I'm big on autonomy and renewable energy, so I opted for the latter.” After all, it makes sense. More and more outdoors devices are relying on solar power these days, from traffic signs to ornamental garden lamps. Solar panels are far more affordable than ever before; the four 2.5W 5V 500mAh panels used in this project are just $8 each. They charge the batteries, but the build doesn’t come to life if the conditions aren’t bright enough. By employing this smart check, the Raspberry Pi Zero W will remain dormant if the weather is overcast; once things brighten up, it will boot up and take photos whenever movement is detected!
There’s an innate simplicity to this project, something that can only be achieved with good planning. A similar build might be used for a birdhouse, perhaps, or some other natural habitat. Interested? Check the full build details for the component list, code and Fritzing diagram.


Leave your feedback...